ISO 16063-17:2016
(Main)Methods for the calibration of vibration and shock transducers — Part 17: Primary calibration by centrifuge
Methods for the calibration of vibration and shock transducers — Part 17: Primary calibration by centrifuge
ISO 16063 comprises a series of documents dealing with methods for the calibration of vibration and shock transducers. ISO 16063-17:2016 lays down detailed specifications for the instrumentation and procedure to be used for primary calibration of accelerometers using centrifuge calibration. ISO 16063-17:2016 is applicable to rectilinear accelerometers with zero-frequency response, mainly of the strain gauge or piezoresistive type, and to primary standard and working transducers. It is applicable for a calibration range from 10 m/s2 to 20 000 m/s2 (higher accelerations possible) at 0 Hz. The limits of uncertainty applicable are ±1 % of reading.
Méthodes pour l'étalonnage des transducteurs de vibrations et de chocs — Partie 17: Étalonnage primaire par centrifugeur
General Information
- Status
- Published
- Publication Date
- 29-May-2016
- Technical Committee
- ISO/TC 108 - Mechanical vibration, shock and condition monitoring
- Drafting Committee
- ISO/TC 108/WG 34 - Calibration of vibration and shock transducers
- Current Stage
- 9093 - International Standard confirmed
- Start Date
- 17-Dec-2021
- Completion Date
- 14-Feb-2026
Relations
- Effective Date
- 28-Dec-2013
Overview
ISO 16063-17:2016 - "Methods for the calibration of vibration and shock transducers - Part 17: Primary calibration by centrifuge" specifies instrumentation, environmental conditions and procedures for the primary calibration of accelerometers using centrifuge (rotational) methods. It applies to rectilinear accelerometers with zero‑frequency response (mainly strain‑gauge and piezoresistive types) including primary standard and working transducers. The standard covers a calibration range from 10 m/s² to 20 000 m/s² (higher accelerations possible) with applicable limits of uncertainty of ±1 % of reading.
Key topics and technical requirements
- Calibration principle: generation of known centripetal acceleration by rotating the accelerometer at controlled radii and rotational frequencies (acceleration ∝ radius × (rotational frequency)²).
- Two methods:
- Method 1 - uses a measured rotation radius (radius uncertainty < ±0.15 %) and measured rotational frequency to calculate reference acceleration and sensitivity.
- Method 2 - used when radius cannot be measured with required uncertainty; uses two radial positions and matched output frequencies; distance between positions measured with uncertainty ≤ ±0.5 %.
- Apparatus requirements:
- Balanced rotational table/arm rotating about a vertical axis; levelling within ±0.5° for lower ranges and ±2° for higher accelerations.
- Rotational frequency stability within ±0.05 %.
- Transducer axis alignment within ±0.5°.
- Heavy, vibration‑isolated base and low hum/noise when rotating.
- Instrumentation performance:
- Rotational frequency measurement contribution (expanded, k=2) ≤ 0.05 %.
- Voltage measurement contribution (expanded, k=2) ≤ 0.01 %.
- Preferred test points: six acceleration values chosen from 10, 20, 50, 100, 200, 500 m/s² (and multiples of ten); nominal reference acceleration 100 m/s² (second choice 50 m/s²).
- Uncertainty reporting: combined and expanded uncertainties calculated per Annex A (coverage factor k = 2) and reported with calibration results.
Applications and users
ISO 16063-17 is used by:
- National metrology institutes and accredited calibration laboratories performing primary accelerometer calibration.
- Transducer manufacturers validating sensor sensitivity and linearity.
- Aerospace, automotive, defense and industrial test laboratories requiring traceable, high‑acceleration calibrations.
- Organizations implementing vibration test programs that need accurately calibrated sensors for shock and vibration characterization.
Keywords: ISO 16063-17, centrifuge calibration, accelerometer calibration, vibration transducers, primary calibration, strain gauge accelerometers, piezoresistive accelerometers, rotational frequency, measurement uncertainty.
Related standards
- ISO 16063 (series) - other primary calibration methods (laser interferometry, reciprocity, gravity, etc.), e.g. Part 1, Part 11, Part 12, Part 16 and Part 21.
- ISO 2041 - vibration and shock vocabulary.
- GUM / ISO/IEC Guide 98-3 - expression of measurement uncertainty.
Get Certified
Connect with accredited certification bodies for this standard

BSMI (Bureau of Standards, Metrology and Inspection)
Taiwan's standards and inspection authority.
Sponsored listings
Frequently Asked Questions
ISO 16063-17:2016 is a standard published by the International Organization for Standardization (ISO). Its full title is "Methods for the calibration of vibration and shock transducers — Part 17: Primary calibration by centrifuge". This standard covers: ISO 16063 comprises a series of documents dealing with methods for the calibration of vibration and shock transducers. ISO 16063-17:2016 lays down detailed specifications for the instrumentation and procedure to be used for primary calibration of accelerometers using centrifuge calibration. ISO 16063-17:2016 is applicable to rectilinear accelerometers with zero-frequency response, mainly of the strain gauge or piezoresistive type, and to primary standard and working transducers. It is applicable for a calibration range from 10 m/s2 to 20 000 m/s2 (higher accelerations possible) at 0 Hz. The limits of uncertainty applicable are ±1 % of reading.
ISO 16063 comprises a series of documents dealing with methods for the calibration of vibration and shock transducers. ISO 16063-17:2016 lays down detailed specifications for the instrumentation and procedure to be used for primary calibration of accelerometers using centrifuge calibration. ISO 16063-17:2016 is applicable to rectilinear accelerometers with zero-frequency response, mainly of the strain gauge or piezoresistive type, and to primary standard and working transducers. It is applicable for a calibration range from 10 m/s2 to 20 000 m/s2 (higher accelerations possible) at 0 Hz. The limits of uncertainty applicable are ±1 % of reading.
ISO 16063-17:2016 is classified under the following ICS (International Classification for Standards) categories: 17.160 - Vibrations, shock and vibration measurements. The ICS classification helps identify the subject area and facilitates finding related standards.
ISO 16063-17:2016 has the following relationships with other standards: It is inter standard links to ISO 5347-7:1993. Understanding these relationships helps ensure you are using the most current and applicable version of the standard.
ISO 16063-17:2016 is available in PDF format for immediate download after purchase. The document can be added to your cart and obtained through the secure checkout process. Digital delivery ensures instant access to the complete standard document.
Standards Content (Sample)
INTERNATIONAL ISO
STANDARD 16063-17
First edition
2016-06-01
Methods for the calibration of
vibration and shock transducers —
Part 17:
Primary calibration by centrifuge
Méthodes pour l’étalonnage des transducteurs de vibrations et de
chocs —
Partie 17: Étalonnage primaire par centrifugeur
Reference number
©
ISO 2016
© ISO 2016, Published in Switzerland
All rights reserved. Unless otherwise specified, no part of this publication may be reproduced or utilized otherwise in any form
or by any means, electronic or mechanical, including photocopying, or posting on the internet or an intranet, without prior
written permission. Permission can be requested from either ISO at the address below or ISO’s member body in the country of
the requester.
ISO copyright office
Ch. de Blandonnet 8 • CP 401
CH-1214 Vernier, Geneva, Switzerland
Tel. +41 22 749 01 11
Fax +41 22 749 09 47
copyright@iso.org
www.iso.org
ii © ISO 2016 – All rights reserved
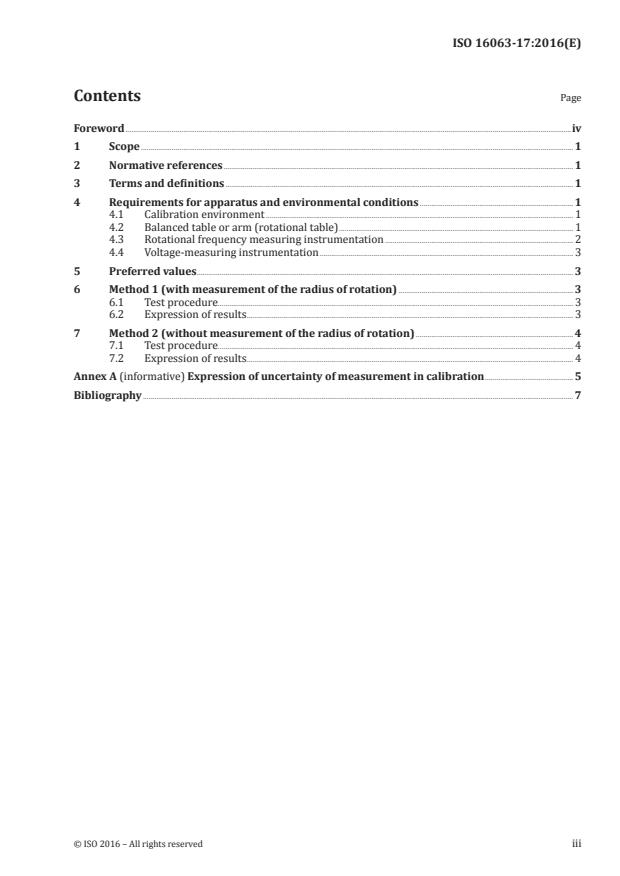
Contents Page
Foreword .iv
1 Scope . 1
2 Normative references . 1
3 Terms and definitions . 1
4 Requirements for apparatus and environmental conditions . 1
4.1 Calibration environment . 1
4.2 Balanced table or arm (rotational table) . 1
4.3 Rotational frequency measuring instrumentation . 2
4.4 Voltage-measuring instrumentation . 3
5 Preferred values . 3
6 Method 1 (with measurement of the radius of rotation) . 3
6.1 Test procedure . 3
6.2 Expression of results . 3
7 Method 2 (without measurement of the radius of rotation) . 4
7.1 Test procedure . 4
7.2 Expression of results . 4
Annex A (informative) Expression of uncertainty of measurement in calibration .5
Bibliography . 7
Foreword
ISO (the International Organization for Standardization) is a worldwide federation of national standards
bodies (ISO member bodies). The work of preparing International Standards is normally carried out
through ISO technical committees. Each member body interested in a subject for which a technical
committee has been established has the right to be represented on that committee. International
organizations, governmental and non-governmental, in liaison with ISO, also take part in the work.
ISO collaborates closely with the International Electrotechnical Commission (IEC) on all matters of
electrotechnical standardization.
The procedures used to develop this document and those intended for its further maintenance are
described in the ISO/IEC Directives, Part 1. In particular the different approval criteria needed for the
different types of ISO documents should be noted. This document was drafted in accordance with the
editorial rules of the ISO/IEC Directives, Part 2 (see www.iso.org/directives).
Attention is drawn to the possibility that some of the elements of this document may be the subject of
patent rights. ISO shall not be held responsible for identifying any or all such patent rights. Details of
any patent rights identified during the development of the document will be in the Introduction and/or
on the ISO list of patent declarations received (see www.iso.org/patents).
Any trade name used in this document is information given for the convenience of users and does not
constitute an endorsement.
For an explanation on the meaning of ISO specific terms and expressions related to conformity assessment,
as well as information about ISO’s adherence to the World Trade Organization (WTO) principles in the
Technical Barriers to Trade (TBT) see the following URL: www.iso.org/iso/foreword.html.
The committee responsible for this document is ISO/TC 108, Mechanical vibration, shock and condition
monitoring, Subcommittee SC 3, Use and calibration of vibration and shock measuring instruments.
This first edition of ISO 16063-17 cancels and replaces ISO 5347-7:1993, which has been technically
revised.
ISO 16063 consists of the following parts, under the general title Methods for the calibration of vibration
and shock transducers:
— Part 1: Basic concepts
— Part 11: Primary vibration calibration by laser interferometry
— Part 12: Primary vibration calibration by the reciprocity method
— Part 13: Primary shock calibration using laser interferometry
— Part 15: Primary angular vibration calibration by laser interferometry
— Part 16: Calibration by Earth’s gravitation
— Part 17: Primary calibration by centrifuge
— Part 21: Vibration calibration by comparison to a reference transducer
— Part 22: Shock calibration by comparison to a reference transducer
— Part 31: Testing of transverse vibration sensitivity
— Part 32: Resonance testing — Testing the frequency and the phase response of accelerometers by means
of shock excitation
— Part 41: Calibration of laser vibrometers
— Part 42: Calibration of seismometers with high accuracy using acceleration of gravity
iv © ISO 2016 – All rights reserved
— Part 43: Calibration of accelerometers by model-based parameter identification
The following parts are under preparation:
— Part 33: Testing of magnetic field sensitivity
INTERNATIONAL STANDARD ISO 16063-17:2016(E)
Methods for the calibration of vibration and shock
transducers —
Part 17:
Primary calibration by centrifuge
1 Scope
ISO 16063 comprises a series of documents dealing with methods for the calibration of vibration and
shock transducers.
This part of ISO 16063 lays down detailed specifications for the instrumentation and procedure to be
used for primary calibration of accelerometers using centrifuge calibration.
This part of ISO 16063 is applicable to rectilinear accelerometers with zero-frequency response, mainly
of the strain gauge or piezoresistive type, and to primary standard and working transducers.
2 2
It is applicable for a calibration range from 10 m/s to 20 000 m/s (higher accelerations possible) at 0 Hz.
The limits of uncertainty applicable are ±1 % of reading.
2 Normative references
The following documents, in whole or in part, are normatively referenced in this document and are
indispensable for its application
...


Questions, Comments and Discussion
Ask us and Technical Secretary will try to provide an answer. You can facilitate discussion about the standard in here.
Loading comments...