SIST ISO 4386-1:2020
(Main)Plain bearings - Metallic multilayer plain bearings - Part 1: Non-destructive ultrasonic testing of bond of thickness greater than or equal to 0,5 mm
Plain bearings - Metallic multilayer plain bearings - Part 1: Non-destructive ultrasonic testing of bond of thickness greater than or equal to 0,5 mm
This document specifies an ultrasonic testing method for determining bond defects between the bearing metal and the backing. The test can be performed on metallic multilayer plain bearings consisting of steel- or copper-based material backings lined with bearing metal based on lead and tin, with layer thicknesses greater than or equal to 0,5 mm. For cast iron backings, this document is applicable with restrictions.
The ultrasonic signal reflected by the bond interface between the bearing metal and the backing is used to determine bonding defects.
Ultrasonic testing is not possible on edge zones of sliding surface, flange sides, joint areas, oil holes, grooves, etc. in a range of less than half the diameter of the ultrasonic probe because of undefined reflections. The same applies to bearings with dovetail keying grooves at the bond. Ultrasonic testing of bond does not apply along the edges of the dovetails.
Evaluation of the bond on the visible transition from the backing to the bearing metal (on end faces or joint faces) is only practicable by the penetrant testing method specified in ISO 4386-3.
This document only describes in detail the pulse-echo method. Within the meaning of this document, the ultrasonic method only permits a qualitative evaluation of the bonding and not a quantitative determination of the bond strength. The ultrasonic bond test differs only between bond and bond defect.
Paliers lisses - Paliers lisses métalliques multicouches
Drsni ležaji - Večslojni kovinski drsni ležaji - 1. del: Neporušitveno ultrazvočno preskušanje debeline spoja, enake ali večje od 0,5 mm
General Information
- Status
- Published
- Publication Date
- 30-Jul-2020
- Technical Committee
- ISEL - Mechanical elements
- Current Stage
- 6060 - National Implementation/Publication (Adopted Project)
- Start Date
- 24-Jun-2020
- Due Date
- 29-Aug-2020
- Completion Date
- 31-Jul-2020
Relations
- Effective Date
- 23-Apr-2020
Overview
ISO 4386-1:2019 specifies a non‑destructive ultrasonic testing (NDT) method for detecting bond defects in metallic multilayer plain bearings. It covers bearings with steel- or copper‑based backings lined with lead‑ or tin‑based bearing metal where the lining thickness is ≥ 0.5 mm. The document describes the pulse‑echo ultrasonic technique (qualitative only) to distinguish between a sound bond and a bond defect; it does not quantify bond strength.
Key topics and technical requirements
- Scope & materials: Applicable to steel- and copper-based backings; limited applicability to cast iron backings. Lining thickness ≥ 0.5 mm. Dovetail edges and small edge zones (within half the probe diameter) are excluded due to undefined reflections.
- Testing method: Pulse‑echo ultrasonic inspection using a rectified A‑scope display. The method relies on the ultrasonic signal reflected at the bond interface (bond echo and back‑wall echo).
- Equipment:
- Ultrasonic instrument with calibrated attenuator (dB) and adjustable time base.
- Normal‑beam probes sized to layer/backing thickness and material (typical diameters ~24 mm at 2 MHz down to 6 mm at 10 MHz). Dual‑element probes may be used for layer thickness < 1 mm.
- Reference block matching the test geometry for time‑base and sensitivity adjustment.
- Surface and coupling: Test surface roughness Ra ≤ 5 µm; clean of dirt/oil. Contact scanning (light machine oil couplant) or immersion scanning permitted. Suppression and swept‑gain functions must be off.
- Procedures:
- Testing with back‑wall echo: adjust so back‑wall echo ~80% screen height; bond defect indicated by breakdown of back‑wall echo and increase/repetition of bond echo.
- Testing without back‑wall echo: adjust reference bond echo to 20% full screen height and compare.
- Evaluation & acceptance:
- Qualitative pass/fail (bond vs defect). Defects generally estimated at ≥ half probe diameter.
- Test classes 1–3 define increasing coverage (from point‑type coverage to full line‑by‑line scanning with 20% probe overlap).
- Defect groups (A–D) and maximum single/total defect sizes are defined and must be agreed between supplier and customer.
- Limitations: Edge transitions are evaluated by penetrant testing per ISO 4386‑3.
Applications and users
- Who uses it: NDT technicians, bearing manufacturers, quality assurance engineers, maintenance teams, and suppliers/customers specifying acceptance criteria for multilayer plain bearings.
- Practical uses: Incoming inspection of lined bearings, production quality control, post‑repair verification (e.g., after soldering), and root‑cause analysis for bond failures.
Related standards
- ISO 4386-3: Non‑destructive penetrant testing for visible transitions (end faces / joint faces).
- Prepared by ISO/TC 123 (Plain bearings), Subcommittee SC 2.
Keywords: ISO 4386-1:2019, plain bearings, metallic multilayer, ultrasonic testing, pulse‑echo, NDT, bond defects, bearing lining inspection.
Frequently Asked Questions
SIST ISO 4386-1:2020 is a standard published by the Slovenian Institute for Standardization (SIST). Its full title is "Plain bearings - Metallic multilayer plain bearings - Part 1: Non-destructive ultrasonic testing of bond of thickness greater than or equal to 0,5 mm". This standard covers: This document specifies an ultrasonic testing method for determining bond defects between the bearing metal and the backing. The test can be performed on metallic multilayer plain bearings consisting of steel- or copper-based material backings lined with bearing metal based on lead and tin, with layer thicknesses greater than or equal to 0,5 mm. For cast iron backings, this document is applicable with restrictions. The ultrasonic signal reflected by the bond interface between the bearing metal and the backing is used to determine bonding defects. Ultrasonic testing is not possible on edge zones of sliding surface, flange sides, joint areas, oil holes, grooves, etc. in a range of less than half the diameter of the ultrasonic probe because of undefined reflections. The same applies to bearings with dovetail keying grooves at the bond. Ultrasonic testing of bond does not apply along the edges of the dovetails. Evaluation of the bond on the visible transition from the backing to the bearing metal (on end faces or joint faces) is only practicable by the penetrant testing method specified in ISO 4386-3. This document only describes in detail the pulse-echo method. Within the meaning of this document, the ultrasonic method only permits a qualitative evaluation of the bonding and not a quantitative determination of the bond strength. The ultrasonic bond test differs only between bond and bond defect.
This document specifies an ultrasonic testing method for determining bond defects between the bearing metal and the backing. The test can be performed on metallic multilayer plain bearings consisting of steel- or copper-based material backings lined with bearing metal based on lead and tin, with layer thicknesses greater than or equal to 0,5 mm. For cast iron backings, this document is applicable with restrictions. The ultrasonic signal reflected by the bond interface between the bearing metal and the backing is used to determine bonding defects. Ultrasonic testing is not possible on edge zones of sliding surface, flange sides, joint areas, oil holes, grooves, etc. in a range of less than half the diameter of the ultrasonic probe because of undefined reflections. The same applies to bearings with dovetail keying grooves at the bond. Ultrasonic testing of bond does not apply along the edges of the dovetails. Evaluation of the bond on the visible transition from the backing to the bearing metal (on end faces or joint faces) is only practicable by the penetrant testing method specified in ISO 4386-3. This document only describes in detail the pulse-echo method. Within the meaning of this document, the ultrasonic method only permits a qualitative evaluation of the bonding and not a quantitative determination of the bond strength. The ultrasonic bond test differs only between bond and bond defect.
SIST ISO 4386-1:2020 is classified under the following ICS (International Classification for Standards) categories: 21.100.10 - Plain bearings. The ICS classification helps identify the subject area and facilitates finding related standards.
SIST ISO 4386-1:2020 has the following relationships with other standards: It is inter standard links to SIST ISO 4386-1:2015. Understanding these relationships helps ensure you are using the most current and applicable version of the standard.
SIST ISO 4386-1:2020 is available in PDF format for immediate download after purchase. The document can be added to your cart and obtained through the secure checkout process. Digital delivery ensures instant access to the complete standard document.
Standards Content (Sample)
SLOVENSKI STANDARD
01-oktober-2020
Drsni ležaji - Večslojni kovinski drsni ležaji - 1. del: Neporušitveno ultrazvočno
preskušanje debeline spoja, enake ali večje od 0,5 mm
Plain bearings - Metallic multilayer plain bearings - Part 1: Non-destructive ultrasonic
testing of bond of thickness greater than or equal to 0,5 mm
Paliers lisses - Paliers lisses métalliques multicouches
Ta slovenski standard je istoveten z: ISO 4386-1:2019
ICS:
21.100.10 Drsni ležaji Plain bearings
2003-01.Slovenski inštitut za standardizacijo. Razmnoževanje celote ali delov tega standarda ni dovoljeno.
INTERNATIONAL ISO
STANDARD 4386-1
Fourth edition
2019-04
Plain bearings — Metallic multilayer
plain bearings —
Part 1:
Non-destructive ultrasonic testing
of bond of thickness greater than or
equal to 0,5 mm
Paliers lisses — Paliers lisses métalliques multicouches —
Partie 1: Contrôle non destructif aux ultrasons des défauts
d'adhérence d'épaisseur supérieure ou égale à 0,5 mm
Reference number
©
ISO 2019
© ISO 2019
All rights reserved. Unless otherwise specified, or required in the context of its implementation, no part of this publication may
be reproduced or utilized otherwise in any form or by any means, electronic or mechanical, including photocopying, or posting
on the internet or an intranet, without prior written permission. Permission can be requested from either ISO at the address
below or ISO’s member body in the country of the requester.
ISO copyright office
CP 401 • Ch. de Blandonnet 8
CH-1214 Vernier, Geneva
Phone: +41 22 749 01 11
Fax: +41 22 749 09 47
Email: copyright@iso.org
Website: www.iso.org
Published in Switzerland
ii © ISO 2019 – All rights reserved
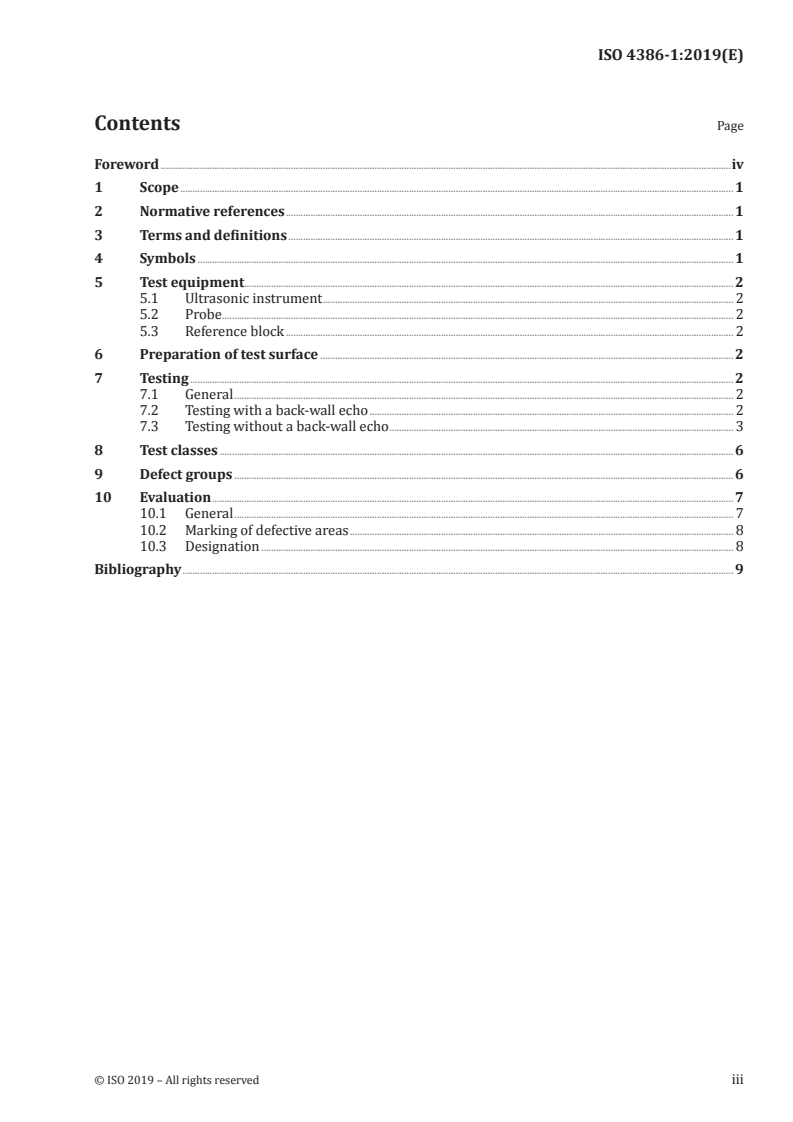
Contents Page
Foreword .iv
1 Scope . 1
2 Normative references . 1
3 Terms and definitions . 1
4 Symbols . 1
5 Test equipment. 2
5.1 Ultrasonic instrument . 2
5.2 Probe . 2
5.3 Reference block . 2
6 Preparation of test surface . 2
7 Testing . 2
7.1 General . 2
7.2 Testing with a back-wall echo . 2
7.3 Testing without a back-wall echo . 3
8 Test classes . 6
9 Defect groups . 6
10 Evaluation . 7
10.1 General . 7
10.2 Marking of defective areas . 8
10.3 Designation . 8
Bibliography . 9
Foreword
ISO (the International Organization for Standardization) is a worldwide federation of national standards
bodies (ISO member bodies). The work of preparing International Standards is normally carried out
through ISO technical committees. Each member body interested in a subject for which a technical
committee has been established has the right to be represented on that committee. International
organizations, governmental and non-governmental, in liaison with ISO, also take part in the work.
ISO collaborates closely with the International Electrotechnical Commission (IEC) on all matters of
electrotechnical standardization.
The procedures used to develop this document and those intended for its further maintenance are
described in the ISO/IEC Directives, Part 1. In particular, the different approval criteria needed for the
different types of ISO documents should be noted. This document was drafted in accordance with the
editorial rules of the ISO/IEC Directives, Part 2 (see www .iso .org/directives).
Attention is drawn to the possibility that some of the elements of this document may be the subject of
patent rights. ISO shall not be held responsible for identifying any or all such patent rights. Details of
any patent rights identified during the development of the document will be in the Introduction and/or
on the ISO list of patent declarations received (see www .iso .org/patents).
Any trade name used in this document is information given for the convenience of users and does not
constitute an endorsement.
For an explanation of the voluntary nature of standards, the meaning of ISO specific terms and
expressions related to conformity assessment, as well as information about ISO's adherence to the
World Trade Organization (WTO) principles in the Technical Barriers to Trade (TBT), see www .iso
.org/iso/foreword .html.
This document was prepared by Technical Committee ISO/TC 123, Plain bearings, Subcommittee SC 2,
Materials and lubricants, their properties, characteristics, test methods and testing conditions.
This fourth edition cancels and replaces the third edition (ISO 4386-1:2012), of which it constitutes a
minor revision. The changes compared to the previous edition are as follows:
— Adjustment to the ISO Directives, including the implementation of Clause 3 Terms and definitions.
A list of all parts in the ISO 4386 series can be found on the ISO website.
Any feedback or questions on this document should be directed to the user’s national standards body. A
complete listing of these bodies can be found at www .iso .org/members .html.
iv © ISO 2019 – All rights reserved
INTERNATIONAL STANDARD ISO 4386-1:2019(E)
Plain bearings — Metallic multilayer plain bearings —
Part 1:
Non-destructive ultrasonic testing of bond of thickness
greater than or equal to 0,5 mm
1 Scope
This document specifies an ultrasonic testing method for determining bond defects between the bearing
metal and the backing. The test can be performed on metallic multilayer plain bearings consisting of
steel- or copper-based material backings lined with bearing metal based on lead and tin, with layer
thicknesses greater than or equal to 0,5 mm. For cast iron backings, this document is applicable with
restrictions.
The ultrasonic signal reflected by the bond interface between the bearing metal and the backing is
used to determine bonding defects.
Ultrasonic testing is not possible on edge zones of sliding surface, flange sides, joint areas, oil holes,
grooves, etc. in a range of less than half the diameter of the ultrasonic probe because of undefined
reflections. The same applies to bearings with dovetail keying grooves at the bond. Ultrasonic testing of
bond does not apply along the edges of the dovetails.
Evaluation of the bond on the visible transition from the backing to the bearing metal (on end faces or
joint faces) is only practicable by the penetrant testing method specified in ISO 4386-3.
This document only describes
...
INTERNATIONAL ISO
STANDARD 4386-1
Fourth edition
2019-04
Plain bearings — Metallic multilayer
plain bearings —
Part 1:
Non-destructive ultrasonic testing
of bond of thickness greater than or
equal to 0,5 mm
Paliers lisses — Paliers lisses métalliques multicouches —
Partie 1: Contrôle non destructif aux ultrasons des défauts
d'adhérence d'épaisseur supérieure ou égale à 0,5 mm
Reference number
©
ISO 2019
© ISO 2019
All rights reserved. Unless otherwise specified, or required in the context of its implementation, no part of this publication may
be reproduced or utilized otherwise in any form or by any means, electronic or mechanical, including photocopying, or posting
on the internet or an intranet, without prior written permission. Permission can be requested from either ISO at the address
below or ISO’s member body in the country of the requester.
ISO copyright office
CP 401 • Ch. de Blandonnet 8
CH-1214 Vernier, Geneva
Phone: +41 22 749 01 11
Fax: +41 22 749 09 47
Email: copyright@iso.org
Website: www.iso.org
Published in Switzerland
ii © ISO 2019 – All rights reserved
Contents Page
Foreword .iv
1 Scope . 1
2 Normative references . 1
3 Terms and definitions . 1
4 Symbols . 1
5 Test equipment. 2
5.1 Ultrasonic instrument . 2
5.2 Probe . 2
5.3 Reference block . 2
6 Preparation of test surface . 2
7 Testing . 2
7.1 General . 2
7.2 Testing with a back-wall echo . 2
7.3 Testing without a back-wall echo . 3
8 Test classes . 6
9 Defect groups . 6
10 Evaluation . 7
10.1 General . 7
10.2 Marking of defective areas . 8
10.3 Designation . 8
Bibliography . 9
Foreword
ISO (the International Organization for Standardization) is a worldwide federation of national standards
bodies (ISO member bodies). The work of preparing International Standards is normally carried out
through ISO technical committees. Each member body interested in a subject for which a technical
committee has been established has the right to be represented on that committee. International
organizations, governmental and non-governmental, in liaison with ISO, also take part in the work.
ISO collaborates closely with the International Electrotechnical Commission (IEC) on all matters of
electrotechnical standardization.
The procedures used to develop this document and those intended for its further maintenance are
described in the ISO/IEC Directives, Part 1. In particular, the different approval criteria needed for the
different types of ISO documents should be noted. This document was drafted in accordance with the
editorial rules of the ISO/IEC Directives, Part 2 (see www .iso .org/directives).
Attention is drawn to the possibility that some of the elements of this document may be the subject of
patent rights. ISO shall not be held responsible for identifying any or all such patent rights. Details of
any patent rights identified during the development of the document will be in the Introduction and/or
on the ISO list of patent declarations received (see www .iso .org/patents).
Any trade name used in this document is information given for the convenience of users and does not
constitute an endorsement.
For an explanation of the voluntary nature of standards, the meaning of ISO specific terms and
expressions related to conformity assessment, as well as information about ISO's adherence to the
World Trade Organization (WTO) principles in the Technical Barriers to Trade (TBT), see www .iso
.org/iso/foreword .html.
This document was prepared by Technical Committee ISO/TC 123, Plain bearings, Subcommittee SC 2,
Materials and lubricants, their properties, characteristics, test methods and testing conditions.
This fourth edition cancels and replaces the third edition (ISO 4386-1:2012), of which it constitutes a
minor revision. The changes compared to the previous edition are as follows:
— Adjustment to the ISO Directives, including the implementation of Clause 3 Terms and definitions.
A list of all parts in the ISO 4386 series can be found on the ISO website.
Any feedback or questions on this document should be directed to the user’s national standards body. A
complete listing of these bodies can be found at www .iso .org/members .html.
iv © ISO 2019 – All rights reserved
INTERNATIONAL STANDARD ISO 4386-1:2019(E)
Plain bearings — Metallic multilayer plain bearings —
Part 1:
Non-destructive ultrasonic testing of bond of thickness
greater than or equal to 0,5 mm
1 Scope
This document specifies an ultrasonic testing method for determining bond defects between the bearing
metal and the backing. The test can be performed on metallic multilayer plain bearings consisting of
steel- or copper-based material backings lined with bearing metal based on lead and tin, with layer
thicknesses greater than or equal to 0,5 mm. For cast iron backings, this document is applicable with
restrictions.
The ultrasonic signal reflected by the bond interface between the bearing metal and the backing is
used to determine bonding defects.
Ultrasonic testing is not possible on edge zones of sliding surface, flange sides, joint areas, oil holes,
grooves, etc. in a range of less than half the diameter of the ultrasonic probe because of undefined
reflections. The same applies to bearings with dovetail keying grooves at the bond. Ultrasonic testing of
bond does not apply along the edges of the dovetails.
Evaluation of the bond on the visible transition from the backing to the bearing metal (on end faces or
joint faces) is only practicable by the penetrant testing method specified in ISO 4386-3.
This document only describes in detail the pulse-echo method. Within the meaning of this document,
the ultrasonic method only permits a qualitative evaluation of the bonding and not a quantitative
determination of the bond strength. The ultrasonic bond test differs only between bond and bond defect.
2 Normative references
The following documents are referred to in the text in such a way that some or all of their content
constitutes requirements of this
...



Questions, Comments and Discussion
Ask us and Technical Secretary will try to provide an answer. You can facilitate discussion about the standard in here.
Loading comments...