ASTM A1037/A1037M-05
(Specification)Standard Specification for Steel Line Pipe, Black, Furnace-butt-Welded
Standard Specification for Steel Line Pipe, Black, Furnace-butt-Welded
SCOPE
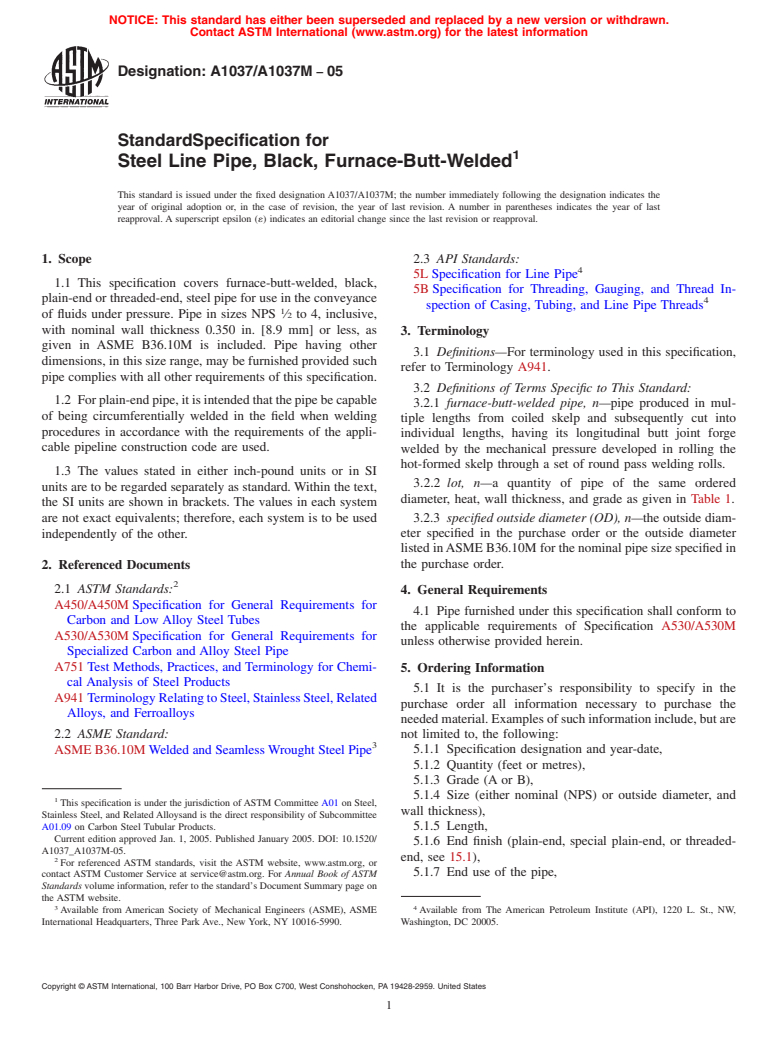
1.1 This specification covers furnace-butt-welded, black, plain-end or threaded-end, steel pipe for use in the conveyance of fluids under pressure. Pipe in sizes NPS ½ to 4, inclusive, with nominal wall thickness 0.350 in. [8.9 mm] or less, as given in ASME B36.10M is included. Pipe having other dimensions, in this size range, may be furnished provided such pipe complies with all other requirements of this specification.
1.2 For plain-end pipe, it is intended that the pipe be capable of being circumferentially welded in the field when welding procedures in accordance with the requirements of the applicable pipeline construction code are used.
1.3 The values stated in either inch-pound units or in SI units are to be regarded separately as standard. Within the text, the SI units are shown in brackets. The values in each system are not exact equivalents; therefore, each system is to be used independently of the other.
General Information
Relations
Standards Content (Sample)
NOTICE: This standard has either been superseded and replaced by a new version or withdrawn.
Contact ASTM International (www.astm.org) for the latest information
Designation:A1037/A1037M −05
StandardSpecification for
Steel Line Pipe, Black, Furnace-Butt-Welded
This standard is issued under the fixed designation A1037/A1037M; the number immediately following the designation indicates the
year of original adoption or, in the case of revision, the year of last revision. A number in parentheses indicates the year of last
reapproval. A superscript epsilon (´) indicates an editorial change since the last revision or reapproval.
1. Scope 2.3 API Standards:
5LSpecification for Line Pipe
1.1 This specification covers furnace-butt-welded, black,
5BSpecification for Threading, Gauging, and Thread In-
plain-end or threaded-end, steel pipe for use in the conveyance 4
spection of Casing, Tubing, and Line Pipe Threads
of fluids under pressure. Pipe in sizes NPS ⁄2 to 4, inclusive,
with nominal wall thickness 0.350 in. [8.9 mm] or less, as
3. Terminology
given in ASME B36.10M is included. Pipe having other
3.1 Definitions—For terminology used in this specification,
dimensions,inthissizerange,maybefurnishedprovidedsuch
refer to Terminology A941.
pipe complies with all other requirements of this specification.
3.2 Definitions of Terms Specific to This Standard:
1.2 Forplain-endpipe,itisintendedthatthepipebecapable
3.2.1 furnace-butt-welded pipe, n—pipe produced in mul-
of being circumferentially welded in the field when welding
tiple lengths from coiled skelp and subsequently cut into
procedures in accordance with the requirements of the appli-
individual lengths, having its longitudinal butt joint forge
cable pipeline construction code are used.
welded by the mechanical pressure developed in rolling the
hot-formed skelp through a set of round pass welding rolls.
1.3 The values stated in either inch-pound units or in SI
3.2.2 lot, n—a quantity of pipe of the same ordered
units are to be regarded separately as standard.Within the text,
diameter, heat, wall thickness, and grade as given in Table 1.
the SI units are shown in brackets. The values in each system
3.2.3 specified outside diameter (OD), n—the outside diam-
are not exact equivalents; therefore, each system is to be used
independently of the other. eter specified in the purchase order or the outside diameter
listedinASMEB36.10Mforthenominalpipesizespecifiedin
the purchase order.
2. Referenced Documents
2.1 ASTM Standards:
4. General Requirements
A450/A450MSpecification for General Requirements for
4.1 Pipe furnished under this specification shall conform to
Carbon and Low Alloy Steel Tubes
the applicable requirements of Specification A530/A530M
A530/A530MSpecification for General Requirements for
unless otherwise provided herein.
Specialized Carbon and Alloy Steel Pipe
A751Test Methods, Practices, and Terminology for Chemi-
5. Ordering Information
cal Analysis of Steel Products
5.1 It is the purchaser’s responsibility to specify in the
A941TerminologyRelatingtoSteel,StainlessSteel,Related
purchase order all information necessary to purchase the
Alloys, and Ferroalloys
neededmaterial.Examplesofsuchinformationinclude,butare
2.2 ASME Standard: not limited to, the following:
5.1.1 Specification designation and year-date,
ASME B36.10MWelded and SeamlessWrought Steel Pipe
5.1.2 Quantity (feet or metres),
5.1.3 Grade (A or B),
5.1.4 Size (either nominal (NPS) or outside diameter, and
This specification is under the jurisdiction ofASTM Committee A01 on Steel,
wall thickness),
Stainless Steel, and RelatedAlloysand is the direct responsibility of Subcommittee
A01.09 on Carbon Steel Tubular Products.
5.1.5 Length,
Current edition approved Jan. 1, 2005. Published January 2005. DOI: 10.1520/
5.1.6 End finish (plain-end, special plain-end, or threaded-
A1037_A1037M-05.
end, see 15.1),
For referenced ASTM standards, visit the ASTM website, www.astm.org, or
5.1.7 End use of the pipe,
contact ASTM Customer Service at service@astm.org. For Annual Book of ASTM
Standards volume information, refer to the standard’s Document Summary page on
the ASTM website.
3 4
Available from American Society of Mechanical Engineers (ASME), ASME Available from The American Petroleum Institute (API), 1220 L. St., NW,
International Headquarters, Three Park Ave., New York, NY 10016-5990. Washington, DC 20005.
Copyright © ASTM International, 100 Barr Harbor Drive, PO Box C700, West Conshohocken, PA 19428-2959. United States
A1037/A1037M−05
TABLE 1 Lot Size and Sample Size for Mechanical Testing
e = minimum elongation in percent, rounded to the nearest
Size Sample
percent,
Lot Size
Designation Size
C = constant = 625000 [1940],
A = cross-sectional area of the tensile test specimen in
NPS 2 through 50 tons [45 Mg] or 500 lengths, 1
2 2
in. [mm ], based upon the specified outside diameter or
NPS 4 or fraction thereof
the nominal specimen width and the specified wall
2 2
thickness, rounded to the nearest 0.01 in. [1 mm ]. If
the area thus calculated is greater than 0.75 in. [485
2 2
5.1.8 Special requirements, and mm ], the value of 0.75 in. [485 mm ] shall be used,
and
5.1.9 Bar coding (see 18.3).
U = specified minimum tensile strength, psi [MPa].
6. Materials and Manufacture
9. Flattening Test
6.1 Thesteelshallbemadebyoneormoreofthefollowing
9.1 Atestspecimenatleast4in.[100mm]inlengthshallbe
processes: basic-oxygen, electric-furnace, or open-hearth.
flattened cold between parallel plates in three steps, with the
6.2 The pipe shall be made by the furnace-butt-welding
weldlocatedeither0°or90°fromthelineofdirectionofforce,
process.
as required in 9.2.1. Except as allowed by 9.3, during the first
step, which is a test for ductility of the weld, no cracks or
7. Chemical Composition
breaks on the inside, outside, or end surfaces at the weld shall
7.1 Thesteelshallcontain,byheatandproductanalyses,no
be present before the distance between the plates is less than
more than 0.25% carbon, 1.20% manganese, 0.045% sulfur,
two thirds of the specified diameter of the pipe. As a second
and 0.045% phosphorus.
step, the flattening shall be continued as a test for ductility
away from the weld. During the second step, no cracks or
7.2 As a minimum, the required analysis shall contain the
breaks on the inside, outside, or end surfaces away from the
following elements: carbon, manganese, phosphorus, sulfur,
weld, shall be present before the distance between the plates is
chromium, columbium, copper, molybdenum, nickel, silicon,
less than one third of the specified outside diameter of the pipe
and vanadium.
but is not less than five times the wall thickness of the pipe.
7.3 Product analyses shall be made on at least two samples
During the third step, which is a test for soundness, the
from each heat of steel.
flattening shall be continued until the test specimen breaks or
7.4 All analyses shall be in accordance with Test Methods,
the opposite walls of the test specimen meet. Evidence of
Practices, and Terminology A751. laminated or unsound material or of incomplete weld that is
revealed by the flattening test shall be cause for rejection.
7.5 Ifoneorbothoftheproductanalysesrepresentingaheat
failstoconformtothespecifiedrequirements,theheatshallbe 9.2 The flattening test specified in 9.1shall be made as
rejected, or analyses shall be made on double the original
follows:
numberoftestsamplesthatfailed,eachofwhichshallconform 9.2.1 Test specimens taken from the front end of the first
to the specified requirements.
pipe intended to be supplied from each coil and the back end
of the last pipe intended to be supplied from each coil shall be
8. Tensile Requirements
flattenedwiththeweldlocatedat90°fromthelineofdirection
of force.
8.1 The material shall conform to the requirements for
9.2.2 Test specimens taken from pipe at any two locations
tensile properties given in Table 2 and in 8.4.
intermediate to the front end of the first pipe and the back end
8.2 The yield strength corresponding to a total extension
of the last pipe intended to be supplied from each coil shall be
under load of 0.5% of the gage length shall be determined.
flattened with the weld located at 0° from the line of direction
8.3 Longitudinal tests shall be performed for all pipe. Such
of force.
tests shall be either strip specimens taken 90° from the weld or
9.3 When low D-to-t ratio pipe is tested, because the strain
full section specimens, at the option of the manufacturer.
imposed due to geometry is unreasonably high on the inside
8.4 The minimum elongation in 2 in. [50 mm] for each
surface at the six and twelve o’clock locations, cracks at these
grade shall be that determined by the following equation:
locations shall not be cause for rejection if the D-to-t ratio is
0.2 0.9
less than 10.
e 5 CA /U (1)
10. Hydrostatic Test
where:
10.1 Each length of pipe shall be subjected to the hydro-
static test without leakage through the weld seam or the pipe
TABLE 2 Tensile Requirements
body.
Yield Strength, min Tensile Strength, min
Grade
10.2 Each length of pipe NPS 2 or larger shall be tested, by
psi MPa psi MPa
the manufacturer, to a minimum hydrostatic pressure calcu-
A 30 000 205 48 000 330
lated from the following relationship:
B 35 000 240 60 000 415
Inch-Pound Units:
A1037/A1037M−05
P 5 2 St/D 3C (2) 11.2 Reference Standards—Reference standards shall have
both the outside diameter and wall thickness within the
SI Units:
tolerancesspecifiedfortheproductionpipetobeinspectedand
P 5 2000 St/D 3C (3)
may be of any convenient length as determined by the pipe
manufacturer. Reference standards shall be either full sections
where:
or coupons taken from the pipe. Reference standards shall
P = minimum hydrostatic test pressure, psi [kPa],
containmachinednotchesasshowninFig.1,oneontheinside
S = specified minimum yield strength, psi [MPa],
surface and one on the outside surface, or a drilled hole as
t = specified wall thickness, in. [mm],
shown in Fig. 1, at the option of the pipe manufacturer. The
D = specified outside diameter, in
...


Questions, Comments and Discussion
Ask us and Technical Secretary will try to provide an answer. You can facilitate discussion about the standard in here.