ASTM B765-03(2013)
(Guide)Standard Guide for Selection of Porosity and Gross Defect Tests for Electrodeposits and Related Metallic Coatings
Standard Guide for Selection of Porosity and Gross Defect Tests for Electrodeposits and Related Metallic Coatings
SIGNIFICANCE AND USE
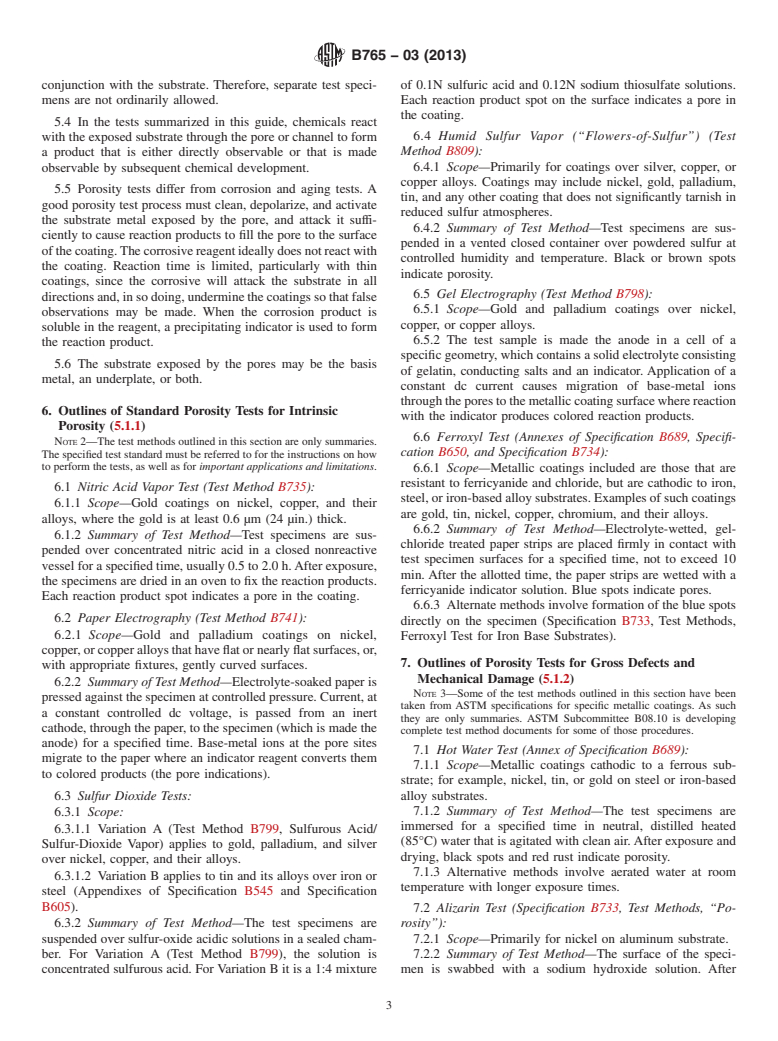
4.1 Porosity tests indicate the completeness of protection or coverage offered by the coating. When a given coating is known to be protective when properly deposited, the porosity serves as a measure of the control of the process. The effects of substrate finish and preparation, plating bath, coating process, and handling, may all affect the degree of imperfection that is measured.Note 1—The substrate exposed by the pores may be the basis metal, an underplate, or both.
4.2 The tests in this guide involve corrosion reactions in which the products delineate pores in coatings. Since the chemistry and properties of these products may not resemble those found in service environments, these tests are not recommended for prediction of product performance unless correlation is first established with service experience.
SCOPE
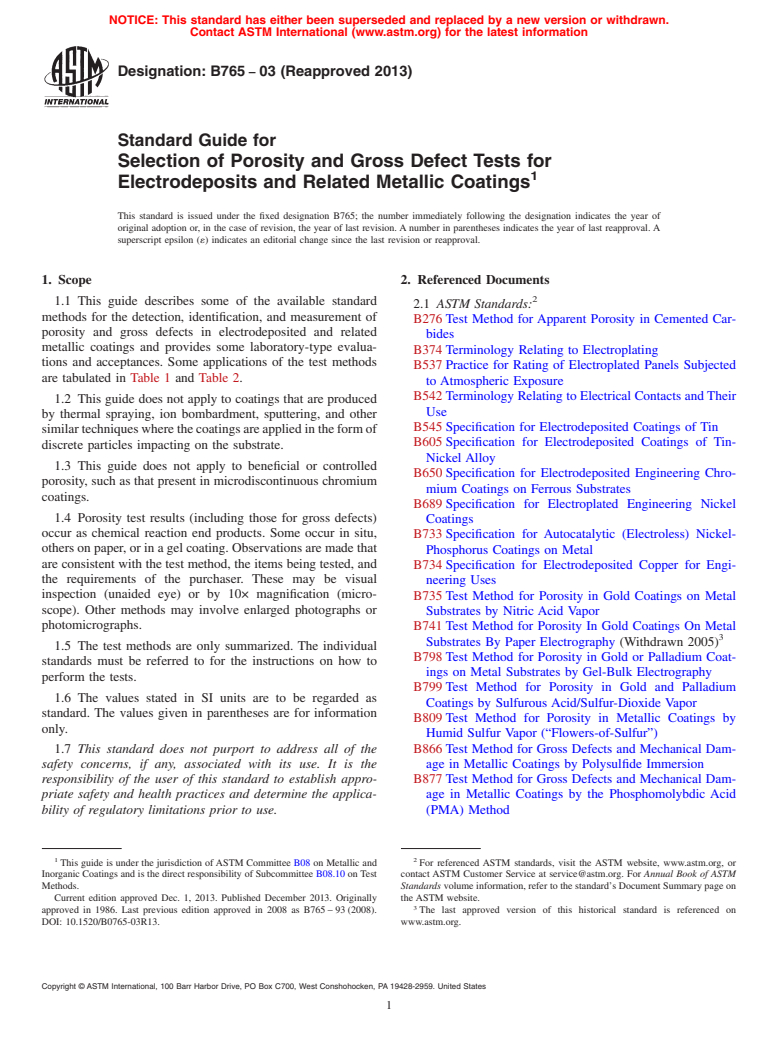
1.1 This guide describes some of the available standard methods for the detection, identification, and measurement of porosity and gross defects in electrodeposited and related metallic coatings and provides some laboratory-type evaluations and acceptances. Some applications of the test methods are tabulated in Table 1 and Table 2.
1.2 This guide does not apply to coatings that are produced by thermal spraying, ion bombardment, sputtering, and other similar techniques where the coatings are applied in the form of discrete particles impacting on the substrate.
1.3 This guide does not apply to beneficial or controlled porosity, such as that present in microdiscontinuous chromium coatings.
1.4 Porosity test results (including those for gross defects) occur as chemical reaction end products. Some occur in situ, others on paper, or in a gel coating. Observations are made that are consistent with the test method, the items being tested, and the requirements of the purchaser. These may be visual inspection (unaided eye) or by 10× magnification (microscope). Other methods may involve enlarged photographs or photomicrographs.
1.5 The test methods are only summarized. The individual standards must be referred to for the instructions on how to perform the tests.
1.6 The values stated in SI units are to be regarded as standard. The values given in parentheses are for information only.
1.7 This standard does not purport to address all of the safety concerns, if any, associated with its use. It is the responsibility of the user of this standard to establish appropriate safety and health practices and determine the applicability of regulatory limitations prior to use.
General Information
Relations
Standards Content (Sample)
NOTICE: This standard has either been superseded and replaced by a new version or withdrawn.
Contact ASTM International (www.astm.org) for the latest information
Designation: B765 − 03 (Reapproved 2013)
Standard Guide for
Selection of Porosity and Gross Defect Tests for
Electrodeposits and Related Metallic Coatings
This standard is issued under the fixed designation B765; the number immediately following the designation indicates the year of
original adoption or, in the case of revision, the year of last revision.Anumber in parentheses indicates the year of last reapproval.A
superscript epsilon (´) indicates an editorial change since the last revision or reapproval.
1. Scope 2. Referenced Documents
1.1 This guide describes some of the available standard
2.1 ASTM Standards:
methods for the detection, identification, and measurement of
B276Test Method for Apparent Porosity in Cemented Car-
porosity and gross defects in electrodeposited and related
bides
metallic coatings and provides some laboratory-type evalua-
B374Terminology Relating to Electroplating
tions and acceptances. Some applications of the test methods
B537Practice for Rating of Electroplated Panels Subjected
are tabulated in Table 1 and Table 2.
to Atmospheric Exposure
B542Terminology Relating to Electrical Contacts andTheir
1.2 This guide does not apply to coatings that are produced
Use
by thermal spraying, ion bombardment, sputtering, and other
B545Specification for Electrodeposited Coatings of Tin
similartechniqueswherethecoatingsareappliedintheformof
B605Specification for Electrodeposited Coatings of Tin-
discrete particles impacting on the substrate.
Nickel Alloy
1.3 This guide does not apply to beneficial or controlled
B650Specification for Electrodeposited Engineering Chro-
porosity, such as that present in microdiscontinuous chromium
mium Coatings on Ferrous Substrates
coatings.
B689Specification for Electroplated Engineering Nickel
1.4 Porosity test results (including those for gross defects)
Coatings
occur as chemical reaction end products. Some occur in situ,
B733Specification for Autocatalytic (Electroless) Nickel-
othersonpaper,orinagelcoating.Observationsaremadethat
Phosphorus Coatings on Metal
are consistent with the test method, the items being tested, and
B734Specification for Electrodeposited Copper for Engi-
the requirements of the purchaser. These may be visual
neering Uses
inspection (unaided eye) or by 10× magnification (micro-
B735Test Method for Porosity in Gold Coatings on Metal
scope). Other methods may involve enlarged photographs or
Substrates by Nitric Acid Vapor
photomicrographs.
B741Test Method for Porosity In Gold Coatings On Metal
Substrates By Paper Electrography (Withdrawn 2005)
1.5 The test methods are only summarized. The individual
B798Test Method for Porosity in Gold or Palladium Coat-
standards must be referred to for the instructions on how to
ings on Metal Substrates by Gel-Bulk Electrography
perform the tests.
B799Test Method for Porosity in Gold and Palladium
1.6 The values stated in SI units are to be regarded as
Coatings by Sulfurous Acid/Sulfur-Dioxide Vapor
standard. The values given in parentheses are for information
B809Test Method for Porosity in Metallic Coatings by
only.
Humid Sulfur Vapor (“Flowers-of-Sulfur”)
1.7 This standard does not purport to address all of the B866Test Method for Gross Defects and Mechanical Dam-
safety concerns, if any, associated with its use. It is the age in Metallic Coatings by Polysulfide Immersion
responsibility of the user of this standard to establish appro- B877Test Method for Gross Defects and Mechanical Dam-
priate safety and health practices and determine the applica- age in Metallic Coatings by the Phosphomolybdic Acid
bility of regulatory limitations prior to use. (PMA) Method
1 2
This guide is under the jurisdiction ofASTM Committee B08 on Metallic and For referenced ASTM standards, visit the ASTM website, www.astm.org, or
Inorganic Coatings and is the direct responsibility of Subcommittee B08.10 on Test contact ASTM Customer Service at service@astm.org. For Annual Book of ASTM
Methods. Standards volume information, refer to the standard’s Document Summary page on
Current edition approved Dec. 1, 2013. Published December 2013. Originally the ASTM website.
approved in 1986. Last previous edition approved in 2008 as B765–93(2008). The last approved version of this historical standard is referenced on
DOI: 10.1520/B0765-03R13. www.astm.org.
Copyright © ASTM International, 100 Barr Harbor Drive, PO Box C700, West Conshohocken, PA 19428-2959. United States
B765 − 03 (2013)
TABLE 1 Applications of Standard Porosity Tests to Metallic Coatings (Section 6)
A
Substrate Metal Gold Silver Nickel Tin-Nickel Tin Tin-Lead Copper Palladium Chromium
B
Copper and Copper 6.1 , 6.2, 6.3A 6.4 6.4 6.4 6.4 . 6.2, 6.3A, 6.4, .
6.4, 6.5
Alloys 6.5
B
Nickel 6.1 , 6.2, 6.5 6.3A . . . . . 6.2, 6.3A, 6.5 .
Iron or Steel 6.6 . 6.6 6.3B, 6.6 6.3B, 6.6 6.3B, 6.6 6.6 . 6.6
Silver 6.4 . 6.4 6.4 6.4 6.4 . 6.4 .
A
The substrate may be the basis metal, an underplate, or both (see Note 1).
B
Thickness restrictions may apply.
TABLE 2 Applications of Tests for Gross Defects and Mechanical Damage (Section 7)
A
Substrate Metal Gold Nickel Tin-Nickel Tin Tin-Lead Palladium Silver
Copper and Copper 7.3, 7.5 7.3, 7.4 7.3 7.3 7.3 7.3, 7.5 7.5
Alloys
Nickel 7.5 . . . . 7.5 7.5
Iron or Steel 7.1 7.1 7.1 7.1 7.1 7.1 .
Aluminum . 7.2 . . . . .
A
The substrate may be the basis metal, an underplate, or both (see Note 1).
3. Terminology 5.1.1 Intrinsic or normal porosity is due primarily to small
deviations from ideal plating and surface preparation condi-
3.1 Definitions—Many terms used in this guide are defined
tions. As such, it will be present to some degree in all
in Terminology B374 or B542.
commercial thin platings and will generally follow an inverse
3.2 Definitions of Terms Specific to This Standard:
relationship with thickness. In addition, scanning electron
3.2.1 porosity—for the purpose of this guide, porosity in a
microscope (SEM) studies have shown that the diameter of
coating is defined as any hole, crack, or other defect that
suchporesattheplatingsurfaceisoftheorderofmicrometers,
exposes the underlying metal to the environment. Differences
so that only small areas of underlying metal are exposed to the
betweenthemajortypesofporosityaredescribedinSection5.
environment.
3.2.2 underplate—ametalliccoatinglayerbetweenthebasis 5.1.2 Gross defects, on the other hand, would result in
metal and the topmost metallic coating. The thickness of an
comparatively large areas of exposed basis metal or underplat-
underplatingisusuallygreaterthan1µm,incontrasttoastrike ing. Examples of such defects are mechanical damage to the
or flash, which are usually thinner.
coatingthroughmishandlingorwear.Grossdefectscanalsobe
found in undamaged coatings in the form of networks of
4. Significance and Use
microcracks and as large as-plated pores—with diameters an
order of magnitude (or more) greater than intrinsic porosity.
4.1 Porosity tests indicate the completeness of protection or
Such gross defects indicate such serious deviations from
coverage offered by the coating. When a given coating is
acceptable coating practice as dirty substrates and contami-
known to be protective when properly deposited, the porosity
nated or out-of-balance baths.
servesasameasureofthecontroloftheprocess.Theeffectsof
substrate finish and preparation, plating bath, coating process,
5.2 Intrinsicporosityandmosttypesofgrossdefectsaretoo
and handling, may all affect the degree of imperfection that is
smalltobeseenexceptatmagnificationssohighthatarealistic
measured.
assessmentoftheoverallcoatingsurfaceinthefunctionalareas
of the part cannot be made. Instead, the presence and severity
NOTE1—Thesubstrateexposedbytheporesmaybethebasismetal,an
underplate, or both. of the porosity is normally determined by some type of
pore-corrosion test that will magnify the pore sites by produc-
4.2 The tests in this guide involve corrosion reactions in
ingvisiblereactionproductsinandaroundtheporesorcracks.
which the products delineate pores in coatings. Since the
Testsforgrossdefects(Section7),andespeciallyformechani-
chemistry and properties of these products may not resemble
caldamageandwear,aredesignedtobelesssevere.Suchtests,
those found in service environments, these tests are not
however, may not detect a sizeable portion of the smaller
recommended for prediction of product performance unless
(intrinsic) pores in a coating. On the other hand, standard tests
correlation is first established with service experience.
forintrinsicporosity(Section6)willeasilyrevealthepresence
of gross defects as well.
5. Applications
5.3 Porosity tests are generally destructive in nature and are
5.1 From the viewpoint of both porosity testing and func-
designed to assess the quality of the coating process in
tionalsignificance,itisusefultodivideporosityintotwobroad
4,5
categories, namely intrinsic porosity and gross defects.
Krumbein, S. J., “The ASTM Approach to Porosity Testing,” Proc. 1991
Baker, R. G., Holden, C. A., and Mendizza, A., Proceedings of the American International Technical Conf. of theAmerican Electroplaters and Surface Finishers
Electroplaters Society, Vol 50, 1963, p. 61. Soc., (SUR/FIN ’91), Toronto, 1991, pp. 527–536.
B765 − 03 (2013)
conjunction with the substrate. Therefore, separate test speci- of 0.1N sulfuric acid and 0.12N sodium thiosulfate solutions.
mens are not ordinarily allowed. Each reaction product spot on the surface indicates a pore in
the coating.
5.4 In the tests summarized in this guide, chemicals react
6.4 Humid Sulfur Vapor (“Flowers-of-Sulfur”) (Test
withtheexposedsubstratethroughtheporeorc
...


Questions, Comments and Discussion
Ask us and Technical Secretary will try to provide an answer. You can facilitate discussion about the standard in here.