ASTM A795/A795M-13
(Specification)Standard Specification for Black and Hot-Dipped Zinc-Coated (Galvanized) Welded and Seamless Steel Pipe for Fire Protection Use
Standard Specification for Black and Hot-Dipped Zinc-Coated (Galvanized) Welded and Seamless Steel Pipe for Fire Protection Use
ABSTRACT
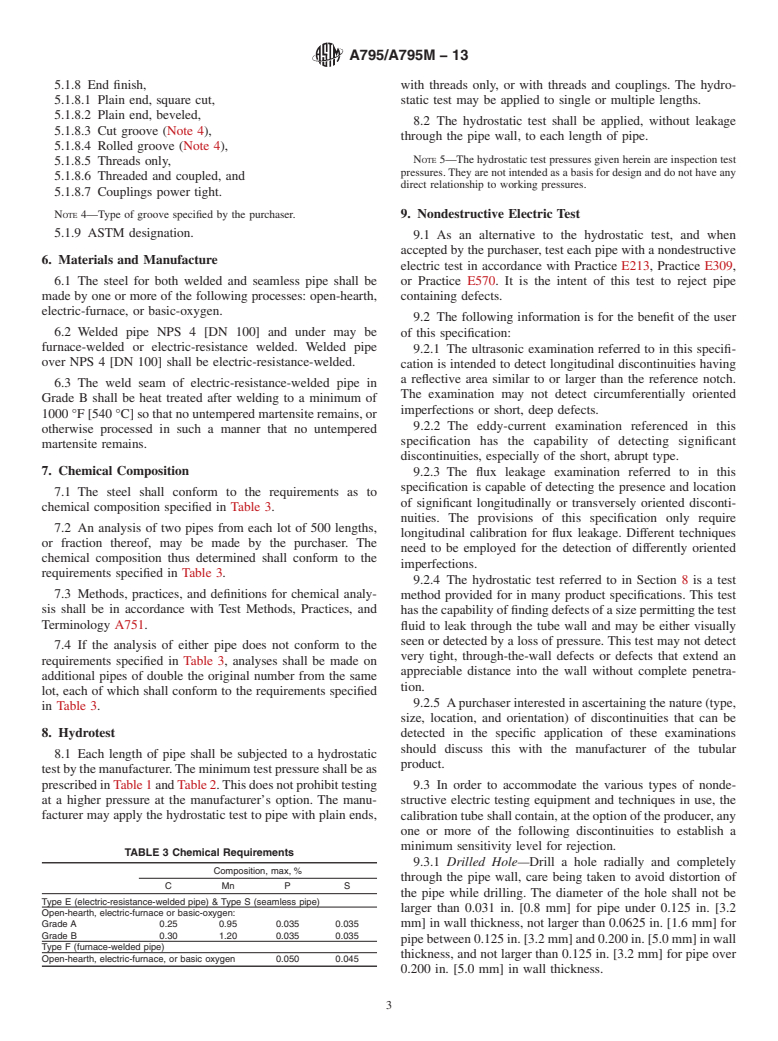
This specification covers black and hot-dipped zinc-coated (galvanized) welded and seamless steel pipe for fire protection use. The pipe may be bent, but it is not intended for bending made at ambient temperature wherein the inside diameter of the bend is less than twelve times the outside diameter of the pipe being bent. The steel shall conform to the required chemical composition. Each length of pipe shall be subjected to a hydrostatic test without leakage through the pipe wall. As an alternative to the hydrostatic test, and when accepted by the purchaser, each pipe shall be tested with a non-destructive electrical method. Finally, flattening test shall be performed on the pipe in accordance with, electric-resistance-welded pipe, and furnace-welded pipe.
SCOPE
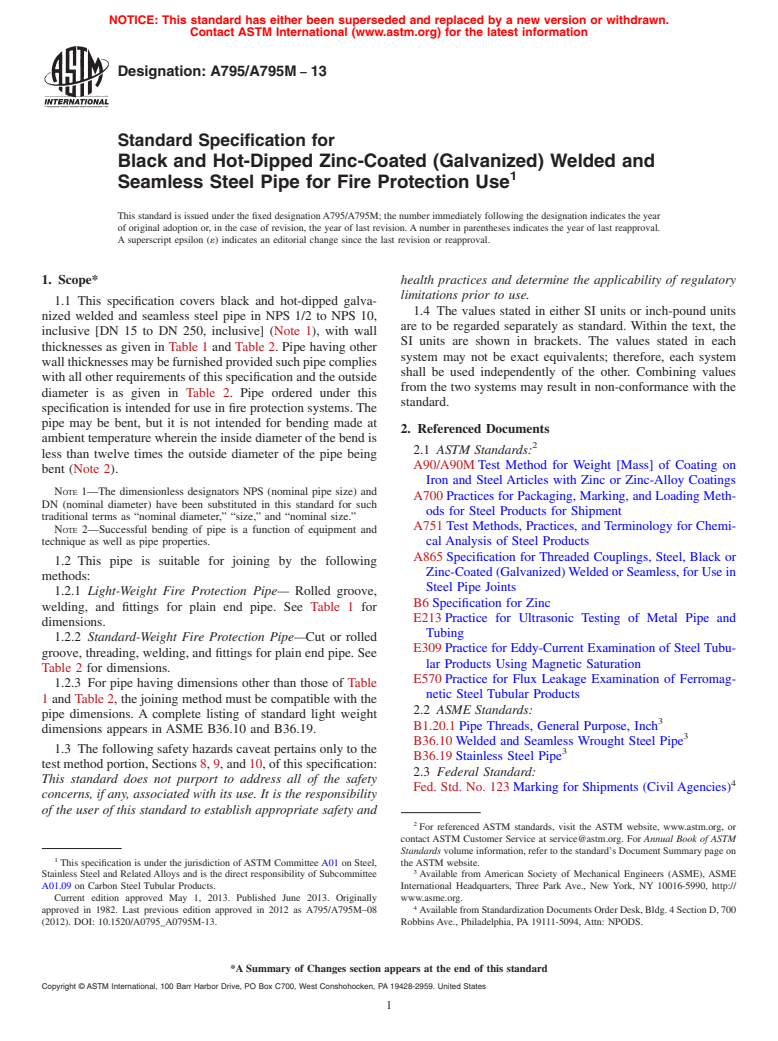
1.1 This specification covers black and hot-dipped galvanized welded and seamless steel pipe in NPS 1/2 to NPS 10, inclusive [DN 15 to DN 250, inclusive] (Note 1), with wall thicknesses as given in Table 1 and Table 2. Pipe having other wall thicknesses may be furnished provided such pipe complies with all other requirements of this specification and the outside diameter is as given in Table 2. Pipe ordered under this specification is intended for use in fire protection systems. The pipe may be bent, but it is not intended for bending made at ambient temperature wherein the inside diameter of the bend is less than twelve times the outside diameter of the pipe being bent (Note 2). Note 1—The dimensionless designators NPS (nominal pipe size) and DN (nominal diameter) have been substituted in this standard for such traditional terms as “nominal diameter,” “size,” and “nominal size.” A Schedule 10 corresponds to Schedule 10S as listed in ANSI B36.19 for NPS 3/4 through 6 [DN 20 through 150] only. B Furnace-welded pipe is not made in sizes larger than NPS 4 [DN 100]. C Not Schedule 10. A NPS 1/2 through 6 [DN 15 through 150]—Schedule 40; NPS 8 and 10 [DN 200 and 250]—Schedule 30.B Based on 20-ft [6.1-m] lengths.C Furnace-welded pipe is not made in sizes larger than NPS 4 [DN 100].Note 2—Successful bending of pipe is a function of equipment and technique as well as pipe properties.
1.2 This pipe is suitable for joining by the following methods:
1.2.1 Light-Weight Fire Protection Pipe—Rolled groove, welding, and fittings for plain end pipe. See Table 1 for dimensions.
1.2.2 Standard-Weight Fire Protection Pipe—Cut or rolled groove, threading, welding, and fittings for plain end pipe. See Table 2 for dimensions.
1.2.3 For pipe having dimensions other than those of Table 1 and Table 2, the joining method must be compatible with the pipe dimensions. A complete listing of standard light weight dimensions appears in ASME B36.10 and B36.19.
1.3 The following safety hazards caveat pertains only to the test method portion, Sections 8, 9, and 10, of this specification: This standard does not purport to address all of the safety concerns, if any, associated with its use. It is the responsibility of the user of this standard to establish appropriate safety and health practices and determine the applicability of regulatory limitations prior to use.
1.4 The values stated in either SI units or inch-pound units are to be regarded separately as standard. Within the text, the SI units are shown in brackets. The values stated in each system may not be exact equivalents; therefore, each system shall be used independently of the other. Combining values from the two systems may result in non-conformance with the standard.
General Information
Relations
Buy Standard
Standards Content (Sample)
NOTICE: This standard has either been superseded and replaced by a new version or withdrawn.
Contact ASTM International (www.astm.org) for the latest information
Designation:A795/A795M −13
Standard Specification for
Black and Hot-Dipped Zinc-Coated (Galvanized) Welded and
1
Seamless Steel Pipe for Fire Protection Use
This standard is issued under the fixed designationA795/A795M; the number immediately following the designation indicates the year
of original adoption or, in the case of revision, the year of last revision. A number in parentheses indicates the year of last reapproval.
A superscript epsilon (´) indicates an editorial change since the last revision or reapproval.
1. Scope* health practices and determine the applicability of regulatory
limitations prior to use.
1.1 This specification covers black and hot-dipped galva-
1.4 The values stated in either SI units or inch-pound units
nized welded and seamless steel pipe in NPS 1/2 to NPS 10,
are to be regarded separately as standard. Within the text, the
inclusive [DN 15 to DN 250, inclusive] (Note 1), with wall
SI units are shown in brackets. The values stated in each
thicknesses as given in Table 1 and Table 2. Pipe having other
system may not be exact equivalents; therefore, each system
wallthicknessesmaybefurnishedprovidedsuchpipecomplies
shall be used independently of the other. Combining values
with all other requirements of this specification and the outside
from the two systems may result in non-conformance with the
diameter is as given in Table 2. Pipe ordered under this
standard.
specification is intended for use in fire protection systems. The
pipe may be bent, but it is not intended for bending made at
2. Referenced Documents
ambient temperature wherein the inside diameter of the bend is
2
2.1 ASTM Standards:
less than twelve times the outside diameter of the pipe being
A90/A90M Test Method for Weight [Mass] of Coating on
bent (Note 2).
Iron and Steel Articles with Zinc or Zinc-Alloy Coatings
NOTE 1—The dimensionless designators NPS (nominal pipe size) and
A700 Practices for Packaging, Marking, and Loading Meth-
DN (nominal diameter) have been substituted in this standard for such
ods for Steel Products for Shipment
traditional terms as “nominal diameter,” “size,” and “nominal size.”
A751 Test Methods, Practices, and Terminology for Chemi-
NOTE 2—Successful bending of pipe is a function of equipment and
technique as well as pipe properties. cal Analysis of Steel Products
A865 Specification for Threaded Couplings, Steel, Black or
1.2 This pipe is suitable for joining by the following
Zinc-Coated (Galvanized)Welded or Seamless, for Use in
methods:
Steel Pipe Joints
1.2.1 Light-Weight Fire Protection Pipe— Rolled groove,
B6 Specification for Zinc
welding, and fittings for plain end pipe. See Table 1 for
E213 Practice for Ultrasonic Testing of Metal Pipe and
dimensions.
Tubing
1.2.2 Standard-Weight Fire Protection Pipe—Cut or rolled
E309 Practice for Eddy-Current Examination of Steel Tubu-
groove, threading, welding, and fittings for plain end pipe. See
lar Products Using Magnetic Saturation
Table 2 for dimensions.
E570 Practice for Flux Leakage Examination of Ferromag-
1.2.3 For pipe having dimensions other than those of Table
netic Steel Tubular Products
1 and Table 2, the joining method must be compatible with the
2.2 ASME Standards:
pipe dimensions. A complete listing of standard light weight
3
B1.20.1 Pipe Threads, General Purpose, Inch
dimensions appears in ASME B36.10 and B36.19.
3
B36.10 Welded and Seamless Wrought Steel Pipe
1.3 The following safety hazards caveat pertains only to the
3
B36.19 Stainless Steel Pipe
test method portion, Sections 8, 9, and 10, of this specification:
2.3 Federal Standard:
This standard does not purport to address all of the safety
4
Fed. Std. No. 123 Marking for Shipments (Civil Agencies)
concerns, if any, associated with its use. It is the responsibility
of the user of this standard to establish appropriate safety and
2
For referenced ASTM standards, visit the ASTM website, www.astm.org, or
contact ASTM Customer Service at service@astm.org. For Annual Book of ASTM
Standards volume information, refer to the standard’s Document Summary page on
1
This specification is under the jurisdiction of ASTM Committee A01 on Steel, the ASTM website.
3
Stainless Steel and Related Alloys and is the direct responsibility of Subcommittee Available from American Society of Mechanical Engineers (ASME), ASME
A01.09 on Carbon Steel Tubular Products. International Headquarters, Three Park Ave., New York, NY 10016-5990, http://
Current edition approved May 1, 2013. Published June 2013. Originally www.asme.org.
4
approved in 1982. Last previous edition approved in 2012 as A795/A795M–08 AvailablefromStandardizationDocumentsOrderDesk,Bldg.4SectionD,700
(2012). DOI: 10.1520/A0795_A0795M-13. Robbins Ave., Philadelphia, PA 19111-5094, Attn: NPODS.
*A Summary of Changes section appears at the end of this standard
Copyright © ASTM International,
...
This document is not an ASTM standard and is intended only to provide the user of an ASTM standard an indication of what changes have been made to the previous version. Because
it may not be technically possible to adequately depict all changes accurately, ASTM recommends that users consult prior editions as appropriate. In all cases only the current version
of the standard as published by ASTM is to be considered the official document.
Designation: A795/A795M − 08 (Reapproved 2012) A795/A795M − 13
Standard Specification for
Black and Hot-Dipped Zinc-Coated (Galvanized) Welded and
1
Seamless Steel Pipe for Fire Protection Use
This standard is issued under the fixed designation A795/A795M; the number immediately following the designation indicates the year
of original adoption or, in the case of revision, the year of last revision. A number in parentheses indicates the year of last reapproval.
A superscript epsilon (´) indicates an editorial change since the last revision or reapproval.
1. Scope*
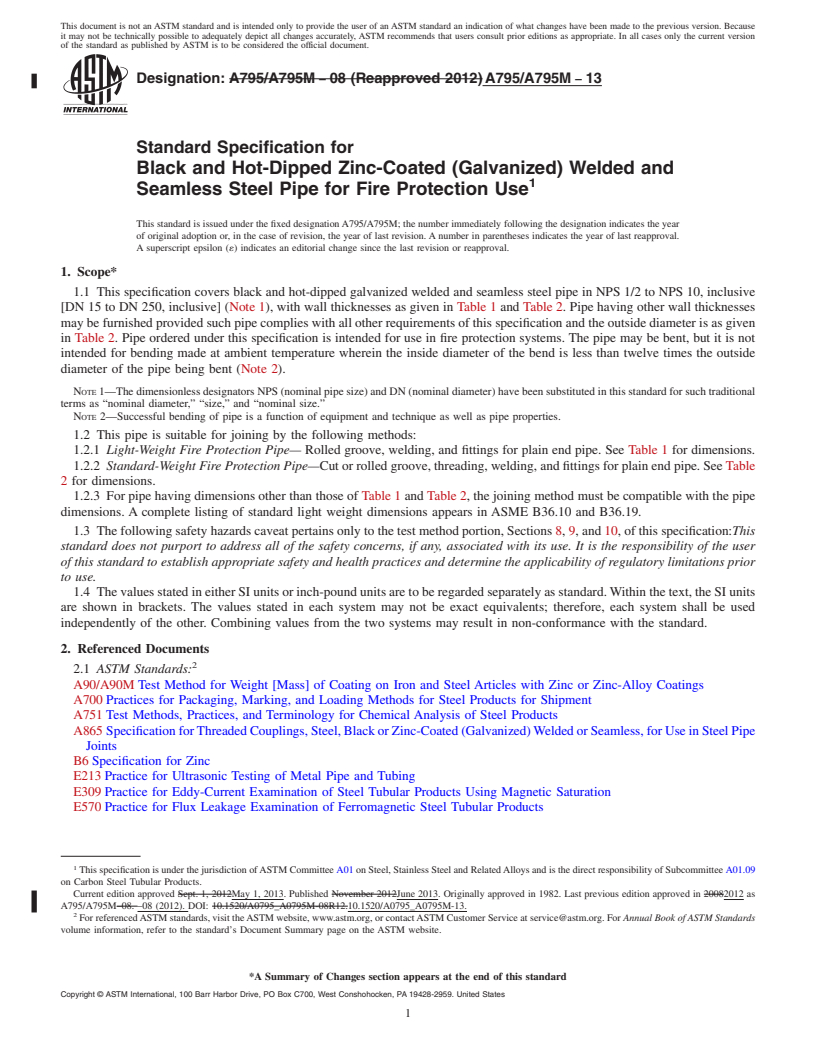
1.1 This specification covers black and hot-dipped galvanized welded and seamless steel pipe in NPS 1/2 to NPS 10, inclusive
[DN 15 to DN 250, inclusive] (Note 1), with wall thicknesses as given in Table 1 and Table 2. Pipe having other wall thicknesses
may be furnished provided such pipe complies with all other requirements of this specification and the outside diameter is as given
in Table 2. Pipe ordered under this specification is intended for use in fire protection systems. The pipe may be bent, but it is not
intended for bending made at ambient temperature wherein the inside diameter of the bend is less than twelve times the outside
diameter of the pipe being bent (Note 2).
NOTE 1—The dimensionless designators NPS (nominal pipe size) and DN (nominal diameter) have been substituted in this standard for such traditional
terms as “nominal diameter,” “size,” and “nominal size.”
NOTE 2—Successful bending of pipe is a function of equipment and technique as well as pipe properties.
1.2 This pipe is suitable for joining by the following methods:
1.2.1 Light-Weight Fire Protection Pipe— Rolled groove, welding, and fittings for plain end pipe. See Table 1 for dimensions.
1.2.2 Standard-Weight Fire Protection Pipe—Cut or rolled groove, threading, welding, and fittings for plain end pipe. See Table
2 for dimensions.
1.2.3 For pipe having dimensions other than those of Table 1 and Table 2, the joining method must be compatible with the pipe
dimensions. A complete listing of standard light weight dimensions appears in ASME B36.10 and B36.19.
1.3 The following safety hazards caveat pertains only to the test method portion, Sections 8, 9, and 10, of this specification:This
standard does not purport to address all of the safety concerns, if any, associated with its use. It is the responsibility of the user
of this standard to establish appropriate safety and health practices and determine the applicability of regulatory limitations prior
to use.
1.4 The values stated in either SI units or inch-pound units are to be regarded separately as standard. Within the text, the SI units
are shown in brackets. The values stated in each system may not be exact equivalents; therefore, each system shall be used
independently of the other. Combining values from the two systems may result in non-conformance with the standard.
2. Referenced Documents
2
2.1 ASTM Standards:
A90/A90M Test Method for Weight [Mass] of Coating on Iron and Steel Articles with Zinc or Zinc-Alloy Coatings
A700 Practices for Packaging, Marking, and Loading Methods for Steel Products for Shipment
A751 Test Methods, Practices, and Terminology for Chemical Analysis of Steel Products
A865 Specification for Threaded Couplings, Steel, Black or Zinc-Coated (Galvanized) Welded or Seamless, for Use in Steel Pipe
Joints
B6 Specification for Zinc
E213 Practice for Ultrasonic Testing of Metal Pipe and Tubing
E309 Practice for Eddy-Current Examination of Steel Tubular Products Using Magnetic Saturation
E570 Practice for Flux Leakage Examination of Ferromagnetic Steel Tubular Products
1
This specification is under the jurisdiction of ASTM Committee A01 on Steel, Stainless Steel and Related Alloys and is the direct responsibility of Subcommittee A01.09
on Carbon Steel Tubular Products.
Current edition approved Sept. 1, 2012May 1, 2013. Published November 2012June 2013. Originally approved in 1982. Last previous edition approved in 20082012 as
A795/A795M–08. –08 (2012). DOI: 10.1520/A0795_A0795M-08R12.10.1520/A0795_A0795M-13.
2
For referenced ASTM standards, visit the ASTM website, www.astm.org, or contact ASTM Customer Service at service@astm.org. For Annual Book of ASTM Standards
volume information, refer to the standard’s Document Summary page on the ASTM website.
*A Summary of Changes section appears at the end of this standard
Copyright © ASTM International, 100 Barr Harbor Drive, PO Box C700, West Conshohocken, PA 19428-2959. United States
1
---------------------- Page: 1 ---------------
...


Questions, Comments and Discussion
Ask us and Technical Secretary will try to provide an answer. You can facilitate discussion about the standard in here.