ASTM D4780-95(2007)
(Test Method)Standard Test Method for Determination of Low Surface Area of Catalysts by Multipoint Krypton Adsorption
Standard Test Method for Determination of Low Surface Area of Catalysts by Multipoint Krypton Adsorption
SIGNIFICANCE AND USE
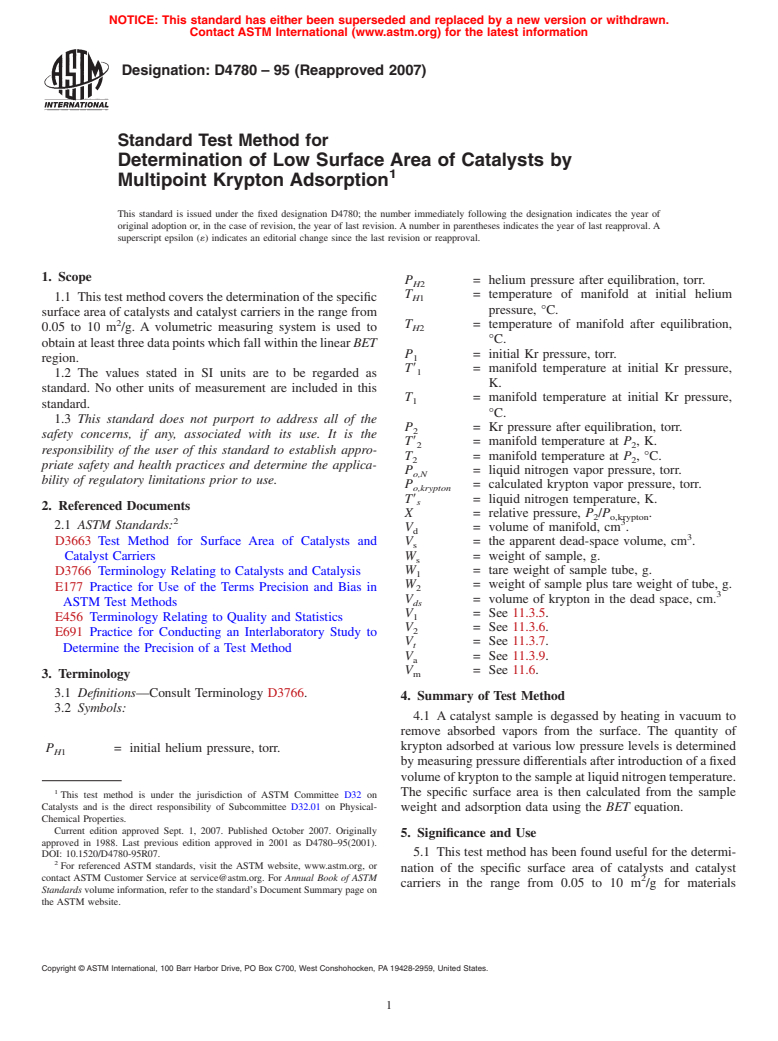
This test method has been found useful for the determination of the specific surface area of catalysts and catalyst carriers in the range from 0.05 to 10 m2/g for materials specification, manufacturing control, and research and development in the evaluation of catalysts. The determination of surface area of catalysts and catalyst carriers above 10 m2/g is addressed in Test Method D 3663.
SCOPE
1.1 This test method covers the determination of the specific surface area of catalysts and catalyst carriers in the range from 0.05 to 10 m2/g. A volumetric measuring system is used to obtain at least three data points which fall within the linear BET region.
1.2 The values stated in SI units are to be regarded as the standard. The values given in parentheses are for information only.
This standard does not purport to address all of the safety concerns, if any, associated with its use. It is the responsibility of the user of this standard to establish appropriate safety and health practices and determine the applicability of regulatory limitations prior to use.
General Information
Relations
Standards Content (Sample)
NOTICE: This standard has either been superseded and replaced by a new version or withdrawn.
Contact ASTM International (www.astm.org) for the latest information
Designation:D4780–95 (Reapproved 2007)
Standard Test Method for
Determination of Low Surface Area of Catalysts by
Multipoint Krypton Adsorption
This standard is issued under the fixed designation D4780; the number immediately following the designation indicates the year of
original adoption or, in the case of revision, the year of last revision.Anumber in parentheses indicates the year of last reapproval.A
superscript epsilon (´) indicates an editorial change since the last revision or reapproval.
1. Scope
P = helium pressure after equilibration, torr.
H2
T = temperature of manifold at initial helium
1.1 Thistestmethodcoversthedeterminationofthespecific
H1
pressure, °C.
surface area of catalysts and catalyst carriers in the range from
T = temperature of manifold after equilibration,
0.05 to 10 m /g. A volumetric measuring system is used to H2
°C.
obtainatleastthreedatapointswhichfallwithinthelinearBET
P = initial Kr pressure, torr.
region.
T8 = manifold temperature at initial Kr pressure,
1.2 The values stated in SI units are to be regarded as
K.
standard. No other units of measurement are included in this
T = manifold temperature at initial Kr pressure,
standard.
°C.
1.3 This standard does not purport to address all of the
P = Kr pressure after equilibration, torr.
safety concerns, if any, associated with its use. It is the
T8 = manifold temperature at P,K.
2 2
responsibility of the user of this standard to establish appro-
T = manifold temperature at P , °C.
2 2
priate safety and health practices and determine the applica-
P = liquid nitrogen vapor pressure, torr.
o,N
bility of regulatory limitations prior to use.
P = calculated krypton vapor pressure, torr.
o,krypton
T8 = liquid nitrogen temperature, K.
s
2. Referenced Documents
X = relative pressure, P /P .
2 o,krypton
2.1 ASTM Standards:
V = volume of manifold, cm .
d
D3663 Test Method for Surface Area of Catalysts and V = the apparent dead-space volume, cm .
s
Catalyst Carriers W = weight of sample, g.
s
D3766 Terminology Relating to Catalysts and Catalysis W = tare weight of sample tube, g.
W = weight of sample plus tare weight of tube, g.
E177 Practice for Use of the Terms Precision and Bias in 2
V = volume of krypton in the dead space, cm.
ASTM Test Methods ds
V = See 11.3.5.
E456 Terminology Relating to Quality and Statistics
V = See 11.3.6.
E691 Practice for Conducting an Interlaboratory Study to
V = See 11.3.7.
t
Determine the Precision of a Test Method
V = See 11.3.9.
a
V = See 11.6.
3. Terminology m
3.1 Definitions—Consult Terminology D3766.
4. Summary of Test Method
3.2 Symbols:
4.1 A catalyst sample is degassed by heating in vacuum to
remove absorbed vapors from the surface. The quantity of
krypton adsorbed at various low pressure levels is determined
P = initial helium pressure, torr.
H1
bymeasuringpressuredifferentialsafterintroductionofafixed
volumeofkryptontothesampleatliquidnitrogentemperature.
The specific surface area is then calculated from the sample
This test method is under the jurisdiction of ASTM Committee D32 on
Catalysts and is the direct responsibility of Subcommittee D32.01 on Physical-
weight and adsorption data using the BET equation.
Chemical Properties.
Current edition approved Sept. 1, 2007. Published October 2007. Originally
5. Significance and Use
approved in 1988. Last previous edition approved in 2001 as D4780–95(2001).
DOI: 10.1520/D4780-95R07. 5.1 This test method has been found useful for the determi-
For referenced ASTM standards, visit the ASTM website, www.astm.org, or
nation of the specific surface area of catalysts and catalyst
contact ASTM Customer Service at service@astm.org. For Annual Book of ASTM 2
carriers in the range from 0.05 to 10 m /g for materials
Standards volume information, refer to the standard’s Document Summary page on
the ASTM website.
Copyright © ASTM International, 100 Barr Harbor Drive, PO Box C700, West Conshohocken, PA 19428-2959, United States.
D4780–95 (2007)
−7
specification, manufacturing control, and research and devel- 6.1.10 Laboratory Balance with 0.1 mg (10 kg) sensitiv-
opment in the evaluation of catalysts. The determination of ity.
surface area of catalysts and catalyst carriers above 10 m /g is 6.1.11 Thermometer for measuring the temperature of the
addressed in Test Method D3663. liquid nitrogen bath (T8 (i)) in kelvins. This will preferably be
s
a nitrogen vapor-pressure-thermometer that gives P directly
o,N
6. Apparatus
and has greater precision, or a resistance thermometer from
which P values may be derived.
6.1 AschematicdiagramoftheapparatusisshowninFig.1. o,N
It may be constructed of glass or of metal and may operate
7. Reagents
manually or automatically. It has the following features:
6.1.1 Vacuum System, capable of attaining pressures below 7.1 Purity of Reagents—Reagent grade chemicals shall be
-4
10 torr (1 torr=133.3 Pa). This will include a vacuum gage
used in all tests. Unless otherwise indicated, it is intended that
(not shown in Fig. 1). Access to the distribution manifold is all reagents shall conform to the specifications of the Commit-
through the valve V.
tee onAnalytical Reagents of theAmerican Chemical Society,
6.1.2 Distribution Manifold, having a volume between 5
where such specifications are available. Other grades may be
3 3
and 40 cm (V ) known to the nearest 0.01 cm .This volume is
used, provided it is first ascertained that the reagent is of
d
defined as the volume between the stopcocks or valves and it
sufficiently high purity to permit its use without lessening the
includes the volume within the pressure gage.
accuracy of the determination.
6.1.3 Constant Volume Gages,capableofmeasuring1to10
7.2 Helium Gas, at least 99.9% pure.
torr to the nearest 0.001 torr and 0 to 1000 torr to the nearest
7.3 Krypton Gas, at least 99.9% pure.
torr (1 torr=133.3 Pa).
7.4 Liquid Nitrogen, of such purity that the saturation vapor
6.1.4 Valve (H), from the helium supply to the distribution
pressure P is not more than 20 torr above barometric
o,N
manifold.
pressure. A fresh daily supply is recommended.
6.1.5 Valve (K), from the krypton supply to the distribution
manifold.
8. Procedure—Sample Preparation and Degassing
6.1.6 Sample Tube(s), with volume between 5 cm and 25
8.1 Select a sample tube of the desired size.A5 cm tube is
cm , depending on the application.The sample tube(s) may be
preferred for small samples to minimize dead space. However,
connected to the distribution manifold with standard taper
larger tubes may be required for larger samples or for finely
joints, glass-to-glass seals, or compression fittings.
powdered samples, to avoid boiling when degassing is started.
8.2 Evacuate the sample tube and then fill to atmospheric
NOTE 1—Modern commercial instruments may employ simple tubes
withvolumesoutsideofthisrange,andmaybecapableoftestingmultiple pressure with helium. This may be done on the surface area
samples simultaneously rather than separately as stated in 9.1.
unit, or on a separate piece of equipment.
8.3 Remove the sample tube, cap, and weigh. Record the
6.1.7 Dewar Flask(s) for immersion of the sample tube(s)
weight as W .
in liquid nitrogen. The nitrogen level should be fixed at a
8.4 Place the sample, whose weight is known approxi-
constant height by means of an automatic level controller or
mately, into the sample tube. If possible, choose the sample
manually refilled to a predetermined mark on the sample
size to provide an estimated total surface area of 1 to 5 m .
tube(s) about 30 to 50 mm below the distribution manifold
8.5 Attachthesampletubetotheapparatus.Ifothersamples
connectors.
are to be run, attach them at this time to the other ports.
6.1.8 Thermometer for measuring the temperature of the
8.6 Open the S valves where there are samples.
distribution manifold (T (i)or T (i)) in degrees Celsius. (Al-
1 2
8.7 Slowlyopenthe Vvalve,monitoringtherateofpressure
ternatively, the distribution manifold may be thermostatted a
decreasetoavoidtoohigharate,whichmightleadtoexcessive
few degrees above ambient to obviate the necessity of record-
fluidization of powdered samples.
ing this temperature.)
8.7.1 If a diffusion pump is used, it may be necessary to
6.1.9 Heating Mantle(s) or Small Furnace(s) for each
close the V valve system periodically to protect the diffusion
sample tube to allow outgassing samples at elevated tempera-
pump fluid from exposure to pressures above 0.1 torr for
tures.
periods of more than 30 s. Close the valve off for 2 min each
time.
8.8 Install a heating mantle or furnace around each sample
andraisethetemperaturetoabout300°C(573K).(Warning—
Take special precautions if the moisture content exceeds
approximately 5% to avoid “bumping” of powdered catalyst,
Reagent Chemicals, American Chemical Society Specifications, American
Chemical Society, Washington, DC. For suggestions on the testing of reagents not
listed by the American Chemical Society, see Analar Standards for Laboratory
Chemicals, BDH Ltd., Poole, Dorset, U.K., and the United States Pharmacopeia
and National Formulary, U.S. Pharmaceutical Convention, Inc. (USPC), Rockville,
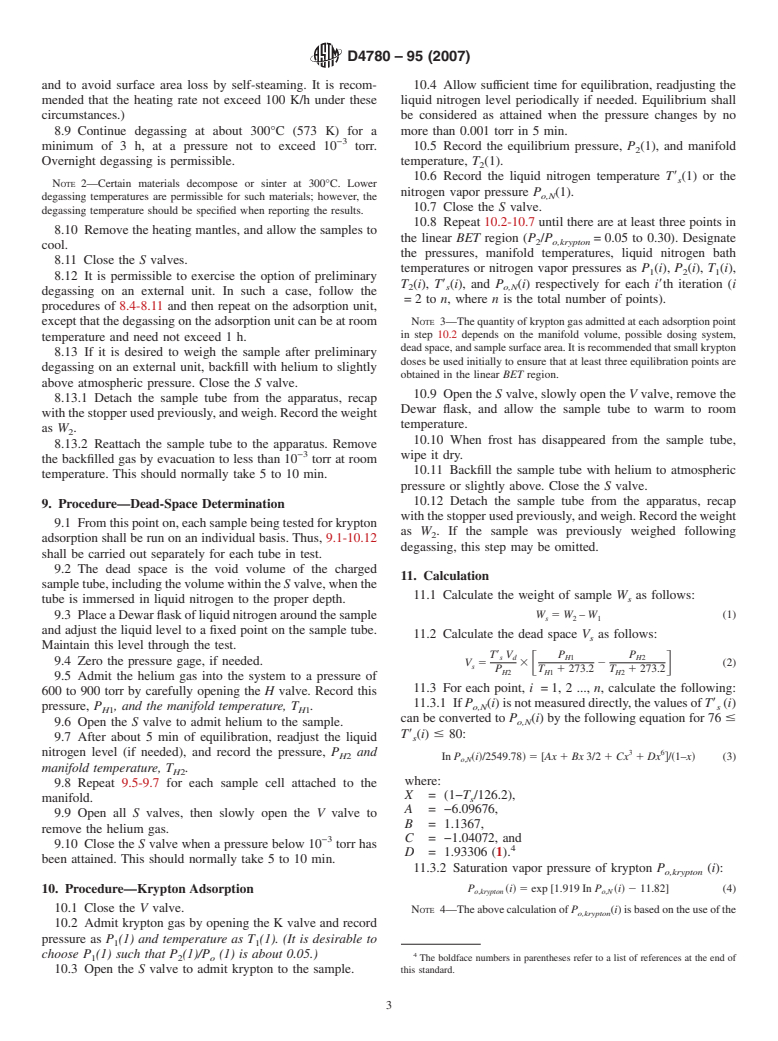
FIG. 1 Schematic Diagram of Surface Area Apparatus MD.
D4780–95 (2007)
and to avoid surface area loss by self-steaming. It is recom- 10.4 Allow sufficient time for equilibration, readjusting the
mended that the heating rate not exceed 100 K/h under these liquid nitrogen level periodically if needed. Equilibrium shall
circumstances.) be considered as attained when the pressure changes by no
8.9 Continue degassing at about 300°C (573 K) for a more than 0.001 torr in 5 min.
−3
minimum of 3 h, at a pressure not to exceed 10 torr. 10.5 Record the equilibrium pressure, P (1), and manifold
Overnight degassing is permissible. temperature, T (1).
10.6 Record the liquid nitrogen temperature T8 (1) or the
s
NOTE 2—Certain materials decompose or sinter at 300°C. Lower
nitrogen vapor pressure P (1).
o,N
degassing temperatures are permissible for such materials; however, the
10.7 Close the S valve.
degassing temperature should be specified when reporting the results.
10.8 Repeat 10.2-10.7 until there are at least three points in
8.10 Remove the heating mantles, and allow the samples to
the linear BET region (P /P =0.05 to 0.30). Designate
2 o,krypton
cool.
the pressures, manifold temperatures, liquid nitrogen bath
8.11 Close the S valves.
temperatures or n
...


Questions, Comments and Discussion
Ask us and Technical Secretary will try to provide an answer. You can facilitate discussion about the standard in here.