ASTM B578-21
(Test Method)Standard Test Method for Microindentation Hardness of Electroplated Coatings
Standard Test Method for Microindentation Hardness of Electroplated Coatings
ABSTRACT
This test method specifies the determination of the microhardness of metallic coatings upon various substrates (electroplated coatings). Measurements shall be made with the Knoop indenter under specified test loads, and the hardness shall be reported as a Knoop hardness number (HK).
SCOPE
1.1 This test method covers the determination of the hardness of metallic coatings upon various substrates. The measurements are made with the Knoop indenter under a test load of 0.245 N (25 gf) or 0.981 N (100 gf).
1.2 This standard does not purport to address all of the safety concerns, if any, associated with its use. It is the responsibility of the user of this standard to establish appropriate safety, health, and environmental practices and determine the applicability of regulatory limitations prior to use.
1.3 This international standard was developed in accordance with internationally recognized principles on standardization established in the Decision on Principles for the Development of International Standards, Guides and Recommendations issued by the World Trade Organization Technical Barriers to Trade (TBT) Committee.
General Information
Buy Standard
Standards Content (Sample)
This international standard was developed in accordance with internationally recognized principles on standardization established in the Decision on Principles for the
Development of International Standards, Guides and Recommendations issued by the World Trade Organization Technical Barriers to Trade (TBT) Committee.
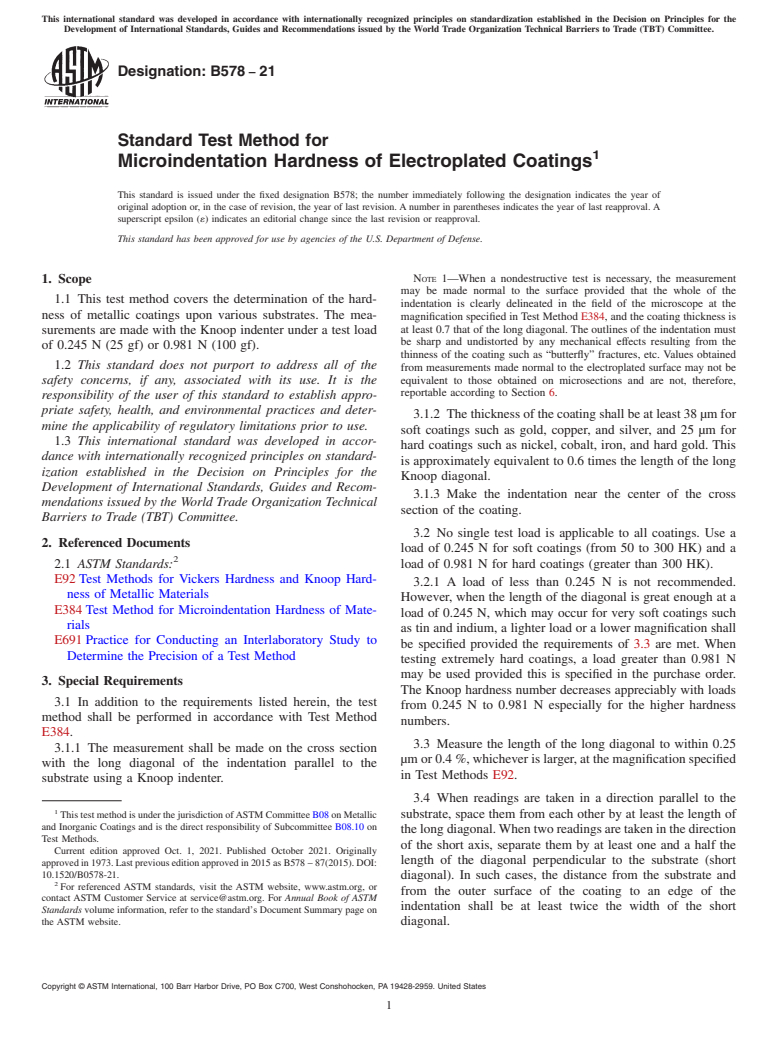
Designation: B578 − 21
Standard Test Method for
1
Microindentation Hardness of Electroplated Coatings
This standard is issued under the fixed designation B578; the number immediately following the designation indicates the year of
original adoption or, in the case of revision, the year of last revision. A number in parentheses indicates the year of last reapproval. A
superscript epsilon (´) indicates an editorial change since the last revision or reapproval.
This standard has been approved for use by agencies of the U.S. Department of Defense.
NOTE 1—When a nondestructive test is necessary, the measurement
1. Scope
may be made normal to the surface provided that the whole of the
1.1 This test method covers the determination of the hard-
indentation is clearly delineated in the field of the microscope at the
ness of metallic coatings upon various substrates. The mea-
magnification specified in Test Method E384, and the coating thickness is
at least 0.7 that of the long diagonal. The outlines of the indentation must
surements are made with the Knoop indenter under a test load
be sharp and undistorted by any mechanical effects resulting from the
of 0.245 N (25 gf) or 0.981 N (100 gf).
thinness of the coating such as “butterfly” fractures, etc. Values obtained
1.2 This standard does not purport to address all of the
from measurements made normal to the electroplated surface may not be
safety concerns, if any, associated with its use. It is the equivalent to those obtained on microsections and are not, therefore,
reportable according to Section 6.
responsibility of the user of this standard to establish appro-
priate safety, health, and environmental practices and deter-
3.1.2 The thickness of the coating shall be at least 38 µm for
mine the applicability of regulatory limitations prior to use.
soft coatings such as gold, copper, and silver, and 25 µm for
1.3 This international standard was developed in accor-
hard coatings such as nickel, cobalt, iron, and hard gold. This
dance with internationally recognized principles on standard-
is approximately equivalent to 0.6 times the length of the long
ization established in the Decision on Principles for the
Knoop diagonal.
Development of International Standards, Guides and Recom-
3.1.3 Make the indentation near the center of the cross
mendations issued by the World Trade Organization Technical
section of the coating.
Barriers to Trade (TBT) Committee.
3.2 No single test load is applicable to all coatings. Use a
2. Referenced Documents
load of 0.245 N for soft coatings (from 50 to 300 HK) and a
2
2.1 ASTM Standards: load of 0.981 N for hard coatings (greater than 300 HK).
E92 Test Methods for Vickers Hardness and Knoop Hard-
3.2.1 A load of less than 0.245 N is not recommended.
ness of Metallic Materials
However, when the length of the diagonal is great enough at a
E384 Test Method for Microindentation Hardness of Mate-
load of 0.245 N, which may occur for very soft coatings such
rials
as tin and indium, a lighter load or a lower magnification shall
E691 Practice for Conducting an Interlaboratory Study to
be specified provided the requirements of 3.3 are met. When
Determine the Precision of a Test Method
testing extremely hard coatings, a load greater than 0.981 N
may be used provided this is specified in the purchase order.
3. Special Requirements
The Knoop hardness number decreases appreciably with loads
3.1 In addition to the requirements listed herein, the test
from 0.245 N to 0.981 N especially for the higher hardness
method shall be performed in accordance with Test Method
numbers.
E384.
3.3 Measure the length of the long diagonal to within 0.25
3.1.1 The measurement shall be made on the cross section
µm or 0.4 %, whichever is larger, at the magnification specified
with the long diagonal of the indentation parallel to the
in Test Methods E92.
substrate using a Knoop indenter.
3.4 When readings are taken in a direction parallel to the
1
ThistestmethodisunderthejurisdictionofASTMCommitteeB08onMetallic substrate, space them from each other by at least the length of
and Inorganic Coatings and is the direct responsibility of Subcommittee B08.10 on
thelongdiagonal.Whentworeadingsaretakeninthedirection
Test Methods.
of the short axis, separate them by at least one and a half the
Current edition approved Oct. 1, 2021. Published October 2021. Originally
length of the diagonal perpendicular to the substrate (short
approvedin1973.Lastpreviouseditionapprovedin2015asB578 – 87(2015).DOI:
10.1520/B0578-21.
diagonal). In such cases, the distance from the substrate and
2
For referenced ASTM standards, visit the ASTM website, www.astm.org, or
from the outer surface of the co
...
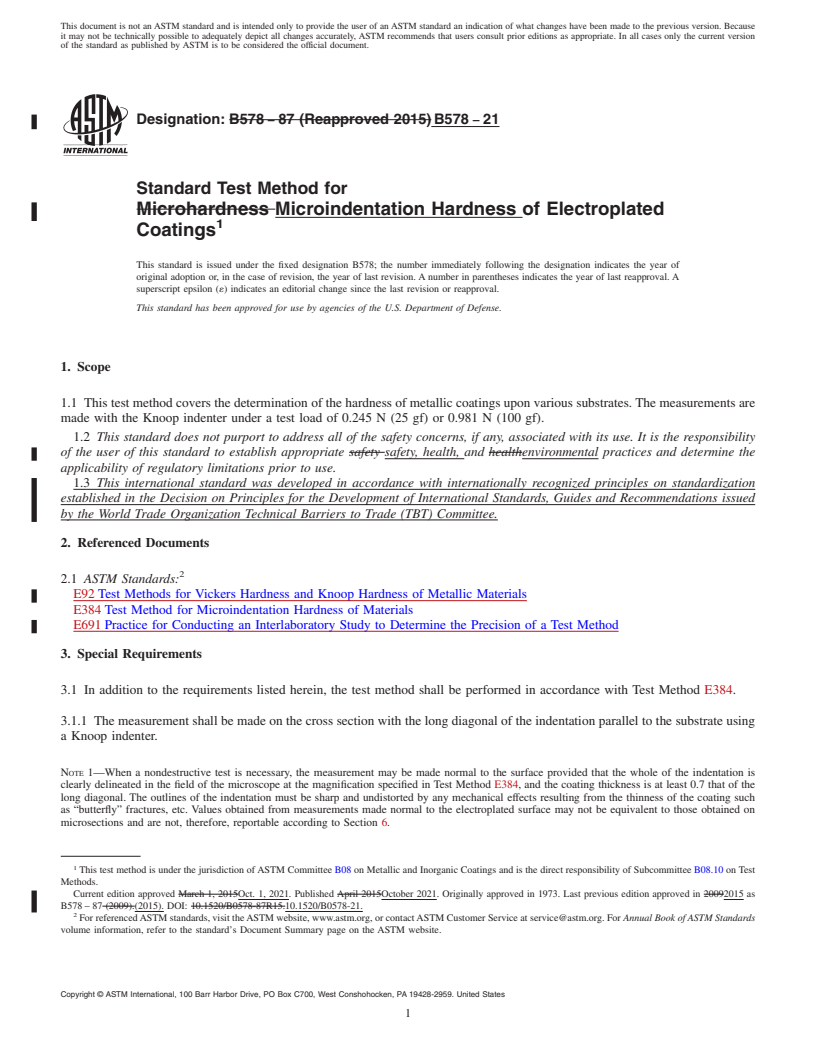
This document is not an ASTM standard and is intended only to provide the user of an ASTM standard an indication of what changes have been made to the previous version. Because
it may not be technically possible to adequately depict all changes accurately, ASTM recommends that users consult prior editions as appropriate. In all cases only the current version
of the standard as published by ASTM is to be considered the official document.
Designation: B578 − 87 (Reapproved 2015) B578 − 21
Standard Test Method for
Microhardness Microindentation Hardness of Electroplated
1
Coatings
This standard is issued under the fixed designation B578; the number immediately following the designation indicates the year of
original adoption or, in the case of revision, the year of last revision. A number in parentheses indicates the year of last reapproval. A
superscript epsilon (´) indicates an editorial change since the last revision or reapproval.
This standard has been approved for use by agencies of the U.S. Department of Defense.
1. Scope
1.1 This test method covers the determination of the hardness of metallic coatings upon various substrates. The measurements are
made with the Knoop indenter under a test load of 0.245 N (25 gf) or 0.981 N (100 gf).
1.2 This standard does not purport to address all of the safety concerns, if any, associated with its use. It is the responsibility
of the user of this standard to establish appropriate safety safety, health, and healthenvironmental practices and determine the
applicability of regulatory limitations prior to use.
1.3 This international standard was developed in accordance with internationally recognized principles on standardization
established in the Decision on Principles for the Development of International Standards, Guides and Recommendations issued
by the World Trade Organization Technical Barriers to Trade (TBT) Committee.
2. Referenced Documents
2
2.1 ASTM Standards:
E92 Test Methods for Vickers Hardness and Knoop Hardness of Metallic Materials
E384 Test Method for Microindentation Hardness of Materials
E691 Practice for Conducting an Interlaboratory Study to Determine the Precision of a Test Method
3. Special Requirements
3.1 In addition to the requirements listed herein, the test method shall be performed in accordance with Test Method E384.
3.1.1 The measurement shall be made on the cross section with the long diagonal of the indentation parallel to the substrate using
a Knoop indenter.
NOTE 1—When a nondestructive test is necessary, the measurement may be made normal to the surface provided that the whole of the indentation is
clearly delineated in the field of the microscope at the magnification specified in Test Method E384, and the coating thickness is at least 0.7 that of the
long diagonal. The outlines of the indentation must be sharp and undistorted by any mechanical effects resulting from the thinness of the coating such
as “butterfly” fractures, etc. Values obtained from measurements made normal to the electroplated surface may not be equivalent to those obtained on
microsections and are not, therefore, reportable according to Section 6.
1
This test method is under the jurisdiction of ASTM Committee B08 on Metallic and Inorganic Coatings and is the direct responsibility of Subcommittee B08.10 on Test
Methods.
Current edition approved March 1, 2015Oct. 1, 2021. Published April 2015October 2021. Originally approved in 1973. Last previous edition approved in 20092015 as
B578 – 87 (2009).(2015). DOI: 10.1520/B0578-87R15.10.1520/B0578-21.
2
For referenced ASTM standards, visit the ASTM website, www.astm.org, or contact ASTM Customer Service at service@astm.org. For Annual Book of ASTM Standards
volume information, refer to the standard’s Document Summary page on the ASTM website.
Copyright © ASTM International, 100 Barr Harbor Drive, PO Box C700, West Conshohocken, PA 19428-2959. United States
1
---------------------- Page: 1 ----------------------
B578 − 21
3.1.2 The thickness of the coating shall be at least 38 μm for soft coatings such as gold, copper, and silver, and 25 μm for hard
coatings such as nickel, cobalt, iron, and hard gold. This is approximately equivalent to 0.6 times the length of the long Knoop
diagonal.
3.1.3 Make the indentation near the center of the cross section of the coating.
3.2 No single test load is applicable to all coatings. Use a load of 0.245 N for soft coatings (from 50 to 300 HK) and a load of
0.981 N for hard coatings (greater than 300 HK).
3.2.1 A load of less than 0.245 N is not recommended. However, when the length of the diagonal is great enough at a load of 0.245
N, which may occur for very soft coatings such as tin and indium, a lighter load or a lower magnification shall be specified
provided the requirements of 3.3 are met. When testing extremely hard coatings, a load greater than 0.981 N may be used provided
this is specified in the purchase order. The Knoop hardness number decreases appreciably with loads from 0.245 N
...


Questions, Comments and Discussion
Ask us and Technical Secretary will try to provide an answer. You can facilitate discussion about the standard in here.