ASTM C1443-99(2010)
(Specification)Standard Specification for Glasses, Portlight, Circular, Fully Tempered
Standard Specification for Glasses, Portlight, Circular, Fully Tempered
ABSTRACT
This specification covers circular, fully tempered, high clarity, flat glasses prescribed for use in portlight applications. The glazing quality float glasses are classified into four types according to the type of edge and the texture of each face. All products should conform to the required values for breaking strength, surface and edge compression, clarity, and warpage and quality of finish.
SCOPE
1.1 This specification covers the requirements for circular, fully tempered, high clarity, flat glasses used for portlight applications.
1.2 The values stated in inch-pound units are to be regarded as standard. The values given in parentheses are mathematical conversions to SI units that are provided for information only and are not considered standard.
1.3 The following safety hazard caveat pertains only to the test method portion, Section 11, of this specification: This standard does not purport to address all of the safety concerns, if any, associated with its use. It is the responsibility of the user of this standard to establish appropriate safety and health practices and determine the applicability of regulatory limitations prior to use.
General Information
Relations
Standards Content (Sample)
NOTICE: This standard has either been superseded and replaced by a new version or withdrawn.
Contact ASTM International (www.astm.org) for the latest information
Designation:C1443 −99(Reapproved 2010)
Standard Specification for
Glasses, Portlight, Circular, Fully Tempered
This standard is issued under the fixed designation C1443; the number immediately following the designation indicates the year of
original adoption or, in the case of revision, the year of last revision. A number in parentheses indicates the year of last reapproval. A
superscript epsilon (´) indicates an editorial change since the last revision or reapproval.
1. Scope 4. Classification
1.1 This specification covers the requirements for circular,
4.1 Glasses covered by this specification shall be of the
fully tempered, high clarity, flat glasses used for portlight
following types, as specified (see 5.1):
applications.
4.1.1 Type 1—Plain edges, both faces polished,
1.2 The values stated in inch-pound units are to be regarded 4.1.2 Type II—Plain edge, one face polished, opposite face
as standard. The values given in parentheses are mathematical frosted,
conversions to SI units that are provided for information only
4.1.3 Type III—Rabbeted edge, both faces polished, or
and are not considered standard.
4.1.4 Type IV—Rabbeted edge, one face polished, opposite
face frosted.
1.3 The following safety hazard caveat pertains only to the
test method portion, Section 11, of this specification:This
standard does not purport to address all of the safety concerns, 5. Ordering Information
if any, associated with its use. It is the responsibility of the user
5.1 Purchasers should select the preferred options permitted
of this standard to establish appropriate safety and health
in this specification, and include the following information in
practices and determine the applicability of regulatory limita-
procurement documents:
tions prior to use.
5.1.1 Title, number, and date of this specification,
2. Referenced Documents
5.1.2 Type of portlight glasses, as requested (see 4.1),
5.1.3 Dimensions of portlight glasses (see 8.1 and 9.3), and
2.1 ASTM Standards:
C162 Terminology of Glass and Glass Products
5.1.4 Type, class, and quality of glass (see Specification
C1036 Specification for Flat Glass C1036) and heat treatment (see Specification C1048).
C1048 Specification for Heat-Strengthened and Fully Tem-
5.2 Samples—If samples are to be supplied with bids, they
pered Flat Glass
should be specifically requested in the invitation for bids and
C1279 Test Method for Non-Destructive Photoelastic Mea-
the particular purpose to be served by the bid sample should be
surement of Edge and Surface Stresses in Annealed,
clearly stated.
Heat-Strengthened, and Fully Tempered Flat Glass
2.2 ANSI Standard:
6. Materials and Manufacture
ANSI Z1.4 Sampling Procedures and Tables for Inspection
by Attributes (DOD Adopted)
6.1 Material—The glass used shall be glazing quality, float
glass in accordance with the requirements for Specification
3. Terminology
C1036, Type I, Class 1, quality q or higher, if required, and
3.1 Definitions—For definitions of terms used in this
heat-treated Specification C1048, kind FT.
specification, refer to Terminology C162 and also Specifica-
6.2 Marking—Specimens shall exhibit the words “fully
tions C1036 and C1048 and Test Method C1279.
tempered” approximately ⁄2 in. (12.7 mm) from the edge by
means of etching or sand blasting. Marking shall be done
This specification is under the jurisdiction of ASTM CommitteeC14 on Glass
before heat treating.
and Glass Products and is the direct responsibility of Subcommittee C14.08 on Flat
Glass.
Current edition approved March 1, 2010. Published March 2010. Originally
7. Other Requirements
approvedin1999.Lastpreviouseditionapprovedin2005asC1443–99(2005).DOI:
10.1520/C1443-99R10.
7.1 Breaking Strength—Glasses shall exhibit satisfactory
For referenced ASTM standards, visit the ASTM website, www.astm.org, or
resistance to breakage (see 11.1.2.1).
contact ASTM Customer Service at service@astm.org. For Annual Book of ASTM
Standards volume information, refer to the standard’s Document Summary page on
7.2 Surface and Edge Compression —Type I and III glasses
the ASTM website.
3 shall have a surface compression of not less than 10 000 psi or
Available from American National Standards Institute (ANSI), 25 W. 43rd St.,
4th Floor, New York, NY 10036, http://www.ansi.org. an edge compression of not less than 9700 psi (see 11.1.1.2).
Copyright © ASTM International, 100 Barr Harbor Drive, PO Box C700, West Conshohocken, PA 19428-2959. United States
C1443−99 (2010)
TABLE 2 Sampling for Surface and Edge Stress Examination and
7.3 Clarity—When glasses are tested (see 11.1.2.3), black
Tests
and white lines of the clarity target shall be definitely distin-
Allowable Number of Allowable Number of
guishable for all parts of the critical area.
Sample Failures for Surface and Failures for Tests (Load,
Lot Size Size Edge Stress Examination Clarity, Warpage)
7.4 Warpage—Glasses shall not exhibit more than ⁄32 in.
(0.8 mm) warpage along any line on either face (see 11.1.2.3). 1-6 all none none
A
7-50 6 load
8. Dimensions B
clarity: none
... ... none
C
warpage: none
51-100 14
8.1 The dimensions of the specimens shall be as specified in
5.1. The thickness of a circular glass specimen shall not vary A
load
B
101-1000 10 none clarity: none
more than ⁄32 in. (0.8 mm) between any two points on its
C
warpage: none
periphery. Dimensional tolerances for circular cut glasses shall
A
See 11.1.2.1.
not exceed values specified in Table 1 and Specification B
Supplier may, at his option, test all remaining glasses in the lot for clarity in
C1036.
accordancewith11.1.2.2andallglassesthatpassshallbeconsideredacceptable.
C
Supplier may, at his option, test all remaining glasses in the lot for warpage in
accordancewith11.1.2.3andallglassesthatpassshallbeconsideredacceptable.
9. Finish and Appearance
9.1 Finish—Glasses shall be finished by grinding to the
tolerances specified in 8.1. Edges shall be ground, with corners
10.1.3 Sampling for Test—Sampling for all tests to be
chamfered ⁄16 in. (1.6 mm).
performed on specimens shall be in accordance with 10.1.2.
9.2 Types II and IV—The designated faces of the glasses
shall be uniformly frosted by sand blasting or etching.
11. Inspection, Acceptance and Rejection
9.3 Types III and IV—The edges of the glasses shall be
11.1 Responsibility—The supplier is responsible for inspec-
rabbeted. The depth of the rabbet in the horizontal direction
tion of cut specimens unless otherwise specified in the contract
and in the vertical direction shall be specified by the purchaser
or purchase order. Two forms of inspection are required:
(see 5.1.3). Depth dimensions for the rabbet shall be accurate
examination and test.
to within in. (0.8 mm) when measured from the edge and from
11.1.1 Examination—Inspection by examination shall con-
the face of the glass. One edge of the rabbet shall be
sist of determining compliance with visual and dimensional
perpendicular to the face of the glass and the other edge of the
requirements.
rabbet shall be perpendicular to the edge of the glass such that
11.1.1.1 Visual and Dimensional Examinations—All speci-
the angle formed by the faces of the rabbet is 90 6 2°.
mens of a sample size selected in accordance with 10.1.1 shall
be examined to verify conformance to all of the requirements
10. Sampling
which do not involve tests or polariscopic examination.The lot
10.1 Inspection Lot—For purposes of inspection, a lot shall
shall be accepted if all of the specimens in the sample (see
consist of not more than 1000 specimens which shall be of a
10.1.1) conform to visual requirements of Section 6.2 and
single thickness, produced in a single plant and offered for
Section 9 and dimensional requirements of Section 8. The lot
delivery at one time.
shall be rejected if any of the specimens in the sample fail to
10.1.1 Sampling for Visual and Dimensional
conformtotheserequirements.Ifthelotisrejectedonthebasis
Examinations—Samples shall be selected in accordance with
of visual and dimensional examination, the supplier may at his
the procedures of ANSI Z1.4 at inspection Level II for
option examine all remaining specimens of the lot to determine
examination in accordance with 11.1.1.1.
conformance with visual and dimensional requirements. Any
10.1.2 Sampling for Surface and Edge Stress—Samples
of the specimens of the lot that comply with the visual and
shall be selected at random in accordance with Table 2 for
dimensional requirements shall be considered acceptable, sub-
examination in accordance with 11.1.1.2. When a lot contains
ject to conformance with polariscopic examination require-
fewer than seven glasses, or when a special use (see 5.1)
ments and test requirements.
requires protection against defects, the sample shall consist of
11.1.1.2 Surface and Edge Stresses, (Type I and Type III
all specimens in the lot. Where the lot consists of between 7
Glasses)—All specimens of a sample size selected in accor-
and 50 glasses, the sample shall consist of 6 specimens. Where
dance with 10.1.2 shall be subjected to surface or edge stress
the lot consists of between 51 and 100 glasses, the sample shall
examination (see 7.2) to determine if they are fully tempered.
consistof14specimens.Lotscontainingmorethan100glasses
It is suggested that Type III glasses be tested for surface stress.
shall be evaluated by means of a sample of 10 specimens.
Test Method C1279 is recommended for testing edge and
Samples from lots consisting of more than 6 glasses shall
surface stresses. If any glass specimen from a sample under-
contain a representative variety of types and diameters.
going surface and edge stress examination does not meet the
requiredvalues(see7.2),thelotshallberejectedinaccordance
with criteria given in Table 2.
TABLE 1 Permitted Tolerances
11.1.2 Test Acceptance or Rejection—Inspection by test
Dimension Tolerance, ± in. (± mm)
shall consist of load, clarity, and warpage tests.
Diameter ⁄16 (1.6)
11.1.2.1 Load Test—All specimens of a sample size selected
Depth of rabbet ⁄32 (0.8)
in accordance with 10.1.3 shall be tested under a load applied
C1443−99 (2010)
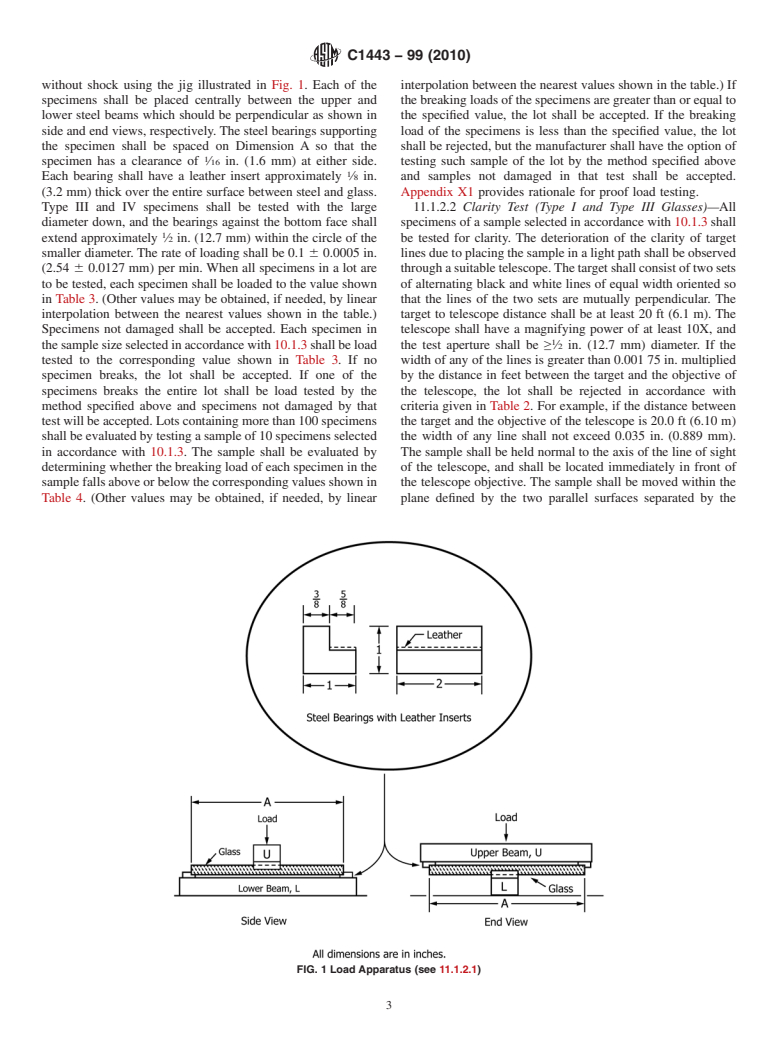
without shock using the jig illustrated in Fig. 1. Each of the interpolation between the nearest values shown in the table.) If
specimens shal
...


Questions, Comments and Discussion
Ask us and Technical Secretary will try to provide an answer. You can facilitate discussion about the standard in here.