ASTM A512-18
(Specification)Standard Specification for Cold-Drawn Buttweld Carbon Steel Mechanical Tubing
Standard Specification for Cold-Drawn Buttweld Carbon Steel Mechanical Tubing
ABSTRACT
This specification covers cold-drawn buttweld carbon steel tubes for use as round, square, rectangular or special shape mechanical tubing. The carbon steel can be made unless a specific type of melting process is required by the purchaser. Heat and product analysis shall be made to determine the specified percentages of chemical elements to which steel tubes shall conform to. The tubing shall be free of injurious defects and shall have a workmanlike finish. Unless otherwise specified, both outside and inside surfaces of the tubing shall be coated with a film of rust-retarding oil before shipping.
SCOPE
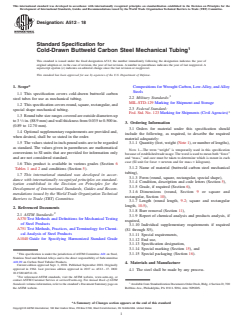
1.1 This specification covers cold-drawn buttweld carbon steel tubes for use as mechanical tubing.
1.2 This specification covers round, square, rectangular, and special shape mechanical tubing.
1.3 Round tube size ranges covered are outside diameters up to 3 1/2 in. (88.9 mm) and wall thickness from 0.035 to 0.500 in. (0.89 to 12.70 mm).
1.4 Optional supplementary requirements are provided and, when desired, shall be so stated in the order.
1.5 The values stated in inch-pound units are to be regarded as standard. The values given in parentheses are mathematical conversions to SI units that are provided for information only and are not considered standard.
1.6 This product is available in various grades (Section 6 Tables 1 and 2 and conditions (Section 5).
1.7 This international standard was developed in accordance with internationally recognized principles on standardization established in the Decision on Principles for the Development of International Standards, Guides and Recommendations issued by the World Trade Organization Technical Barriers to Trade (TBT) Committee.
General Information
- Status
- Published
- Publication Date
- 31-Aug-2018
- Technical Committee
- A01 - Steel, Stainless Steel and Related Alloys
- Drafting Committee
- A01.09 - Carbon Steel Tubular Products
Relations
- Replaces
ASTM A512-17 - Standard Specification for Cold-Drawn Buttweld Carbon Steel Mechanical Tubing - Effective Date
- 01-Sep-2018
- Effective Date
- 01-Mar-2024
- Effective Date
- 01-Jul-2019
- Refers
ASTM A370-17a - Standard Test Methods and Definitions for Mechanical Testing of Steel Products - Effective Date
- 15-Nov-2017
- Effective Date
- 01-Jan-2017
- Effective Date
- 01-Nov-2015
- Effective Date
- 01-Sep-2015
- Effective Date
- 15-May-2014
- Effective Date
- 01-Mar-2014
- Effective Date
- 15-Nov-2013
- Refers
ASTM A370-12a - Standard Test Methods and Definitions for Mechanical Testing of Steel Products - Effective Date
- 15-Oct-2012
- Effective Date
- 15-Mar-2012
- Refers
ASTM A370-11a - Standard Test Methods and Definitions for Mechanical Testing of Steel Products - Effective Date
- 15-Nov-2011
- Effective Date
- 15-Jun-2010
- Effective Date
- 01-Apr-2010
Overview
ASTM A512-18 is the standard specification for cold-drawn buttweld carbon steel mechanical tubing, published by ASTM International. This standard encompasses requirements for carbon steel tubes formed by the furnace buttweld process and subsequently cold drawn for improved dimensional control, surface quality, and mechanical properties. Cold-drawn buttweld tubing covered by ASTM A512-18 includes round, square, rectangular, and special shape configurations, serving a wide range of mechanical and structural applications.
Key Topics
- Product Scope: Applies to cold-drawn buttweld carbon steel tubes intended for mechanical purposes. Tubing is available in a broad size range, with round tubes up to 3-1/2 in. (88.9 mm) outside diameter and wall thicknesses from 0.035 to 0.500 in. (0.89 to 12.70 mm).
- Dimensional Variations: Strict tolerances for diameter, wall thickness, length, straightness, squareness, and twist are specified for both round and shaped tubes.
- Chemical Composition: Detailed chemical requirements are given for multiple grades of carbon steel (e.g., MT 1010, MT 1015, MT 1020, 1018, 1026, etc.), covering limits on carbon, manganese, phosphorus, and sulfur.
- Manufacturing Process: Tubes are formed by the furnace buttweld process and further finished by cold drawing, which may be performed externally (sunk) or both internally and externally (mandrel drawn).
- Mechanical and Supplementary Tests: When required by the order, tubes may be subjected to tensile, hardness, flattening, flaring, and nondestructive electrical testing according to supplemental requirements.
- Surface Finish and Coating: Finished tubes must be free from injurious defects and are typically coated with a rust-retarding oil for shipping unless otherwise specified.
- Marking and Packaging: Tubes must be suitably marked for identification and can be packed in boxes, crates, or bundles, in accordance with purchaser or government requirements.
Applications
ASTM A512-18 cold-drawn carbon steel mechanical tubing is widely used in industrial, automotive, and structural sectors due to its precise dimensional tolerances and enhanced mechanical properties. Key application areas include:
- Machinery Components: Shafts, bushings, and precision parts requiring tight dimensional control and good surface quality.
- Automotive Components: Axles, drive shafts, and suspension parts which benefit from the tube’s uniform strength and formability.
- Structural Fabrication: Frames, supports, and custom profiles for equipment, where consistency and reliability are paramount.
- Hydraulic and Pneumatic Systems: Tubing for transfer lines and system frameworks where integrity, dimensional accuracy, and surface finish are critical.
- Furniture Manufacturing: Structural supports and specialty shapes for furniture and fixtures.
- General Engineering: Applications demanding strong, formable, and machinable steel tubing.
Related Standards
For comprehensive compliance and proper specification of carbon steel mechanical tubing, the following related ASTM standards are often referenced:
- ASTM A370 - Test Methods and Definitions for Mechanical Testing of Steel Products
- ASTM A751 - Test Methods, Practices, and Terminology for Chemical Analysis of Steel Products
- ASTM A1040 - Guide for Specifying Harmonized Standard Grade Compositions for Wrought Carbon, Low-Alloy, and Alloy Steels
- MIL-STD-129 - Marking for Shipment and Storage (for military procurement)
- Fed. Std. No. 123 - Marking for Shipments (civil agencies)
Keywords: ASTM A512, cold-drawn buttweld tubing, carbon steel mechanical tubing, steel tube specification, mechanical tubing standard, industrial tubing, carbon steel tube, dimensional tolerances, ASTM International.
Buy Documents
ASTM A512-18 - Standard Specification for Cold-Drawn Buttweld Carbon Steel Mechanical Tubing
REDLINE ASTM A512-18 - Standard Specification for Cold-Drawn Buttweld Carbon Steel Mechanical Tubing
Get Certified
Connect with accredited certification bodies for this standard

Institut za varilstvo d.o.o. (Welding Institute)
Slovenia's leading welding institute since 1952. ISO 3834, EN 1090, pressure equipment certification, NDT personnel, welder qualification. Only IIW Au
Sponsored listings
Frequently Asked Questions
ASTM A512-18 is a technical specification published by ASTM International. Its full title is "Standard Specification for Cold-Drawn Buttweld Carbon Steel Mechanical Tubing". This standard covers: ABSTRACT This specification covers cold-drawn buttweld carbon steel tubes for use as round, square, rectangular or special shape mechanical tubing. The carbon steel can be made unless a specific type of melting process is required by the purchaser. Heat and product analysis shall be made to determine the specified percentages of chemical elements to which steel tubes shall conform to. The tubing shall be free of injurious defects and shall have a workmanlike finish. Unless otherwise specified, both outside and inside surfaces of the tubing shall be coated with a film of rust-retarding oil before shipping. SCOPE 1.1 This specification covers cold-drawn buttweld carbon steel tubes for use as mechanical tubing. 1.2 This specification covers round, square, rectangular, and special shape mechanical tubing. 1.3 Round tube size ranges covered are outside diameters up to 3 1/2 in. (88.9 mm) and wall thickness from 0.035 to 0.500 in. (0.89 to 12.70 mm). 1.4 Optional supplementary requirements are provided and, when desired, shall be so stated in the order. 1.5 The values stated in inch-pound units are to be regarded as standard. The values given in parentheses are mathematical conversions to SI units that are provided for information only and are not considered standard. 1.6 This product is available in various grades (Section 6 Tables 1 and 2 and conditions (Section 5). 1.7 This international standard was developed in accordance with internationally recognized principles on standardization established in the Decision on Principles for the Development of International Standards, Guides and Recommendations issued by the World Trade Organization Technical Barriers to Trade (TBT) Committee.
ABSTRACT This specification covers cold-drawn buttweld carbon steel tubes for use as round, square, rectangular or special shape mechanical tubing. The carbon steel can be made unless a specific type of melting process is required by the purchaser. Heat and product analysis shall be made to determine the specified percentages of chemical elements to which steel tubes shall conform to. The tubing shall be free of injurious defects and shall have a workmanlike finish. Unless otherwise specified, both outside and inside surfaces of the tubing shall be coated with a film of rust-retarding oil before shipping. SCOPE 1.1 This specification covers cold-drawn buttweld carbon steel tubes for use as mechanical tubing. 1.2 This specification covers round, square, rectangular, and special shape mechanical tubing. 1.3 Round tube size ranges covered are outside diameters up to 3 1/2 in. (88.9 mm) and wall thickness from 0.035 to 0.500 in. (0.89 to 12.70 mm). 1.4 Optional supplementary requirements are provided and, when desired, shall be so stated in the order. 1.5 The values stated in inch-pound units are to be regarded as standard. The values given in parentheses are mathematical conversions to SI units that are provided for information only and are not considered standard. 1.6 This product is available in various grades (Section 6 Tables 1 and 2 and conditions (Section 5). 1.7 This international standard was developed in accordance with internationally recognized principles on standardization established in the Decision on Principles for the Development of International Standards, Guides and Recommendations issued by the World Trade Organization Technical Barriers to Trade (TBT) Committee.
ASTM A512-18 is classified under the following ICS (International Classification for Standards) categories: 23.040.10 - Iron and steel pipes. The ICS classification helps identify the subject area and facilitates finding related standards.
ASTM A512-18 has the following relationships with other standards: It is inter standard links to ASTM A512-17, ASTM A370-24, ASTM A370-19, ASTM A370-17a, ASTM A370-17, ASTM A370-15, ASTM A1040-10(2015)e1, ASTM A370-14, ASTM A751-14, ASTM A370-13, ASTM A370-12a, ASTM A370-12, ASTM A370-11a, ASTM A370-10, ASTM A1040-10. Understanding these relationships helps ensure you are using the most current and applicable version of the standard.
ASTM A512-18 is available in PDF format for immediate download after purchase. The document can be added to your cart and obtained through the secure checkout process. Digital delivery ensures instant access to the complete standard document.
Standards Content (Sample)
This international standard was developed in accordance with internationally recognized principles on standardization established in the Decision on Principles for the
Development of International Standards, Guides and Recommendations issued by the World Trade Organization Technical Barriers to Trade (TBT) Committee.
Designation:A512 −18
Standard Specification for
Cold-Drawn Buttweld Carbon Steel Mechanical Tubing
This standard is issued under the fixed designation A512; the number immediately following the designation indicates the year of
original adoption or, in the case of revision, the year of last revision. A number in parentheses indicates the year of last reapproval. A
superscript epsilon (´) indicates an editorial change since the last revision or reapproval.
This standard has been approved for use by agencies of the U.S. Department of Defense.
1. Scope* Compositions for Wrought Carbon, Low-Alloy, andAlloy
Steels
1.1 This specification covers cold-drawn buttweld carbon
2.2 Military Standards:
steel tubes for use as mechanical tubing.
MIL-STD-129 Marking for Shipment and Storage
1.2 This specification covers round, square, rectangular, and
2.3 Federal Standard:
special shape mechanical tubing.
Fed. Std. No. 123 Marking for Shipments (Civil Agencies)
1.3 Roundtubesizerangescoveredareoutsidediametersup
to3 ⁄2 in.(88.9mm)andwallthicknessfrom0.035to0.500in.
3. Ordering Information
(0.89 to 12.70 mm).
3.1 Orders for material under this specification should
1.4 Optional supplementary requirements are provided and,
include the following, as required, to describe the required
when desired, shall be so stated in the order.
material adequately:
1.5 The values stated in inch-pound units are to be regarded 3.1.1 Quantity(feet,weight(Note1),ornumberoflengths),
as standard. The values given in parentheses are mathematical
NOTE 1—The term “weight” is temporarily used in this specification
conversions to SI units that are provided for information only
because of established trade usage.The word is used to mean both “force”
and are not considered standard.
and “mass,” and care must be taken to determine which is meant in each
case (SI unit for force = newton and for mass = kilogram).
1.6 This product is available in various grades (Section 6
3.1.2 Name of material (buttweld carbon steel mechanical
Tables 1 and 2 and conditions (Section 5).
tubing),
1.7 This international standard was developed in accor-
3.1.3 Form (round, square, rectangular, special shape),
dance with internationally recognized principles on standard-
3.1.4 Condition, description and code letters (Section 5),
ization established in the Decision on Principles for the
3.1.5 Grade, if required (Section 6),
Development of International Standards, Guides and Recom-
3.1.6 Dimensions (round, Section 9 or square and
mendations issued by the World Trade Organization Technical
rectangular, Section 10),
Barriers to Trade (TBT) Committee.
3.1.7 Length (round length, 9.2; square and rectangular
length, 10.5),
2. Referenced Documents
3.1.8 Burr removal (Section 11),
2.1 ASTM Standards:
3.1.9 Report of chemical analysis and products analysis, if
A370 Test Methods and Definitions for Mechanical Testing
required,
of Steel Products
3.1.10 Individual supplementary requirements if required
A751 Test Methods, Practices, and Terminology for Chemi-
(S1 through S5),
cal Analysis of Steel Products
3.1.11 Special requirements,
A1040 Guide for Specifying Harmonized Standard Grade
3.1.12 End use,
3.1.13 Specification designation,
3.1.14 Special marking (Section 15), and
This specification is under the jurisdiction ofASTM Committee A01 on Steel, 3.1.15 Special packaging (Section 16).
Stainless Steel and Related Alloys and is the direct responsibility of Subcommittee
A01.09 on Carbon Steel Tubular Products.
4. Materials and Manufacture
Current edition approved Sept. 1, 2018. Published September 2018. Originally
approved in 1964. Last previous edition approved in 2017 as A512 – 17. DOI:
4.1 The steel shall be made by any process.
10.1520/A0512-18.
For referenced ASTM standards, visit the ASTM website, www.astm.org, or
contact ASTM Customer Service at service@astm.org. For Annual Book of ASTM
Standards volume information, refer to the standard’s Document Summary page on AvailablefromStandardizationDocumentsOrderDesk,Bldg.4SectionD,700
the ASTM website. Robbins Ave., Philadelphia, PA 19111-5094, Attn: NPODS.
*A Summary of Changes section appears at the end of this standard
Copyright © ASTM International, 100 Barr Harbor Drive, PO Box C700, West Conshohocken, PA 19428-2959. United States
A512−18
A
TABLE 1 Chemical Requirements
SDSR—Sink Drawn and Stress Relieved
Chemical Composition Limits, %
MDSA—Mandrel Drawn and SoftAnnealed or normalized
Grade
Phospho-
SDSA—Sink Drawn and Soft Annealed or normalized
Designation
Carbon Manganese Sulfur, max
rus, max
NORM-MD-SR—Normalized, Mandrel Drawn, and Stress
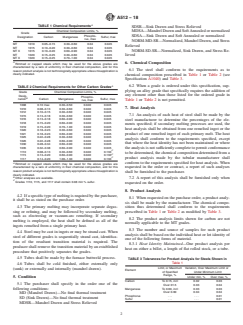
MT 1010 0.05–0.15 0.30–0.60 0.04 0.045
Relieved
MT 1015 0.10–0.20 0.30–0.60 0.04 0.045
NORM-SD-SR—Normalized, Sink Drawn, and Stress Re-
MT X 1015 0.10–0.20 0.60–0.90 0.04 0.045
MT 1020 0.15–0.25 0.30–0.60 0.04 0.045
lieved
MT X 1020 0.15–0.25 0.70–1.00 0.04 0.045
A
Rimmed or capped steels which may be used for the above grades are 6. Chemical Composition
characterized by a lack of uniformity in their chemical composition, and for this
6.1 The steel shall conform to the requirements as to
reason product analysis is not technologically appropriate unless misapplication is
clearly indicated.
chemical composition prescribed in Table 1 or Table 2 (see
Specification A1040) and Table 3.
A 6.2 When a grade is ordered under this specification, sup-
TABLE 2 Chemical Requirements for Other Carbon Grades
plying an alloy grade that specifically requires the addition of
Grade Chemical Composition Limits, %
Desig- any element other than those listed for the ordered grade in
Phospho-
B
Carbon Manganese Sulfur, max
nation
Table 1 or Table 2 is not permitted.
rus, max
1008 0.10 max 0.30–0.50 0.040 0.045
7. Heat Analysis
1010 0.08–0.13 0.30–0.60 0.040 0.045
1012 0.10–0.15 0.30–0.60 0.040 0.045
7.1 An analysis of each heat of steel shall be made by the
1015 0.13–0.18 0.30–0.60 0.040 0.045
1016 0.13–0.18 0.60–0.90 0.040 0.045
steel manufacturer to determine the percentages of the ele-
1018 0.15–0.20 0.60–0.90 0.040 0.045
ments specified; if secondary melting processes are used, the
1019 0.15–0.20 0.70–1.00 0.040 0.045
heat analysis shall be obtained from one remelted ingot or the
1020 0.18–0.23 0.30–0.60 0.040 0.045
1021 0.18–0.23 0.60–0.90 0.040 0.045 product of one remelted ingot of each primary melt. The heat
1025 0.22–0.28 0.30–0.60 0.040 0.045
analysis shall conform to the requirements specified, except
1026 0.22–0.28 0.60–0.90 0.040 0.045
that where the heat identity has not been maintained or where
1030 0.28–0.34 0.60–0.90 0.040 0.045
1035 0.32–0.38 0.60–0.90 0.040 0.045 the analysis is not sufficiently complete to permit conformance
C
1110 0.08–0.13 0.30–0.60 0.040 0.130
to be determined, the chemical composition determined from a
C
1115 0.13–0.20 0.60–0.90 0.040 0.130
C product analysis made by the tubular manufacturer shall
1117 0.14–0.20 1.00–1.30 0.040 0.130
A conform to the requirements specified for heat analysis. When
Rimmed or capped steels which may be used for the above grades are
requested in the order or contract, a report of such analyses
characterized by a lack of uniformity in their chemical composition, and for this
reason product analysis is not technologically appropriate unless misapplication is
shall be furnished to the purchaser.
clearly indicated.
B
Other analyses are available.
7.2 A report of this analysis shall be furnished only when
C
Grades 1110, 1115, and 1117 shall contain 0.08 min % sulfur.
requested on the order.
8. Product Analysis
4.2 If a specific type of melting is required by the purchaser,
8.1 When requested on the purchase order, a product analy-
it shall be as stated on the purchase order.
sis shall be made by the manufacturer. The chemical compo-
4.3 The primary melting may incorporate separate degas-
sition thus determined shall conform to the requirements
sing or refining, and may be followed by secondary melting,
prescribed in Table 1 or Table 2 as modified by Table 3.
such as electroslag or vacuum-arc remelting. If secondary
8.2 The product analysis limits shown for carbon are not
melting is employed, the heat shall be defined as all of the
normally applicable to the MT grades.
ingots remelted from a single primary heat.
8.3 The number and source of samples for such product
4.4 Steel may be cast in ingots or may be strand cast. When
analysis shall be based on the individual heat or lot identity of
steel of different grades is sequentially strand cast, identifica-
one of the following forms of material.
tion of the resultant transition material is required. The
8.3.1 Heat Identity Maintained—One product analysis per
producer shall remove the transition material by an established
heat on either a billet, a length of flat rolled stock, or a tube.
procedure that positively separates the grades.
4.5 Tubes shall be made by the furnace buttweld process.
TABLE 3 Tolerances for Product Analysis for Steels Shown in
Table 1
4.6 Tubes shall be cold finished, either externally only
Limit, or Maximum Variation, Over Maximum Limit or
(sunk) or externally and internally (mandrel drawn).
Element
of Specified Under Minimum Limit
Range, %
Under min, % Over max, %
5. Condition
Carbon To 0.15, incl 0.02 0.03
5.1 The purchaser shall specify in the order one of the
Over 01.5 0.03 0.04
following conditions: Manganese To 0.60, incl 0.03 0.03
Over 0.60 0.04 0.04
MD (Mandrel Drawn)—No final thermal treatment
Phosphorus . . 0.01
SD (Sink Drawn)—No final thermal treatment
Sulfur . . 0.01
MDSR—Mandrel Drawn and Stress Relieved
A512−18
8.3.2 Heat Identity Not Maintained—One product analysis specifiedwiththeunderstandingthatnotmorethan10 %ofthe
from one tube per 2000 ft (610 m) or less for sizes over 3 in. total footage in a shipment may be furnished in individual
(76.2 mm), or one product analysis from one tube per 5000 ft multiples cut to the customer’s specifications.
(1524 m) or less for sizes under 3 in. (76.2 mm). 9.2.2 Variations from the specified length shall not exceed
the amounts prescribed in Table 5.
8.4 If the original test for product analysis fails, retests of 2
additional billets, 2 lengths of flat rolled stock, or 2 tubes shall
9.3 Straightness:
be made. Both retests for the elements in question shall meet
9.3.1 Aroundtubeshallbeconsideredstraightprovidedthat
the requirements of this specification; otherwise all remaining
no 3-ft (0.9-m) section departs from a straight line by more
material in the heat or lot shall be rejected, or at the option of
than 0.030 in. (0.76 mm).
the producer, each billet, length, flat rolled stock, or tube may
9.3.2 The straightness of round tubes shorter than 3 ft (0.9
be individually tested for acceptance.
m) shall be proportionate to 0.010 in./ft (0.8 mm/m).
9.3.3 These straightness tolerances do not apply to soft-
8.5 Samples for product analysis shall be taken in accor-
annealed tubing nor to long lengths of small diameter tubing.
dance with Practice A751, and the composition thus deter-
mined shall correspond to the requirements in the applicable
10. Permissible Variations in Dimensions of Square and
section or table.
Rectangular Tubing
9. Permissible Variations in Dimensions of Round Tubing
10.1 OutsideDimensionsandWallThickness—Variations in
9.1 Diameter and Wall Thickness:
largest outside dimensions across flats and wall thickness shall
9.1.1 Variations in outside diameter, inside diameter, and
not exceed the amounts prescribed in Table 6.
wallthicknessshallnotexceedtheamountsprescribedinTable
10.2 Corner Radii—The corners of square and rectangular
4.
tubes shall be slightly rounded inside and slightly rounded
9.1.2 These variations apply to round, unannealed, and
outside consistent with wall thickness. The outside corners
stress-relieved tubing.
may be slightly flattened. The radii of corners for square and
9.1.3 Diameter tolerance includes ovality.
rectangular cold-finished buttweld tubes shall be in accordance
9.1.4 Sink tubing is normally ordered by outside diameter
with Table 7. Special radii may be obtained.
and nominal wall. Mandrel-drawn tubing is normally ordered
byoutsidediameterandinsidediameterandmaybeorderedby 10.3 Squareness Tolerance—Permissible variations for the
outside diameter or inside diameter and wall thickness but not
side of square and rectangular tube shall be determined by the
by all three dimensions. following equation:
9.2 Length—Randomlengthsbetweenacceptablelimitswill 6b 5 c 30.006, in. mm
~ !
befurnished,utilizingthefullmilllength.Tubingwillbecutin
where:
half if specified. Full length random tubing will have a spread
b = tolerance for out-of-square, and
not exceeding 7 ft (2.1 m). Half-length random tubing will
c = largest external dimensions across flats, in. (mm).
have a spread not exceeding 4 ft (1.2 m). Not more than 10 %
of the total footage of a shipment may be furnished in lengths The squareness of sides is commonly determined by one of
the following methods:
shorter than the minimum specified but not less than 6 ft (1.8
m). 10.3.1 Asquare, with two adjustable contact points on each
9.2.1 Whenspecified,multiplelengthswillbefurnishedand arm, is placed on two sides.Afixed feeler gage is then used to
shouldincludeallowancesmadeforthecustomer’scuttingtool measure the maximum distance between the free contact point
width and grippage. Maximum and minimum lengths may be and the surface of the tubing.
TABLE 4 Diameter and Wall Thickness Tolerances for Round Tubing
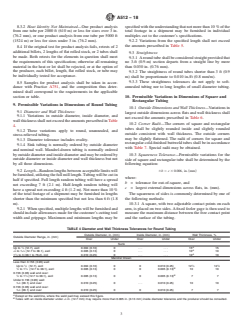
Outside Diameter, in. (mm) Inside Diameter, in. (mm) Wall Thickness, %
Outside Diameter Range, in. (mm)
Over Under Over Under Over Under
Sunk
A
Up to ⁄2 (12.7), excl 0.004 (0.10) 0 . . . . . . 15 15
1 1 A
⁄2 to 1 ⁄2 (12.7 to 38.1), excl 0.005 (0.13) 0 . . . . . . 10 10
A
1 ⁄2 to 3 (38.1 to 76.2), incl 0.010 (0.25) 0 . . . . . . 10 10
Mandrel Drawn
Less than 0.156 (3.96) wall:
1 1 1
Up to ⁄2 (12.7), excl 0.004 (0.10) 0 0 0.010 (0.25) 12 ⁄2 12 ⁄2
B
1 1
⁄2 to 1 ⁄2 (12.7 to 38.1), excl 0.005 (0.13) 0 0 0.005 (0.13) 10 10
0.156 (3.96) wall and over:
B
1 1
⁄2 to 1 ⁄2 (12.7 to 38.1), excl 0.005 (0.13) 0 0 0.005 (0.13) 77
Under 0.156 (3.96) wall:
1 ⁄2 (38.1) and over 0.010 (0.25) 0 . . . 0.010 (0.25) 10 10
0.156 (3.96) wall and over:
1 ⁄2 (38.1) and over 0.010 (0.25) 0 0 0.010 (0.25) 7 7
A
Except at the weld line, where the weld pad may exceed this figure.
B
Tubes with an inside diameter under ⁄2 in. (12.7 mm) may require more than 0.005 in. (0.13 mm) inside diameter tolerance and the producer should be consulted.
A512−18
TABLE 5 Permissible Variations in Length—Round Tubing
11.4 The tubing shall be free of scale. In the case of
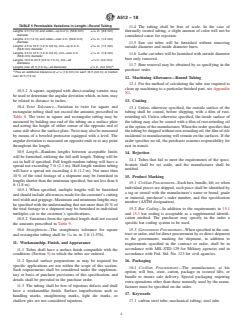
Lengths 4 ft (1.2 m) and under—up to 2 in. (50.8 mm) ± ⁄32 in. (0.8 mm) thermally treated tubing, a slight amount of color will not be
diameter
considered cause for rejection.
Lengths 4 ft (1.2 m) and under—over 2 in. (50.8 mm) ± ⁄64 in. (1.2 mm)
diameter
11.5 Saw cut tubes will be furnished without removing
Lengths 4 ft to 10 ft (1.2 to 3.0 m), incl—up to 2 in. ± ⁄64 in. (1.2 mm)
outside diameter and inside diameter burrs.
(50.8 mm) diameter
Lengths 4 ft to 10 ft (1.2 to 3.0 m), incl—over 2 in. ± ⁄16 in. (1.6 mm)
11.6
...
This document is not an ASTM standard and is intended only to provide the user of an ASTM standard an indication of what changes have been made to the previous version. Because
it may not be technically possible to adequately depict all changes accurately, ASTM recommends that users consult prior editions as appropriate. In all cases only the current version
of the standard as published by ASTM is to be considered the official document.
Designation: A512 − 17 A512 − 18
Standard Specification for
Cold-Drawn Buttweld Carbon Steel Mechanical Tubing
This standard is issued under the fixed designation A512; the number immediately following the designation indicates the year of
original adoption or, in the case of revision, the year of last revision. A number in parentheses indicates the year of last reapproval. A
superscript epsilon (´) indicates an editorial change since the last revision or reapproval.
This standard has been approved for use by agencies of the U.S. Department of Defense.
1. Scope*
1.1 This specification covers cold-drawn buttweld carbon steel tubes for use as mechanical tubing.
1.2 This specification covers round, square, rectangular, and special shape mechanical tubing.
1.3 Round tube size ranges covered are outside diameters up to 3 ⁄2 in. (88.9 mm) and wall thickness from 0.035 to 0.500 in.
(0.89 to 12.70 mm).
1.4 Optional supplementary requirements are provided and, when desired, shall be so stated in the order.
1.5 The values stated in inch-pound units are to be regarded as standard. The values given in parentheses are mathematical
conversions to SI units that are provided for information only and are not considered standard.
1.6 This product is available in various grades (Section 6 Tables 1 and 2 and conditions (Section 5).
1.7 This international standard was developed in accordance with internationally recognized principles on standardization
established in the Decision on Principles for the Development of International Standards, Guides and Recommendations issued
by the World Trade Organization Technical Barriers to Trade (TBT) Committee.
2. Referenced Documents
2.1 ASTM Standards:
A370 Test Methods and Definitions for Mechanical Testing of Steel Products
A751 Test Methods, Practices, and Terminology for Chemical Analysis of Steel Products
A1040 Guide for Specifying Harmonized Standard Grade Compositions for Wrought Carbon, Low-Alloy, and Alloy Steels
2.2 Military Standards:
MIL-STD-129 Marking for Shipment and Storage
2.3 Federal Standard:
Fed. Std. No. 123 Marking for Shipments (Civil Agencies)
3. Ordering Information
3.1 Orders for material under this specification should include the following, as required, to describe the required material
adequately:
3.1.1 Quantity (feet, weight (Note 1), or number of lengths),
NOTE 1—The term “weight” is temporarily used in this specification because of established trade usage. The word is used to mean both “force” and
“mass,” and care must be taken to determine which is meant in each case (SI unit for force = newton and for mass = kilogram).
3.1.2 Name of material (buttweld carbon steel mechanical tubing),
3.1.3 Form (round, square, rectangular, special shape),
3.1.4 Condition, description and code letters (Section 5),
3.1.5 Grade, if required (Section 6),
3.1.6 Dimensions (round, Section 9 or square and rectangular, Section 10),
This specification is under the jurisdiction of ASTM Committee A01 on Steel, Stainless Steel and Related Alloys and is the direct responsibility of Subcommittee A01.09
on Carbon Steel Tubular Products.
Current edition approved Nov. 1, 2017Sept. 1, 2018. Published November 2017September 2018. Originally approved in 1964. Last previous edition approved in 20122017
as A512 – 06 (2012).A512 – 17. DOI: 10.1520/A0512-17.10.1520/A0512-18.
For referenced ASTM standards, visit the ASTM website, www.astm.org, or contact ASTM Customer Service at service@astm.org. For Annual Book of ASTM Standards
volume information, refer to the standard’s Document Summary page on the ASTM website.
Available from Standardization Documents Order Desk, Bldg. 4 Section D, 700 Robbins Ave., Philadelphia, PA 19111-5094, Attn: NPODS.
*A Summary of Changes section appears at the end of this standard
Copyright © ASTM International, 100 Barr Harbor Drive, PO Box C700, West Conshohocken, PA 19428-2959. United States
A512 − 18
A
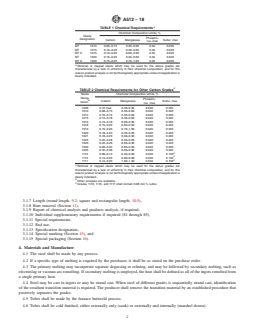
TABLE 1 Chemical Requirements
Chemical Composition Limits, %
Grade
Phospho-
Designation
Carbon Manganese Sulfur, max
rus, max
MT 1010 0.05–0.15 0.30–0.60 0.04 0.045
MT 1015 0.10–0.20 0.30–0.60 0.04 0.045
MT X 1015 0.10–0.20 0.60–0.90 0.04 0.045
MT 1020 0.15–0.25 0.30–0.60 0.04 0.045
MT X 1020 0.15–0.25 0.70–1.00 0.04 0.045
A
Rimmed or capped steels which may be used for the above grades are
characterized by a lack of uniformity in their chemical composition, and for this
reason product analysis is not technologically appropriate unless misapplication is
clearly indicated.
A
TABLE 2 Chemical Requirements for Other Carbon Grades
Grade Chemical Composition Limits, %
Desig-
Phospho-
B
Carbon Manganese Sulfur, max
nation
rus, max
1008 0.10 max 0.30–0.50 0.040 0.045
1010 0.08–0.13 0.30–0.60 0.040 0.045
1012 0.10–0.15 0.30–0.60 0.040 0.045
1015 0.13–0.18 0.30–0.60 0.040 0.045
1016 0.13–0.18 0.60–0.90 0.040 0.045
1018 0.15–0.20 0.60–0.90 0.040 0.045
1019 0.15–0.20 0.70–1.00 0.040 0.045
1020 0.18–0.23 0.30–0.60 0.040 0.045
1021 0.18–0.23 0.60–0.90 0.040 0.045
1025 0.22–0.28 0.30–0.60 0.040 0.045
1026 0.22–0.28 0.60–0.90 0.040 0.045
1030 0.28–0.34 0.60–0.90 0.040 0.045
1035 0.32–0.38 0.60–0.90 0.040 0.045
C
1110 0.08–0.13 0.30–0.60 0.040 0.130
C
1115 0.13–0.20 0.60–0.90 0.040 0.130
C
1117 0.14–0.20 1.00–1.30 0.040 0.130
A
Rimmed or capped steels which may be used for the above grades are
characterized by a lack of uniformity in their chemical composition, and for this
reason product analysis is not technologically appropriate unless misapplication is
clearly indicated.
B
Other analyses are available.
C
Grades 1110, 1115, and 1117 shall contain 0.08 min % sulfur.
3.1.7 Length (round length, 9.2; square and rectangular length, 10.5),
3.1.8 Burr removal (Section 11),
3.1.9 Report of chemical analysis and products analysis, if required,
3.1.10 Individual supplementary requirements if required (S1 through S5),
3.1.11 Special requirements,
3.1.12 End use,
3.1.13 Specification designation,
3.1.14 Special marking (Section 15), and
3.1.15 Special packaging (Section 16).
4. Materials and Manufacture
4.1 The steel shall be made by any process.
4.2 If a specific type of melting is required by the purchaser, it shall be as stated on the purchase order.
4.3 The primary melting may incorporate separate degassing or refining, and may be followed by secondary melting, such as
electroslag or vacuum-arc remelting. If secondary melting is employed, the heat shall be defined as all of the ingots remelted from
a single primary heat.
4.4 Steel may be cast in ingots or may be strand cast. When steel of different grades is sequentially strand cast, identification
of the resultant transition material is required. The producer shall remove the transition material by an established procedure that
positively separates the grades.
4.5 Tubes shall be made by the furnace buttweld process.
4.6 Tubes shall be cold finished, either externally only (sunk) or externally and internally (mandrel drawn).
A512 − 18
5. Condition
5.1 The purchaser shall specify in the order one of the following conditions:
MD (Mandrel Drawn)—No final thermal treatment
SD (Sink Drawn)—No final thermal treatment
MDSR—Mandrel Drawn and Stress Relieved
SDSR—Sink Drawn and Stress Relieved
MDSA—Mandrel Drawn and Soft Annealed or normalized
SDSA—Sink Drawn and Soft Annealed or normalized
NORM-MD-SR—Normalized, Mandrel Drawn, and Stress Relieved
NORM-SD-SR—Normalized, Sink Drawn, and Stress Relieved
6. Chemical Composition
6.1 The steel shall conform to the requirements as to chemical composition prescribed in Table 1 or Table 2 (see Specification
A1040) and Table 3.
6.2 When a grade is ordered under this specification, supplying an alloy grade that specifically requires the addition of any
element other than those listed for the ordered grade in Table 1 or Table 2 is not permitted.
7. Heat Analysis
7.1 An analysis of each heat of steel shall be made by the steel manufacturer to determine the percentages of the elements
specified; if secondary melting processes are used, the heat analysis shall be obtained from one remelted ingot or the product of
one remelted ingot of each primary melt. The heat analysis shall conform to the requirements specified, except that where the heat
identity has not been maintained or where the analysis is not sufficiently complete to permit conformance to be determined, the
chemical composition determined from a product analysis made by the tubular manufacturer shall conform to the requirements
specified for heat analysis. When requested in the order or contract, a report of such analyses shall be furnished to the purchaser.
7.2 A report of this analysis shall be furnished only when requested on the order.
8. Product Analysis
8.1 When requested on the purchase order, a product analysis shall be made by the manufacturer. The chemical composition
thus determined shall conform to the requirements prescribed in Table 1 or Table 2 as modified by Table 3.
8.2 The product analysis limits shown for carbon are not normally applicable to the MT grades.
8.3 The number and source of samples for such product analysis shall be based on the individual heat or lot identity of one of
the following forms of material.
8.3.1 Heat Identity Maintained—One product analysis per heat on either a billet, a length of flat rolled stock, or a tube.
8.3.2 Heat Identity Not Maintained—One product analysis from one tube per 2000 ft (610 m) or less for sizes over 3 in. (76.2
mm), or one product analysis from one tube per 5000 ft (1524 m) or less for sizes under 3 in. (76.2 mm).
8.4 If the original test for product analysis fails, retests of 2 additional billets, 2 lengths of flat rolled stock, or 2 tubes shall be
made. Both retests for the elements in question shall meet the requirements of this specification; otherwise all remaining material
in the heat or lot shall be rejected, or at the option of the producer, each billet, length, flat rolled stock, or tube may be individually
tested for acceptance.
8.5 Samples for product analysis, except for spectrochemical analysis, analysis shall be taken in accordance with Practice A751,
and the composition thus determined shall correspond to the requirements in the applicable section or table.
9. Permissible Variations in Dimensions of Round Tubing
9.1 Diameter and Wall Thickness:
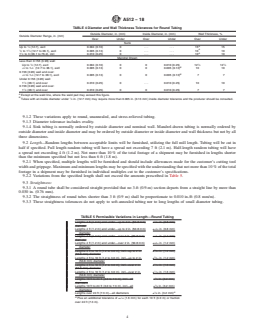
9.1.1 Variations in outside diameter, inside diameter, and wall thickness shall not exceed the amounts prescribed in Table 4.
TABLE 3 Tolerances for Product Analysis for Steels Shown in
Table 1
Limit, or Maximum Variation, Over Maximum Limit or
Element
of Specified Under Minimum Limit
Range, %
Under min, % Over max, %
Carbon To 0.15, incl 0.02 0.03
Over 01.5 0.03 0.04
Manganese To 0.60, incl 0.03 0.03
Over 0.60 0.04 0.04
Phosphorus . . . . . . 0.01
Sulfur . . . . . . 0.01
A512 − 18
TABLE 4 Diameter and Wall Thickness Tolerances for Round Tubing
Outside Diameter, in. (mm) Inside Diameter, in. (mm) Wall Thickness, %
Outside Diameter Range, in. (mm)
Over Under Over Under Over Under
Sunk
A
Up to ⁄2 (12.7), excl 0.004 (0.10) 0 . . . . . . 15 15
A
1 1
⁄2 to 1 ⁄2 (12.7 to 38.1), excl 0.005 (0.13) 0 . . . . . . 10 10
A
1 ⁄2 to 3 (38.1 to 76.2), incl 0.010 (0.25) 0 . . . . . . 10 10
Mandrel Drawn
Less than 0.156 (3.96) wall:
1 1 1
Up to ⁄2 (12.7), excl 0.004 (0.10) 0 0 0.010 (0.25) 12 ⁄2 12 ⁄2
B
1 1
⁄2 to 1 ⁄2 (12.7 to 38.1), excl 0.005 (0.13) 0 0 0.005 (0.13) 10 10
0.156 (3.96) wall and over:
B
1 1
⁄2 to 1 ⁄2 (12.7 to 38.1), excl 0.005 (0.13) 0 0 0.005 (0.13) 7 7
Under 0.156 (3.96) wall:
1 ⁄2 (38.1) and over 0.010 (0.25) 0 . . . 0.010 (0.25) 10 10
0.156 (3.96) wall and over:
1 ⁄2 (38.1) and over 0.010 (0.25) 0 0 0.010 (0.25) 7 7
A
Except at the weld line, where the weld pad may exceed this figure.
B
Tubes with an inside diameter under ⁄2 in. (12.7 mm) may require more than 0.005 in. (0.13 mm) inside diameter tolerance and the producer should be consulted.
9.1.2 These variations apply to round, unannealed, and stress-relieved tubing.
9.1.3 Diameter tolerance includes ovality.
9.1.4 Sink tubing is normally ordered by outside diameter and nominal wall. Mandrel-drawn tubing is normally ordered by
outside diameter and inside diameter and may be ordered by outside diameter or inside diameter and wall thickness but not by all
three dimensions.
9.2 Length—Random lengths between acceptable limits will be furnished, utilizing the full mill length. Tubing will be cut in
half if specified. Full length random tubing will have a spread not exceeding 7 ft (2.1 m). Half-length random tubing will have
a spread not exceeding 4 ft (1.2 m). Not more than 10 % of the total footage of a shipment may be furnished in lengths shorter
than the minimum specified but not less than 6 ft (1.8 m).
9.2.1 When specified, multiple lengths will be furnished and should include allowances made for the customer’s cutting tool
width and grippage. Maximum and minimum lengths may be specified with the understanding that not more than 10 % of the total
footage in a shipment may be furnished in individual multiples cut to the customer’s specifications.
9.2.2 Variations from the specified length shall not exceed the amounts prescribed in Table 5.
9.3 Straightness:
9.3.1 A round tube shall be considered straight provided that no 3-ft (0.9-m) section departs from a straight line by more than
0.030 in. (0.76 mm).
9.3.2 The straightness of round tubes shorter than 3 ft (0.9 m) shall be proportionate to 0.010 in./ft (0.8 mm/m).
9.3.3 These straightness tolerances do not apply to soft-annealed tubing nor to long lengths of small diameter tubing.
TABLE 5 Permissible Variations in Length—Round Tubing
Lengths 4 ft (1.2 m) and under—up to 2 in. (50.8 mm) ± ⁄32 in. (0.8 mm)
diameter
Lengths 4 ft (1.2 m) and under—up to 2 in. (50.8 mm) ± ⁄32 in. (0.8 mm)
diameter
Lengths 4 ft (1.2 m) and under—over 2 in. (50.8 mm) ± ⁄64 in. (1.2 mm)
diameter
Lengths 4 ft (1.2 m) and under—over 2 in. (50.8 mm) ± ⁄64 in. (1.2 mm)
diameter
Lengths 4 ft to 10 ft (1.2 to 3.0 m), incl—up to 2 in. ± ⁄64 in. (1.2 mm)
(50.8 mm) diameter
Lengths 4 ft to 10 ft (1.2 to 3.0 m), incl—up to 2 in. ± ⁄64 in. (1.2 mm)
(50.8 mm) diameter
Lengths 4 ft to 10 ft (1.2 to 3.0 m), incl—over 2 in. ± ⁄16 in. (1.6 mm)
(50.8 mm) diameter
Lengths 4 ft to 10 ft (1.2 to 3.0 m), incl—over 2 in. ± ⁄16 in. (1.6 mm)
(50.8 mm) diameter
Lengths 10 ft to 24 ft (3.0 to 7.3 m), incl—all ± ⁄8 in. (3.2 mm)
diameters
Lengths 10 ft to 24 ft (3.0 to 7.3 m), incl—all ± ⁄8 in. (3.2 mm)
diameters
A
Lengths over 24 ft (7.3 m)—all diameters ± ⁄8 in. (3.2 mm)
A 1
Plus an additional tolerance of ± ⁄16 (1.6 mm) for each 10 ft (3.0 m) or fraction
over 24 ft (7.3 m).
A512 − 18
10. Permissible Variations in Dimensions of Square and Rectangular Tubing
10.1 Outside Dimensions and Wall Thickness—Variations in largest outside dimensions across flats and wall thickness shall not
exceed the amounts prescribed in Table 6.
10.2 Corner Radii—The corners of square and rectangular tubes shall be slightly rounded inside and slightly rounded outside
consistent with wall thickness. The outside corners may be slightly flattened. The radii of corners for square and rectangular
cold-finished buttweld tubes shall be in accordance with Table 7. Special radii may be obtained.
10.3 Squareness Tolerance—Permissible variations for the side of square and rectangular tube shall be determined by the
following equation:
6b 5 c 30.006, in. mm
~ !
where:
b = tolerance for out-of-square, and
c =
...
Questions, Comments and Discussion
Ask us and Technical Secretary will try to provide an answer. You can facilitate discussion about the standard in here.
Loading comments...