ISO 10074:2010
(Main)Anodizing of aluminium and its alloys — Specification for hard anodic oxidation coatings on aluminium and its alloys
Anodizing of aluminium and its alloys — Specification for hard anodic oxidation coatings on aluminium and its alloys
ISO 10074:2010 specifies requirements for hard anodic oxidation coatings on aluminium and its alloys, including test methods.
Anodisation de l'aluminium et de ses alliages — Spécification pour l'anodisation dure de l'aluminium et des alliages d'aluminium
General Information
- Status
- Withdrawn
- Publication Date
- 04-Feb-2010
- Withdrawal Date
- 04-Feb-2010
- Technical Committee
- ISO/TC 79/SC 2 - Organic and anodic oxidation coatings on aluminium
- Drafting Committee
- ISO/TC 79/SC 2/WG 15 - Anodic oxidation coatings on aluminium
- Current Stage
- 9599 - Withdrawal of International Standard
- Start Date
- 17-Nov-2017
- Completion Date
- 12-Feb-2026
Relations
- Effective Date
- 14-Nov-2015
- Revises
ISO 10074:1994 - Specification for hard anodic oxidation coatings on aluminium and its alloys - Effective Date
- 15-Apr-2008
Get Certified
Connect with accredited certification bodies for this standard

National Aerospace and Defense Contractors Accreditation Program (NADCAP)
Global cooperative program for special process quality in aerospace.

CARES (UK Certification Authority for Reinforcing Steels)
UK certification for reinforcing steels and construction.

DVS-ZERT GmbH
German welding certification society.
Sponsored listings
Frequently Asked Questions
ISO 10074:2010 is a standard published by the International Organization for Standardization (ISO). Its full title is "Anodizing of aluminium and its alloys — Specification for hard anodic oxidation coatings on aluminium and its alloys". This standard covers: ISO 10074:2010 specifies requirements for hard anodic oxidation coatings on aluminium and its alloys, including test methods.
ISO 10074:2010 specifies requirements for hard anodic oxidation coatings on aluminium and its alloys, including test methods.
ISO 10074:2010 is classified under the following ICS (International Classification for Standards) categories: 25.220.20 - Surface treatment. The ICS classification helps identify the subject area and facilitates finding related standards.
ISO 10074:2010 has the following relationships with other standards: It is inter standard links to ISO 10074:2017, ISO 10074:1994. Understanding these relationships helps ensure you are using the most current and applicable version of the standard.
ISO 10074:2010 is available in PDF format for immediate download after purchase. The document can be added to your cart and obtained through the secure checkout process. Digital delivery ensures instant access to the complete standard document.
Standards Content (Sample)
INTERNATIONAL ISO
STANDARD 10074
Second edition
2010-02-15
Anodizing of aluminium and its alloys —
Specification for hard anodic oxidation
coatings on aluminium and its alloys
Anodisation de l'aluminium et de ses alliages — Spécification pour
l'anodisation dure de l'aluminium et des alliages d'aluminium
Reference number
©
ISO 2010
PDF disclaimer
This PDF file may contain embedded typefaces. In accordance with Adobe's licensing policy, this file may be printed or viewed but
shall not be edited unless the typefaces which are embedded are licensed to and installed on the computer performing the editing. In
downloading this file, parties accept therein the responsibility of not infringing Adobe's licensing policy. The ISO Central Secretariat
accepts no liability in this area.
Adobe is a trademark of Adobe Systems Incorporated.
Details of the software products used to create this PDF file can be found in the General Info relative to the file; the PDF-creation
parameters were optimized for printing. Every care has been taken to ensure that the file is suitable for use by ISO member bodies. In
the unlikely event that a problem relating to it is found, please inform the Central Secretariat at the address given below.
© ISO 2010
All rights reserved. Unless otherwise specified, no part of this publication may be reproduced or utilized in any form or by any means,
electronic or mechanical, including photocopying and microfilm, without permission in writing from either ISO at the address below or
ISO's member body in the country of the requester.
ISO copyright office
Case postale 56 • CH-1211 Geneva 20
Tel. + 41 22 749 01 11
Fax + 41 22 749 09 47
E-mail copyright@iso.org
Web www.iso.org
Published in Switzerland
ii © ISO 2010 – All rights reserved
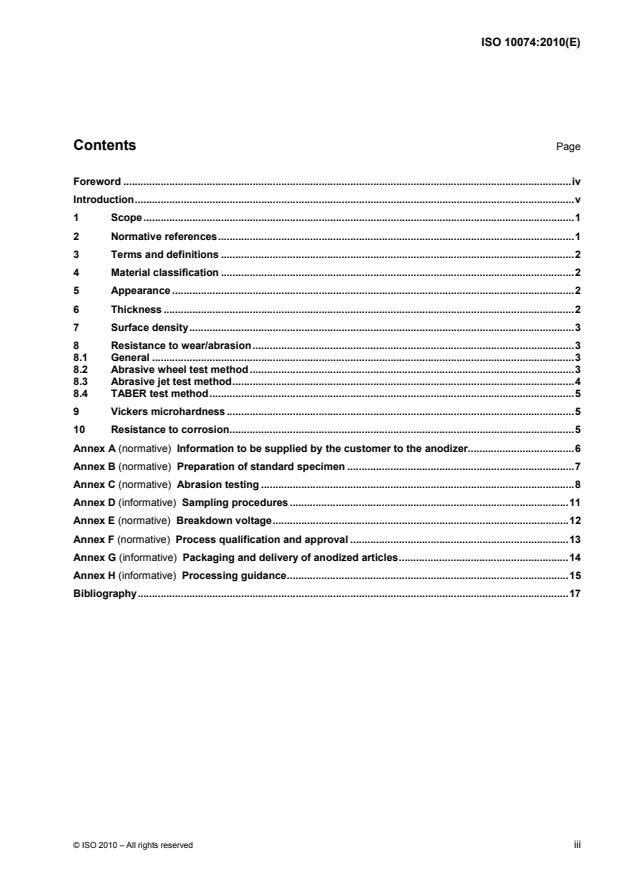
Contents Page
Foreword .iv
Introduction.v
1 Scope.1
2 Normative references.1
3 Terms and definitions .2
4 Material classification .2
5 Appearance .2
6 Thickness .2
7 Surface density.3
8 Resistance to wear/abrasion.3
8.1 General .3
8.2 Abrasive wheel test method.3
8.3 Abrasive jet test method.4
8.4 TABER test method.5
9 Vickers microhardness.5
10 Resistance to corrosion.5
Annex A (normative) Information to be supplied by the customer to the anodizer.6
Annex B (normative) Preparation of standard specimen .7
Annex C (normative) Abrasion testing .8
Annex D (informative) Sampling procedures .11
Annex E (normative) Breakdown voltage.12
Annex F (normative) Process qualification and approval .13
Annex G (informative) Packaging and delivery of anodized articles.14
Annex H (informative) Processing guidance.15
Bibliography.17
Foreword
ISO (the International Organization for Standardization) is a worldwide federation of national standards bodies
(ISO member bodies). The work of preparing International Standards is normally carried out through ISO
technical committees. Each member body interested in a subject for which a technical committee has been
established has the right to be represented on that committee. International organizations, governmental and
non-governmental, in liaison with ISO, also take part in the work. ISO collaborates closely with the
International Electrotechnical Commission (IEC) on all matters of electrotechnical standardization.
International Standards are drafted in accordance with the rules given in the ISO/IEC Directives, Part 2.
The main task of technical committees is to prepare International Standards. Draft International Standards
adopted by the technical committees are circulated to the member bodies for voting. Publication as an
International Standard requires approval by at least 75 % of the member bodies casting a vote.
Attention is drawn to the possibility that some of the elements of this document may be the subject of patent
rights. ISO shall not be held responsible for identifying any or all such patent rights.
ISO 10074 was prepared by Technical Committee ISO/TC 79, Light metals and their alloys, Subcommittee
SC 2, Organic and anodic oxidation coatings on aluminium.
This second edition cancels and replaces the first edition (ISO 10074:1994), which has been technically
revised.
iv © ISO 2010 – All rights reserved
Introduction
Hard anodizing is an electrolytic treatment which results in the formation of a hard and usually thick coating of
alumina used primarily for engineering purposes.
Hard anodizing can be applied to cast or wrought aluminium and aluminium alloys; however, alloys containing
more than 5 % copper and/or 8 % silicon and die casting alloys require special anodizing procedures. To
obtain optimum microhardness, wear resistance or low surface roughness characteristics, low contents of
alloy are selected.
Unless otherwise specified, articles are anodized after all heat-treatment, machining, welding, forming and
perforating operations. The best results are achieved on machined surfaces. Sharp edges are machined to a
radius of at least 10 times the intended thickness to avoid "burning" and/or spalling.
Hard anodizing will usually result in a dimensional increase on each surface equal to about 50 % of the
coating thickness. The dimensions of the component prior to anodizing will allow for this, if necessary.
The thickness is generally within the range of 25 µm to 150 µm. Low thickness (up to 25 µm) is sometimes
used in a variety of applications, such as splines and threads. Normal thickness (50 µm to 80 µm) is used for
wear or insulation requirements. High thickness (150 µm) is used for repairing purposes, but thick coatings
tend to be softer in outer regions. Very hard coatings reduce the fatigue strength. This phenomena can be
minimized by reducing thickness and/or by sealing. Hard anodizing tends to increase surface roughness. This
can be limited with low alloy contents and/or mechanical finishing.
Hard anodic oxidation coatings are mainly used to obtain
⎯ resistance to wear through abrasion or erosion;
⎯ electrical insulation;
⎯ thermal insulation;
⎯ build-up (to repair parts out of tolerance on machining or worn parts);
⎯ resistance to corrosion (when sealed).
INTERNATIONAL STANDARD ISO 10074:2010(E)
Anodizing of aluminium and its alloys — Specification for hard
anodic oxidation coatings on aluminium and its alloys
1 Scope
This International Standard specifies requirements for hard anodic oxidation coatings on aluminium and its
alloys, including test methods.
Information to be supplied by the customer to the anodizer is given in Annex A.
NOTE This International Standard is not applicable to coatings produced by processes such as those referred to as
plasma electrolytic oxidation, micro-arc oxidation, plasma-chemical anodic oxidation, anodic spark deposition or spark
anodizing.
2 Normative references
The following referenced documents are indispensable for the application of this document. For dated
references, only the edition cited applies. For undated references, the latest edition of the referenced
document (including any amendments) applies.
ISO 1463:2003, Metallic and oxide coatings — Measurement of coating thickness — Microscopical method
1)
ISO 2106:— , Anodizing of aluminium and its alloys — Determination of mass per unit area (surface density)
of anodic oxidation coatings — Gravimetric method
ISO 2360:2003, Non-conductive coatings on non-magnetic electrically conductive basis materials —
Measurement of coating thickness — Amplitude-sensitive eddy-current method
2)
ISO 2376:— , Anodizing of aluminium and its alloys — Determination of electric breakdown potential
ISO 4516:2002, Metallic and other inorganic coatings — Vickers and Knoop microhardness tests
ISO 7583:1986, Anodizing of aluminium and its alloys — Vocabulary
3)
ISO 8251:— , Anodizing of aluminium and its alloys — Measurement of abrasion resistance of anodic
oxidation coatings
ISO 9227:2007, Corrosion tests in artificial atmospheres — Salt spray tests
1) To be published. (Revision of ISO 2106:1982)
2) To be published. (Revision of ISO 2376:1972)
3) To be published. (Revision of ISO 8251:1987 and ISO 8252:1987)
3 Terms and definitions
For the purposes of this document, the terms and definitions given in ISO 7583 and the following apply.
3.1
lot
articles of the same nominal composition and temper which are processed together
3.2
lot acceptance tests
tests on a production lot to determine its conformance to the requirements of this specification
3.3
significant surface
part of the article covered or to be covered by the coating and for which the coating is essential for
serviceability and/or appearance
NOTE Adapted from ISO 2064:1996, Definition 3.1.
4 Material classification
The properties and characteristics of hard anodic oxidation coatings are significantly affected by both the alloy
and the method of production.
Consequently, for the purposes of this International Standard, materials are classified into five alloy groupings
as follows:
⎯ Class 1: all wrought alloys except those in Class 2;
⎯ Class 2 (a): alloys of the 2 000 series;
⎯ Class 2 (b): alloys of the 5 000 series containing 2 % or more magnesium and alloys of the 7 000 series;
⎯ Class 3 (a): casting alloys with less than 2 % copper and/or 8 % silicon;
⎯ Class 3 (b): other casting alloys.
5 Appearance
The significant surface shall be completely anodized and the visual appearance shall be substantially uniform.
There shall be no spalling, blistering or powdery (burnt) areas. Visual examination shall be a lot acceptance
test.
Crazing or microcracks shall not normally be a reason for rejection.
6 Thickness
Thickness measurements shall be made on the significant surfaces, but not within 5 mm of contact (jigging)
marks, nor in the immediate neighbourhood of a sharp edge.
Measurement shall be made using either the non-destructive eddy current method described in ISO 2360, or
the destructive microscopical method described in ISO 1463. In the case of a dispute, the microscopical
method (ISO 1463) shall be used.
Measurement of thickness or, where relevant, final dimensions, shall be dealt with in a lot acceptance test.
NOTE The usual coating thickness is between 40 µm and 60 µm (see introduction and Annex A). The test specimen
is produced according to the conditions given in Annex B.
2 © ISO 2010 – All rights reserved
7 Surface density
The surface density (coating mass per unit area), when measured in accordance with ISO 2106 on unsealed
anodic oxidation coatings with a nominal thickness of 50 µm ± 5 µm, shall have the minimum values given in
Table 1.
Table 1 — Minimum surface density
Material class Minimum acceptable value
Class 1 1 100 mg/dm
Class 2 950 mg/dm
Class 3 (a) 950 mg/dm
Class 3 (b) By agreement
If the coating thickness is not 50 µm, the surface density shall be corrected proportionately.
8 Resistance to wear/abrasion
8.1 General
The resistance to wear/abrasion shall be measured on unsealed anodic oxidation coatings (see Note). Due to
good correlation achieved with other properties, resistance to wear/abrasion shall be tested in accordance
with Annex C, C.1, using the abrasive wheel test method described in ISO 8251.
NOTE Resistance to abrasion can be measured on sealed anodic oxidation coatings but hydrothermal sealing and/or
dyeing can reduce the resistance to abrasion/wear by over 50 %.
When the abrasive wheel method is not appropriate (especially on some curved surfaces), resistance to
wear/abrasion shall be tested in accordance with C.2, using the abrasive jet test method described in
ISO 8251:—, Clause 6. This test gives an average for the total coating thickness.
The TABER method (see C.3) may only be used when specified.
8.2 Abrasive wheel test method
The resistance to wear/abrasion shall be determined by the measurement of loss in coating thickness or loss
in coating mass. When determined in accordance with C.1, using the abrasive wheel wear test method
described in ISO 8251:—, Clause 5, the final value shall be an average of at least three tests, using a load of
19,6 N ± 0,5 N and silicon carbide paper of 240 mesh size.
The acceptance values shall be in accordance with Table 2. The standard specimen shall be tested each day,
under the same conditions as those used for the test specimen. When the loss in coating thickness is used,
each thickness value shall be the average of ten readings in the test area.
The time between hard anodizing and abrasion testing shall be at least 24 h. During this period, the test
pieces shall be stored in the test environment.
Table 2 — Acceptance values for abrasive wheel test
Alloy Number of double strokes Relative mean specific abrasion resistance acceptance value
(ds) % compared to standard specimen (see Annex B)
Class 1 800 to 100 W 80 %
Class 2 (a) 400 to 100 W 30 %
Class 2 (b) 800 to 100 W 55 %
a
Class 3 (a) 400 to 100 W 55 %
⎫
or by agreement (see Note)
⎬
a
Class 3 (b) 400 to 100 W 20 %
⎭
NOTE The relative mean specific abrasion resistance (RMSAR) is given by the equation
Mean wear resistance of test specimen
RMSAR=× 100
Mean wear resistance of standard specimen
where the wear resistance is the number of double strokes, which is necessary to remove 1 µm ( or 1 mg) of coatings.
a
Castings are not always suitable for abrasion/wear testing because of the surface condition and/or the structure of the anodic
oxidation coating. In the unusual event of Class 3 alloys requiring to be tested, the abrasion/wear resistance acceptance value shall be
agreed upon between the anodizer and the customer and may require special reference panels.
8.3 Abrasive jet test method
The resistance to wear/abrasion shall be determined by either the mass of silicon carbide or the time required
to penetrate the coating. When determined in accordance with C.2, using the abrasive jet test method
described in ISO 8251:—, Clause 6, the final val
...


Questions, Comments and Discussion
Ask us and Technical Secretary will try to provide an answer. You can facilitate discussion about the standard in here.
Loading comments...