ISO 10074:2017
(Main)Anodizing of aluminium and its alloys — Specification for hard anodic oxidation coatings on aluminium and its alloys
Anodizing of aluminium and its alloys — Specification for hard anodic oxidation coatings on aluminium and its alloys
ISO 10074:2017 specifies requirements for hard anodic oxidation coatings on aluminium and its alloys, including test methods. It also specifies the information to be supplied by the customer to the anodizer (see Annex A). It is not applicable to coatings produced by processes such as those referred to as plasma electrolytic oxidation, micro-arc oxidation, plasma-chemical anodic oxidation, anodic spark deposition or spark anodizing.
Anodisation de l'aluminium et de ses alliages — Spécification pour l'anodisation dure de l'aluminium et des alliages d'aluminium
General Information
- Status
- Withdrawn
- Publication Date
- 16-Nov-2017
- Withdrawal Date
- 16-Nov-2017
- Technical Committee
- ISO/TC 79/SC 2 - Organic and anodic oxidation coatings on aluminium
- Drafting Committee
- ISO/TC 79/SC 2/WG 15 - Anodic oxidation coatings on aluminium
- Current Stage
- 9599 - Withdrawal of International Standard
- Start Date
- 25-May-2021
- Completion Date
- 12-Feb-2026
Relations
- Effective Date
- 23-Apr-2020
- Effective Date
- 14-Nov-2015
Get Certified
Connect with accredited certification bodies for this standard

National Aerospace and Defense Contractors Accreditation Program (NADCAP)
Global cooperative program for special process quality in aerospace.

CARES (UK Certification Authority for Reinforcing Steels)
UK certification for reinforcing steels and construction.

DVS-ZERT GmbH
German welding certification society.
Sponsored listings
Frequently Asked Questions
ISO 10074:2017 is a standard published by the International Organization for Standardization (ISO). Its full title is "Anodizing of aluminium and its alloys — Specification for hard anodic oxidation coatings on aluminium and its alloys". This standard covers: ISO 10074:2017 specifies requirements for hard anodic oxidation coatings on aluminium and its alloys, including test methods. It also specifies the information to be supplied by the customer to the anodizer (see Annex A). It is not applicable to coatings produced by processes such as those referred to as plasma electrolytic oxidation, micro-arc oxidation, plasma-chemical anodic oxidation, anodic spark deposition or spark anodizing.
ISO 10074:2017 specifies requirements for hard anodic oxidation coatings on aluminium and its alloys, including test methods. It also specifies the information to be supplied by the customer to the anodizer (see Annex A). It is not applicable to coatings produced by processes such as those referred to as plasma electrolytic oxidation, micro-arc oxidation, plasma-chemical anodic oxidation, anodic spark deposition or spark anodizing.
ISO 10074:2017 is classified under the following ICS (International Classification for Standards) categories: 25.220.20 - Surface treatment. The ICS classification helps identify the subject area and facilitates finding related standards.
ISO 10074:2017 has the following relationships with other standards: It is inter standard links to ISO 10074:2021, ISO 10074:2010. Understanding these relationships helps ensure you are using the most current and applicable version of the standard.
ISO 10074:2017 is available in PDF format for immediate download after purchase. The document can be added to your cart and obtained through the secure checkout process. Digital delivery ensures instant access to the complete standard document.
Standards Content (Sample)
INTERNATIONAL ISO
STANDARD 10074
Third edition
2017-11
Anodizing of aluminium and its
alloys — Specification for hard anodic
oxidation coatings on aluminium and
its alloys
Anodisation de l'aluminium et de ses alliages — Spécification pour
l'anodisation dure de l'aluminium et des alliages d'aluminium
Reference number
©
ISO 2017
© ISO 2017, Published in Switzerland
All rights reserved. Unless otherwise specified, no part of this publication may be reproduced or utilized otherwise in any form
or by any means, electronic or mechanical, including photocopying, or posting on the internet or an intranet, without prior
written permission. Permission can be requested from either ISO at the address below or ISO’s member body in the country of
the requester.
ISO copyright office
Ch. de Blandonnet 8 • CP 401
CH-1214 Vernier, Geneva, Switzerland
Tel. +41 22 749 01 11
Fax +41 22 749 09 47
copyright@iso.org
www.iso.org
ii © ISO 2017 – All rights reserved
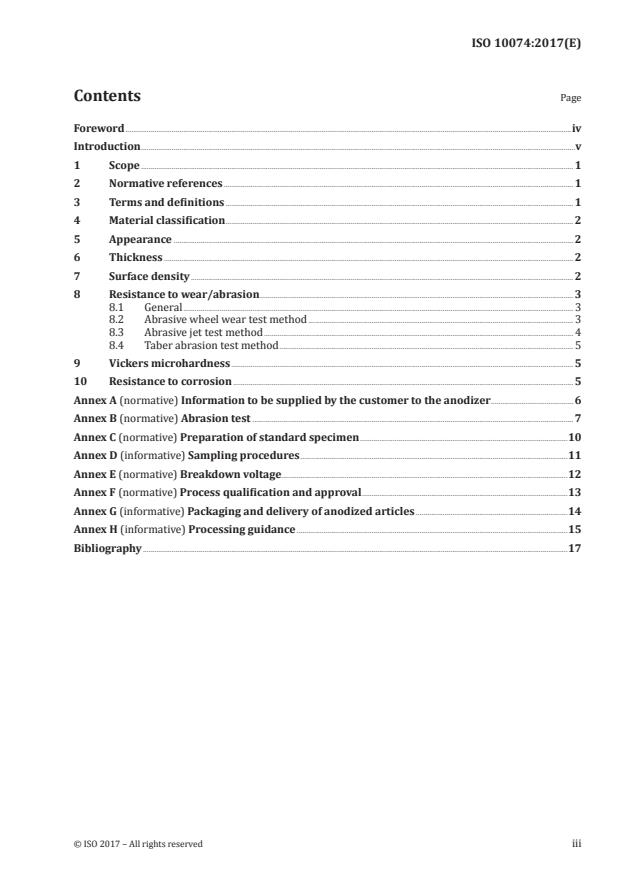
Contents Page
Foreword .iv
Introduction .v
1 Scope . 1
2 Normative references . 1
3 Terms and definitions . 1
4 Material classification . 2
5 Appearance . 2
6 Thickness . 2
7 Surface density . 2
8 Resistance to wear/abrasion . 3
8.1 General . 3
8.2 Abrasive wheel wear test method . 3
8.3 Abrasive jet test method . 4
8.4 Taber abrasion test method . 5
9 Vickers microhardness . 5
10 Resistance to corrosion . 5
Annex A (normative) Information to be supplied by the customer to the anodizer .6
Annex B (normative) Abrasion test . 7
Annex C (normative) Preparation of standard specimen .10
Annex D (informative) Sampling procedures .11
Annex E (normative) Breakdown voltage.12
Annex F (normative) Process qualification and approval .13
Annex G (informative) Packaging and delivery of anodized articles .14
Annex H (informative) Processing guidance .15
Bibliography .17
Foreword
ISO (the International Organization for Standardization) is a worldwide federation of national standards
bodies (ISO member bodies). The work of preparing International Standards is normally carried out
through ISO technical committees. Each member body interested in a subject for which a technical
committee has been established has the right to be represented on that committee. International
organizations, governmental and non-governmental, in liaison with ISO, also take part in the work.
ISO collaborates closely with the International Electrotechnical Commission (IEC) on all matters of
electrotechnical standardization.
The procedures used to develop this document and those intended for its further maintenance are
described in the ISO/IEC Directives, Part 1. In particular the different approval criteria needed for the
different types of ISO documents should be noted. This document was drafted in accordance with the
editorial rules of the ISO/IEC Directives, Part 2 (see www.iso.org/directives).
Attention is drawn to the possibility that some of the elements of this document may be the subject of
patent rights. ISO shall not be held responsible for identifying any or all such patent rights. Details of
any patent rights identified during the development of the document will be in the Introduction and/or
on the ISO list of patent declarations received (see www.iso.org/patents).
Any trade name used in this document is information given for the convenience of users and does not
constitute an endorsement.
For an explanation on the voluntary nature of standards, the meaning of ISO specific terms and
expressions related to conformity assessment, as well as information about ISO's adherence to the
World Trade Organization (WTO) principles in the Technical Barriers to Trade (TBT) see the following
URL: www.iso.org/iso/foreword.html.
This document was prepared by Technical Committee ISO/TC 79, Light metals and their alloys,
Subcommittee SC 2, Organic and anodic oxidation coatings on aluminium.
This third edition cancels and replaces the second edition (ISO 10074:2010), which has been technically
revised.
The main changes compared to the previous edition are as follows:
— the normative references have been updated;
— the recommended jet nozzle for abrasion testing has been revised.
iv © ISO 2017 – All rights reserved
Introduction
Hard anodizing is an electrolytic treatment which results in the formation of a hard and usually thick
coating of alumina used primarily for engineering purposes.
Hard anodizing can be applied to cast or wrought aluminium and aluminium alloys; however,
alloys containing more than 5 % copper and/or 8 % silicon and die casting alloys require special
anodizing procedures. To obtain optimum microhardness, wear resistance or low surface roughness
characteristics, low contents of alloy are selected.
Unless otherwise specified, articles are anodized after all heat-treatment, machining, welding, forming
and perforating operations. The best results are achieved on machined surfaces. Sharp edges are
machined to a radius of at least 10 times the intended thickness to avoid “burning” and/or spalling.
Hard anodizing will usually result in a dimensional increase on each surface equal to about 50 % of the
coating thickness. The dimensions of the component prior to anodizing will allow for this, if necessary.
The thickness is generally within the range of 25 μm to 150 μm. Low thickness (up to 25 μm) is
sometimes used in a variety of applications, such as splines and threads. Normal thickness (50 μm
to 80 μm) is used for wear or insulation requirements. High thickness (150 μm) is used for repairing
purposes, but thick coatings tend to be softer in outer regions. Very hard coatings reduce the fatigue
strength. This phenomenon can be minimized by applying shot peening before hard anodizing (see H.6),
by reducing thickness and/or by sealing. Hard anodizing tends to increase surface roughness. This can
be limited with low alloy contents and/or mechanical finishing.
Hard anodic oxidation coatings are mainly used to obtain the following:
— resistance to wear through abrasion or erosion;
— electrical insulation;
— thermal insulation;
— build-up (to repair parts out of tolerance on machining or worn parts);
— resistance to corrosion (when sealed).
INTERNATIONAL STANDARD ISO 10074:2017(E)
Anodizing of aluminium and its alloys — Specification for
hard anodic oxidation coatings on aluminium and its alloys
1 Scope
This document specifies requirements for hard anodic oxidation coatings on aluminium and its alloys,
including test methods.
It also specifies the information to be supplied by the customer to the anodizer (see Annex A).
It is not applicable to coatings produced by processes such as those referred to as plasma electrolytic
oxidation, micro-arc oxidation, plasma-chemical anodic oxidation, anodic spark deposition or spark
anodizing.
2 Normative references
The following documents are referred to in the text in such a way that some or all of their content
constitutes requirements of this document. For dated references, only the edition cited applies. For
undated references, the latest edition of the referenced document (including any amendments) applies.
ISO 1463, Metallic and oxide coatings — Measurement of coating thickness — Microscopical method
ISO 2106, Anodizing of aluminium and its alloys — Determination of mass per unit area (surface density) of
anodic oxidation coatings — Gravimetric method
ISO 2360, Non-conductive coatings on non-magnetic electrically conductive base metals — Measurement
of coating thickness — Amplitude-sensitive eddy-current method
ISO 2376, Anodizing of aluminium and its alloys — Determination of electric breakdown potential
ISO 4516, Metallic and other inorganic coatings — Vickers and Knoop microhardness tests
ISO 6344-1, Coated abrasives — Grain size analysis — Part 1: Grain size distribution test
ISO 7583, Anodizing of aluminium and its alloys — Terms and definitions
ISO 8251, Anodizing of aluminium and its alloys — Measurement of abrasion resistance of anodic oxidation
coatings
ISO 9227, Corrosion tests in artificial atmospheres — Salt spray tests
3 Terms and definitions
For the purposes of this document, the terms and definitions given in ISO 7583 and the following apply.
ISO and IEC maintain terminological databases for use in standardization at the following addresses:
— ISO Online browsing platform: available at http://www.iso.org/obp
— IEC Electropedia: available at http://www.electropedia.org/
3.1
lot
articles of the same nominal composition and temper which are processed together
3.2
lot acceptance test
test on a production lot (3.1) to determine its conformance to specified requirements
4 Material classification
The properties and characteristics of hard anodic oxidation coatings are significantly affected by both
the alloy and the method of production.
Consequently, for the purposes of this document, materials are classified into five alloy groupings as
follows.
— Class 1: all wrought alloys except those in Class 2.
— Class 2 (a): alloys of the 2 000 series including alloys that contain more than 5 % copper.
— Class 2 (b): alloys of the 5 000 series containing 2 % or more magnesium and alloys of the 7 000 series.
— Class 3 (a): casting alloys with less than 2 % copper and/or 8 % silicon.
— Class 3 (b): other casting alloys.
Information to be supplied by the customer to the anodizer shall be in accordance with Annex A.
5 Appearance
The significant surface shall be completely anodized and the visual appearance shall be substantially
uniform. There shall be no spalling, blistering or powdery (burnt) areas. Visual examination shall be a
lot acceptance test.
Crazing or microcracks shall not normally be a reason for rejection.
6 Thickness
Thickness measurements shall be made on the significant surfaces, but not within 5 mm of contact
(jigging) marks, nor in the immediate neighbourhood of a sharp edge.
Measurement shall be made using either the non-destructive eddy current method described in
ISO 2360 or the destructive microscopical method described in ISO 1463. In the case of a dispute, the
microscopical method (ISO 1463) shall be used.
Measurement of thickness or, where relevant, final dimensions shall be dealt with in a lot acceptance test.
7 Surface density
The surface density (coating mass per unit area), when measured in accordance with ISO 2106 on
unsealed anodic oxidation coatings with a nominal thickness of 50 μm ± 5 μm, shall have the minimum
values given in Table 1.
If the coating thickness is not 50 μm, the surface density shall be corrected proportionately.
WARNING — The method specified in ISO 2106 requires the use of a reagent containing
chromium(VI). Chromium(VI) is toxic and its solutions are hazardous to the environment and
severely hazardous to waters.
2 © ISO 2017 – All rights reserved
Table 1 — Minimum surface density
Material class Minimum acceptable value
Class 1 1 100 mg/dm
Class 2 (a) (b) 950 mg/dm
Class 3 (a) 950 mg/dm
Class 3 (b) By agreement
8 Resistance to wear/abrasion
8.1 General
The resistance to wear/abrasion shall be measured on unsealed anodic oxidation coatings (see NOTE).
Due to good correlation achieved with other properties, resistance to wear/abrasion shall be tested in
accordance with B.1, using the abrasive wheel wear test method described in ISO 8251.
NOTE Resistance to abrasion can be measured on sealed anodic oxidation coatings but hydrothermal sealing
and/or dyeing can reduce the resistance to abrasion/wear by over 50 %.
When the abrasive wheel wear test method is not appropriate (especially on some curved surfaces),
resistance to wear/abrasion shall be tested in accordance with B.2, using the abrasive jet test method
described in ISO 8251. This test gives an average for the total coating thickness.
The abrasive wheel wear test method assesses the resistance to abrasive wear. The abrasive jet
test method assesses the resistance to erosive wear (erosion). Thus, the results are not necessarily
comparable.
The Taber abrasion test method in accordance with B.3 may only be used when specified.
8.2 Abrasive wheel wear test method
The resistance to wear/abrasion shall be determined by the measurement of loss in coating thickness
or loss in coating mass. When determined in accordance with B.1, the final value shall be an average of
at least three tests.
The acceptance values shall be in accordance with Table 2. The standard specimen, in accordance
with Annex C, shall be tested each day, under the same conditions as those used for the test specimen.
When the loss in coating thickness is used, each thickness value shall be the average of 10 readings in
the test area.
The time between hard anodizing and abrasion testing shall be at least 24 h. During this period, the test
specimens shall be stored in the test environment.
Table 2 — Acceptance values for abrasive wheel wear test
Alloy Number of double Relative mean specific abrasion resistance acceptance
strokes value
ds % compared to standard specimen (in accordance with
Annex C)
Class 1 800 to 100 ≥ 80 %
Class 2 (a) 400 to 100 ≥ 30 %
Class 2 (b) 800 to 100 ≥ 55 %
a
Class 3 (a) 400 to 100 ≥ 55 %
or by agreement (see NOTE)
a
Class 3 (b) 400 to 100 ≥ 20 %
NOTE The relative mean specific abrasion resistance (RMSAR) is given by the formula
Mean wear resistance of test specimen
RMSAR = × 100
Mean we
...


Questions, Comments and Discussion
Ask us and Technical Secretary will try to provide an answer. You can facilitate discussion about the standard in here.
Loading comments...