ISO 18951-1:2022
(Main)Imaging materials — Scratch resistance of photographic prints — Part 1: General test method
Imaging materials — Scratch resistance of photographic prints — Part 1: General test method
This document specifies test method, test target, and reporting requirements to determine the scratch resistance of prints with photographic images. Photographic images can be produced by a wide range of printing technologies, including silver halide, electrophotography, inkjet, dye diffusion thermal transfer, commonly known as dye sublimation, and dye transfer processes. This document is applicable to prints with paper substrate and other type of substrates including prints on plastic, glass, metal and other materials. This document is applicable to photographic prints that have no protection as well as photographic prints that are protected by a coating or lamination. It is not the purpose of this document to define limits of acceptability or failure. They would be determined by the user and the intended application.
Matériaux pour l'image — Résistance à la rayure des épreuves photographiques — Partie 1: Méthode d'essai générale
General Information
- Status
- Published
- Publication Date
- 21-Nov-2022
- Technical Committee
- ISO/TC 42 - Photography
- Current Stage
- 6060 - International Standard published
- Start Date
- 22-Nov-2022
- Due Date
- 23-Nov-2023
- Completion Date
- 22-Nov-2022
Overview
ISO 18951-1:2022 - Imaging materials - Scratch resistance of photographic prints - Part 1: General test method - defines a standardized approach to assess the scratch resistance of photographic prints. The document sets out the test target, general test method, sample preparation, conditioning, evaluation and reporting requirements for prints produced by a wide range of technologies (silver halide, electrophotography, inkjet, dye‑sublimation, dye transfer) and on diverse substrates (paper, plastic, glass, metal). It applies to both unprotected prints and those with coatings or laminations. The standard provides guidance for reproducible testing but does not prescribe acceptance limits - those are left to users and intended applications.
Key topics and technical requirements
- Test principle: A stylus is moved across the print under controlled load and speed to introduce localized stresses (indentation, friction) and produce damage. Results are characterized by a critical load (minimum load producing a defined damage level).
- Stylus classification: Defines scratch scales by stylus size - nano (<10 µm), micro (≥10 µm and <0.5 mm), macro (≥0.5 mm) - with examples (2 µm, 50 µm, 4 mm).
- Test methods: Outlines constant‑load and variable‑load procedures and recommends selection of stylus geometry, load and linear velocity appropriate to the expected use.
- Sample handling: Requirements for sample preparation and conditioning to ensure reproducibility.
- Damage assessment: Defines damage levels (level 0 to level 3) and evaluation routes - visual inspection and instrumented measurement-based evaluation (critical loads F_c1, F_c2, F_c3).
- Reporting: Specifies what information to record (equipment, stylus geometry, loads, velocity, substrate/coating details, results) to enable comparison and traceability.
- Limitations: Emphasizes that results depend strongly on equipment and stylus geometry and should not be directly compared across different test setups.
Applications and users
ISO 18951-1:2022 is practical for:
- Printer manufacturers and ink formulators evaluating surface durability of print/ink/substrate combinations.
- Photo labs and print houses performing QC and comparing supplier performance.
- Material scientists and converters assessing coatings, laminates and substrate resistance to handling.
- Contracting parties using the method to agree test protocols (e.g., supplier/customer QC specifications).
Typical uses include product development (selecting ink/substrate/coating combinations), quality control, and comparative durability testing.
Related standards
- ISO 18951-2: specific sclerometer test method (detailed parameters)
- ISO 18913 (vocabulary) and other ISO 189xx series for permanence and durability (ISO 18937, 18936, 18941, 18946, ISO 18947, ISO 18922, ISO 18935)
Keywords: ISO 18951-1:2022, scratch resistance, photographic prints, test method, critical load, stylus, sclerometer, imaging materials, print durability.
Frequently Asked Questions
ISO 18951-1:2022 is a standard published by the International Organization for Standardization (ISO). Its full title is "Imaging materials — Scratch resistance of photographic prints — Part 1: General test method". This standard covers: This document specifies test method, test target, and reporting requirements to determine the scratch resistance of prints with photographic images. Photographic images can be produced by a wide range of printing technologies, including silver halide, electrophotography, inkjet, dye diffusion thermal transfer, commonly known as dye sublimation, and dye transfer processes. This document is applicable to prints with paper substrate and other type of substrates including prints on plastic, glass, metal and other materials. This document is applicable to photographic prints that have no protection as well as photographic prints that are protected by a coating or lamination. It is not the purpose of this document to define limits of acceptability or failure. They would be determined by the user and the intended application.
This document specifies test method, test target, and reporting requirements to determine the scratch resistance of prints with photographic images. Photographic images can be produced by a wide range of printing technologies, including silver halide, electrophotography, inkjet, dye diffusion thermal transfer, commonly known as dye sublimation, and dye transfer processes. This document is applicable to prints with paper substrate and other type of substrates including prints on plastic, glass, metal and other materials. This document is applicable to photographic prints that have no protection as well as photographic prints that are protected by a coating or lamination. It is not the purpose of this document to define limits of acceptability or failure. They would be determined by the user and the intended application.
ISO 18951-1:2022 is classified under the following ICS (International Classification for Standards) categories: 37.040.20 - Photographic paper, films and plates. Cartridges. The ICS classification helps identify the subject area and facilitates finding related standards.
ISO 18951-1:2022 is available in PDF format for immediate download after purchase. The document can be added to your cart and obtained through the secure checkout process. Digital delivery ensures instant access to the complete standard document.
Standards Content (Sample)
INTERNATIONAL ISO
STANDARD 18951-1
First edition
2022-11
Imaging materials — Scratch
resistance of photographic prints —
Part 1:
General test method
Matériaux pour l'image — Résistance à la rayure des épreuves
photographiques —
Partie 1: Méthode d'essai générale
Reference number
© ISO 2022
All rights reserved. Unless otherwise specified, or required in the context of its implementation, no part of this publication may
be reproduced or utilized otherwise in any form or by any means, electronic or mechanical, including photocopying, or posting on
the internet or an intranet, without prior written permission. Permission can be requested from either ISO at the address below
or ISO’s member body in the country of the requester.
ISO copyright office
CP 401 • Ch. de Blandonnet 8
CH-1214 Vernier, Geneva
Phone: +41 22 749 01 11
Email: copyright@iso.org
Website: www.iso.org
Published in Switzerland
ii
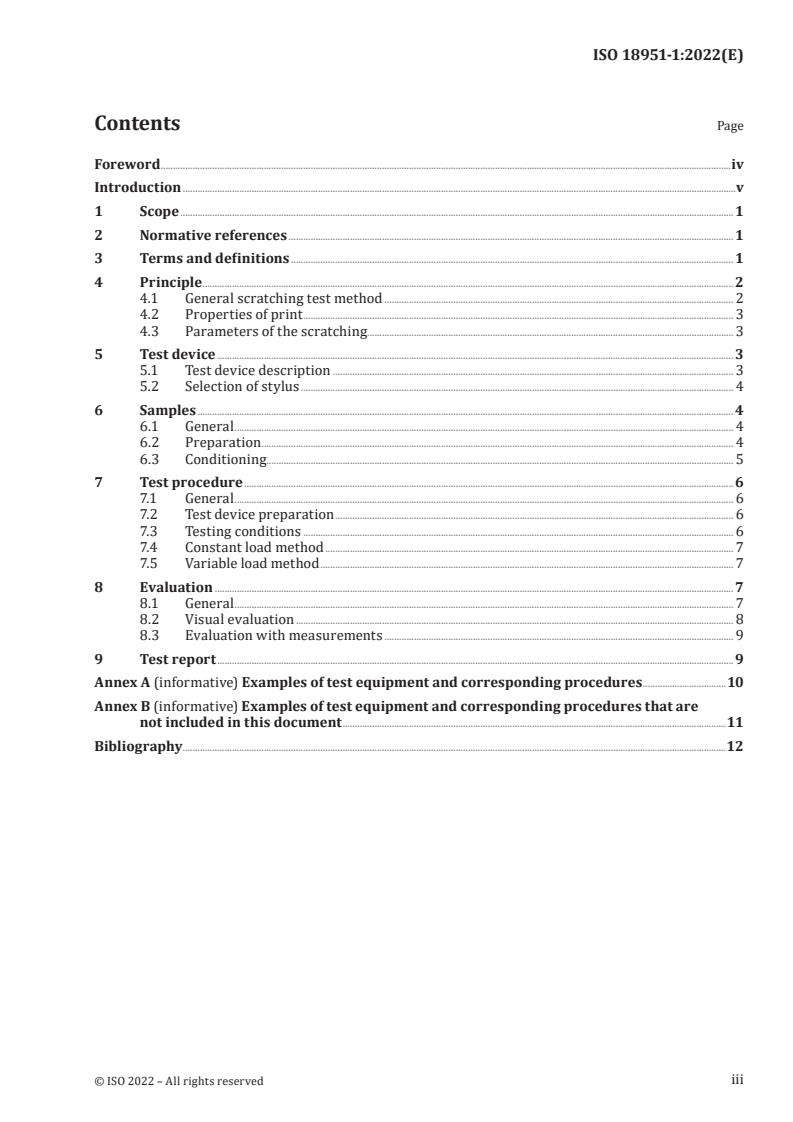
Contents Page
Foreword .iv
Introduction .v
1 Scope . 1
2 Normative references . 1
3 Terms and definitions . 1
4 Principle . 2
4.1 General scratching test method . 2
4.2 Properties of print . 3
4.3 Parameters of the scratching. 3
5 Test device . 3
5.1 Test device description . 3
5.2 Selection of stylus . 4
6 Samples . 4
6.1 General . 4
6.2 Preparation . 4
6.3 Conditioning. 5
7 Test procedure .6
7.1 General . 6
7.2 Test device preparation . 6
7.3 Testing conditions . 6
7.4 Constant load method . 7
7.5 Variable load method . 7
8 Evaluation . 7
8.1 General . 7
8.2 Visual evaluation . 8
8.3 Evaluation with measurements . 9
9 Test report . 9
Annex A (informative) Examples of test equipment and corresponding procedures .10
Annex B (informative) Examples of test equipment and corresponding procedures that are
not included in this document .11
Bibliography .12
iii
Foreword
ISO (the International Organization for Standardization) is a worldwide federation of national standards
bodies (ISO member bodies). The work of preparing International Standards is normally carried out
through ISO technical committees. Each member body interested in a subject for which a technical
committee has been established has the right to be represented on that committee. International
organizations, governmental and non-governmental, in liaison with ISO, also take part in the work.
ISO collaborates closely with the International Electrotechnical Commission (IEC) on all matters of
electrotechnical standardization.
The procedures used to develop this document and those intended for its further maintenance are
described in the ISO/IEC Directives, Part 1. In particular, the different approval criteria needed for the
different types of ISO documents should be noted. This document was drafted in accordance with the
editorial rules of the ISO/IEC Directives, Part 2 (see www.iso.org/directives).
Attention is drawn to the possibility that some of the elements of this document may be the subject of
patent rights. ISO shall not be held responsible for identifying any or all such patent rights. Details of
any patent rights identified during the development of the document will be in the Introduction and/or
on the ISO list of patent declarations received (see www.iso.org/patents).
Any trade name used in this document is information given for the convenience of users and does not
constitute an endorsement.
For an explanation of the voluntary nature of standards, the meaning of ISO specific terms and
expressions related to conformity assessment, as well as information about ISO's adherence to
the World Trade Organization (WTO) principles in the Technical Barriers to Trade (TBT), see
www.iso.org/iso/foreword.html.
This document was prepared by Technical Committee ISO/TC 42, Photography.
A list of all parts in the ISO 18951 series can be found on the ISO website.
Any feedback or questions on this document should be directed to the user’s national standards body. A
complete listing of these bodies can be found at www.iso.org/members.html.
iv
Introduction
This document is one of a series ISO 189xx relating to permanence and durability of image prints, which
is the resistance to mechanical, chemical and/or environmental stresses in conditions of use.
The permanence of the image under environmental stresses is tested by each stress factor individually:
[8] [7] [9] [10]
light (ISO 18937 ), heat (ISO 18936 ), ozone (ISO 18941 ), and humidity (ISO 18946 ). These
stress factors are given by the ambient conditions, over which the user often has limited control. The
exposure to mechanical and physical stress may often be controlled by the user, unless intense handling
is integral to intended use. Tests for rubbing of prints resulting in abrasion or smearing of the image
[11] [5]
are handled in ISO 18947 (all parts) , scratch resistance is addressed in ISO 18922 (for film) and
[6]
durability tests to simulate accidental exposure to water are described ISO 18935 .
Photographic prints are also susceptible to scratching when handled during their intended use. This
problem is particularly evident with digital prints, which may have colorants on the surface without
protection from physical damage. The test methods in this document for evaluating the scratch
resistance of photographic prints provides another means of characterizing the physical durability of
photographic prints.
Scratching tends to occur in a specific location at a single point of contact, as opposed to abrasion which
affect larger areas of the print material. And it might occur accidentally or repeatedly by handling of the
print.
This document provides standardized requirements to evaluate the scratch resistance of image prints
in their various formats. As a test method for scratching, pencil hardness is well-known. However, the
pencil test is proved difficult to carry out in a reproducible manner with photographic prints.
In the same point of view, test devices for scratch test show wide variety of the test conditions and
parameters. Therefore, the test method and test conditions should be carefully determined taking
into account the mechanical stresses that are expected during the use of the printed matter, and also
consideration of print material.
This document describes the general guidelines of the scratch test and general considerations for the
test device and parameter setting, test sample preparation, general test procedure, assessment of
results, reporting requirements and examples of test equipment. The scratch test in this document
can be used not only by a printer manufacturer, but also by a system integrator in a printing house to
optimize the selection of ink set and substrate combination which will offer strong scratch resistance
of the image, or it can be used as an agreeable QC test method between a photo print supplier and their
customers, or it could be used by an ink developer to select desirable ingredients that will yield inks
[12]
with strong scratch resistance, etc. ISO 18951-2 describes a specific test method with detailed test
parameter selection, test procedure and results assessment for a sclerometer.
v
INTERNATIONAL STANDARD ISO 18951-1:2022(E)
Imaging materials — Scratch resistance of photographic
prints —
Part 1:
General test method
1 Scope
This document specifies test method, test target, and reporting requirements to determine the scratch
resistance of prints with photographic images. Photographic images can be produced by a wide range
of printing technologies, including silver halide, electrophotography, inkjet, dye diffusion thermal
transfer, commonly known as dye sublimation, and dye transfer processes. This document is applicable
to prints with paper substrate and other type of substrates including prints on plastic, glass, metal and
other materials. This document is applicable to photographic prints that have no protection as well as
photographic prints that are protected by a coating or lamination.
It is not the purpose of this document to define limits of acceptability or failure. They would be
determined by the user and the intended application.
2 Normative references
The following documents are referred to in the text in such a way that some or all of their content
constitutes requirements of this document. For dated references, only the edition cited applies. For
undated references, the latest edition of the referenced document (including any amendments) applies.
ISO 18913, Imaging materials — Permanence — Vocabulary
3 Terms and definitions
For the purposes of this document, the terms and definitions given in ISO 18913 and the following apply.
For the purposes of this document, the following terms and definitions apply.
ISO and IEC maintain terminology databases for use in standardization at the following addresses:
— ISO Online browsing platform: available at https:// www .iso .org/ obp
— IEC Electropedia: available at https:// www .electropedia .org/
3.1
nano scratch
scratch with a testing device using a stylus, which diameter is smaller than 10 μm
Note 1 to entry: An example is a spherical stylus with diameter 2 μm providing a contact area with a diameter
of~500 nm.
3.2
micro scratch
scratch with a testing device using a stylus, which diameter is equal or larger than 10 μm and smaller
than 0,5 mm
Note 1 to entry: An example is a spherical stylus with diameter 50 μm providing a contact area with a diameter
of ~12 μm
3.3
macro scratch
scratch with a testing device using a stylus, which diameter is equal or larger than 0,5 mm
Note 1 to entry: An example is a spherical stylus with diameter 4 mm providing a contact area with a diameter of
~1 mm or less.
3.4
cohesive failure
breaking that occur inside the boundary between the uppermost layer and the layer underneath or
within the uppermost layer, caused when the local stress level introduced by the stylus movement
exceeds the yield point of the layers
Note 1 to entry: Cohesive failure is observed as fracture, cracking (forward and rearward), buckling, and flaking
on the print surface.
3.5
buckling
deformation of a layer by compression and/or shear upon scratching manifesting itself as local
variations of the cross-section of the layer
Note 1 to entry: Analogous observations are bowing of a column of material under compression or wrinkling of a
plate under shear
3.6
flaking
cracking and chipping of a layer along the scratch line forming small pieces that flake off
3.7
plastic deformation
permanent distortion that occurs when a material is subjected to tensile, compressive, bending, or
torsion stresses that exceed its yield strength and cause it to elongate, compress, buckle, bend, or twist
3.8
adhesive failure
separation between the base material and the coating layers or between different coating layers
4 Principle
4.1 General scratching test method
Typically, scratch resistance is a desirable property of prints and substrates. The degree to which it is
required depends on the intended applications of the photographic print. Scratch resistance depends on
two main factors, namely the properties of the print and the parameters of the scratching. The scratch
test for the print is applied using a stylus which moves relative to the print with a specific force. The
vertical load on the stylus tends to cause a surface indentation. During a relative movement of stylus
and test surface, compressive/tensile/shear stresses are introduced due to friction. And the stresses
tend to result into deformation of the printed layers.
Damage level of the deformation is classified into four levels. The details of the damage levels (level 0 to
level 3) are described in 8.2.
The critical load, F denotes the minimum load that just causes the specific damage assigned for
c
each level, i.e. F , F and F for damage levels 1, 2 and 3, as mentioned before, respectively. The
c,1 c,2 c,3
measurement of a critical load is highly dependent on the performance of the equipment. However,
“critical load” is useful to compare the test results quantitatively as far as the same kind of the
equipment is used.
NOTE 1 The critical load can be determined by constant load method (see 7.3) with stepwise change of load or
variable load method (see 7.4)
NOTE 2 L is also used as a symbol of the critical load instead of F .
c c
4.2 Properties of print
The type of damage varies widely depending on physical properties of the prints. For example, physical
properties of the print surface (coefficient of friction, smoothness, strength of the surface layer) can
affect the damage types. In addition, properties of the whole print (thickness of the coating layer,
coating adhesion strength, inter-layer adhesion strength, elasticity and resistance to deformation of the
coating layer, elasticity and resistance to deformation of the substrate) can affect the type of damage.
4.3 Parameters of the scratching
The stress level used in a scratch test greatly depends upon the geometry of the stylus used in the test,
the load applied to the stylus and the linear velocity of the stylus. The geometry of the stylus, which can
be described by shape and diameter, is one of the important parameters for scratching. The contact area
between the stylus and the print will depend on the stylus geometry, the surface properties of the print
and the force applied. For example, spherical sapphire stylus of 0,050 mm or 0,075 mm diameter give
different results from a spherical stylus with large diameter (e.g. 1 mm diameter tip). For this reason,
scratch levels obtained with different stylus geometries shall not be compared.
Choosing stylus diameters that are smaller or comparable to the coating thickness, can provide
additional information on the damage introduced by scratching, especially when evaluated with
microscopic or topographic methods.
Another factor is the material of the stylus, which can result in a different friction coefficient between
the stylus and the print surface. As the typical materials for styli, inorganic materials such as sapphire,
ruby, diamond, tungsten carbide, metals (e.g. steel), metal oxide (e.g. aluminium oxide), synthetic resin
(e.g. polyacrylate) and some natural materials can be used.
The load applied to the needle and the linear velocity are important parameters also. They should be
selected considering the supposed application. On the other hand, these parameters depend on the type
of test equipment. The recommended range for the parameters is described in Table 1.
When using similar shape, size, material of stylus and similar load and moving speed, the test results
can be compared.
5 Test device
5.1 Test device description
As described above, the scratch test devices are composed as follows:
— Stylus: needle like component;
— Load-generation component;
— Scanning mechanism;
— Flat plane, on which the specimen is fixed;
— Optional monitoring functions to detect the load, depth of stylus.
The test device shall have a flat sample stage, on which the specimen is fixed. The stage shall have a
smooth surface in comparison to the print substrate. During the scratching, sample and stylus shall
not be moved except the intended movement. Therefore, samples shall be fixed with enough force using
clasps, screws, springs or weights. Annex A gives examples of the devices; however, other equipment
with the above-mentioned components can be used. Annex B gives examples of devices not included in
this document.
NOTE When a curved surface is tested, the load and the stylus motion is adjusted carefully. Under the
condition that the scratching parameters are controlled appropriately, this document can be applied on curved
surfaces (e.g. photo mug cup).
5.2 Selection of stylus
Because the scratch test result greatly depends upon the geometry and the material of the stylus used
in the test, the stylus shall be selected in accordance with the objective of the test. A good practice to
select the test condition and the stylus is to take into account the mechanical stresses that are expected
during the use of the prints. For example, if the problem in the market is the scratch with a sharp
object, then a sharp stylus should be used. In this test method, typically a stylus with a hemispherical
shape shall be used. Other shapes of stylus (such as diamond shape, flat shape, nail-like shape, etc.)
may be used when required for the specific use case. The material for the stylus can be selected from
the typical types written in 4.3, also considering the usage of the print and equipment of the test.
Some of crystalline materials (e.g. sapphire, diamond) are available for relatively small stylus, and
synthetic resins are available for larger stylus. However, regarding the hardness of the stylus, inorganic
compounds are recommended rather than synthetic resins.
Spherical sapphire styli of 0,050 mm or 0,075 mm diameter are widely used in the field of photographic
[5]
films as referenced in ISO 18922 .
...


Questions, Comments and Discussion
Ask us and Technical Secretary will try to provide an answer. You can facilitate discussion about the standard in here.
Loading comments...