ISO 18669-2
(Main)Internal combustion engines — Piston pins — Part 2: Inspection measuring principles
Internal combustion engines — Piston pins — Part 2: Inspection measuring principles
This document defines the measuring principles used for measuring piston pins; it applies to piston pins with a nominal outer diameter from 8 mm up to and including 100 mm, for reciprocating internal combustion engines for road vehicles and other applications. In certain applications, except road vehicles, and provided that mutual agreement is made between the purchaser and the manufacturer, this document can be used with suitable modifications.
Moteurs à combustion interne — Axes de pistons — Partie 2: Principes de mesure pour le contrôle
General Information
Relations
Buy Standard
Standards Content (Sample)
FINAL DRAFT
International
Standard
ISO/FDIS 18669-2
ISO/TC 22/SC 34
Internal combustion engines —
Secretariat: ANSI
Piston pins —
Voting begins on:
2024-10-09
Part 2:
Inspection measuring principles
Voting terminates on:
2024-12-04
Moteurs à combustion interne — Axes de pistons —
Partie 2: Principes de mesure pour le contrôle
RECIPIENTS OF THIS DRAFT ARE INVITED TO SUBMIT,
WITH THEIR COMMENTS, NOTIFICATION OF ANY
RELEVANT PATENT RIGHTS OF WHICH THEY ARE AWARE
AND TO PROVIDE SUPPOR TING DOCUMENTATION.
IN ADDITION TO THEIR EVALUATION AS
BEING ACCEPTABLE FOR INDUSTRIAL, TECHNO-
LOGICAL, COMMERCIAL AND USER PURPOSES, DRAFT
INTERNATIONAL STANDARDS MAY ON OCCASION HAVE
TO BE CONSIDERED IN THE LIGHT OF THEIR POTENTIAL
TO BECOME STAN DARDS TO WHICH REFERENCE MAY BE
MADE IN NATIONAL REGULATIONS.
Reference number
ISO/FDIS 18669-2:2024(en) © ISO 2024
FINAL DRAFT
ISO/FDIS 18669-2:2024(en)
International
Standard
ISO/FDIS 18669-2
ISO/TC 22/SC 34
Internal combustion engines —
Secretariat: ANSI
Piston pins —
Voting begins on:
Part 2:
Inspection measuring principles
Voting terminates on:
Moteurs à combustion interne — Axes de pistons —
Partie 2: Principes de mesure pour le contrôle
RECIPIENTS OF THIS DRAFT ARE INVITED TO SUBMIT,
WITH THEIR COMMENTS, NOTIFICATION OF ANY
RELEVANT PATENT RIGHTS OF WHICH THEY ARE AWARE
AND TO PROVIDE SUPPOR TING DOCUMENTATION.
© ISO 2024
IN ADDITION TO THEIR EVALUATION AS
All rights reserved. Unless otherwise specified, or required in the context of its implementation, no part of this publication may
BEING ACCEPTABLE FOR INDUSTRIAL, TECHNO-
LOGICAL, COMMERCIAL AND USER PURPOSES, DRAFT
be reproduced or utilized otherwise in any form or by any means, electronic or mechanical, including photocopying, or posting on
INTERNATIONAL STANDARDS MAY ON OCCASION HAVE
the internet or an intranet, without prior written permission. Permission can be requested from either ISO at the address below
TO BE CONSIDERED IN THE LIGHT OF THEIR POTENTIAL
or ISO’s member body in the country of the requester.
TO BECOME STAN DARDS TO WHICH REFERENCE MAY BE
MADE IN NATIONAL REGULATIONS.
ISO copyright office
CP 401 • Ch. de Blandonnet 8
CH-1214 Vernier, Geneva
Phone: +41 22 749 01 11
Email: copyright@iso.org
Website: www.iso.org
Published in Switzerland Reference number
ISO/FDIS 18669-2:2024(en) © ISO 2024
ii
ISO/FDIS 18669-2:2024(en)
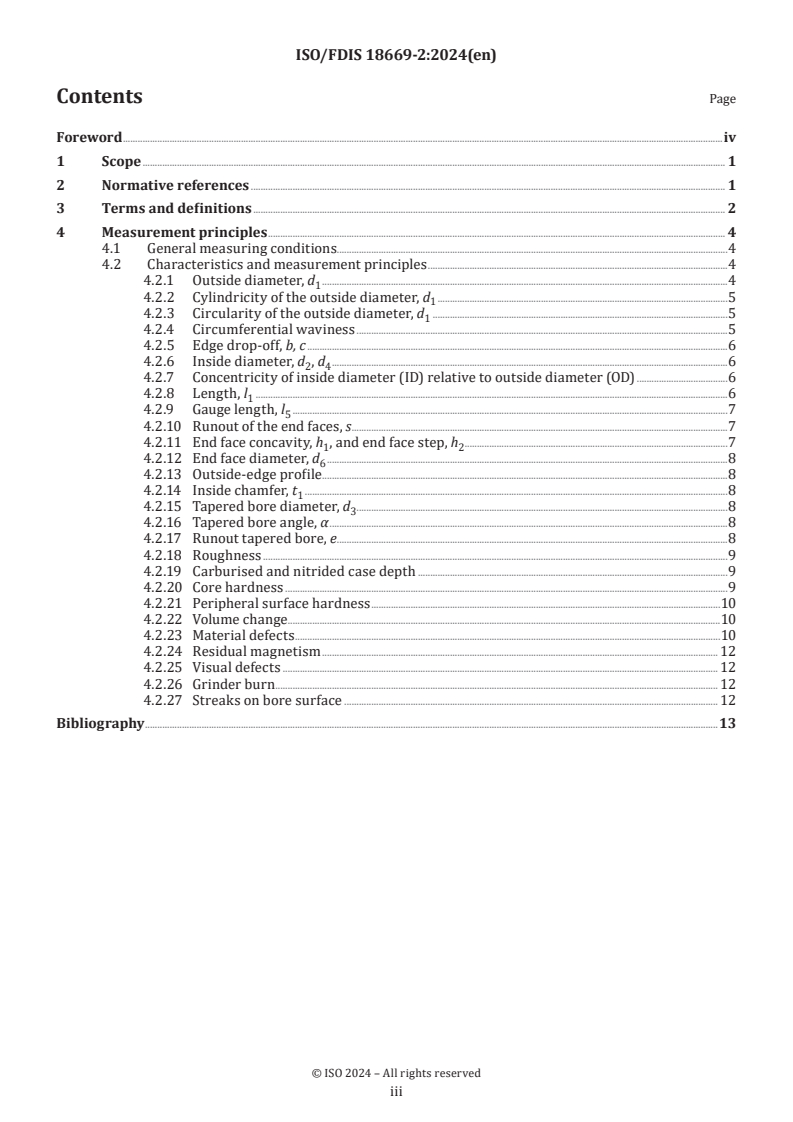
Contents Page
Foreword .iv
1 Scope . 1
2 Normative references . 1
3 Terms and definitions . 2
4 Measurement principles . 4
4.1 General measuring conditions.4
4.2 Characteristics and measurement principles .4
4.2.1 Outside diameter, d .4
4.2.2 Cylindricity of the outside diameter, d .5
4.2.3 Circularity of the outside diameter, d .5
4.2.4 Circumferential waviness .5
4.2.5 Edge drop-off, b, c .6
4.2.6 Inside diameter, d , d .6
2 4
4.2.7 Concentricity of inside diameter (ID) relative to outside diameter (OD) .6
4.2.8 Length, l .6
4.2.9 Gauge length, l .7
4.2.10 Runout of the end faces, s .7
4.2.11 End face concavity, h , and end face step, h .7
1 2
4.2.12 End face diameter, d .8
4.2.13 Outside-edge profile .8
4.2.14 Inside chamfer, t .8
4.2.15 Tapered bore diameter, d .8
4.2.16 Tapered bore angle, α .8
4.2.17 Runout tapered bore, e .8
4.2.18 Roughness .9
4.2.19 Carburised and nitrided case depth .9
4.2.20 Core hardness .9
4.2.21 Peripheral surface hardness .10
4.2.22 Volume change.10
4.2.23 Material defects .10
4.2.24 Residual magnetism . 12
4.2.25 Visual defects . 12
4.2.26 Grinder burn . . . 12
4.2.27 Streaks on bore surface . 12
Bibliography .13
iii
ISO/FDIS 18669-2:2024(en)
Foreword
ISO (the International Organization for Standardization) is a worldwide federation of national standards
bodies (ISO member bodies). The work of preparing International Standards is normally carried out through
ISO technical committees. Each member body interested in a subject for which a technical committee
has been established has the right to be represented on that committee. International organizations,
governmental and non-governmental, in liaison with ISO, also take part in the work. ISO collaborates closely
with the International Electrotechnical Commission (IEC) on all matters of electrotechnical standardization.
The procedures used to develop this document and those intended for its further maintenance are described
in the ISO/IEC Directives, Part 1. In particular, the different approval criteria needed for the different types
of ISO documents should be noted. This document was drafted in accordance with the editorial rules of the
ISO/IEC Directives, Part 2 (see www.iso.org/directives).
Attention is drawn to the possibility that some of the elements of this document may be the subject of patent
rights. ISO shall not be held responsible for identifying any or all such patent rights. Details of any patent
rights identified during the development of the document will be in the Introduction and/or on the ISO list of
patent declarations received (see www.iso.org/patents).
Any trade name used in this document is information given for the convenience of users and does not
constitute an endorsement.
For an explanation of the voluntary nature of standards, the meaning of ISO specific terms and expressions
related to conformity assessment, as well as information about ISO's adherence to the World Trade
Organization (WTO) principles in the Technical Barriers to Trade (TBT) see www.iso.org/iso/foreword.html.
This document was prepared by Technical Committee ISO/TC 22, Road vehicles, Subcommittee SC 34,
Propulsion, powertrain and powertrain fluids.
This third edition cancels and replaces the second edition (ISO 18669-2:2020), which has been technically
revised.
The main changes are as follows:
— the reference for material defects by eddy current inspection has been updated to align with ISO 18669-1.
A list of all parts in the ISO 18669 series can be found on the ISO website.
Any feedback or questions on this document should be directed to the user’s national standards body. A
complete listing of these bodies can be found at www.iso.org/members.html.
iv
FINAL DRAFT International Standard ISO/FDIS 18669-2:2024(en)
Internal combustion engines — Piston pins —
Part 2:
Inspection measuring principles
1 Scope
This document defines the measuring principles used for measuring piston pins. It applies to piston pins with
a nominal outer diameter from 8 mm up to and including 100 mm, for reciprocating internal combustion
engines for road vehicles and other applications.
In certain applications, except road vehicles, and provided that the purchaser and the manufacturer agree,
this document can be used with suitable modifications.
2 Normative references
The following documents are referred to in the text in such a way that some or all of their content constitutes
requirements of this document. For dated references, only the edition cited applies. For undated references,
the latest edition of the referenced document (including any amendments) applies.
ISO 21920-1, Geometrical Product Specifications (GPS) — Surface texture: Profile — Part 1: Indication of
surface texture
ISO 21920-2, Geometrical Product Specifications (GPS) — Surface texture: Profile— Terms, definitions and
surface texture parameters
ISO 21920-3, Geometrical Product Specifications (GPS) — Surface texture: Profile— Part 3: Specification
operators
ISO 9934 (all parts), Non-destructive testing — Magnetic particle testing
ISO 6506 (all parts), Metallic materials — Brinell hardness test
ISO 6507 (all parts), Metallic materials — Vickers hardness test
ISO 6508 (all parts), Metallic materials — Rockwell hardness test
ISO 8015, Geometrical product specifications (GPS) — Fundamentals — Concepts, principles and rules
ISO 12180-2, Geometrical product specifications (GPS) — Cylindricity — Part
ISO 12181-2, Geometrical product specifications (GPS) — Roundness — Part
ISO 14104:2017, Gears — Surface temper etch inspection after grinding, chemical method
ISO 14253 (all parts), Geometrical product specifications (GPS) — Inspection by measurement of workpieces
and measuring equipment
ISO 15548 (all parts), Non-destructive testing — Equipment for eddy current examination
ISO 16810, Non-destructive testing — Ultrasonic testing — General principles
ISO 18203, Steel — Determination of the thickness of surface-hardened layers
ISO 18265, Metallic materials — Conversion of hardness values
ISO/FDIS 18669-2:2024(en)
ISO 18669-1:2021, Internal combustion engines — Piston pins — Part 1: General specifications
3 Terms and definitions
For the purposes of this document, the following terms and definitions apply.
ISO and IEC maintain terminology databases for use in standardization at the following addresses:
— ISO Online browsing platform: available at https:// www .iso
...
ISO/DIS FDIS 18669--2:2021(E)
ISO /TC 22/SC 34/WG 9
Date: 2022-01-25
Secretariat: ANSI
Date: 2024-09-25
Internal combustion engines — Piston pins — —
Part 2:
Inspection measuring principles
Moteurs à combustion interne — Axes de pistons —
Partie 2: Principes de mesure pour le contrôle
FDIS stage
MUST BE USED
FOR FINAL
DRAFT
ISO/DIS FDIS 18669--2:2021(E2024(en)
All rights reserved. Unless otherwise specified, or required in the context of its implementation, no part of this publication
may be reproduced or utilized otherwise in any form or by any means, electronic or mechanical, including photocopying,
or posting on the internet or an intranet, without prior written permission. Permission can be requested from either ISO
at the address below or ISO'sISO’s member body in the country of the requester.
ISO Copyright Officecopyright office
CP 401 • Ch. de Blandonnet 8
CH-1214 Vernier, Geneva
Phone: + 41 22 749 01 11
Email: copyright@iso.org
E-mail: copyright@iso.org
Website: www.iso.orgwww.iso.org
Published in Switzerland.
ii © ISO 2021 – All rights reserved
ii
ISO/DIS FDIS 18669--2:2021(E2024(en)
Contents
Foreword . iv
1 Scope . 1
2 Normative references . 1
3 Terms and definitions . 2
4 Measurement principles . 5
4.1 General measuring conditions . 5
4.2 Characteristics and measurement principles . 5
Bibliography . 24
MUST BE USED
FOR FINAL
iii
DRAFT
ISO/DIS FDIS 18669--2:2021(E2024(en)
Foreword
ISO (the International Organization for Standardization) is a worldwide federation of national standards
bodies (ISO member bodies). The work of preparing International Standards is normally carried out through
ISO technical committees. Each member body interested in a subject for which a technical committee has been
established has the right to be represented on that committee. International organizations, governmental and
non-governmental, in liaison with ISO, also take part in the work. ISO collaborates closely with the
International Electrotechnical Commission (IEC) on all matters of electrotechnical standardization.
The procedures used to develop this document and those intended for its further maintenance are described
in the ISO/IEC Directives, Part 1. In particular, the different approval criteria needed for the different types of
ISO documents should be noted. This document was drafted in accordance with the editorial rules of the
ISO/IEC Directives, Part 2 (see www.iso.org/directiveswww.iso.org/directives).
Attention is drawn to the possibility that some of the elements of this document may be the subject of patent
rights. ISO shall not be held responsible for identifying any or all such patent rights. Details of any patent rights
identified during the development of the document will be in the Introduction and/or on the ISO list of patent
declarations received (see www.iso.org/patentswww.iso.org/patents).
Any trade name used in this document is information given for the convenience of users and does not
constitute an endorsement.
For an explanation of the voluntary nature of standards, the meaning of ISO specific terms and expressions
related to conformity assessment, as well as information about ISO's adherence to the World Trade
Organization (WTO) principles in the Technical Barriers to Trade (TBT) see
www.iso.org/iso/foreword.htmlwww.iso.org/iso/foreword.html.
This document was prepared by Technical Committee ISO/TC 22, Road vehicles, Subcommittee SC 34,
Propulsion, powertrain and powertrain fluids.
This third edition cancels and replaces the second edition (ISO 18669--2:2020), which has been technically
revised.
The main changes are as follows:
— — Updated the reference for material defects by eddy current inspection to match changes to part has
been updated to align with ISO 18669-1 of the standard.
A list of all parts in the ISO 18669 series can be found on the ISO website.
Any feedback or questions on this document should be directed to the user’s national standards body. A
complete listing of these bodies can be found at www.iso.org/members.htmlwww.iso.org/members.html.
iv © ISO 2021 – All rights reserved
iv
DRAFT INTERNATIONAL STANDARD ISO/DIS 18669-2:2021(E)
Internal combustion engines — Piston pins — —
Part 2:
Inspection measuring principles
1 Scope
This document defines the measuring principles used for measuring piston pins; it. It applies to piston pins
with a nominal outer diameter from 8 mm up to and including 100 mm, for reciprocating internal combustion
engines for road vehicles and other applications.
In certain applications, except road vehicles, and provided that mutual agreement is made between the
purchaser and the manufacturer agree, this document can be used with suitable modifications.
2 Normative references
The following documents are referred to in the text in such a way that some or all of their content constitutes
requirements of this document. For dated references, only the edition cited applies. For undated references,
the latest edition of the referenced document (including any amendments) applies.
ISO 1302, Geometrical Product Specifications (GPS) — Indication of surface texture in technical product
documentation
ISO 428721920-1, Geometrical Product Specifications (GPS) — Surface texture: Profile method — Part 1:
Indication of surface texture
ISO 21920-2, Geometrical Product Specifications (GPS) — Surface texture: Profile— Terms, definitions and
surface texture parameters
ISO 428821920-3, Geometrical Product Specifications (GPS) — Surface texture: Profile method — Rules and
procedures for the assessment of surface texture— Part 3: Specification operators
ISO 9934 (all parts), Non-destructive testing — Magnetic particle testing
ISO 6506 (all parts), Metallic materials — Brinell hardness test
ISO 6507 (all parts), Metallic materials — Vickers hardness test
ISO 6508 (all parts), Metallic materials — Rockwell hardness test
ISO 8015, Geometrical product specifications (GPS) — Fundamentals — Concepts, principles and rules
ISO 12181 12180-2, Geometrical product specifications (GPS) -— Cylindricity — Part
ISO 12181-2, Geometrical product specifications (GPS) — Roundness — Part
ISO 14104:2017, Gears — Surface temper etch inspection after grinding, chemical method
ISO/DIS FDIS 18669--2:2021(E2024(en)
ISO 14253 (all parts), Geometrical product specifications (GPS) — Inspection by measurement of workpieces and
measuring equipment
ISO 15548 (all parts), Non-destructive testing — Equipment for eddy current examination
ISO 16810, Non-destructive testing — Ultrasonic testing — General principles
ISO 18203, Steel — Determination of the thickness of surface-hardened layers
ISO 18265, Metallic materials — Conversion of hardness values
ISO 18669--1:2021, Internal combustion engines — Piston pins — Part 1: General specifications
3 Terms and definitions
For the purposes of this document, the following terms and definitions apply.
ISO and IEC maintain terminology databases for use in standardization at the following addresses:
— — ISO Online browsing platform: available at https://www.iso.org/obphttps://www.iso.org/obp
— — IEC Electropedia: available at https://www.electropedia.org/https://www.electropedia.org/
3.1
outside diameter
OD
d1
diameter of the outer surface measured at any point excluding areas of edge drop-off (b) (3.5)(3.5)
Note 1 to entry: See ISO 18669--1:2021, Figure 12.
3.2
cylindricity of the outside diameter
CYLt
peak-to-valley cylindricity deviation; geometric form of the peripheral surface excluding areas of edge drop-
off (b) (3.5)(3.5)
Note 1 to entry: Characteristics measured in the axial direction are taper, convexity, concavity and waviness.
Note 2 to entry: See ISO 1101.
3.3
circularity of the outside diameter
RONt
peak-to-valley roundness deviation; deviations of the peripheral surface from circularity such as waviness,
ovality and spherical-triangular forms
Note 1 to entry: See ISO 1101.
3.4
circumferential waviness
undulations of the peripheral surface from circularity in a waveform
MUST BE USED
2 © ISO 2021 – All rights reserved
DRAFT
ISO/DIS FDIS 18669--2:2021(E2024(en)
3.5
edge drop-off
b
c
geometric form of the peripheral surface at the outside edges
3.6
inside diameter
ID
d
d4
diameter of the bore measured at any point
3.7
concentricity of inside diameter relative to outside diameter
difference between the maximum and minimum dimensions of the wall thickness (a) as measured in a plane
perpendicular to the peripheral surface
Note 1 to entry: See ISO 1101.
3.8
length
l
maximum dimension measured between two planes perpendicular to the peripheral surface
3.9
gauge length
l
dimension between the gauge points measured perpendicular to the peripheral surface
3.10
runout of the end faces
s
axial distance between two circles located concentrically to the axis of the piston pin
Note 1 to entry: All points of the end face of the piston pin must lie around the axis during rotation around the axis.
3.11
end face diameter
d
maximum diameter of end face concavity or end face step
3.12
outside-edge profile
transition from the peripheral surface to the end face of piston pin
3.13
inside chamfer
t
transition from the inside cylindrical surface to the end face
ISO/DIS FDIS 18669--2:2021(E2024(en)
3.14
tapered bore diameter
d
diameter of the taper at the end face
3.15
tapered bore angle
α
angle of inclination measured from the peripheral surface
3.16
runout tapered bore
e
concentricity of the tapered bore (3.26) to the outside diameter (3.1)(3.1)
3.17
carburised and nitrided case depth
thickness of the surface layer with a hardness value which is greater than the limit hardness, H , measured
s
perpendicular to the piston pin peripheral surface or bore surface on the finish-machined piston pin
3.18
core hardness
hardness in the core zone that is not affected by the case-hardened or the nitrided layer
3.19
peripheral surface hardness
hardness measured on the peripheral surface of the carburised or nitrided layer
3.20
volume change
change in volume detected as a permanent outside-diameter dimensional deviation at reference temperature
after being heated to a test temperature for a specified period of time
3.21
material defect
defects within the whole volume and on surfaces of the pin.
EXAMPLE Grinding cracks, hardening cracks, stress cracks, inclusions, slag lines and seams.
3.22
residual magnetism
remaining magnetism after demagnetisation
3.23
visual defect
visible defects detected without magnification, by inspectors having normal eyesight (corrected if necessary)
or detected automatically with opto-electronic systems
3.24
grinder burn
localised over- heating on ground surfaces, resulting in surface tempering and/or reheating with measurable
changes in surface hardness
MUST BE USED
4 © ISO 2021 – All rights reserved
DRAFT
ISO/DIS FDIS 18669--2:2021(E2024(en)
3.25
streaks on bore surface
forming streaksmarks on bore surface of cold-‑formed end-web pins
3.26
tapered bore
pin with conical-shaped inside diameter near the ends that reduces the weight of the piston pin
[SOURCE: ISO 18669-1:2021, 3.2.1.3]
4 Measurement principles
4.1 General measuring conditions
The following general requirements are applicable to all measurement principles unless otherwise specified.:
a) a) Measurements shall be made using instruments with a resolution not exceeding 10 % of the tolerance
of the dimension being measured.
b) b) “Measurement uncertainty” according to the ISO 14253 series shall apply.
c) c) “Measurement systems analysis” reference AIAG IATF 16949 applies.
d) d) The reference temperature for outside-‑diameter measurements shall be 20 °C ± 1 °C.
e) e) The "principle of independence" according to ISO 8015 shall apply.
f) f) Other methods which are able tothat can guarantee the required measurement accuracy are allowed
with prior agreement between manufacturer and customer.
4.2 Characteristics and measurement principles
4.2.1 Outside diameter, d
Measurement principle
— — Reference method:
Measure with a precision calliper having spherical measuring probes each of radius 1.0 mm min. exerting a
measuring force of approximately 1 N (see Figure 1).
ISO/DIS FDIS 18669--2:2021(E2024(en)
Figure 1 — Outside-diameter measurement principle
Other methods: All methods which are able to guarantee the required measurement uncertainty. Method must
be agreed to between manufacturer and client.
Measurement uncertainty:
±0,000 5 mm in accordance with the ISO 14253 series.
Reference method: Measure with a precision calliper having spherical measuring probes each of radius
1,0 mm min. exerting a measuring force of approximately 1 N (see Figure 1).
Figure 1 — Outside-diameter measurement principle
Other methods: Any method that can guarantee the
...


Questions, Comments and Discussion
Ask us and Technical Secretary will try to provide an answer. You can facilitate discussion about the standard in here.