ISO 19613:2018
(Main)Fine ceramics (advanced ceramics, advanced technical ceramics) — Measurement of viscosity of ceramic slurry by use of a rotational viscometer
Fine ceramics (advanced ceramics, advanced technical ceramics) — Measurement of viscosity of ceramic slurry by use of a rotational viscometer
ISO 19613:2018 specifies a method for measurement of the viscosity of a ceramic slurry using a rotational viscometer.
Céramiques techniques — Mesure de la viscosité des céramiques en suspension au moyen d'un viscosimètre rotatif
General Information
- Status
- Published
- Publication Date
- 05-Apr-2018
- Technical Committee
- ISO/TC 206 - Fine ceramics
- Drafting Committee
- ISO/TC 206/WG 2 - Powders
- Current Stage
- 9092 - International Standard to be revised
- Start Date
- 13-Nov-2023
- Completion Date
- 12-Feb-2026
Overview - ISO 19613:2018 (viscosity of ceramic slurry)
ISO 19613:2018 specifies a standardized method for measuring the viscosity of ceramic slurry using a rotational viscometer. It applies to fine ceramics (advanced/technical ceramics) and covers both instruments that provide a defined shear rate (coaxial cylinder, cone-and-plate, parallel plates) and single-cylinder viscometers that produce an apparent viscosity as a function of angular velocity. The document defines terms (shear stress, shear rate, Newtonian/non-Newtonian behaviour, thixotropy, Bingham plastic), measurement principles, apparatus, calibration, sample pretreatment and reporting.
Key topics and technical requirements
- Measurement principle: Viscosity η = shear stress τ / shear rate γ̇ for viscometers with a defined shear rate; single-cylinder devices measure torque vs angular velocity producing apparent viscosity.
- Measuring geometries: Coaxial double cylinder, cone-and-plate, and parallel plates are detailed (see annexes) for defined shear-rate measurements; single-cylinder options are described for rapid comparative testing.
- Apparatus performance: Instrument torque-measurement accuracy of 2% of full-scale and rotational-frequency accuracy of 2%; viscosity repeatability required to be ±2%.
- Calibration and conditions: Procedures for calibration, temperature control (thermostat/thermometer), selection of geometry/spindle and rotational frequency or shear rate.
- Sample handling: Guidance on sampling, degassing, mixing/dispersion (including ultrasonication), and measurements at fixed shear rate or angular velocity with repeat measurements.
- Result reporting: Expression of results, flow/viscosity curves, and full test-report content requirements.
Practical applications and users
ISO 19613:2018 is used to ensure reproducible, comparable viscosity data for processes and products that rely on ceramic slurries, including:
- Slip casting, tape casting, screen printing, dip and spray coating
- Spray drying feedstocks and polishing/paste formulations
- R&D and formulation development in ceramics and advanced materials
- Quality control and incoming material inspection in ceramic manufacturing Primary users: materials scientists, process engineers, QC laboratories, testing/calibration labs, instrument manufacturers and standards compliance teams.
Related standards
- ISO/IEC 17025 - competence of testing and calibration laboratories (referenced for laboratory competence)
- ISO 20507 - fine ceramics vocabulary (terminology used)
- ISO 80000-4 - symbols (referenced for notation)
Keywords: ISO 19613:2018, fine ceramics, ceramic slurry viscosity, rotational viscometer, shear rate, cone-and-plate, coaxial cylinder, parallel plates, apparent viscosity, non-Newtonian, thixotropy, Bingham plastic.
Frequently Asked Questions
ISO 19613:2018 is a standard published by the International Organization for Standardization (ISO). Its full title is "Fine ceramics (advanced ceramics, advanced technical ceramics) — Measurement of viscosity of ceramic slurry by use of a rotational viscometer". This standard covers: ISO 19613:2018 specifies a method for measurement of the viscosity of a ceramic slurry using a rotational viscometer.
ISO 19613:2018 specifies a method for measurement of the viscosity of a ceramic slurry using a rotational viscometer.
ISO 19613:2018 is classified under the following ICS (International Classification for Standards) categories: 81.060.30 - Advanced ceramics. The ICS classification helps identify the subject area and facilitates finding related standards.
ISO 19613:2018 is available in PDF format for immediate download after purchase. The document can be added to your cart and obtained through the secure checkout process. Digital delivery ensures instant access to the complete standard document.
Standards Content (Sample)
INTERNATIONAL ISO
STANDARD 19613
First edition
2018-04
Fine ceramics (advanced ceramics,
advanced technical ceramics) —
Measurement of viscosity of
ceramic slurry by use of a rotational
viscometer
Céramiques techniques — Mesure de la viscosité des céramiques en
suspension au moyen d'un viscosimètre rotatif
Reference number
©
ISO 2018
© ISO 2018
All rights reserved. Unless otherwise specified, or required in the context of its implementation, no part of this publication may
be reproduced or utilized otherwise in any form or by any means, electronic or mechanical, including photocopying, or posting
on the internet or an intranet, without prior written permission. Permission can be requested from either ISO at the address
below or ISO’s member body in the country of the requester.
ISO copyright office
CP 401 • Ch. de Blandonnet 8
CH-1214 Vernier, Geneva
Phone: +41 22 749 01 11
Fax: +41 22 749 09 47
Email: copyright@iso.org
Website: www.iso.org
Published in Switzerland
ii © ISO 2018 – All rights reserved
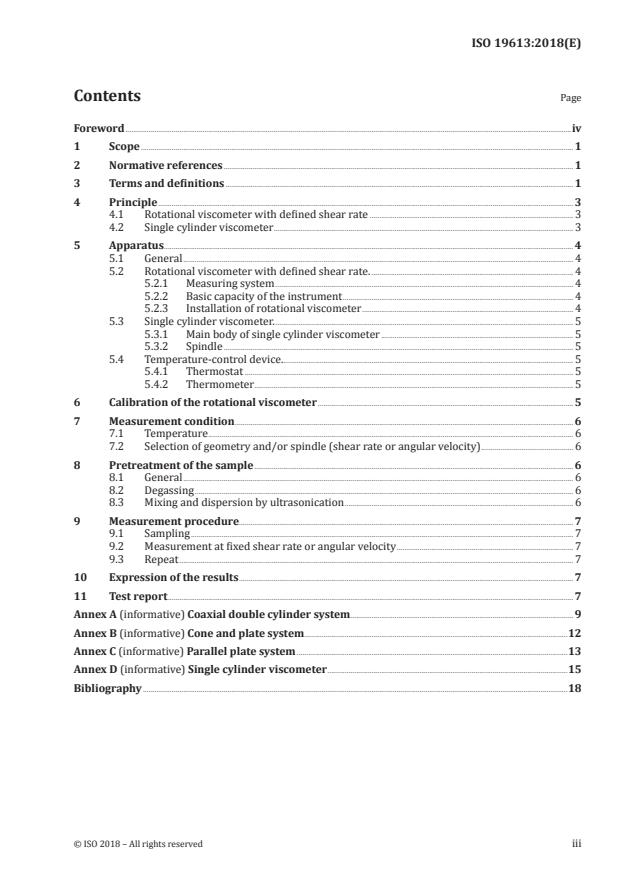
Contents Page
Foreword .iv
1 Scope . 1
2 Normative references . 1
3 Terms and definitions . 1
4 Principle . 3
4.1 Rotational viscometer with defined shear rate . 3
4.2 Single cylinder viscometer . 3
5 Apparatus . 4
5.1 General . 4
5.2 Rotational viscometer with defined shear rate. . 4
5.2.1 Measuring system . 4
5.2.2 Basic capacity of the instrument . 4
5.2.3 Installation of rotational viscometer . 4
5.3 Single cylinder viscometer. . 5
5.3.1 Main body of single cylinder viscometer . 5
5.3.2 Spindle . 5
5.4 Temperature-control device. 5
5.4.1 Thermostat . 5
5.4.2 Thermometer . 5
6 Calibration of the rotational viscometer . 5
7 Measurement condition . 6
7.1 Temperature . 6
7.2 Selection of geometry and/or spindle (shear rate or angular velocity) . 6
8 Pretreatment of the sample . 6
8.1 General . 6
8.2 Degassing . 6
8.3 Mixing and dispersion by ultrasonication . 6
9 Measurement procedure . 7
9.1 Sampling . 7
9.2 Measurement at fixed shear rate or angular velocity . 7
9.3 Repeat . 7
10 Expression of the results . 7
11 Test report . 7
Annex A (informative) Coaxial double cylinder system . 9
Annex B (informative) Cone and plate system .12
Annex C (informative) Parallel plate system .13
Annex D (informative) Single cylinder viscometer .15
Bibliography .18
Foreword
ISO (the International Organization for Standardization) is a worldwide federation of national standards
bodies (ISO member bodies). The work of preparing International Standards is normally carried out
through ISO technical committees. Each member body interested in a subject for which a technical
committee has been established has the right to be represented on that committee. International
organizations, governmental and non-governmental, in liaison with ISO, also take part in the work.
ISO collaborates closely with the International Electrotechnical Commission (IEC) on all matters of
electrotechnical standardization.
The procedures used to develop this document and those intended for its further maintenance are
described in the ISO/IEC Directives, Part 1. In particular the different approval criteria needed for the
different types of ISO documents should be noted. This document was drafted in accordance with the
editorial rules of the ISO/IEC Directives, Part 2 (see www .iso .org/ directives).
Attention is drawn to the possibility that some of the elements of this document may be the subject of
patent rights. ISO shall not be held responsible for identifying any or all such patent rights. Details of
any patent rights identified during the development of the document will be in the Introduction and/or
on the ISO list of patent declarations received (see www .iso .org/ patents).
Any trade name used in this document is information given for the convenience of users and does not
constitute an endorsement.
For an explanation on the voluntary nature of standards, the meaning of ISO specific terms and
expressions related to conformity assessment, as well as information about ISO's adherence to the
World Trade Organization (WTO) principles in the Technical Barriers to Trade (TBT) see the following
URL: www .iso .org/ iso/ foreword .html.
This document was prepared by Technical Committee ISO/TC 206, Fine ceramics.
iv © ISO 2018 – All rights reserved
INTERNATIONAL STANDARD ISO 19613:2018(E)
Fine ceramics (advanced ceramics, advanced technical
ceramics) — Measurement of viscosity of ceramic slurry by
use of a rotational viscometer
1 Scope
This document specifies a method for measurement of the viscosity of a ceramic slurry using a
rotational viscometer.
2 Normative references
The following documents are referred to in the text in such a way that some or all of their content
constitutes requirements of this document. For dated references, only the edition cited applies. For
undated references, the latest edition of the referenced document (including any amendments) applies.
ISO/IEC 17025, General requirements for the competence of testing and calibration laboratories
ISO 20507, Fine ceramics (advanced ceramics, advanced technical ceramics) — Vocabulary
3 Terms and definitions
For the purposes of this document, the terms and definitions given in ISO 20507 and the following apply.
ISO and IEC maintain terminological databases for use in standardization at the following addresses:
— ISO Online browsing platform: available at https:// www .iso .org/ obp
— IEC Electropedia: available at http:// www .electropedia .org/
3.1
shear stress
stress acting on planes parallel to the direction of flow when the fluid is subject to laminar flow
Note 1 to entry: The SI units are pascals (Pa).
3.2
shear rate
gradient of laminar flow rate perpendicular to the fluid flow
−1
Note 1 to entry: The SI units are s .
3.3
viscosity
ratio of shear stress to shear rate
Note 1 to entry: This ratio is representative of the internal resistance of the fluid to flow.
Note 2 to entry: The SI unit of viscosity is Pa × s.
Note 3 to entry: mPa × s = 1 cP in terms of c.g.s. units [where 1 P = 1 g/(cm × s)].
Note 4 to entry: Viscosity is sometimes called ‘dynamic viscosity’ or ‘shear viscosity’ for clarification. The
measured viscosity is conventionally called ‘apparent viscosity’ since the gradient of shear rate is not identical
for all parts of the spindle.
3.4
Newtonian fluid
fluid in which shear stress is proportional to shear rate
Note 1 to entry: The ratio of shear stress to shear rate is viscosity.
3.5
non-Newtonian fluid
fluid in which shear stress is not proportional to shear rate
Note 1 to entry: The non-Newtonian behaviour can be determined by measuring shear stress using varying
shear rate (or angular velocity). Viscosity of the non-Newtonian fluid changes with the shear rate, in contrast
with Newtonian fluid, which has constant viscosity with the shear rate.
3.6
thixotropy
flow behaviour of fluid that shows time dependence, such that the apparent viscosity decreases with
time for a constant shear rate, and recovers slowly with withdrawal of the shear force
3.7
shear thickening
increase of shear viscosity of fluid when the shear rate (or stress) is increased
3.8
shear thinning
decrease of shear viscosity of fluid when the shear rate (or stress) is increased
3.9
Bingham plastic
linear shear stress/shear rate relationship starting from a finite yield stress value below which the
fluid does not flow
3.10
flow curve
curve showing the relationship between shear rate and shear stress
Note 1 to entry: See Figure 1 a).
3.11
viscosity curve
curve showing the relationship between shear rate (or shear stress) and viscosity
Note 1 to entry: See Figure 1 b).
3.12
ceramic slurry
suspension of grinding frit, clay or ceramic powders mixed or dispersed in water or other liquid
Note 1 to entry: ceramic slurry is used in ceramic processes such as dip coating, spray coating, screen printing,
slip casting, tape casting, spray drying and polishing.
Note 2 to entry: The category may include low-viscosity colloids with small particles with sizes in the nanometre
or micrometre range, and high-viscosity pastes with inhomogeneous mixtures.
2 © ISO 2018 – All rights reserved
a) Flow curve b) Viscosity curve
Key
shear rate 2 shear thickening (dilatant)
γ
τ shear stress 3 Newtonian
η viscosity 4 shear thinning (pseudoplastic)
1 Bingham plastic 5 thixotropy (time dependent)
Figure 1 — Summary of rheological behaviours
4 Principle
4.1 Rotational viscometer with defined shear rate
The viscosity, η, of a ceramic slurry measured using a rotational viscometer with a defined shear rate is
determined using Formula (1):
τ
η = (1)
γ
where
η is the viscosity, in Pa × s;
τ is the shear stress, in Pa;
−1
is the shear rate, in s .
γ
NOTE Symbols are in accordance with ISO 80000-4.
4.2 Single cylinder viscometer
A spindle of cylindrical or disk-like shape is driven in the ceramic slurry at a fixed angular velocity.
Torque is developed from the fluid resistance, and it depends on the viscosity of the slurry. Theoretically,
shear rate (or shear stress) cannot be determined, but viscosity can be measured as a function of
angular velocity.
NOTE The gradient of shear rate is not identical for all parts of the spindle. Therefore, the measurement
result is conventionally called apparent viscosity because it is not the viscosity determined from the gradient of a
known shear rate.
5 Apparatus
5.1 General
Rotational viscometers have various measuring geometries. Representative rotational viscometers
having a defined shear rate are a coaxial cylinder system (Annex A), a cone and plate system (Annex B),
and a parallel plates system (Annex C). In contrast, single cylinder viscometers without a defined shear
rate (Annex D) are able to give an apparent viscosity relatively quickly and reproducibly, and to provide
a comparison between samples.
5.2 Rotational viscometer with defined shear rate.
5.2.1 Measuring system
The measuring system shall consist of two rigid, symmetrical, coaxial surfaces between which the fluid
whose viscosity is to be measured is placed. One of these surfaces shall rotate while the other remains
at rest. The measuring system shall be such that the shear rate can be defined for each measurement.
A torque-measuring device shall be connected to one of the surfaces, thus permitting determination of
the torque required to overcome the viscous resistance of the fluid. Suitable measuring systems are the
coaxial double cylinder system (Annex A), cone and plate system (Annex B), and parallel plate system
(Annex C), as prescribed by JIS 8803 and ISO 20507. The dimensions of each measuring system are
detailed in Annexes A, B, and C, which are designed to ensure a geometrically similar flow field for all
types of measurement and all common types of basic instrument.
5.2.2 Basic capacity of the instrument
The basic instrument shall be designed to permit alternative rotors and stators to be fitted, for the
generation of a range of defined rotational frequencies (stepwise or continuously variable), and for
measuring the resulting torque, or vice versa (i.e. measurement of the necessary angular velocity to
generate a defined torque). The apparatus shall have a torque-measurement accuracy of 2 % of the full-
scale reading. Within the regular working range of the instrument, the accuracy of rotational-frequency
measurement shall be 2 % of the measured value. The repeatability of viscosity measurement shall
be ±2 %.
NOTE By using different measuring systems and rotational frequencies, most commercial instruments
−2 3
cover a viscosity range of at least 10 Pa × s to 10 Pa × s.
5.2.3 Installation of rotational viscometer
5.2.3.1 Coaxial double cylinder viscometer
a) The axis of rotation of the viscometer is installed vertically.
b) The surface of the sample is maintained at a lower position than the surface of the thermostat or
the top of the liquid jacket in the outer cylinder.
c) The inner cylinder is placed with its axis coinciding with the axis of the outer cylinder; the distance
from the bottom of the inner cylinder to the bottom of the outer cylinder is more than 5 mm. The
upper surface of the inner cylinder is more than 5 mm below the surface of the sample.
4 © ISO 2018 – All rights reserved
5.2.3.2 Cone and plate viscometer
a) The axis of rotation of the viscometer is installed vertically, and the plate horizontally.
b) The surface of the sample is maintained at a lower position than the surface of the thermostat or
the top of the liquid jacket in cone and plate.
c) The cone is adjusted so its tip lies on the axis of rotation, and the centre of the parallel plate is also
positioned on the axis.
NOTE The tip of the cone may cause friction if it is in contact with the plate. The tip means the imaginary tip
of the cone obtained by extrapolation if the end is cut flat.
5.3 Single cylinder viscometer.
The single cylinder viscometer has two main components relevant to this standard.
5.3.1 Main body of single cylinder viscometer
It is necessary to select the proper model of viscometer for the viscosity to be measured, each model
being suited to a specific range of viscosities. Brookfield provides single cylinder viscometers that are
classified as LV (low viscosity), RV (medium viscosity) and HA/HB (high viscosity), as prescribed in
ISO 2555. Other manufacturers also provide equivalent systems. The suitable uses of cylinder-type
viscometers are also determined by special spindles such as Krebs or vane types. Some single cylinder
viscometers do not have a demarcation point between the body/shaft and spindle to define
...


Questions, Comments and Discussion
Ask us and Technical Secretary will try to provide an answer. You can facilitate discussion about the standard in here.
Loading comments...