ISO 9364:2011
(Main)Continuous hot-dip 55 % aluminium/zinc alloy-coated steel sheet of commercial, drawing and structural qualities
Continuous hot-dip 55 % aluminium/zinc alloy-coated steel sheet of commercial, drawing and structural qualities
Tôles en acier revêtues en continu par immersion à chaud d'une couche d'alliage aluminium-zinc 55 % de qualité commerciale, pour emboutissage ou destinées à la construction
General Information
- Status
- Withdrawn
- Publication Date
- 22-Nov-2011
- Withdrawal Date
- 22-Nov-2011
- Technical Committee
- ISO/TC 17/SC 12 - Continuous mill flat rolled products
- Drafting Committee
- ISO/TC 17/SC 12 - Continuous mill flat rolled products
- Current Stage
- 9599 - Withdrawal of International Standard
- Start Date
- 21-Nov-2017
- Completion Date
- 12-Feb-2026
Relations
- Effective Date
- 21-Nov-2015
- Effective Date
- 16-Jan-2010
Get Certified
Connect with accredited certification bodies for this standard

Element Materials Technology
Materials testing and product certification.

Inštitut za kovinske materiale in tehnologije
Institute of Metals and Technology. Materials testing, metallurgical analysis, NDT.
Sponsored listings
Frequently Asked Questions
ISO 9364:2011 is a standard published by the International Organization for Standardization (ISO). Its full title is "Continuous hot-dip 55 % aluminium/zinc alloy-coated steel sheet of commercial, drawing and structural qualities". This standard covers: Continuous hot-dip 55 % aluminium/zinc alloy-coated steel sheet of commercial, drawing and structural qualities
Continuous hot-dip 55 % aluminium/zinc alloy-coated steel sheet of commercial, drawing and structural qualities
ISO 9364:2011 is classified under the following ICS (International Classification for Standards) categories: 77.140.50 - Flat steel products and semi-products. The ICS classification helps identify the subject area and facilitates finding related standards.
ISO 9364:2011 has the following relationships with other standards: It is inter standard links to ISO 9364:2017, ISO 9364:2006. Understanding these relationships helps ensure you are using the most current and applicable version of the standard.
ISO 9364:2011 is available in PDF format for immediate download after purchase. The document can be added to your cart and obtained through the secure checkout process. Digital delivery ensures instant access to the complete standard document.
Standards Content (Sample)
INTERNATIONAL ISO
STANDARD 9364
Fourth edition
2011-12-01
Continuous hot-dip 55 % aluminium/zinc
alloy-coated steel sheet of commercial,
drawing and structural qualities
Tôles en acier revêtues en continu par immersion à chaud d’une
couche d’alliage aluminium-zinc 55 % de qualité commerciale, pour
emboutissage ou destinées à la construction
Reference number
©
ISO 2011
All rights reserved. Unless otherwise specified, no part of this publication may be reproduced or utilized in any form or by any means,
electronic or mechanical, including photocopying and microfilm, without permission in writing from either ISO at the address below or ISO’s
member body in the country of the requester.
ISO copyright office
Case postale 56 • CH-1211 Geneva 20
Tel. + 41 22 749 01 11
Fax + 41 22 749 09 47
E-mail copyright@iso.org
Web www.iso.org
Published in Switzerland
ii © ISO 2011 – All rights reserved
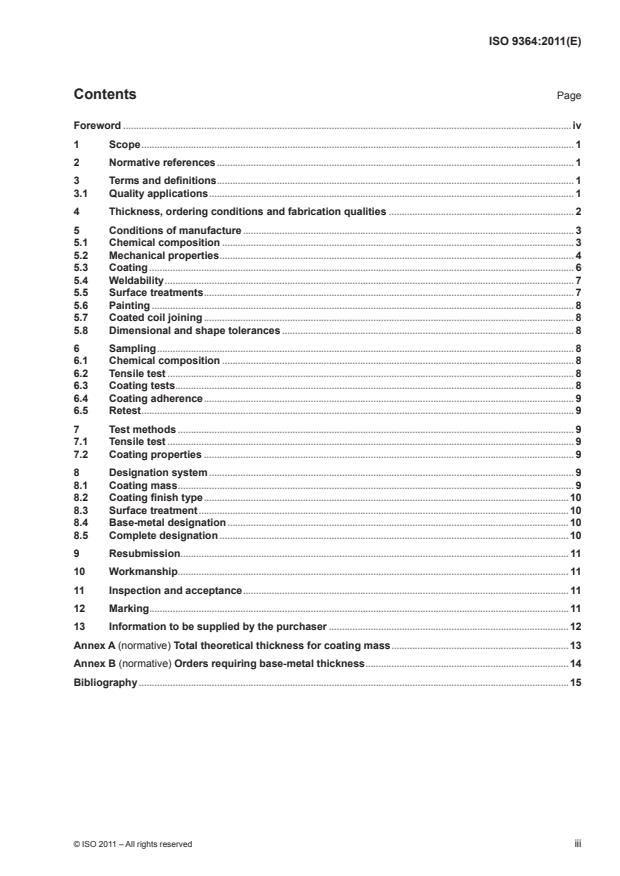
Contents Page
Foreword .iv
1 Scope . 1
2 Normative references . 1
3 Terms and definitions . 1
3.1 Quality applications . 1
4 Thickness, ordering conditions and fabrication qualities . 2
5 Conditions of manufacture . 3
5.1 Chemical composition . 3
5.2 Mechanical properties . 4
5.3 Coating . 6
5.4 Weldability . 7
5.5 Surface treatments . 7
5.6 Painting . 8
5.7 Coated coil joining . 8
5.8 Dimensional and shape tolerances . 8
6 Sampling . 8
6.1 Chemical composition . 8
6.2 Tensile test . 8
6.3 Coating tests . 8
6.4 Coating adherence . 9
6.5 Retest . 9
7 Test methods . 9
7.1 Tensile test . 9
7.2 Coating properties . 9
8 Designation system . 9
8.1 Coating mass . 9
8.2 Coating finish type .10
8.3 Surface treatment .10
8.4 Base-metal designation .10
8.5 Complete designation .10
9 Resubmission . 11
10 Workmanship . 11
11 Inspection and acceptance . 11
12 Marking . 11
13 Information to be supplied by the purchaser .12
Annex A (normative) Total theoretical thickness for coating mass .13
Annex B (normative) Orders requiring base-metal thickness .14
Bibliography .15
Foreword
ISO (the International Organization for Standardization) is a worldwide federation of national standards bodies
(ISO member bodies). The work of preparing International Standards is normally carried out through ISO
technical committees. Each member body interested in a subject for which a technical committee has been
established has the right to be represented on that committee. International organizations, governmental and
non-governmental, in liaison with ISO, also take part in the work. ISO collaborates closely with the International
Electrotechnical Commission (IEC) on all matters of electrotechnical standardization.
International Standards are drafted in accordance with the rules given in the ISO/IEC Directives, Part 2.
The main task of technical committees is to prepare International Standards. Draft International Standards
adopted by the technical committees are circulated to the member bodies for voting. Publication as an
International Standard requires approval by at least 75 % of the member bodies casting a vote.
Attention is drawn to the possibility that some of the elements of this document may be the subject of patent
rights. ISO shall not be held responsible for identifying any or all such patent rights.
ISO 9364 was prepared by Technical Committee ISO/TC 17, Steel, Subcommittee SC 12, Continuous mill flat
rolled products.
This fourth edition cancels and replaces the third edition (ISO 9364:2006), which has been technically revised.
iv © ISO 2011 – All rights reserved
INTERNATIONAL STANDARD ISO 9364:2011(E)
Continuous hot-dip 55 % aluminium/zinc alloy-coated steel
sheet of commercial, drawing and structural qualities
1 Scope
This International Standard applies to the characteristics of steel sheet of commercial, drawing and structural
qualities coated by a continuous hot-dip 55 % aluminium/zinc alloy-coating process. The aluminium/zinc alloy
composition by mass is nominally 55 % aluminium, 1,6 % silicon, and the balance zinc. The product is intended
for applications where the corrosion characteristics of aluminium coupled with those of zinc are desired.
2 Normative references
The following referenced documents are indispensable for the application of this document. For dated
references, only the edition cited applies. For undated references, the latest edition of the referenced document
(including any amendments) applies.
ISO 1460, Metallic coatings — Hot dip galvanized coatings on ferrous materials — Gravimetric determination
of the mass per unit area
ISO 2178, Non-magnetic coatings on magnetic substrates — Measurement of coating thickness — Magnetic
method
ISO 3497, Metallic coatings — Measurement of coating thickness — X-ray spectrometric methods
ISO 6892-1, Metallic materials — Tensile testing — Part 1: Method of test at room temperature
ISO 7438, Metallic materials — Bend test
ISO 16160, Continuously hot-rolled steel sheet products — Dimensional and shape tolerances
ISO 16162, Continuously cold-rolled steel sheet products — Dimensional and shape tolerances
ISO 16163, Continuously hot-dipped coated steel sheet products — Dimensional and shape tolerances
3 Terms and definitions
For the purposes of this document, the following terms and definitions apply.
3.1 Quality applications
3.1.1
commercial
intended for general fabricating purposes where sheet is used in the flat condition, or for bending or moderate
forming
3.1.2
drawing
intended for parts where drawing or severe forming may be involved
3.1.3
deep drawing
intended for parts where severe forming or severe drawing may be involved
3.2
normal spangle
coating formed as a result of unrestricted growth of aluminium/zinc crystals during normal solidification
3.3
smooth finish
smooth coating produced by skinpassing the coated material in order to achieve an improved surface condition
compared with the normal as-coated product
3.4
ageing
susceptibility to changes in properties with the passage of time
NOTE Ageing may result in a change in yield strength and a corresponding decrease in ductility during storage.
Ageing always has a negative effect on formability. The redevelopment of an upper yield point as a result of ageing can
result in a renewed susceptibility to surface imperfections, such as stretcher strain marks (Luder’s Lines) and fluting
when the steel is formed. To avoid these adverse outcomes, it is essential that the period between final processing at
the producing mill and fabrication be kept to a minimum. Rotation of stock, by using the oldest material first, is important.
Effective roller leveling immediately prior to fabrication can achieve reasonable freedom from stretcher strain marks.
3.5
skin pass
a light cold rolling of the coated steel sheet
NOTE The purpose of the skin pass is to produce a higher degree of surface smoothness and thereby improve the
surface appearance. The skin pass also temporarily minimizes the occurrence of a surface condition known as stretcher
strain (Luder’s Lines) or fluting during the fabrication of finished parts. The skin pass also controls and improves flatness.
Some increase in hardness and some loss in ductility will result from skin passing.
3.6
differential coating
coating having a coating mass on one surface that is significantly different from the coating mass on the other
surface
4 Thickness, ordering conditions and fabrication qualities
4.1 Aluminum-zinc alloy-coated steel sheet is produced in thicknesses up to and including 5,0 mm after
coating, and in widths of 600 mm and over in coils and cut lengths. Aluminium/zinc alloy-coated steel sheet less
than 600 mm wide may be slit from wide sheet and will be considered as sheet.
4.2 The thickness of hot-dip aluminum-zinc alloy-coated steel sheet may be specified as a combination of the
base metal and metallic coating, or as the base metal alone. The purchaser shall indicate on the order which
method of specifying thickness is required. In the event that the purchaser does not indicate any preference, the
thickness as a combination of the base metal and coating will be provided. Annex B describes the requirements
for specifying the thickness as base metal alone.
4.3 Aluminium/zinc alloy-coated steel sheet may be ordered in one of two ordering conditions.
— Ordering condition A): steel ordered to satisfy mechanical properties.
— Ordering condition B): steel ordered to make an identified part.
4.4 Aluminium/zinc alloy-coated steel sheet is available in several fabrication qualities.
a) Commercial: intended for general fabricating purposes, where sheet is used in the flat condition, or for
bending or moderate forming.
b) Drawing: intended for applications where drawing or severe forming may be involved.
c) Deep drawing: intended for applications where severe drawing or severe forming may be involved.
2 © ISO 2011 – All rights reserved
d) Structural: aluminium/zinc alloy-coated steel sheet is produced in six grades as defined by minimum yield
stress.
e) Interstitial free steel (IF Steel) may be applied on orders specifying 02 drawing [see item b)] or 03 deep
drawing [see item c)] provided that the customer be informed of the substitution and related shipping
documents that reflect the actual material shipped.
5 Conditions of manufacture
5.1 Chemical composition
The chemical composition (heat analysis) shall not exceed the values given in Tables 1 and 2.
Table 1 — Chemical composition (heat analysis)
Mass fractions in percent
Base-metal quality C Mn P S
Name Designation max. max. max. max.
Commercial 01 0,10 0,60 0,030 0,035
a
Drawing and deep drawing 02 and 03 0,06 0,50 0,020 0,025
Structural 220 to 550 0,25b 1,15 0,20c 0,040
a
If interstitial free steel (IF Steel) is to be applied on drawing 02 or deep drawing 03 orders [see 4.4, item e)], the values of 0,15 %
maximum for titanium and 0,10 % maximum for niobium and vanadium are acceptable to ensure that the carbon and nitrogen are fully
stabilized.
b
Grade 350 may exceed the limits in Table 3 or conform to all the requirements of Table 3 and have 0,40 % max. carbon.
c
Grades 250 and 280: phosphorus − 0,10 % max. Grade 350: phosphorus − 0,20 % max.
a
Table 2 — Limits on additional chemical elements
Heat analysis Product analysis
Elements
max. % max. %
b
Cu 0,20 0,23
b
Ni 0,20 0,23
b,c
Cr 0,15 0,19
b,c
Mo 0,06 0,07
e
Nb 0,008 0,018
d,e
V 0,008 0,018
e
Ti 0,008 0,018
a Each of the elements listed in this table shall be included in the report of the heat analysis. When the amount of copper, nickel,
chromium or molybdenum present is less than 0,02 %, the analysis may be reported as “< 0,02 %”.
b The sum of copper, nickel, chromium and molybdenum shall not exceed 0,50 % on heat analysis. When one or more of these
elements are specified, the sum does not apply; in which case, only the individual limits on the remaining elements will apply.
c The sum of chromium and molybdenum shall not exceed 0,16 % on heat analysis. When one or more of these elements are
specified, the sum does not apply; in which case, only the individual limits on the remaining elements will apply.
d Heat analysis greater than 0,008 may be supplied after agreement between the producer and consumer.
e For interstitial free steel (IF Steel), only the value of 0,15 % maximum for titanium, and 0,10 % maximum for niobium and vanadium,
are acceptable to ensure that the carbon and nitrogen are fully stabilized.
A verification analysis may be made by the purchaser to verify the specified analysis of the product and
shall take into consideration any normal heterogeneity. Non-killed steels (such as rimmed or capped) are not
technologically suited to product analysis. The product analysis tolerances are shown in Table 3.
Table 3 — Product analysis tolerances %
Element Maximum of specified element Tolerance over maximum specified
C 0,25 0,04
Mn 1,15 0,05
P 0,20 0,01
S 0,04 0,01
NOTE The above maximum tolerance is the allowable excess over the specified requirement and not the heat analysis.
The processes used in making the steel and in manufacturing aluminium/zinc alloy-coated sheet are left to the
discretion of the manufacturer. When requested, the purchaser shall be informed of the steel-making process
used. On request, a report of the heat analysis shall be made to the purchaser.
5.2 Mechanical properties
5.2.1 Commercial and drawing quality
Aluminium/zinc alloy-coated sheet of designations 01, 02 and 03 are supplied under the following two ordering
conditions.
Ordering condition A): Steel, when ordered according to its mechanical properties, at the time the steel is made
available for shipment, shall satisfy the applicable requirements of Table 4.
Ordering condition B): Steel, when ordered to make an identified part, shall be supplied with a commitment
for satisfactory manufacturing performance within a properly established breakage allowance, which shall be
previously agreed upon between the interested parties. In these cases, the part name, the details of fabrication,
and special requirements (such as freedom from stretcher strain or fluting) shall be specified.
4 © ISO 2011 – All rights reserved
Table 4 — Mechanical properties
c
A min.
a b
Base metal quality R max. R max.
e m
%
e
d d L = 5,65 S
o
Name Designation MPa MPa L = 50 mm L = 80 mm o
o o
Commercial 01 — — — — —
f
Drawing 02 300 430 24 23 22
Deep drawing 03 260 410 26 25 24
R = yield stress
e
R = tensile strength
m
A = percentage elongation after fracture
L = gauge length on test piece
o
S = original cross-sectional area of gauge length
o
NOTE 1 Time period for which values stated in this table are applicable.
Quality Time peri
...


Questions, Comments and Discussion
Ask us and Technical Secretary will try to provide an answer. You can facilitate discussion about the standard in here.
Loading comments...