ISO 17123-8:2015
(Main)Optics and optical instruments — Field procedures for testing geodetic and surveying instruments — Part 8: GNSS field measurement systems in real-time kinematic (RTK)
Optics and optical instruments — Field procedures for testing geodetic and surveying instruments — Part 8: GNSS field measurement systems in real-time kinematic (RTK)
ISO 17123-8:2015 specifies field procedures to be adopted when determining and evaluating the precision (repeatability) of Global Navigation Satellite System (GNSS) field measurement systems (this includes GPS, GLONASS, as well as the future systems like GALILEO) in real-time kinematic (GNSS RTK) and their ancillary equipment when used in building, surveying, and industrial measurements. Primarily, these tests are intended to be field verifications of the suitability of a particular instrument for the required application at hand and to satisfy the requirements of other standards. They are not proposed as tests for acceptance or performance evaluations that are more comprehensive in nature.
Optique et instruments d'optique — Méthodes d'essai sur site des instruments géodésiques et d'observation — Partie 8: Systèmes de mesure GNSS sur site en temps réel cinématique
General Information
- Status
- Published
- Publication Date
- 08-Jun-2015
- Technical Committee
- ISO/TC 172/SC 6 - Geodetic and surveying instruments
- Drafting Committee
- ISO/TC 172/SC 6 - Geodetic and surveying instruments
- Current Stage
- 9093 - International Standard confirmed
- Start Date
- 24-Nov-2025
- Completion Date
- 12-Feb-2026
Relations
- Effective Date
- 06-Jun-2022
- Effective Date
- 27-Oct-2012
Overview
ISO 17123-8:2015 - “Optics and optical instruments - Field procedures for testing geodetic and surveying instruments - Part 8: GNSS field measurement systems in real-time kinematic (RTK)” specifies standardized field procedures to determine and evaluate the precision (repeatability) of GNSS RTK measurement systems (GPS, GLONASS and future systems such as GALILEO) and their ancillary equipment when used in building, surveying and industrial measurements. The standard is intended for field verification of suitability for a given task and to satisfy requirements of other standards - it is not a substitute for comprehensive acceptance or performance testing.
Key technical topics and requirements
- Two test procedures:
- Simplified test procedure (Clause 5) for quicker verifications.
- Full test procedure (Clause 6) for detailed evaluation including statistical tests.
- Test network configuration:
- One base (reference) point and two rover points separated by minimum 2 m, maximum 20 m.
- Horizontal distances and height differences between rover points must be measured by non-RTK methods with precision better than 3 mm (used as nominal references).
- Measurement protocol:
- A series consists of five sets; each set measures rover point 1 then rover point 2.
- Time lag between sets ≈ 5 minutes (series span ≈ 25 minutes) to capture multipath variations (~20 min cycle).
- Start times of successive series separated by at least 90 minutes to reflect satellite geometry and atmospheric changes.
- Performance and uncertainty:
- Guidance on centring precision and antenna height: recommended standard deviations ≈ 1 mm.
- Procedures include statistical tests, Type A and Type B uncertainty evaluation and calculation of combined standard uncertainty following ISO/IEC GUM principles.
- Operational requirements:
- Ensure sufficient satellite count, maximum PDOP, observation time, and antenna model consistency (important for network RTK).
- Receiver initialization (reset power) and data collection after integer ambiguity fixing.
Practical applications and users
- Who uses ISO 17123-8:
- Land surveyors, geodetic and cadastral engineers
- Construction and industrial measurement teams
- GNSS equipment manufacturers and integrators
- Calibration laboratories, QA managers and project managers responsible for on-site verification
- Typical uses:
- Field verification of GNSS RTK systems before critical surveys
- On-site checks to confirm equipment suitability for required precision
- Supporting uncertainty budgets for measurement deliverables and compliance with related metrology standards
Related standards
- ISO 17123 series (Parts 1–7) - field procedures for other geodetic instruments
- ISO/IEC Guide 98-3 (GUM) - Guide to the expression of uncertainty in measurement
- ISO/IEC Guide 99 (VIM) - International vocabulary of metrology
- ISO 3534-1, ISO 9849, ISO 12858-2 - applicable statistical, vocabulary and ancillary device references
Keywords: ISO 17123-8, GNSS RTK, field procedures, real-time kinematic, surveying instruments, precision, repeatability, uncertainty, combined standard uncertainty, rover, base, PDOP, multipath.
Get Certified
Connect with accredited certification bodies for this standard

BSMI (Bureau of Standards, Metrology and Inspection)
Taiwan's standards and inspection authority.
Sponsored listings
Frequently Asked Questions
ISO 17123-8:2015 is a standard published by the International Organization for Standardization (ISO). Its full title is "Optics and optical instruments — Field procedures for testing geodetic and surveying instruments — Part 8: GNSS field measurement systems in real-time kinematic (RTK)". This standard covers: ISO 17123-8:2015 specifies field procedures to be adopted when determining and evaluating the precision (repeatability) of Global Navigation Satellite System (GNSS) field measurement systems (this includes GPS, GLONASS, as well as the future systems like GALILEO) in real-time kinematic (GNSS RTK) and their ancillary equipment when used in building, surveying, and industrial measurements. Primarily, these tests are intended to be field verifications of the suitability of a particular instrument for the required application at hand and to satisfy the requirements of other standards. They are not proposed as tests for acceptance or performance evaluations that are more comprehensive in nature.
ISO 17123-8:2015 specifies field procedures to be adopted when determining and evaluating the precision (repeatability) of Global Navigation Satellite System (GNSS) field measurement systems (this includes GPS, GLONASS, as well as the future systems like GALILEO) in real-time kinematic (GNSS RTK) and their ancillary equipment when used in building, surveying, and industrial measurements. Primarily, these tests are intended to be field verifications of the suitability of a particular instrument for the required application at hand and to satisfy the requirements of other standards. They are not proposed as tests for acceptance or performance evaluations that are more comprehensive in nature.
ISO 17123-8:2015 is classified under the following ICS (International Classification for Standards) categories: 17.180.30 - Optical measuring instruments. The ICS classification helps identify the subject area and facilitates finding related standards.
ISO 17123-8:2015 has the following relationships with other standards: It is inter standard links to ISO 21404:2020, ISO 17123-8:2007. Understanding these relationships helps ensure you are using the most current and applicable version of the standard.
ISO 17123-8:2015 is available in PDF format for immediate download after purchase. The document can be added to your cart and obtained through the secure checkout process. Digital delivery ensures instant access to the complete standard document.
Standards Content (Sample)
INTERNATIONAL ISO
STANDARD 17123-8
Second edition
2015-06-15
Optics and optical instruments —
Field procedures for testing geodetic
and surveying instruments —
Part 8:
GNSS field measurement systems in
real-time kinematic (RTK)
Optique et instruments d’optique — Méthodes d’essai sur site des
instruments géodésiques et d’observation —
Partie 8: Systèmes de mesure GNSS sur site en temps réel cinématique
Reference number
©
ISO 2015
© ISO 2015, Published in Switzerland
All rights reserved. Unless otherwise specified, no part of this publication may be reproduced or utilized otherwise in any form
or by any means, electronic or mechanical, including photocopying, or posting on the internet or an intranet, without prior
written permission. Permission can be requested from either ISO at the address below or ISO’s member body in the country of
the requester.
ISO copyright office
Ch. de Blandonnet 8 • CP 401
CH-1214 Vernier, Geneva, Switzerland
Tel. +41 22 749 01 11
Fax +41 22 749 09 47
copyright@iso.org
www.iso.org
ii © ISO 2015 – All rights reserved
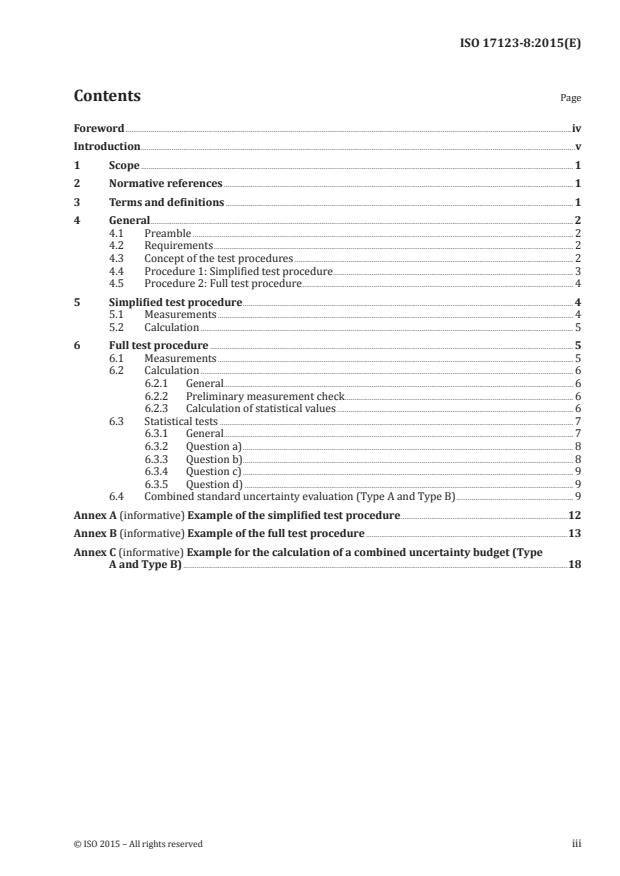
Contents Page
Foreword .iv
Introduction .v
1 Scope . 1
2 Normative references . 1
3 Terms and definitions . 1
4 General . 2
4.1 Preamble . 2
4.2 Requirements . 2
4.3 Concept of the test procedures . 2
4.4 Procedure 1: Simplified test procedure . 3
4.5 Procedure 2: Full test procedure . 4
5 Simplified test procedure . 4
5.1 Measurements . 4
5.2 Calculation . 5
6 Full test procedure . 5
6.1 Measurements . 5
6.2 Calculation . 6
6.2.1 General. 6
6.2.2 Preliminary measurement check . 6
6.2.3 Calculation of statistical values . 6
6.3 Statistical tests . 7
6.3.1 General. 7
6.3.2 Question a) . 8
6.3.3 Question b). 8
6.3.4 Question c) . 9
6.3.5 Question d) . 9
6.4 Combined standard uncertainty evaluation (Type A and Type B) . 9
Annex A (informative) Example of the simplified test procedure .12
Annex B (informative) Example of the full test procedure .13
Annex C (informative) Example for the calculation of a combined uncertainty budget (Type
A and Type B) .18
Foreword
ISO (the International Organization for Standardization) is a worldwide federation of national standards
bodies (ISO member bodies). The work of preparing International Standards is normally carried out
through ISO technical committees. Each member body interested in a subject for which a technical
committee has been established has the right to be represented on that committee. International
organizations, governmental and non-governmental, in liaison with ISO, also take part in the work.
ISO collaborates closely with the International Electrotechnical Commission (IEC) on all matters of
electrotechnical standardization.
The procedures used to develop this document and those intended for its further maintenance are
described in the ISO/IEC Directives, Part 1. In particular the different approval criteria needed for the
different types of ISO documents should be noted. This document was drafted in accordance with the
editorial rules of the ISO/IEC Directives, Part 2 (see www.iso.org/directives).
Attention is drawn to the possibility that some of the elements of this document may be the subject of
patent rights. ISO shall not be held responsible for identifying any or all such patent rights. Details of
any patent rights identified during the development of the document will be in the Introduction and/or
on the ISO list of patent declarations received (see www.iso.org/patents).
Any trade name used in this document is information given for the convenience of users and does not
constitute an endorsement.
For an explanation on the meaning of ISO specific terms and expressions related to conformity
assessment, as well as information about ISO’s adherence to the WTO principles in the Technical Barriers
to Trade (TBT) see the following URL: Foreword - Supplementary information
The committee responsible for this document is ISO/TC 172, Optics and photonics, Subcommittee SC 6,
Geodetic and surveying instruments.
This second edition cancels and replaces the first edition (ISO 17123-8:2007), which has been technically
revised.
ISO 17123 consists of the following parts, under the general title Optics and optical instruments — Field
procedures for testing geodetic and surveying instruments:
— Part 1: Theory
— Part 2: Levels
— Part 3: Theodolites
— Part 4: Electro-optical distance meters (EDM measurements to reflectors)
— Part 5: Total stations
— Part 6: Rotating lasers
— Part 7: Optical plumbing instruments
— Part 8: GNSS field measurement systems in real-time kinematic (RTK)
Annex A, Annex B, and Annex C of this part of ISO 17123 are for information only.
iv © ISO 2015 – All rights reserved
Introduction
This part of ISO 17123 specifies field procedures for adoption when determining and evaluating the
uncertainty of measurement results obtained by geodetic instruments and their ancillary equipment,
when used in building and surveying measuring tasks. Primarily, these tests are intended to be field
verifications of suitability of a particular instrument for the immediate task. They are not proposed as
tests for acceptance or performance evaluations that are more comprehensive in nature.
The definition and concept of uncertainty as a quantitative attribute to the final result of measurement
was developed mainly in the last two decades, even though error analysis has already long been a part
of all measurement sciences. After several stages, the CIPM (Comité Internationale des Poids et Mesures)
referred the task of developing a detailed guide to ISO. Under the responsibility of the ISO Technical
Advisory Group on Metrology (TAG 4) and in conjunction with six worldwide metrology organizations,
a guidance document on the expression of measurement uncertainty was compiled with the objective
of providing rules for use within standardization, calibration, laboratory, accreditation, and metrology
services. ISO/IEC Guide 98-3 was first published as the Guide to the Expression of Uncertainty in
Measurement (GUM) in 1995.
With the introduction of uncertainty in measurement in ISO 17123 (all parts), it is intended to finally
provide a uniform, quantitative expression of measurement uncertainty in geodetic metrology with the
aim of meeting the requirements of customers.
ISO 17123 (all parts) provides not only a means of evaluating the precision (experimental standard
deviation) of an instrument but also a tool for defining an uncertainty budget, which allows for the
summation of all uncertainty components, whether they are random or systematic, to a representative
measure of accuracy, i.e. the combined standard uncertainty.
ISO 17123 (all parts) therefore provides, for defining for each instrument investigated by the procedures,
a proposal for additional, typical influence quantities, which can be expected during practical use. The
customer can estimate, for a specific application, the relevant standard uncertainty components in
order to derive and state the uncertainty of the measuring result.
INTERNATIONAL STANDARD ISO 17123-8:2015(E)
Optics and optical instruments — Field procedures for
testing geodetic and surveying instruments —
Part 8:
GNSS field measurement systems in real-time kinematic
(RTK)
1 Scope
This part of ISO 17123 specifies field procedures to be adopted when determining and evaluating the
precision (repeatability) of Global Navigation Satellite System (GNSS) field measurement systems (this
includes GPS, GLONASS, as well as the future systems like GALILEO) in real-time kinematic (GNSS
RTK) and their ancillary equipment when used in building, surveying, and industrial measurements.
Primarily, these tests are intended to be field verifications of the suitability of a particular instrument
for the required application at hand and to satisfy the requirements of other standards. They are not
proposed as tests for acceptance or performance evaluations that are more comprehensive in nature.
2 Normative references
The following documents, in whole or in part, are normatively referenced in this document and are
indispensable for its application. For dated references, only the edition cited applies. For undated
references, the latest edition of the referenced document (including any amendments) applies.
ISO 3534-1, Statistics — Vocabulary and symbols — Part 1: General statistical terms and terms used in
probability
ISO 9849, Optics and optical instruments — Geodetic and surveying instruments — Vocabulary
ISO 12858-2, Optics and optical instruments — Ancillary devices for geodetic instruments — Part 2: Tripods
ISO 17123-1, Optics and optical instruments — Field procedures for testing geodetic and surveying
instruments — Part 1: Theory
ISO 17123-2, Optics and optical instruments — Field procedures for testing geodetic and surveying
instruments — Part 2: Levels
ISO 17123-5, Optics and optical instruments — Field procedures for testing geodetic and surveying
instruments — Part 5: Total stations
ISO/IEC Guide 98-3:2008, Uncertainty of measurement — Part 3: Guide to the expression of uncertainty in
measurement (GUM: 1995)
ISO/IEC Guide 99:2007, International vocabulary of metrology — Basic and general concepts and associated
terms (VIM)
3 Terms and definitions
For the purposes of this document, the terms and definitions given in ISO 3534-1, ISO 9849, ISO 17123-1,
ISO 17123-2, ISO 17123-5, ISO/IEC Guide 98-3, and ISO/IEC Guide 99 apply.
4 General
4.1 Preamble
The real-time kinematic positioning method is a relative measuring procedure using reference (base)
and moving (rover) receivers. For utilization of network RTK applications, a separate reference receiver
is not required. Both receivers perform the observations simultaneously and merge their results by
wireless transmission. Thus, the rover can display the instantaneous coordinates of the antenna in
any appropriate datum, e.g. International Terrestrial Reference Frame (ITRF). For practical use, they
are transformed to horizontal coordinates and ellipsoidal heights. Subsequently, only these types of
coordinate are treated as original observables.
4.2 Requirements
Before commencing surveying, it is important for the operator to ensure that the equipment, the GNSS
receiver and antenna, has sufficient precision for the task required.
The test should apply typically to a set of GNSS receivers and antennae listed in the manufacturer’s
reference manual. In case of using network RTK, consistency of antenna models (e.g. antenna correction
parameters) shall be ensured.
The receiver, antenna, and their ancillary equipment for rover points shall be checked to be in acceptable
condition according to the methods specified in the reference manual.
The operator shall follow the guidelines in the manufacturer’s reference manual for positioning
requirements such as the minimum number of satellites, maximum Position Dilution Of Precision
(PDOP) value, minimum observation time, and possibly other required pre-conditions.
The operator shall initialize the receiver by resetting its power prior to every measurement and collect
the data after the integer ambiguity fixing has been completed.
The following is the guideline for achievable centring precision expressed in standard deviation:
— centring: 1 mm;
— measuring the antenna height: 1 mm.
The results of the test are influenced by several factors, such as satellite configuration visible at the
points, ionospheric and tropospheric conditions, multipath environment around the points, precision of
the equipment, and quality of the software running in the rover equipment or in the system generating
the data transmitted from the base point.
This part of ISO 17123 describes two different field procedures, namely the simplified test procedure
and the full test procedure, as given in Clauses 5 and 6, respectively. Therefore, the observation time of
test procedure shall be so arranged to cover such variations.
The operator shall choose the procedure that is most appropriate to the requirements of the project.
4.3 Concept of the test procedures
The test field consists of a base point and two rover points. The location of the rover points shall be close
to the area of the task concerned. The separation of two rover points shall be a minimum of 2 m and
shall not exceed 20 m. The positions of two rover points may be selected at convenience in the field (see
Figure 1).
The horizontal distance and height difference between two rover points shall be determined by methods
with precision better than 3 mm other than RTK. These values are considered as nominal values and are
used in the first step of both test procedures. The horizontal distances and height differences calculated
from the measured coordinates in each set of measurements shall be compared with these values in
2 © ISO 2015 – All rights reserved
order to ensure that the measurements are free from any outlier. However, the nominal values are not
used in the statistical tests.
A series of measurements consists of five sets. Each set of measurements consists of successive
measurements at rover points 1 and 2.
Key
1 rover point 1
2 rover point 2
3 base point
a
Minimum 2 m; shall not exceed 20 m.
b
Corresponding distance according to the task concerned.
Figure 1 — Configuration of the field test network
The time lag between successive sets shall be approximately 5 min. This requirement makes the span
of a series of measurements to be about 25 min and five sets of measurements at both rover points
shall be uniformly distributed in this span. Due to the fact that the variation cycle of a typical multipath
influence is about 20 min, the measuring procedure will mostly cover the period of this influence factor.
The start time for each successive series shall be separated by at least 90 min. Thus, multiple series of
measurements tend to reflect influences such as changes in satellite configuration and variations in the
ionospheric and tropospheric conditions.
The standard deviations calculated over all measurements will therefore represent a quantitative
measure of precision in use including most of the typical influences in satellite positioning.
The simplified test procedure contains only one series of measurements and therefore only deals with
the outlier detection and with no statistical evaluation. Conversely, the full test procedure consists of
three series and additionally enables the estimation of standard deviations and statistical tests.
4.4 Procedure 1: Simplified test procedure
The simplified test procedure consists of a single series of measurements and provides an estimate as to
whether the precision of the equipment in use is within a specified allowable deviation.
The simplified test procedure is based on a limited number of measurements. Therefore, a significant
standard deviation cannot be obtained and the statistical tests are not applied. If a more precise
assessment of the equipment is required, it is recommended to adopt the more rigorous full test
procedure as given in 4.5.
4.5 Procedure 2: Full test procedure
The full test procedure shall be adopted to determine the best achievable measure of precision of the
equipment in use.
The full test procedure consists of three series of measurements.
The full test procedure is intended for determining the experimental standard deviation for a single
position and height measurement.
Further, this procedure may be used to determine the following:
— the measure of the precision of equipment under given conditions (including typical short- and long-
term influences);
— the measure of the precision of equipment used in different periods of time or under different
conditions (multiple samples);
— the measure of the capability of comparison between different precision of equipment achievable
under similar conditions.
Statistical tests shall be applied to determine whether the sample from the experiment belongs to the
same population as the one giving the theoretical standard deviation and to determine whether two
samples from different experiments belong to the same population.
5 Simplified test procedure
5.1 Measurements
For the simple test procedure, one series of measurements shall be taken, in which the observer shall
obtain five sets of measurements at two rover points. The sequence of the measurements is shown in
Table 1 in which the column labelled “Seq. No.” explicitly indicates the sequence of the measurement.
Table 1 — Sequence of the measurements for one series
Seq. Rover
Series Set Measurement
No. point
i j k x y h
1 1 1 1 x y h
1, 1, 1 1, 1, 1 1, 1, 1
2 1 1 2 x y h
1, 1, 2 1, 1, 2 1, 1, 2
...


Questions, Comments and Discussion
Ask us and Technical Secretary will try to provide an answer. You can facilitate discussion about the standard in here.
Loading comments...