ASTM C1350M-96(2003)
(Test Method)Standard Test Method for Measurement of Viscosity of Glass Between Softening Point and Annealing Range (Approximately 108 Pa·s to Approximately 10 13 Pa·s) by Beam Bending (Metric)
Standard Test Method for Measurement of Viscosity of Glass Between Softening Point and Annealing Range (Approximately 10<sup>8</sup> Pa·s to Approximately 10 <sup>13</sup> Pa·s) by Beam Bending (Metric)
SCOPE
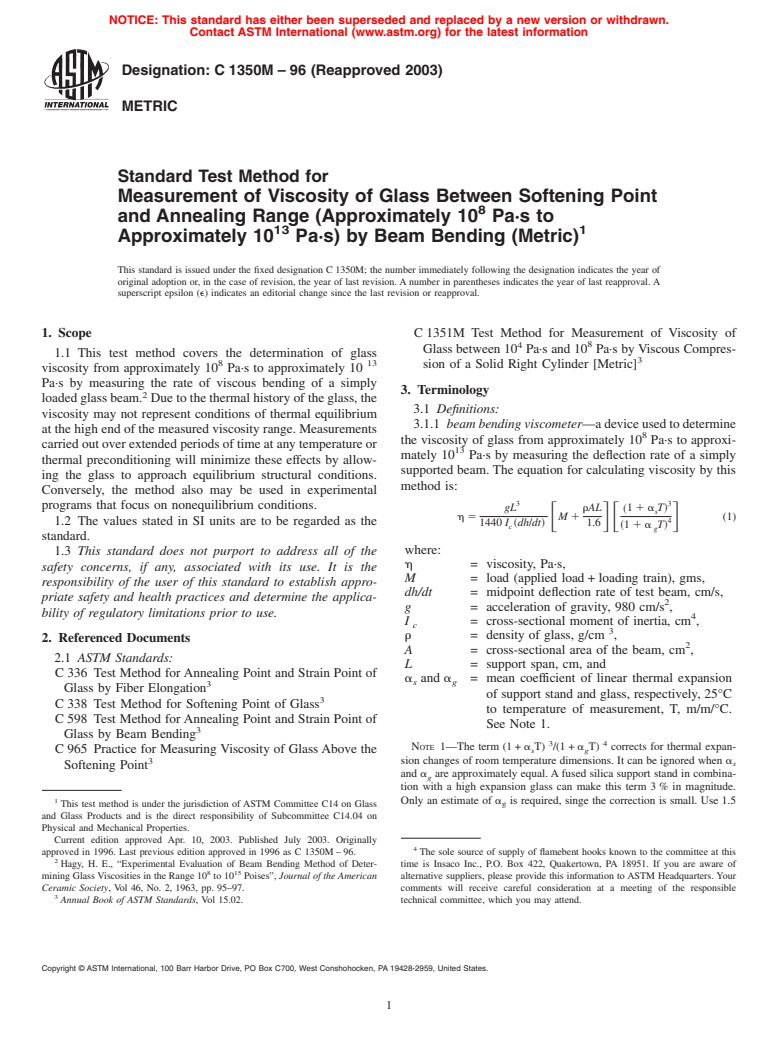
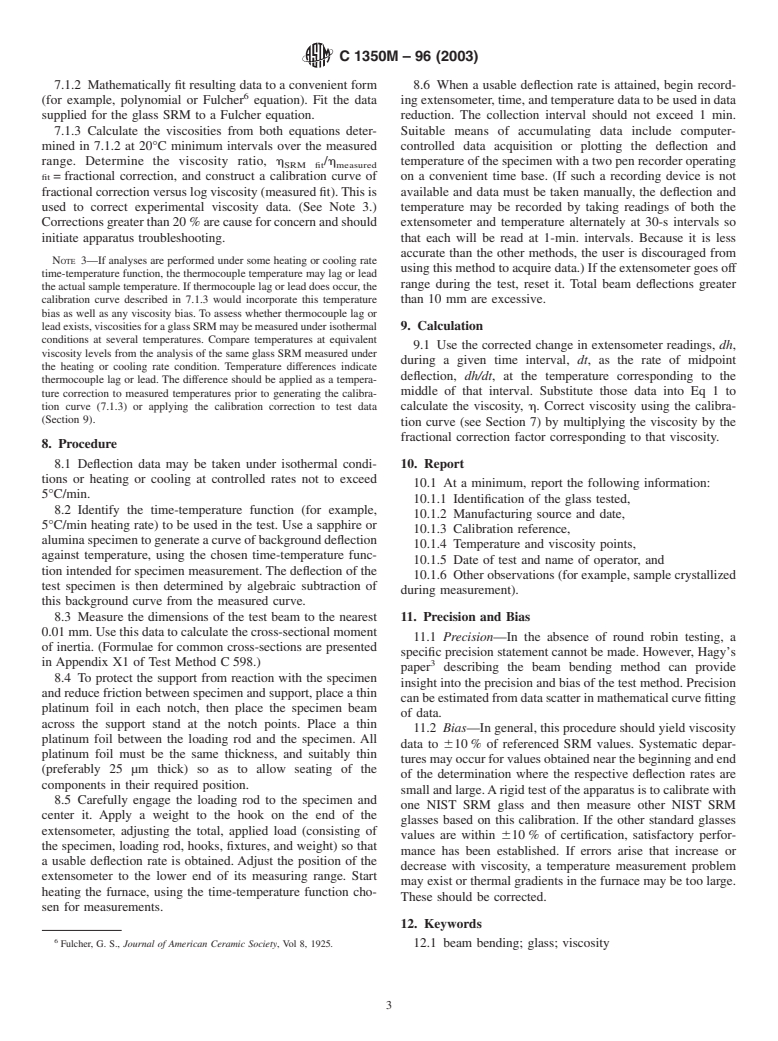
1.1 This test method covers the determination of glass viscosity from approximately 108 Pa·s to approximately 10 13 Pa·s by measuring the rate of viscous bending of a simply loaded glass beam². Due to the thermal history of the glass, the viscosity may not represent conditions of thermal equilibrium at the high end of the measured viscosity range. Measurements carried out over extended periods of time at any temperature or thermal preconditioning will minimize these effects by allowing the glass to approach equilibrium structural conditions. Conversely, the method also may be used in experimental programs that focus on nonequilibrium conditions.
1.2 The values stated in SI units are to be regarded as the standard.
1.3 This standard does not purport to address all of the safety concerns, if any, associated with its use. It is the responsibility of the user of this standard to establish appropriate safety and health practices and determine the applicability of regulatory limitations prior to use.
General Information
Relations
Buy Standard
Standards Content (Sample)
NOTICE: This standard has either been superseded and replaced by a new version or withdrawn.
Contact ASTM International (www.astm.org) for the latest information
Designation:C1350M–96 (Reapproved 2003)
METRIC
Standard Test Method for
Measurement of Viscosity of Glass Between Softening Point
and Annealing Range (Approximately 10 Pa·s to
Approximately 10 Pa·s) by Beam Bending (Metric)
This standard is issued under the fixed designation C 1350M; the number immediately following the designation indicates the year of
original adoption or, in the case of revision, the year of last revision. A number in parentheses indicates the year of last reapproval. A
superscript epsilon (e) indicates an editorial change since the last revision or reapproval.
1. Scope C 1351M Test Method for Measurement of Viscosity of
Glass between 10 Pa·s and 10 Pa·s by Viscous Compres-
1.1 This test method covers the determination of glass
8 13
sion of a Solid Right Cylinder [Metric]
viscosity from approximately 10 Pa·s to approximately 10
Pa·s by measuring the rate of viscous bending of a simply
3. Terminology
loaded glass beam. Due to the thermal history of the glass, the
3.1 Definitions:
viscosity may not represent conditions of thermal equilibrium
3.1.1 beam bending viscometer—adeviceusedtodetermine
at the high end of the measured viscosity range. Measurements
the viscosity of glass from approximately 10 Pa·s to approxi-
carried out over extended periods of time at any temperature or
mately 10 Pa·s by measuring the deflection rate of a simply
thermal preconditioning will minimize these effects by allow-
supported beam. The equation for calculating viscosity by this
ing the glass to approach equilibrium structural conditions.
method is:
Conversely, the method also may be used in experimental
3 3
programs that focus on nonequilibrium conditions.
gL rAL 11a T
~ !
s
h5 M 1 (1)
F GF 4G
1.2 The values stated in SI units are to be regarded as the 1.6
1440 I ~dh/dt!
~11a T!
c
g
standard.
where:
1.3 This standard does not purport to address all of the
h = viscosity, Pa·s,
safety concerns, if any, associated with its use. It is the
M = load (applied load + loading train), gms,
responsibility of the user of this standard to establish appro-
dh/dt = midpoint deflection rate of test beam, cm/s,
priate safety and health practices and determine the applica-
g = acceleration of gravity, 980 cm/s ,
bility of regulatory limitations prior to use.
I = cross-sectional moment of inertia, cm ,
c
r = density of glass, g/cm ,
2. Referenced Documents
A = cross-sectional area of the beam, cm ,
2.1 ASTM Standards:
L = support span, cm, and
C 336 Test Method for Annealing Point and Strain Point of
a and a = mean coefficient of linear thermal expansion
s g
Glass by Fiber Elongation
of support stand and glass, respectively, 25°C
C 338 Test Method for Softening Point of Glass
to temperature of measurement, T, m/m/°C.
C 598 Test Method for Annealing Point and Strain Point of
See Note 1.
Glass by Beam Bending
3 4
NOTE 1—The term (1 + a T) /(1 + a T) corrects for thermal expan-
C 965 Practice for Measuring Viscosity of GlassAbove the s g
3 sion changes of room temperature dimensions. It can be ignored when a
s
Softening Point
and a are approximately equal. A fused silica support stand in combina-
g
tion with a high expansion glass can make this term 3 % in magnitude.
1 Only an estimate of a is required, singe the correction is small. Use 1.5
g
This test method is under the jurisdiction of ASTM Committee C14 on Glass
and Glass Products and is the direct responsibility of Subcommittee C14.04 on
Physical and Mechanical Properties.
Current edition approved Apr. 10, 2003. Published July 2003. Originally
approved in 1996. Last previous edition approved in 1996 as C 1350M – 96. The sole source of supply of flamebent hooks known to the committee at this
Hagy, H. E., “Experimental Evaluation of Beam Bending Method of Deter- time is Insaco Inc., P.O. Box 422, Quakertown, PA 18951. If you are aware of
8 15
mining Glass Viscosities in the Range 10 to 10 Poises”, Journal of the American alternative suppliers, please provide this information to ASTM Headquarters. Your
Ceramic Society, Vol 46, No. 2, 1963, pp. 95–97. comments will receive careful consideration at a meeting of the responsible
Annual Book of ASTM Standards, Vol 15.02. technical committee, which you may attend.
Copyright © ASTM International, 100 Barr Harbor Drive, PO Box C700, West Conshohocken, PA 19428-2959, United States.
C1350M–96 (2003)
times the room temperature coefficient if data are unavailable.
of these notches define the support span once the specimen
beam starts to deflect. A support span of about 5 cm (62 in.)
4. Significance and Use
is recommended. A suitable loading rod can be provided by a
4.1 This test method is well suited for measuring the
single-crystal sapphire rod flame bent at one end in the form of
viscosity of glasses in ranges higher than those covered by
a shepherd’s crook. This crook will contribute to the load on
parallel plate (see Test Method C 1351) and rotational viscom-
the specimen, so its weight should be kept to a minimum.
etry (see Practice C 965) methods. This test method is useful
NOTE 2—Vitreous silica is a suitable material for both support stand
for providing information related to the behavior of glass after
and loading rod. It is not recommended for temperatures above 900°C.
it has been formed into an object of commerce and in research
5.6 Extensometer for Measuring Midpoint Deflection:
and development.
5.6.1 The means for observing the rate of deflection of the
5. Apparatus specimen shall allow reliable reading of total deflection of at
least 10 mm. The extensometer shall permit direct reading of
5.1 The apparatus shall consist of a furnace, a means of
0.010 mm and estimates of 0.0010 mm. Its accuracy shall be
controlling its temperature and heating rate, specimen holders
such that the error of indication will not exceed 62 % for any
and loading rod, and a means of observing the rate of viscous
measured deflection. This will limit the minimum deflection
deflection of the glass specimen.
that may be used in calculation.Alinearly variable differential
5.2 Furnace:
transformer (LVDT) is suitable for this purpose, as is any other
5.2.1 The furnace shall be electrically heated by resistance
device (for example, optical or capacitive), provided that
elements. The dimensions and the details of the furnace
deflection is reliably measured as specified.
construction are not critical; its cross-section can be circular of
5.7 Weights:
75 mm (;3 in.) diameter or square with sides of 75 mm. The
5.7.1 A set of weights spanning the range from 1 to 500 g
furnace should have a constant temperature zone that covers
and accurate to 0.1 % relative is required.
the specimen geometry, including the deflection range. Differ-
5.8 Micrometre Calipers:
ences in temperature greater than 2°C within that constant
5.8.1 Micrometre calipers which can be read to an accuracy
temperature zone are unacceptable.
of at least 0.01 mm are required for measuring specimen
5.3 Temperature Measuring and Indicating Instruments:
dimensions.
5.3.1 For the measurement of temperature, there shall be
5.9 Analytical Balance:
provided a calibrated Type K, R, or S thermocouple. The
5.9.1 An analytical balance capable of weighing the shep-
thermocouple shall be housed in a double-bore alumina tube
herd’s crook and loading train to an accuracy of 0.1 % relative.
with its junction placed within 5 mm of the specimen near the
axis of the furnace. The thermocouple shall be referenced to
6. Preparation of Test Specimen
0°C by means of an ice bath, and its emf measured with a
6.1 Specimens may either be flame drawn or centerless
calibrated potentiometer that can be read with a sensitivity of
ground into cylindrical form or diamond-saw cut and mill
0.1°Candanaccuracyof 60.5°C.Precautionsshallbetakento
ground into rectangular form. Nonuniformity of any dimension
ensure that the ice bath is maintained at 0°C throughout the
along the length of the specimen shall not exceed 2 %. When
test. Alternately, the output of the thermocouple can be
nonuniformity of any dimension exists, an average value shall
measured on a calibrated, direct reading meter (electronic
be used.
thermometer) that can be read with a sensitivity of 0.1°C and
6.2 The numerical ratio of beam span to moment of inertia
an accuracy of 60.5°C. See Note 3 for temperature lag-lead
shall not be less than 60. The thickness or diameter to span
corrections.
ratio shall be less than 0.1.
5.4 Furnace Control:
5.4.1 Suitable means shall be provided for maintaining the
7. Calibration
furnace temperature at a fixed control point and for controlling
the heating and cooling rates. Commercially available pro- 7.1 Direct calibration of the apparatus is accomplished by
gramming equipment provides
...


Questions, Comments and Discussion
Ask us and Technical Secretary will try to provide an answer. You can facilitate discussion about the standard in here.