ASTM E388-04(2009)
(Test Method)Standard Test Method for Wavelength Accuracy and Spectral Bandwidth of Fluorescence Spectrometers ,
Standard Test Method for Wavelength Accuracy and Spectral Bandwidth of Fluorescence Spectrometers <sup>,</sup>
ABSTRACT
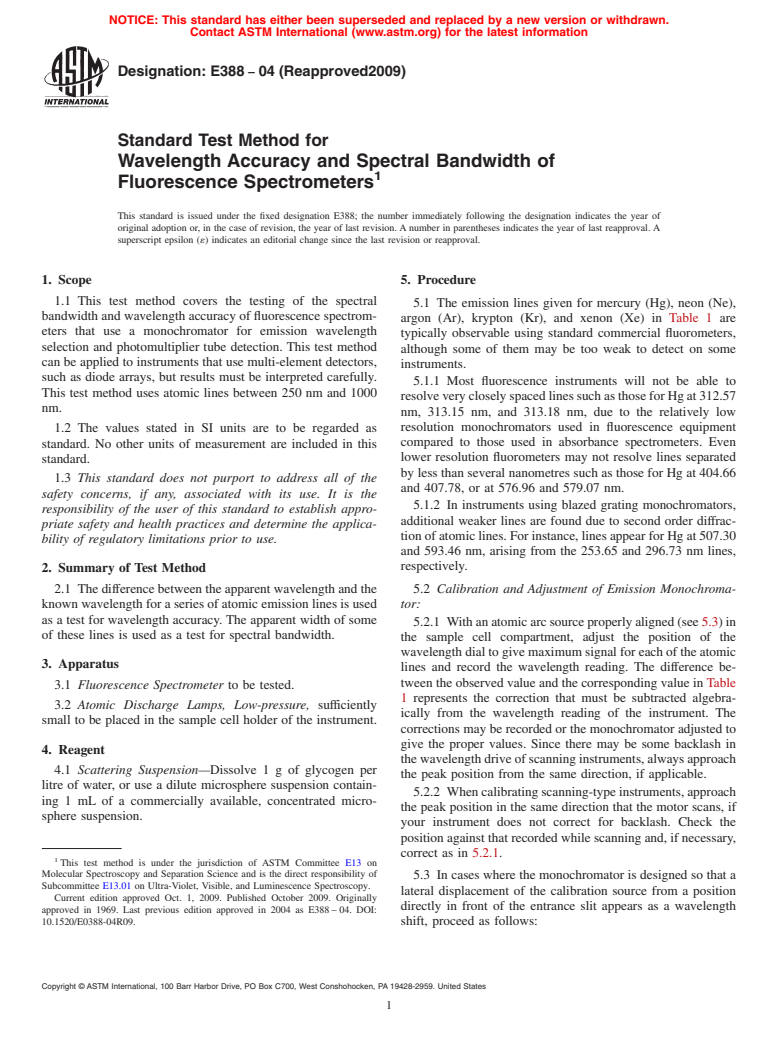
This test method covers the testing of the spectral bandwidth and wavelength accuracy of fluorescence spectrometers that use a monochromator for emission wavelength selection and photomultiplier tube detection. The method can be applied to instruments that use multi-element detectors, such as diode arrays, but results must be interpreted carefully. Atomic lines between 250 nm and 1000 nm are used in the method. The difference between the apparent wavelength and the known wavelength for a series of atomic emission lines is used as a test for wavelength accuracy. The apparent width of some of these lines is used as a test for spectral bandwidth.
SCOPE
1.1 This test method covers the testing of the spectral bandwidth and wavelength accuracy of fluorescence spectrometers that use a monochromator for emission wavelength selection and photomultiplier tube detection. This test method can be applied to instruments that use multi-element detectors, such as diode arrays, but results must be interpreted carefully. This test method uses atomic lines between 250 nm and 1000 nm.
1.2 The values stated in SI units are to be regarded as standard. No other units of measurement are included in this standard.
1.3 This standard does not purport to address all of the safety concerns, if any, associated with its use. It is the responsibility of the user of this standard to establish appropriate safety and health practices and determine the applicability of regulatory limitations prior to use.
General Information
Relations
Buy Standard
Standards Content (Sample)
NOTICE: This standard has either been superseded and replaced by a new version or withdrawn.
Contact ASTM International (www.astm.org) for the latest information
Designation: E388 − 04 (Reapproved2009)
Standard Test Method for
Wavelength Accuracy and Spectral Bandwidth of
Fluorescence Spectrometers
This standard is issued under the fixed designation E388; the number immediately following the designation indicates the year of
original adoption or, in the case of revision, the year of last revision. A number in parentheses indicates the year of last reapproval. A
superscript epsilon (´) indicates an editorial change since the last revision or reapproval.
1. Scope 5. Procedure
1.1 This test method covers the testing of the spectral
5.1 The emission lines given for mercury (Hg), neon (Ne),
bandwidth and wavelength accuracy of fluorescence spectrom-
argon (Ar), krypton (Kr), and xenon (Xe) in Table 1 are
eters that use a monochromator for emission wavelength
typically observable using standard commercial fluorometers,
selection and photomultiplier tube detection. This test method
although some of them may be too weak to detect on some
can be applied to instruments that use multi-element detectors,
instruments.
such as diode arrays, but results must be interpreted carefully.
5.1.1 Most fluorescence instruments will not be able to
This test method uses atomic lines between 250 nm and 1000
resolveverycloselyspacedlinessuchasthoseforHgat312.57
nm.
nm, 313.15 nm, and 313.18 nm, due to the relatively low
resolution monochromators used in fluorescence equipment
1.2 The values stated in SI units are to be regarded as
compared to those used in absorbance spectrometers. Even
standard. No other units of measurement are included in this
lower resolution fluorometers may not resolve lines separated
standard.
by less than several nanometres such as those for Hg at 404.66
1.3 This standard does not purport to address all of the
and 407.78, or at 576.96 and 579.07 nm.
safety concerns, if any, associated with its use. It is the
5.1.2 In instruments using blazed grating monochromators,
responsibility of the user of this standard to establish appro-
additional weaker lines are found due to second order diffrac-
priate safety and health practices and determine the applica-
tion of atomic lines. For instance, lines appear for Hg at 507.30
bility of regulatory limitations prior to use.
and 593.46 nm, arising from the 253.65 and 296.73 nm lines,
respectively.
2. Summary of Test Method
2.1 The difference between the apparent wavelength and the 5.2 Calibration and Adjustment of Emission Monochroma-
known wavelength for a series of atomic emission lines is used tor:
as a test for wavelength accuracy. The apparent width of some
5.2.1 Withanatomicarcsourceproperlyaligned(see5.3)in
of these lines is used as a test for spectral bandwidth.
the sample cell compartment, adjust the position of the
wavelengthdialtogivemaximumsignalforeachoftheatomic
3. Apparatus
lines and record the wavelength reading. The difference be-
tween the observed value and the corresponding value in Table
3.1 Fluorescence Spectrometer to be tested.
1 represents the correction that must be subtracted algebra-
3.2 Atomic Discharge Lamps, Low-pressure, sufficiently
ically from the wavelength reading of the instrument. The
small to be placed in the sample cell holder of the instrument.
corrections may be recorded or the monochromator adjusted to
give the proper values. Since there may be some backlash in
4. Reagent
thewavelengthdriveofscanninginstruments,alwaysapproach
4.1 Scattering Suspension—Dissolve1gof glycogen per
the peak position from the same direction, if applicable.
litre of water, or use a dilute microsphere suspension contain-
5.2.2 Whencalibratingscanning-typeinstruments,approach
ing 1 mL of a commercially available, concentrated micro-
the peak position in the same direction that the motor scans, if
sphere suspension.
your instrument does not correct for backlash. Check the
position against that recorded while scanning and, if necessary,
correct as in 5.2.1.
This test method is under the jurisdiction of ASTM Committee E13 on
Molecular Spectroscopy and Separation Science and is the direct responsibility of
5.3 In cases where the monochromator is designed so that a
Subcommittee E13.01 on Ultra-Violet, Visible, and Luminescence Spectroscopy.
lateral displacement of the calibration source from a position
Current edition approved Oct. 1, 2009. Published October 2009. Originally
directly in front of the entrance slit appears as a wavelength
approved in 1969. Last previous edition approved in 2004 as E388 – 04. DOI:
10.1520/E0388-04R09. shift, proceed as follows:
Copyright © ASTM International, 100 Barr Harbor Drive, PO Box C700, West Conshohocken, PA 19428-2959. United States
E388 − 04 (2009)
A
TABLE 1 Atomic Emission Lines for Wavelength Accuracy
Hg Ne Ar Kr Xe
253.65 336.99 633.44 830.03 696.54 427.40 645.63 450.10
296.73 341.79 638.30 836.57 706.72 428.30 722.41 458.28
302.15 345.42 640.11 837.76 727.29 431.96 758.74 462.43
312.57 346.66 640.22 841.72 738.40 436.26 760.15 467.12
313.15 347.26 650.65 841.84 750.39 437.61 768.53 469.70
313.18 350.12 653.29 846.34 751.47 440.00 769.45 473.42
334.15 352.05 659.90 857.14 763.51 442.52 785.48 480.70
365.02 359.35 667.83 859.13 772.38 445.39 805.95 482.97
404.66 533.08 671.70 863.46 794.82 446.37 810.44 484.33
407.78 534.11 692.95 864.70 800.62 450.24 811.29 491.65
435.84 540.06 703.24 865.44 801.48 557.03 819.00 492.32
546.07 576.44 717.39 865.55 810.37 564.96 826.32 711.96
576.96 582.01 724.52 867.95 811.53 567.25 828.10 764.20
579.07 585.25 743.89 868.19 826.45 583.29 829.81 823.16
588.19 783.91 870.41 840.82 587.09 850.89 828.01
594.48 792.71 877.17 842.46 599.39 877.67 834.68
597.55 793.70 878.06 912.30 601.21 975.18 840.92
603.00 794.32 885.39 922.45 605.61 881.94
607.43 808.25 920.18 965.78 895.22
609.62 811.85 930.09 979.97
614.31 812.89 932.65 992.32
616.36 813.64 942.54
621.73 825.94 948.67
626.65 826.61 953.42
630.48 826.71
A
Wavelength values have been obtained from Harrison, G.R., MIT Wavelength
...
This document is not anASTM standard and is intended only to provide the user of anASTM standard an indication of what changes have been made to the previous version. Because
it may not be technically possible to adequately depict all changes accurately, ASTM recommends that users consult prior editions as appropriate. In all cases only the current version
of the standard as published by ASTM is to be considered the official document.
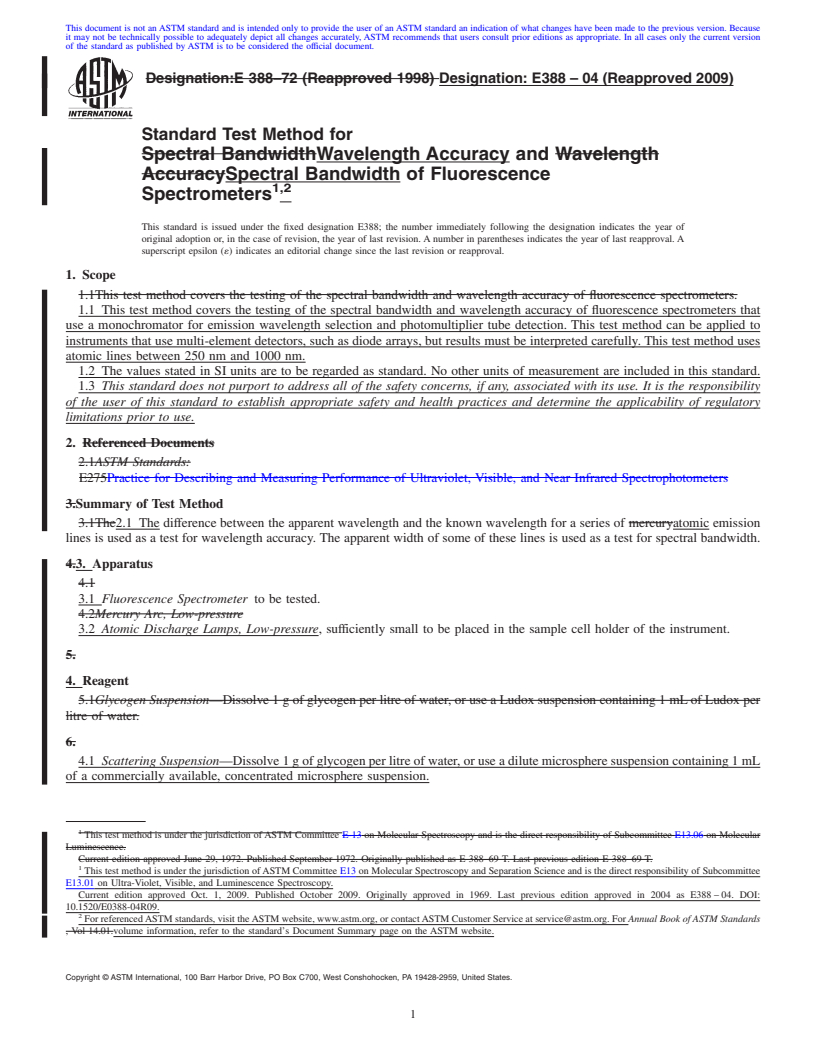
Designation:E 388–72 (Reapproved 1998) Designation:E388–04(Reapproved2009)
Standard Test Method for
Spectral BandwidthWavelength Accuracy and Wavelength
AccuracySpectral Bandwidth of Fluorescence
,
Spectrometers
This standard is issued under the fixed designation E388; the number immediately following the designation indicates the year of
original adoption or, in the case of revision, the year of last revision. A number in parentheses indicates the year of last reapproval. A
superscript epsilon (´) indicates an editorial change since the last revision or reapproval.
1. Scope
1.1This test method covers the testing of the spectral bandwidth and wavelength accuracy of fluorescence spectrometers.
1.1 This test method covers the testing of the spectral bandwidth and wavelength accuracy of fluorescence spectrometers that
use a monochromator for emission wavelength selection and photomultiplier tube detection. This test method can be applied to
instruments that use multi-element detectors, such as diode arrays, but results must be interpreted carefully. This test method uses
atomic lines between 250 nm and 1000 nm.
1.2 The values stated in SI units are to be regarded as standard. No other units of measurement are included in this standard.
1.3 This standard does not purport to address all of the safety concerns, if any, associated with its use. It is the responsibility
of the user of this standard to establish appropriate safety and health practices and determine the applicability of regulatory
limitations prior to use.
2. Referenced Documents
2.1ASTM Standards:
E275Practice for Describing and Measuring Performance of Ultraviolet, Visible, and Near Infrared Spectrophotometers
3.Summary of Test Method
3.1The2.1 The difference between the apparent wavelength and the known wavelength for a series of mercuryatomic emission
lines is used as a test for wavelength accuracy. The apparent width of some of these lines is used as a test for spectral bandwidth.
4.3. Apparatus
4.1
3.1 Fluorescence Spectrometer to be tested.
4.2Mercury Arc, Low-pressure
3.2 Atomic Discharge Lamps, Low-pressure, sufficiently small to be placed in the sample cell holder of the instrument.
5.
4. Reagent
5.1Glycogen Suspension—Dissolve1gof glycogen per litre of water, or use a Ludox suspension containing 1 mLof Ludox per
litre of water.
6.
4.1 Scattering Suspension—Dissolve1gof glycogen per litre of water, or use a dilute microsphere suspension containing 1 mL
of a commercially available, concentrated microsphere suspension.
This test method is under the jurisdiction of ASTM Committee E-13 on Molecular Spectroscopy and is the direct responsibility of Subcommittee E13.06 on Molecular
Luminescence.
Current edition approved June 29, 1972. Published September 1972. Originally published as E 388–69 T. Last previous edition E 388–69 T.
This test method is under the jurisdiction ofASTM Committee E13 on Molecular Spectroscopy and Separation Science and is the direct responsibility of Subcommittee
E13.01 on Ultra-Violet, Visible, and Luminescence Spectroscopy.
Current edition approved Oct. 1, 2009. Published October 2009. Originally approved in 1969. Last previous edition approved in 2004 as E388 – 04. DOI:
10.1520/E0388-04R09.
For referencedASTM standards, visit theASTM website, www.astm.org, or contactASTM Customer Service at service@astm.org. For Annual Book ofASTM Standards
, Vol 14.01.volume information, refer to the standard’s Document Summary page on the ASTM website.
Copyright © ASTM International, 100 Barr Harbor Drive, PO Box C700, West Conshohocken, PA 19428-2959, United States.
E388–04 (2009)
5. Procedure
6.1Lines suitable for calibration are the nine mercury lines at 253.65, 296.73, 334.15, 404.66, 407.78, 435.84, 546.07, 576.96,
and 579.07 nm. These are listed in the Mercury Arc Emission Spectrum in the Ultraviolet and Visible Regions fig. of Practice E
275E 275.
6.1.1Other lines are suitable for calibration such as some of the weaker lines included in the Mercury Arc Emission Spectrum
in the Ultraviolet and Visible Regions fig. of Practice E 275E 275, but not included in the above list. The comparatively low
resolution monochromators often used in fluorescence equipment may not resolve pairs of lines such as at 404.66 and 407.78, or
at 576.96 and 579.07 nm.
6.1.2In instruments using grating monochromators, additional weaker lines are found due to second order diffraction of mercury
lines. Thus, lines appear at 507.30, 593.46, 668.30 nm, arising from the 253.65, 296.73, and 334.15-nm lines, respectively.
6.2
5.1 The emission lines given for mercury (Hg), neon (Ne), argon (Ar), krypton (Kr), and xenon (Xe) in Table 1 are typically
observable using standard commercial fluorometers, although some of them may be too weak to detect on some instruments.
5.1.1 Most fluorescence instruments will not be able to resolve very closely spaced lines such as those for Hg at 312.57 nm,
313.15nm,and313.18nm,duetotherelativelylowresolutionmonochromatorsusedinfluorescenceequipmentcomparedtothose
used in absorbance spectrometers. Even lower resolution fluorometers may not resolve lines separated by less than several
nanometres such as those for Hg at 404.66 and 407.78, or at 576.96 and 579.07 nm.
5.1.2 In instruments using blazed grating monochromators, additional weaker lines are found due to second order diffraction of
atomic lines. For instance, lines appear for Hg at 507.30 and 593.46 nm, arising from the 253.65 and 296.73 nm lines, respectively.
5.2 Calibration and Adjustment of Emission Monochromator:
6.2.15.2.1 With the mercuryan atomic arc source properly aligned (see 5.3) in the sample cell compartment, adjust the position
of the wavelength dial to give maximum signal for each of the mercuryatomic lines and record the wavelength reading. The
difference between the observed value and the corresponding value in 6.1Table 1 represents the correction that must be subtracted
algebraically from the wavelength reading onof the dial.instrument. The corrections may be recorded or the monochromator
adjusted to give the proper values. Since there is may be some backlash in the wavelength drive, always adjust the dial todrive
of scanning instruments, always approach the peak readingposition from the same direction, if applicable.
65.2.2 When calibrating scanning-type instruments, turnapproach the dial to give the peak readingposition in the same direction
that the dial is turned by the scan motor. motor scans, if your instrument does not correct for backlash. Check the dial reading
position against the value that recorded while scanning and, if necessary, correct as in 6.2.15.2.1.
6.3In5.3 In cases where the monochromator is designed so that a lateral displacement of the calibration source from a position
directly in front of the entrance slit appears as a wavelength shift, proceed as follows:
65.3.1 Instead of placing the mercuryatomic lamp in front of the entrance slit of the monochromator, fill a sample cell with a
Ludox dilute scattering suspension, diluted to 1000 mL with distilled water, or with a glycogen suspension containing1gof
glycogen per litre of distilled water. as described in 4.1.
A
TABLE 1 Atomic Emission Lines for Wavelength Accuracy
Hg Ne Ar Kr Xe
253.65 336.99 633.44 830.03 696.54 427.40 645.63 450.10
296.73 341.79 638.30 836.57 706.72 428.30 722.41 458.28
302.15 345.42 640.11 837.76 727.29 431.96 758.74 462.43
312.57 346.66 640.22 841.72 738.40 436.26 760.15 467.12
313.15 347.26 650.
...


Questions, Comments and Discussion
Ask us and Technical Secretary will try to provide an answer. You can facilitate discussion about the standard in here.