ASTM B487-20
(Test Method)Standard Test Method for Measurement of Metal and Oxide Coating Thickness by Microscopical Examination of Cross Section
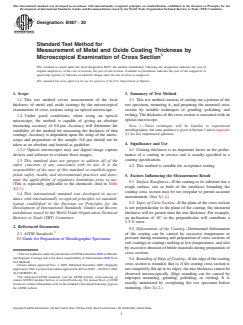
Standard Test Method for Measurement of Metal and Oxide Coating Thickness by Microscopical Examination of Cross Section
SIGNIFICANCE AND USE
4.1 Coating thickness is an important factor in the performance of a coating in service and is usually specified in a coating specification.
4.2 This method is suitable for acceptance testing.
SCOPE
1.1 This test method covers measurement of the local thickness of metal and oxide coatings by the microscopical examination of cross sections using an optical microscope.
1.2 Under good conditions, when using an optical microscope, the method is capable of giving an absolute measuring accuracy of 0.8 μm. Accuracy will determine the suitability of the method for measuring the thickness of thin coatings. Accuracy is dependent upon the setup of the microscope and preparation of the sample; 0.8 μm should not be taken as an absolute and instead as guideline.
1.2.1 Optical microscopes may use digital image capture devices and software to evaluate those images.
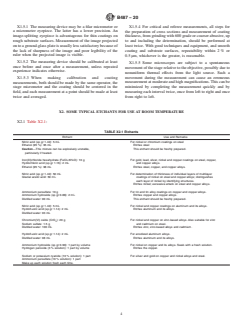
1.3 This standard does not purport to address all of the safety concerns, if any, associated with its use. It is the responsibility of the user of this standard to establish appropriate safety, health, and environmental practices and determine the applicability of regulatory limitations prior to use. (This is especially applicable to the chemicals cited in Table X2.1.)
1.4 This international standard was developed in accordance with internationally recognized principles on standardization established in the Decision on Principles for the Development of International Standards, Guides and Recommendations issued by the World Trade Organization Technical Barriers to Trade (TBT) Committee.
General Information
- Status
- Published
- Publication Date
- 31-Oct-2020
- Technical Committee
- B08 - Metallic and Inorganic Coatings
- Drafting Committee
- B08.10 - Test Methods
Relations
- Effective Date
- 01-Jul-2007
- Effective Date
- 01-Jul-2007
- Effective Date
- 10-Apr-2001
- Effective Date
- 10-Apr-2001
Overview
ASTM B487-20, titled Standard Test Method for Measurement of Metal and Oxide Coating Thickness by Microscopical Examination of Cross Section, is a widely recognized international standard developed by ASTM International. This standard outlines a reliable method for measuring the local thickness of metal and oxide coatings by examining the cross sections of coated materials using an optical microscope. Coating thickness is a critical factor influencing the durability, performance, and compliance of coated products in various industrial applications.
The method described in ASTM B487-20 is suitable for acceptance testing and is highly valued for its accuracy, especially when coatings must meet strict specifications. It supports both conventional optical microscopy and digital image analysis techniques, providing flexibility for laboratories leveraging modern measurement technologies.
Key Topics
- Measurement Principle: The standard prescribes preparing a specimen by sectioning, mounting, grinding, polishing, and etching, followed by microscopical examination to determine coating thickness.
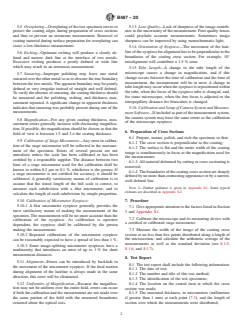
- Accuracy and Precision: Under optimal conditions, measurements can achieve an absolute accuracy up to 0.8 μm. Actual accuracy depends on microscope setup and sample preparation.
- Influencing Factors: Surface roughness, cross-section orientation, deformation during preparation, and equipment calibration are critical for achieving accurate results.
- Calibration and Equipment:
- Certified stage micrometers and calibrated eyepiece micrometers are essential for reliable measurements.
- Digital image capture devices and measurement software may also be employed.
- Proper calibration and equipment maintenance significantly impact measurement quality.
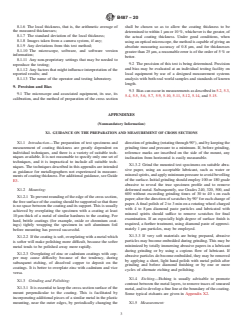
- Documentation: The test report must include detailed measurement data, equipment and software details, test parameters, and the operator and facility information.
- Safety Considerations: The standard calls for users to implement appropriate safety, health, and environmental practices, especially when handling chemicals for etching.
Applications
ASTM B487-20 is used extensively across multiple sectors where metal and oxide coatings are applied to enhance performance, prevent corrosion, or meet regulatory requirements. Some key applications include:
- Quality Control in Manufacturing: Ensuring that coating thickness meets product specifications for items such as automotive parts, aerospace components, electronics, and fasteners.
- Acceptance Testing: Providing documented evidence that coatings comply with procurement requirements or customer contracts.
- Research and Development: Assessing new coating materials or application processes by accurately measuring and validating coating thickness.
- Failure Analysis: Investigating premature coating failure by correlating observed service issues with measured coating thickness.
- Metallurgical Laboratories: Supporting routine or referee testing as part of metallographic examination workflows.
This method is particularly valuable for cases requiring precise thickness evaluation of thin coatings where alternative non-destructive measurement methods may lack the necessary resolution.
Related Standards
Users of ASTM B487-20 often refer to related standards for comprehensive coating evaluation and specimen preparation, including:
- ASTM E3: Guide for Preparation of Metallographic Specimens - Provides foundational guidance for specimen mounting, grinding, and polishing.
- ASTM B499/B504/B530: Methods for measuring metallic coating thickness by alternative techniques such as magnetic or coulometric methods.
- ISO 2177, ISO 3497: International equivalents and complementary methods for coating thickness measurement.
- ASTM D7091: Standard Practice for Nondestructive Measurement of Dry Film Thickness of Nonmagnetic Coatings on Ferrous and Nonferrous Metals.
For organizations focused on quality assurance, compliance, and product reliability, following ASTM B487-20 ensures the standardized measurement of coating thickness, benchmarking practices against globally recognized protocols, and supporting product conformance in competitive markets.
Buy Documents
ASTM B487-20 - Standard Test Method for Measurement of Metal and Oxide Coating Thickness by Microscopical Examination of Cross Section
REDLINE ASTM B487-20 - Standard Test Method for Measurement of Metal and Oxide Coating Thickness by Microscopical Examination of Cross Section
Get Certified
Connect with accredited certification bodies for this standard

BSMI (Bureau of Standards, Metrology and Inspection)
Taiwan's standards and inspection authority.
Sponsored listings
Frequently Asked Questions
ASTM B487-20 is a standard published by ASTM International. Its full title is "Standard Test Method for Measurement of Metal and Oxide Coating Thickness by Microscopical Examination of Cross Section". This standard covers: SIGNIFICANCE AND USE 4.1 Coating thickness is an important factor in the performance of a coating in service and is usually specified in a coating specification. 4.2 This method is suitable for acceptance testing. SCOPE 1.1 This test method covers measurement of the local thickness of metal and oxide coatings by the microscopical examination of cross sections using an optical microscope. 1.2 Under good conditions, when using an optical microscope, the method is capable of giving an absolute measuring accuracy of 0.8 μm. Accuracy will determine the suitability of the method for measuring the thickness of thin coatings. Accuracy is dependent upon the setup of the microscope and preparation of the sample; 0.8 μm should not be taken as an absolute and instead as guideline. 1.2.1 Optical microscopes may use digital image capture devices and software to evaluate those images. 1.3 This standard does not purport to address all of the safety concerns, if any, associated with its use. It is the responsibility of the user of this standard to establish appropriate safety, health, and environmental practices and determine the applicability of regulatory limitations prior to use. (This is especially applicable to the chemicals cited in Table X2.1.) 1.4 This international standard was developed in accordance with internationally recognized principles on standardization established in the Decision on Principles for the Development of International Standards, Guides and Recommendations issued by the World Trade Organization Technical Barriers to Trade (TBT) Committee.
SIGNIFICANCE AND USE 4.1 Coating thickness is an important factor in the performance of a coating in service and is usually specified in a coating specification. 4.2 This method is suitable for acceptance testing. SCOPE 1.1 This test method covers measurement of the local thickness of metal and oxide coatings by the microscopical examination of cross sections using an optical microscope. 1.2 Under good conditions, when using an optical microscope, the method is capable of giving an absolute measuring accuracy of 0.8 μm. Accuracy will determine the suitability of the method for measuring the thickness of thin coatings. Accuracy is dependent upon the setup of the microscope and preparation of the sample; 0.8 μm should not be taken as an absolute and instead as guideline. 1.2.1 Optical microscopes may use digital image capture devices and software to evaluate those images. 1.3 This standard does not purport to address all of the safety concerns, if any, associated with its use. It is the responsibility of the user of this standard to establish appropriate safety, health, and environmental practices and determine the applicability of regulatory limitations prior to use. (This is especially applicable to the chemicals cited in Table X2.1.) 1.4 This international standard was developed in accordance with internationally recognized principles on standardization established in the Decision on Principles for the Development of International Standards, Guides and Recommendations issued by the World Trade Organization Technical Barriers to Trade (TBT) Committee.
ASTM B487-20 is classified under the following ICS (International Classification for Standards) categories: 17.040.20 - Properties of surfaces. The ICS classification helps identify the subject area and facilitates finding related standards.
ASTM B487-20 has the following relationships with other standards: It is inter standard links to ASTM E3-01(2007)e1, ASTM E3-01(2007), ASTM E3-01, ASTM E3-95. Understanding these relationships helps ensure you are using the most current and applicable version of the standard.
ASTM B487-20 is available in PDF format for immediate download after purchase. The document can be added to your cart and obtained through the secure checkout process. Digital delivery ensures instant access to the complete standard document.
Standards Content (Sample)
This international standard was developed in accordance with internationally recognized principles on standardization established in the Decision on Principles for the
Development of International Standards, Guides and Recommendations issued by the World Trade Organization Technical Barriers to Trade (TBT) Committee.
Designation: B487 − 20
Standard Test Method for
Measurement of Metal and Oxide Coating Thickness by
Microscopical Examination of Cross Section
This standard is issued under the fixed designation B487; the number immediately following the designation indicates the year of
original adoption or, in the case of revision, the year of last revision.Anumber in parentheses indicates the year of last reapproval.A
superscript epsilon (´) indicates an editorial change since the last revision or reapproval.
This standard has been approved for use by agencies of the U.S. Department of Defense.
1. Scope 3. Summary of Test Method
1.1 This test method covers measurement of the local
3.1 This test method consists of cutting out a portion of the
thickness of metal and oxide coatings by the microscopical test specimen, mounting it, and preparing the mounted cross
examination of cross sections using an optical microscope. section by suitable techniques of grinding, polishing, and
etching.Thethicknessofthecrosssectionismeasuredwithan
1.2 Under good conditions, when using an optical
optical microscope.
microscope, the method is capable of giving an absolute
measuring accuracy of 0.8µm. Accuracy will determine the
NOTE 1—These techniques will be familiar to experienced
metallographers,butsomeguidanceisgiveninSection5andinAppendix
suitability of the method for measuring the thickness of thin
X1 for less experienced operators.
coatings. Accuracy is dependent upon the setup of the micro-
scope and preparation of the sample; 0.8 µm should not be
4. Significance and Use
taken as an absolute and instead as guideline.
1.2.1 Optical microscopes may use digital image capture
4.1 Coating thickness is an important factor in the perfor-
devices and software to evaluate those images. mance of a coating in service and is usually specified in a
coating specification.
1.3 This standard does not purport to address all of the
safety concerns, if any, associated with its use. It is the
4.2 This method is suitable for acceptance testing.
responsibility of the user of this standard to establish appro-
priate safety, health, and environmental practices and deter-
5. Factors Influencing the Measurement Result
mine the applicability of regulatory limitations prior to use.
5.1 Surface Roughness—If the coating or its substrate has a
(This is especially applicable to the chemicals cited in Table
rough surface, one or both of the interfaces bounding the
X2.1.)
coating cross section may be too irregular to permit accurate
1.4 This international standard was developed in accor-
measurement. (See X1.4.)
dance with internationally recognized principles on standard-
ization established in the Decision on Principles for the 5.2 Taper of Cross Section—Iftheplaneofthecrosssection
is not perpendicular to the plane of the coating, the measured
Development of International Standards, Guides and Recom-
mendations issued by the World Trade Organization Technical thickness will be greater than the true thickness. For example,
an inclination of 10° to the perpendicular will contribute a
Barriers to Trade (TBT) Committee.
1.5% error.
2. Referenced Documents
5.3 Deformation of the Coating—Detrimental deformation
2.1 ASTM Standards: of the coating can be caused by excessive temperature or
pressure during mounting and preparation of cross sections of
E3Guide for Preparation of Metallographic Specimens
soft coatings or coatings melting at low temperatures, and also
by excessive abrasion of brittle materials during preparation of
cross sections.
ThistestmethodisunderthejurisdictionofASTMCommitteeB08onMetallic
and Inorganic Coatings and is the direct responsibility of Subcommittee B08.10 on
5.4 Rounding of Edge of Coating—Iftheedgeofthecoating
Test Methods.
cross section is rounded, that is, if the coating cross section is
Current edition approved Nov. 1, 2020. Published November 2020. Originally
notcompletelyflatuptoitsedges,thetruethicknesscannotbe
approvedin1968.Lastpreviouseditionapprovedin2013asB487–85(2013).DOI:
10.1520/B0487-20.
observed microscopically. Edge rounding can be caused by
For referenced ASTM standards, visit the ASTM website, www.astm.org, or
improper mounting, grinding, polishing, or etching. It is
contact ASTM Customer Service at service@astm.org. For Annual Book of ASTM
usually minimized by overplating the test specimen before
Standards volume information, refer to the standard’s Document Summary page on
the ASTM website. mounting. (See X1.2.)
Copyright © ASTM International, 100 Barr Harbor Drive, PO Box C700, West Conshohocken, PA 19428-2959. United States
B487 − 20
5.5 Overplating—Overplatingofthetestspecimenservesto 5.13 Lens Quality—Lack of sharpness of the image contrib-
protect the coating edges during preparation of cross sections utes to the uncertainty of the measurement. Poor quality lenses
and thus to prevent an erroneous measurement. Removal of could preclude accurate measurements. Sometimes image
coating material during surface preparation for overplating can sharpness can be improved by using monochromatic light.
cause a low-thickness measurement.
5.14 Orientation of Eyepiece—The movement of the hair-
lineoftheeyepieceforalignmenthastobeperpendiculartothe
5.6 Etching—Optimum etching will produce a clearly de-
boundaries of the coating cross section. For example, 10°
fined and narrow dark line at the interface of two metals.
misalignment will contribute a 1.5% error.
Excessive etching produces a poorly defined or wide line
which may result in an erroneous measurement.
5.15 Tube Length—A change in the tube length of the
microscope causes a change in magnification, and if this
5.7 Smearing—Improper polishing may leave one metal
change occurs between the time of calibration and the time of
smearedovertheothermetalsoastoobscurethetrueboundary
measurement, the measurement will be in error. A change in
betweenthetwometals.Theapparentboundarymaybepoorly
tubelengthmayoccurwhentheeyepieceisrepositionedwithin
defined or very irregular instead of straight and well defined.
the tube, when the focus of the eyepiece tube is changed, and,
Toverifytheabsenceofsmearing,thecoatingthicknessshould
for some microscopes, when the fine focus is adjusted or the
be measured and the polishing, etching, and thickness mea-
interpupillary distance for binoculars is changed.
surement repeated. A significant change in apparent thickness
indicates that smearing was probably present during one of the
5.16 Calibration and Setup of Camera System and Measure-
measurements. ment Software—Ifincludedaspartofthemeasurementsystem,
the camera system may have the same errors as the calibration
5.8 Magnification—For any given coating thickness, mea-
of the microscope eyepiece.
surement errors generally increase with decreasing magnifica-
tion.Ifpossible,themagnificationshouldbechosensothatthe
6. Preparation of Cross Sections
field of view is between 1.5 and 3×the coating thickness.
6.1 Prepare, mount, polish, and etch the specimen so that:
5.9 Calibration of Stage Micrometer—Any error in calibra-
6.1.1 The cross section is perpendicular to the coating;
tion of the stage micrometer will be reflected in the measure-
6.1.2 The surface is flat and the entire width of the coating
ment of the specimen. Errors of several percent are not
image is simultaneously in focus at the magnification used for
unrealistic unless the scale has been calibrated or has been
the measurement;
certified by a responsible supplier. The distance between two
6.1.3 Allmaterialdeformedbycuttingorcrosssectioningis
lines of a stage micrometer used for the calibration shall be
removed;
known to within 0.2 µm or 0.1%, whichever is the greater. If
6.1.4 Theboundariesofthecoatingcrosssectionaresharply
a stage micrometer is not certified for accuracy, it should be
definedbynomorethancontrastingappearanceorbyanarrow,
calibrated. A generally satisfactory means of calibration is to
well-defined line.
assume that the stated length of the full scale is correct, to
NOTE 2—Further guidance is given in Appendix X1. Some typical
measure each subdivision with a filar micrometer, and to
etchants are described in Appendix X2.
calculate the length of each subdivision by simple proportion.
5.10 Calibration of Micrometer Eyepiece:
7. Procedure
5.10.1 A filar micrometer eyepiece generally provides the
7.1 GiveappropriateattentiontothefactorslistedinSection
most satisfactory means of making the measurement of the
5 and Appendix X1.
specimen.The measurement will be no more accurate than the
7.2 Calibrate the microscope and its measuring device with
calibration of the eyepiece. As calibration is operator
a certified or calibrated stage micrometer.
dependent, the eyepiece shall be calibrated by the person
7.3 Measure the width of the image of the coating cross
making the measurement.
section at no less than five points distributed along a length of
5.10.2 Repeated calibrations of the micrometer eyepiece
the microsection, and calculate the arithmetic average of the
can be reasonably expected to have a spread of less than 1%.
measurements as well as the standard deviation (see 8.1.5,
5.10.3 Some image-splitting micrometer eyepieces have a
8.1.6, and 8.1.7).
nonlinearity that introduces an error of up to 1% for short
measurement distances.
8. Test Report
5.11 Alignment—Errors can be introduced by backlash in
8.1 The test report shall include the following information:
the movement of the micrometer eyepiece. If the final motion
8.1.1 The date of test;
during alignment of the hairline is always made in the same
8.1.2 The number and title of this test method;
direction, this error will be eliminated.
8.1.3 The identification of the test specimens;
5.12 Uniformity of Magnification—Because the magnifica- 8.1.4 The location on the coated item at which the cross
tion may not be uniform over the entire field, errors can occur section was made;
if both the calibration and the measurement are not made over 8.1.5 The measured thickness, in micrometres (millimetres
the same portion of the field with the measured boundaries if greater than 1 mm) at each point (7.3), and the length of
centered about the optical axis. section over which the measurements were distributed;
B487 − 20
8.1.6 The local thickness, that is, the arithmetic average of shall be chosen so as to allow the coating thickness to be
...
This document is not an ASTM standard and is intended only to provide the user of an ASTM standard an indication of what changes have been made to the previous version. Because
it may not be technically possible to adequately depict all changes accurately, ASTM recommends that users consult prior editions as appropriate. In all cases only the current version
of the standard as published by ASTM is to be considered the official document.
Designation: B487 − 85 (Reapproved 2013) B487 − 20
Standard Test Method for
Measurement of Metal and Oxide Coating Thickness by
Microscopical Examination of Cross Section
This standard is issued under the fixed designation B487; the number immediately following the designation indicates the year of
original adoption or, in the case of revision, the year of last revision. A number in parentheses indicates the year of last reapproval. A
superscript epsilon (´) indicates an editorial change since the last revision or reapproval.
This standard has been approved for use by agencies of the U.S. Department of Defense.
1. Scope
1.1 This test method covers measurement of the local thickness of metal and oxide coatings by the microscopical examination of
cross sections using an optical microscope.
1.2 Under good conditions, when using an optical microscope, the method is capable of giving an absolute measuring accuracy
of 0.8 μm. This 0.8 μm. Accuracy will determine the suitability of the method for measuring the thickness of thin coatings.
Accuracy is dependent upon the setup of the microscope and preparation of the sample; 0.8 μm should not be taken as an absolute
and instead as guideline.
1.2.1 Optical microscopes may use digital image capture devices and software to evaluate those images.
1.3 This standard does not purport to address all of the safety concerns, if any, associated with its use. It is the responsibility
of the user of this standard to establish appropriate safety safety, health, and healthenvironmental practices and determine the
applicability of regulatory limitations prior to use. (This is especially applicable to the chemicals cited in Table X2.1.)
1.4 This international standard was developed in accordance with internationally recognized principles on standardization
established in the Decision on Principles for the Development of International Standards, Guides and Recommendations issued
by the World Trade Organization Technical Barriers to Trade (TBT) Committee.
2. Referenced Documents
2.1 ASTM Standards:
E3 Guide for Preparation of Metallographic Specimens
3. Summary of Test Method
3.1 This test method consists of cutting out a portion of the test specimen, mounting it, and preparing the mounted cross section
by suitable techniques of grinding, polishing, and etching. The thickness of the cross section is measured with an optical
microscope.
This test method is under the jurisdiction of ASTM Committee B08 on Metallic and Inorganic Coatings and is the direct responsibility of Subcommittee B08.10 on Test
Methods.
Current edition approved Dec. 1, 2013Nov. 1, 2020. Published December 2013November 2020. Originally approved in 1968. Last previous edition approved in 20072013
as B487 – 85 (2007).(2013). DOI: 10.1520/B0487-85R13.10.1520/B0487-20.
For referenced ASTM standards, visit the ASTM website, www.astm.org, or contact ASTM Customer Service at service@astm.org. For Annual Book of ASTM Standards
volume information, refer to the standard’s Document Summary page on the ASTM website.
Copyright © ASTM International, 100 Barr Harbor Drive, PO Box C700, West Conshohocken, PA 19428-2959. United States
B487 − 20
NOTE 1—These techniques will be familiar to experienced metallographers, but some guidance is given in Section 5 and in Appendix X1 for less
experienced operators.
4. Significance and Use
4.1 Coating thickness is an important factor in the performance of a coating in service and is usually specified in a coating
specification.
4.2 This method is suitable for acceptance testing.
5. Factors Influencing the Measurement Result
5.1 Surface Roughness—If the coating or its substrate has a rough surface, one or both of the interfaces bounding the coating cross
section may be too irregular to permit accurate measurement. (See X1.4).)
5.2 Taper of Cross Section—If the plane of the cross section is not perpendicular to the plane of the coating, the measured thickness
will be greater than the true thickness. For example, an inclination of 10° to the perpendicular will contribute a 1.5 % error.
5.3 Deformation of the Coating—Detrimental deformation of the coating can be caused by excessive temperature or pressure
during mounting and preparation of cross sections of soft coatings or coatings melting at low temperatures, and also by excessive
abrasion of brittle materials during preparation of cross sections.
5.4 Rounding of Edge of Coating—If the edge of the coating cross section is rounded, that is, if the coating cross section is not
completely flat up to its edges, the true thickness cannot be observed microscopically. Edge rounding can be caused by improper
mounting, grinding, polishing, or etching. It is usually minimized by overplating the test specimen before mounting. (See X1.2.)
5.5 Overplating—Overplating of the test specimen serves to protect the coating edges during preparation of cross sections and thus
to prevent an erroneous measurement. Removal of coating material during surface preparation for overplating can cause a
low-thickness measurement.
5.6 Etching—Optimum etching will produce a clearly defined and narrow dark line at the interface of two metals. Excessive
etching produces a poorly defined or wide line which may result in an erroneous measurement.
5.7 Smearing—Improper polishing may leave one metal smeared over the other metal so as to obscure the true boundary between
the two metals. The apparent boundary may be poorly defined or very irregular instead of straight and well defined. To verify the
absence of smearing, the coating thickness should be measured and the polishing, etching, and thickness measurement repeated.
A significant change in apparent thickness indicates that smearing was probably present during one of the measurements.
5.8 Magnification—For any given coating thickness, measurement errors generally increase with decreasing magnification. If
possible, the magnification should be chosen so that the field of view is between 1.5 and 3 × the coating thickness.
5.9 Calibration of Stage Micrometer—Any error in calibration of the stage micrometer will be reflected in the measurement of the
specimen. Errors of several percent are not unrealistic unless the scale has been calibrated or has been certified by a responsible
supplier. The distance between two lines of a stage micrometer used for the calibration shall be known to within 0.2 μm or 0.1 %,
whichever is the greater. If a stage micrometer is not certified for accuracy, it should be calibrated. A generally satisfactory means
of calibration is to assume that the stated length of the full scale is correct, to measure each subdivision with a filar micrometer,
and to calculate the length of each subdivision by simple proportion.
5.10 Calibration of Micrometer Eyepiece : Eyepiece:
5.10.1 A filar micrometer eyepiece generally provides the most satisfactory means of making the measurement of the specimen.
The measurement will be no more accurate than the calibration of the eyepiece. As calibration is operator dependent, the eyepiece
shall be calibrated by the person making the measurement.
5.10.2 Repeated calibrations of the micrometer eyepiece can be reasonably expected to have a spread of less than 1 %.
B487 − 20
5.10.3 Some image-splitting micrometer eyepieces have a nonlinearity that introduces an error of up to 1 % for short measurement
distances.
5.11 Alignment—Errors can be introduced by backlash in the movement of the micrometer eyepiece. If the final motion during
alignment of the hairline is always made in the same direction, this error will be eliminated.
5.12 Uniformity of Magnification—Because the magnification may not be uniform over the entire field, errors can occur if both
the calibration and the measurement are not made over the same portion of the field with the measured boundaries centered about
the optical axis.
5.13 Lens Quality—Lack of sharpness of the image contributes to the uncertainty of the measurement. Poor quality lenses could
preclude accurate measurements. Sometimes image sharpness can be improved by using monochromatic light.
5.14 Orientation of Eyepiece—The movement of the hairline of the eyepiece for alignment has to be perpendicular to the
boundaries of the coating cross section. For example, 10° misalignment will contribute a 1.5 % error.
5.15 Tube Length—A change in the tube length of the microscope causes a change in magnification, and if this change occurs
between the time of calibration and the time of measurement, the measurement will be in error. A change in tube length may occur
when the eyepiece is repositioned within the tube, when the focus of the eyepiece tube is changed, and, for some microscopes,
when the fine focus is adjusted or the interpupillary distance for binoculars is changed.
5.16 Calibration and Setup of Camera System and Measurement Software—If included as part of the measurement system, the
camera system may have the same errors as the calibration of the microscope eyepiece.
6. Preparation of Cross Sections
6.1 Prepare, mount, polish, and etch the specimen so that:
6.1.1 The cross section is perpendicular to the coating;
6.1.2 The surface is flat and the entire width of the coating image is simultaneously in focus at the magnification used for the
measurement;
6.1.3 All material deformed by cutting or cross sectioning is removed.removed;
6.1.4 The boundaries of the coating cross section are sharply defined by no more than contrasting appearance or by a narrow,
well-defined line.
NOTE 2—Further guidance is given in Appendix X1. Some typical etchants are described in Appendix X2.
7. Procedure
7.1 Give appropriate attention to the factors listed in Section 5 and Appendix X1.
7.2 Calibrate the microscope and its measuring device with a certified or calibrated stage micrometer.
7.3 Measure the width of the image of the coating cross section at no less than five points distributed along a length of the
microsection, and calculate the arithmetic meanaverage of the measurements as well as the standard deviation (see 8.1.5, 8.1.6and
, and 8.1.68.1.7).
8. Test Report
8.1 The test report shall include the following information:
8.1.1 The date of test;
B487 − 20
8.1.2 The number and title of this test method;
8.1.3 The identification of the test specimens;
8.1.4 The location on the coated item at which the cross section was made;
8.1.5 The measured thickness, in micrometres (millimetres if greater than 1 mm) at each point (7.3), and the length of section over
which the measurements were distributed;
8.1.6 The local thickness, that is, t
...
Questions, Comments and Discussion
Ask us and Technical Secretary will try to provide an answer. You can facilitate discussion about the standard in here.
Loading comments...