ASTM D3704-96(2012)
(Test Method)Standard Test Method for Wear Preventive Properties of Lubricating Greases Using the (Falex) Block on Ring Test Machine in Oscillating Motion
Standard Test Method for Wear Preventive Properties of Lubricating Greases Using the (Falex) Block on Ring Test Machine in Oscillating Motion
SIGNIFICANCE AND USE
This test method is used to differentiate between greases having high, medium, and low wear preventive properties using oscillating motion. The user of this method should determine to his own satisfaction whether results of this test procedure correlate with field performance or other bench test machines.
SCOPE
1.1 This test method covers the determination of wear properties of lubricating greases by means of the Falex block-on-ring friction and wear test machine.
1.2 The values stated in SI units are to be regarded as standard except where equipment is supplied using inch-pound units and would then be regarded as standard. The metric equivalents of inch-pound units given in such cases in the body of the standard may be approximate.
1.3 This standard does not purport to address all of the safety concerns, if any, associated with its use. It is the responsibility of the user of this standard to establish appropriate safety and health practices and determine the applicability of regulatory limitations prior to use
General Information
Relations
Standards Content (Sample)
NOTICE: This standard has either been superseded and replaced by a new version or withdrawn.
Contact ASTM International (www.astm.org) for the latest information
Designation: D3704 − 96 (Reapproved 2012)
Standard Test Method for
Wear Preventive Properties of Lubricating Greases Using
the (Falex) Block on Ring Test Machine in Oscillating
Motion
This standard is issued under the fixed designation D3704; the number immediately following the designation indicates the year of
original adoption or, in the case of revision, the year of last revision.Anumber in parentheses indicates the year of last reapproval.A
superscript epsilon (´) indicates an editorial change since the last revision or reapproval.
1. Scope µ or 5 ~F/N! (1)
3.1.1.1 Discussion—A distinction is often made between
1.1 This test method covers the determination of wear
static coeffıcient of friction and kinetic coeffıcient of friction.
properties of lubricating greases by means of the Falex
G40
block-on-ring friction and wear test machine.
3.1.2 friction force, n—the resisting force tangential to the
1.2 The values stated in SI units are to be regarded as
interface between two bodies when, under the action of an
standardexceptwhereequipmentissuppliedusinginch-pound
externalforce,onebodymovesortendstomoverelativetothe
units and would then be regarded as standard. The metric
other. G40
equivalentsofinch-poundunitsgiveninsuchcasesinthebody
3.1.3 kinetic coeffıcient of friction, n—the coefficient of
of the standard may be approximate.
friction under conditions of macroscopic relative motion be-
1.3 This standard does not purport to address all of the
tween two bodies. G40
safety concerns, if any, associated with its use. It is the
3.1.4 wear, n—damage to a solid surface, generally involv-
responsibility of the user of this standard to establish appro-
ingprogressivelossofmaterial,duetorelativemotionbetween
priate safety and health practices and determine the applica-
that surface and a contacting substance or substances. G40
bility of regulatory limitations prior to use
4. Summary of Test Method
2. Referenced Documents
4.1 The tester is operated with a steel test ring oscillating
2.1 ASTM Standards:
against a steel test block.Test speed, load, angle of oscillation,
D1403Test Methods for Cone Penetration of Lubricating
timeandspecimensurfacefinishandhardnesscanbevariedto
Grease Using One-Quarter and One-Half Scale Cone
simulate field conditions.
Equipment
4.2 The width of the wear scar, developed on the test block
D2714Test Method for Calibration and Operation of the
from contact with the oscillating test ring, is measured.
Falex Block-on-Ring Friction and Wear Testing Machine
G40Terminology Relating to Wear and Erosion
5. Significance and Use
3. Terminology 5.1 Thistestmethodisusedtodifferentiatebetweengreases
having high, medium, and low wear preventive properties
3.1 Definitions:
using oscillating motion. The user of this method should
3.1.1 coeffıcient of friction, µ or f, n—in tribology, the
determine to his own satisfaction whether results of this test
dimensionless ratio of the friction force (F) between two
procedure correlate with field performance or other bench test
bodies to the normal force (N) pressing these two bodies
machines.
together.
6. Apparatus
6.1 Falex Block-on-Ring Test Machine with Friction
This test method is under the jurisdiction of ASTM Committee D02 on
Recorder, described in detail in Annex A1 and illustrated in
Petroleum Products, Liquid Fuels, and Lubricants and is the direct responsibility of
Subcommittee D02.L0.05 on Solid Lubricants.
Fig. 1.
Current edition approved April 15, 2012. Published April 2012. Originally
approved in 1978. Last previous edition approved in 2006 as D3704–96(2012).
DOI: 10.1520/D3704-96R12. The sole source of supply of the apparatus known to the committee at this time
For referenced ASTM standards, visit the ASTM website, www.astm.org, or is Falex Corp., 1020 Airpark Dr., Sugar Grove, IL 60554. If you are aware of
contact ASTM Customer Service at service@astm.org. For Annual Book of ASTM alternative suppliers, please provide this information to ASTM International
Standards volume information, refer to the standard’s Document Summary page on Headquarters.Your comments will receive careful consideration at a meeting of the
the ASTM website. responsible technical committee, which you may attend.
Copyright © ASTM International, 100 Barr Harbor Drive, PO Box C700, West Conshohocken, PA 19428-2959. United States
D3704 − 96 (2012)
FIG. 1 Falex Block on Ring Test Machine
FIG. 1 Falex Ring and Block Test Machine (continued)
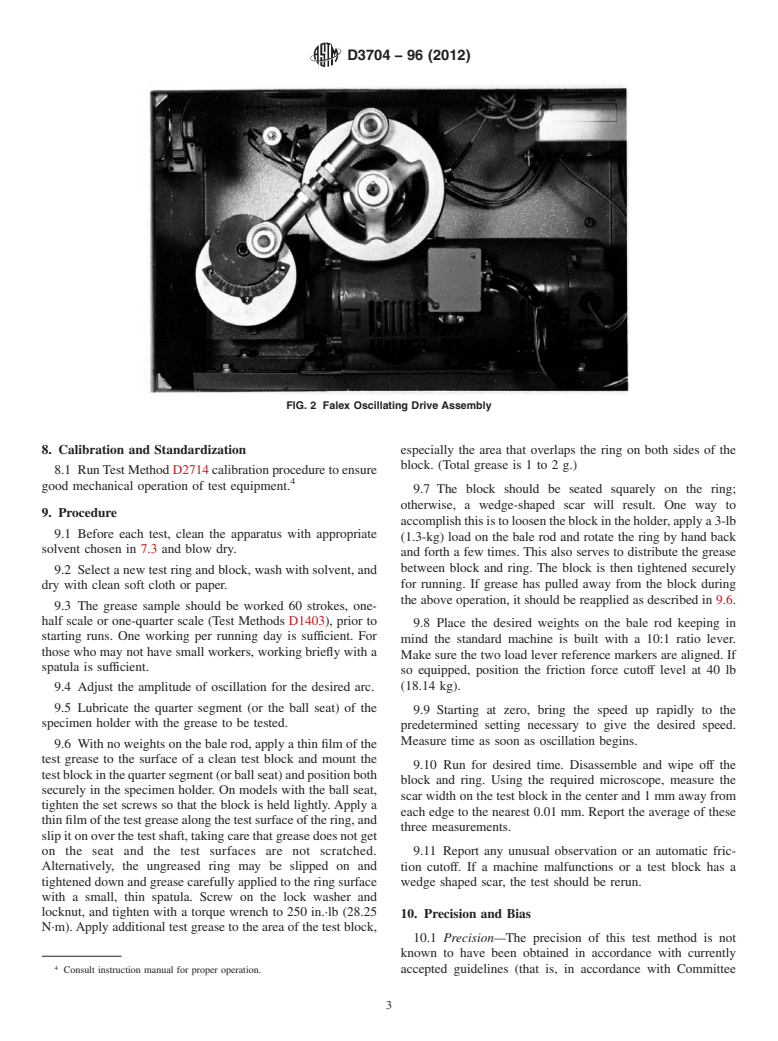
6.2 Falex Oscillating Drive Accessory, described in detail 0.15to0.30µm(6to12µin.)rms.Thesurfaceroughnessofthe
in A1.6 and illustrated in Fig. 2.
S-25 ring shall be 0.51 to 0.71 µm (22 to 28 µin.) rms.
6.3 Microscope, low-power (50× to 60×) having sufficient
7.2 Test Blocks, Falex Type H-30 or H-60 —SAE 01 tool
clearance under objective to accommodate the test block. It
steel having two ground test surfaces of 0.10 to 0.20 µm (4 to
should be fitted with a filar micrometer so that scar width may
8µin.)rms.Thetestblockhasawidth6.35mm(0.250in.)and
be measured with accuracy of 60.01 mm.
a 15.76 mm (0.620 in.) length. The H-30 test block has a
6.4 Timer, graduated in minutes and seconds.
hardness of HRC 27 to 33. The H-60 test block has a hardness
of HRC 58 to 63.
7. Reagents and Materials
7.3 Solvent, non-film forming, nonchlorinated.
7.1 Test Rings, Falex Type S-10 or S-25 —SAE 4620
carburize steel, having a hardness of 58 to 63 HRC. The test
NOTE 1—Solvents formerly used in this test method were eliminated
ring has a width of 8.15 mm (0.321 in.), a diameter of 35 mm
due to possible toxic effects. Each user should select a solvent that can
(1.3775 in.), and a maximum radial run out of 0.013 mm
meethisapplicablesafetystandardsandstillthoroughlycleanthemachine
(0.0005 in.). The surface roughness of the S-10 ring shall be parts.
D3704 − 96 (2012)
FIG. 2 Falex Oscillating Drive Assembly
8. Calibration and Standardization especially the area that overlaps the ring on both sides of the
block. (Total grease is 1 to 2 g.)
8.1 RunTestMethodD2714calibrationproceduretoensure
good mechanical operation of test equipment.
9.7 The block should be seated squarely on the ring;
otherwise, a wedge-shaped scar will result. One way to
9. Procedure
accomplishthisistoloosentheblockintheholder,applya3-lb
9.1 Before each test, clean the apparatus with appropriate
(1.3-kg) load on the bale rod and rotate the ring by hand back
solvent chosen in 7.3 and blow dry.
and forth a few times. This also serves to distribute the grease
between block and ring. The block is then tightened securely
9.2 Select a new test ring and block, wash with solvent, and
for running. If grease has pulled away from the block during
dry with clean soft cloth or paper.
the above operation, it should be reapplied as described in 9.6.
9.3 The grease sample should be worked 60 strokes, one-
half scale or one-quarter scale (Test Methods D1403), prior to
9.8 Place the desired weights on the bale rod keeping in
starting runs. One working per running day is sufficient. For
mind the standard machine is built with a 10:1 ratio lever.
those who may not have small workers, working briefly with a
Make sure the two load lever reference markers are aligned. If
spatula is sufficient.
so equipped, position the friction force cutoff level at 40 lb
(18.14 kg).
9.4 Adjust the amplitude of oscillation for the desired arc.
9.5 Lubricate the quarter segment (or the ball seat) of the
9.9 Starting at
...


Questions, Comments and Discussion
Ask us and Technical Secretary will try to provide an answer. You can facilitate discussion about the standard in here.