ASTM D7236-16
(Test Method)Standard Test Method for Flash Point by Small Scale Closed Cup Tester (Ramp Method)
Standard Test Method for Flash Point by Small Scale Closed Cup Tester (Ramp Method)
SIGNIFICANCE AND USE
5.1 The flash point temperature is one measure of the tendency of the test specimen to form a flammable mixture with air under controlled laboratory conditions. It is only one of a number of properties that must be considered in assessing the overall flammability hazard of a material.
5.2 Flash point is used in shipping and safety regulations to define flammable and combustible materials and classify them. Consult the particular regulation involved for precise definitions of these classifications.
5.3 This test method can be used to measure and describe the properties of materials in response to heat and a test flame under controlled laboratory conditions and shall not be used to describe or appraise the fire hazard or fire risk of materials under actual fire conditions. However, results of this test method may be used as elements of a fire risk assessment, that takes into account all of the factors that are pertinent to an assessment of the fire hazard of a particular end use.
SCOPE
1.1 This test method covers the determination of the flash point of aviation turbine fuel, diesel fuel, kerosine and related products in the temperature range of 40 °C to 135 °C by a small scale closed cup apparatus.
1.2 This test method is only applicable to homogeneous materials that are liquid at or near ambient temperature and at temperatures required to perform the test.
1.3 This test method is not applicable to liquids contaminated by traces of highly volatile materials.
1.4 This test method is a dynamic method and depends on a definite rate of temperature increase. It is one of many flash point methods available, and every flash point test method, including this one, is an empirical one.
1.5 If the user's specification requires a defined flash point method, neither this test nor any other method should be substituted for the prescribed method without obtaining comparative data and an agreement from the specifier.
1.6 The values stated in SI units are to be regarded as standard. No other units of measurement are included in this standard.
1.7 This standard does not purport to address all of the safety concerns, if any, associated with its use. It is the responsibility of the user of this standard to establish appropriate safety and health practices and determine the applicability of regulatory limitations prior to use. For specific hazard statements, see Section 7 and the Material Safety Data Sheet for the product being tested.
General Information
Relations
Buy Standard
Standards Content (Sample)
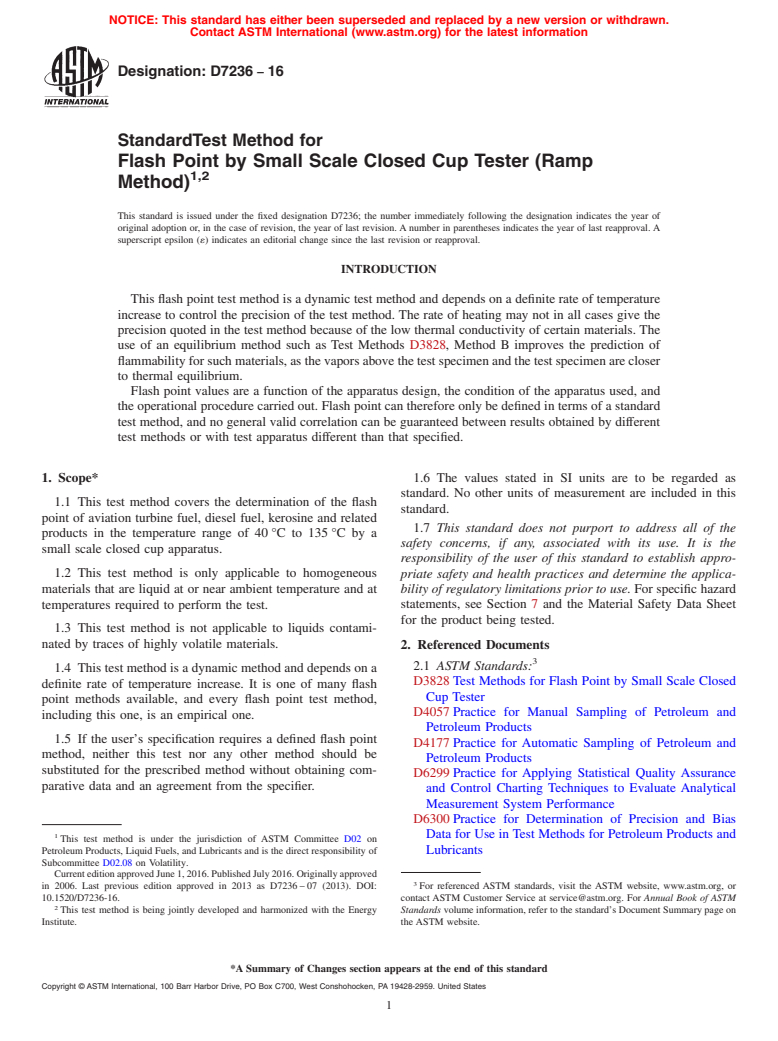
NOTICE: This standard has either been superseded and replaced by a new version or withdrawn.
Contact ASTM International (www.astm.org) for the latest information
Designation: D7236 − 16
StandardTest Method for
Flash Point by Small Scale Closed Cup Tester (Ramp
1,2
Method)
This standard is issued under the fixed designation D7236; the number immediately following the designation indicates the year of
original adoption or, in the case of revision, the year of last revision. A number in parentheses indicates the year of last reapproval. A
superscript epsilon (´) indicates an editorial change since the last revision or reapproval.
INTRODUCTION
This flash point test method is a dynamic test method and depends on a definite rate of temperature
increase to control the precision of the test method. The rate of heating may not in all cases give the
precision quoted in the test method because of the low thermal conductivity of certain materials. The
use of an equilibrium method such as Test Methods D3828, Method B improves the prediction of
flammabilityforsuchmaterials,asthevaporsabovethetestspecimenandthetestspecimenarecloser
to thermal equilibrium.
Flash point values are a function of the apparatus design, the condition of the apparatus used, and
the operational procedure carried out. Flash point can therefore only be defined in terms of a standard
test method, and no general valid correlation can be guaranteed between results obtained by different
test methods or with test apparatus different than that specified.
1. Scope* 1.6 The values stated in SI units are to be regarded as
standard. No other units of measurement are included in this
1.1 This test method covers the determination of the flash
standard.
point of aviation turbine fuel, diesel fuel, kerosine and related
1.7 This standard does not purport to address all of the
products in the temperature range of 40 °C to 135 °C by a
safety concerns, if any, associated with its use. It is the
small scale closed cup apparatus.
responsibility of the user of this standard to establish appro-
1.2 This test method is only applicable to homogeneous priate safety and health practices and determine the applica-
materials that are liquid at or near ambient temperature and at bility of regulatory limitations prior to use. For specific hazard
temperatures required to perform the test. statements, see Section 7 and the Material Safety Data Sheet
for the product being tested.
1.3 This test method is not applicable to liquids contami-
nated by traces of highly volatile materials.
2. Referenced Documents
3
2.1 ASTM Standards:
1.4 This test method is a dynamic method and depends on a
D3828 Test Methods for Flash Point by Small Scale Closed
definite rate of temperature increase. It is one of many flash
Cup Tester
point methods available, and every flash point test method,
D4057 Practice for Manual Sampling of Petroleum and
including this one, is an empirical one.
Petroleum Products
1.5 If the user’s specification requires a defined flash point
D4177 Practice for Automatic Sampling of Petroleum and
method, neither this test nor any other method should be
Petroleum Products
substituted for the prescribed method without obtaining com-
D6299 Practice for Applying Statistical Quality Assurance
parative data and an agreement from the specifier.
and Control Charting Techniques to Evaluate Analytical
Measurement System Performance
D6300 Practice for Determination of Precision and Bias
1 Data for Use in Test Methods for Petroleum Products and
This test method is under the jurisdiction of ASTM Committee D02 on
Petroleum Products, Liquid Fuels, and Lubricants and is the direct responsibility of Lubricants
Subcommittee D02.08 on Volatility.
CurrenteditionapprovedJune1,2016.PublishedJuly2016.Originallyapproved
3
in 2006. Last previous edition approved in 2013 as D7236 – 07 (2013). DOI: For referenced ASTM standards, visit the ASTM website, www.astm.org, or
10.1520/D7236-16. contact ASTM Customer Service at service@astm.org. For Annual Book of ASTM
2
This test method is being jointly developed and harmonized with the Energy Standards volume information, refer to the standard’s Document Summary page on
Institute. the ASTM website.
*A Summary of Changes section appears at the end of this standard
Copyright © ASTM International, 100 Barr Harbor Drive, PO Box C700, West Conshohocken, PA 19428-2959. United States
1
---------------------- Page: 1 ----------------------
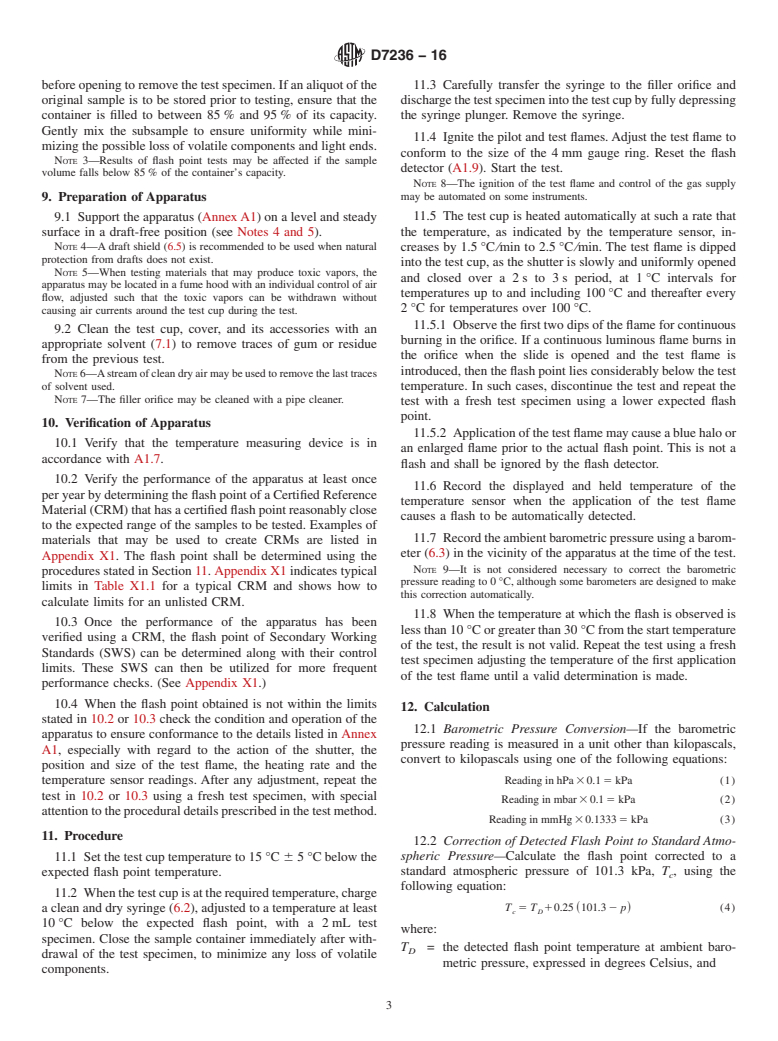
D7236 − 16
E300 Practice for Sampling Industrial Chemicals test temperature when a flash is detected. The key parts and
4
2.2 ISO Standards: dimensions are described in Annex A1 and illustrated in Fig.
A1.1.
ISO Guide 34 Quality Systems Guidelines for the Produc-
tion of Reference Materials
6.2 Syringe, 2 mL, adjusted to deliver 2.00 mL 6 0.1 mL.
ISO Guide 35 Certification of Reference Material—General
6.3 Barometer, accurate to 0.5 kPa. Barometers pre-
and Statistical Principles
corrected to give sea level readings, such as those used at
weather s
...
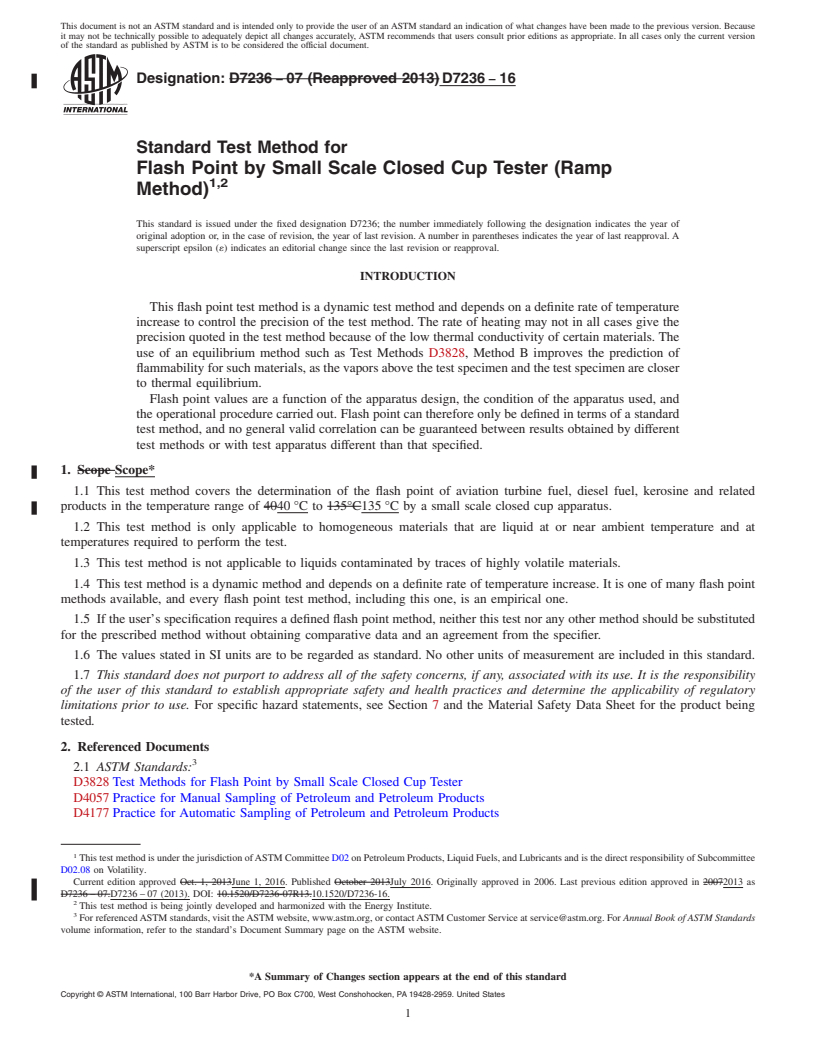
This document is not an ASTM standard and is intended only to provide the user of an ASTM standard an indication of what changes have been made to the previous version. Because
it may not be technically possible to adequately depict all changes accurately, ASTM recommends that users consult prior editions as appropriate. In all cases only the current version
of the standard as published by ASTM is to be considered the official document.
Designation: D7236 − 07 (Reapproved 2013) D7236 − 16
Standard Test Method for
Flash Point by Small Scale Closed Cup Tester (Ramp
1,2
Method)
This standard is issued under the fixed designation D7236; the number immediately following the designation indicates the year of
original adoption or, in the case of revision, the year of last revision. A number in parentheses indicates the year of last reapproval. A
superscript epsilon (´) indicates an editorial change since the last revision or reapproval.
INTRODUCTION
This flash point test method is a dynamic test method and depends on a definite rate of temperature
increase to control the precision of the test method. The rate of heating may not in all cases give the
precision quoted in the test method because of the low thermal conductivity of certain materials. The
use of an equilibrium method such as Test Methods D3828, Method B improves the prediction of
flammability for such materials, as the vapors above the test specimen and the test specimen are closer
to thermal equilibrium.
Flash point values are a function of the apparatus design, the condition of the apparatus used, and
the operational procedure carried out. Flash point can therefore only be defined in terms of a standard
test method, and no general valid correlation can be guaranteed between results obtained by different
test methods or with test apparatus different than that specified.
1. Scope Scope*
1.1 This test method covers the determination of the flash point of aviation turbine fuel, diesel fuel, kerosine and related
products in the temperature range of 4040 °C to 135°C135 °C by a small scale closed cup apparatus.
1.2 This test method is only applicable to homogeneous materials that are liquid at or near ambient temperature and at
temperatures required to perform the test.
1.3 This test method is not applicable to liquids contaminated by traces of highly volatile materials.
1.4 This test method is a dynamic method and depends on a definite rate of temperature increase. It is one of many flash point
methods available, and every flash point test method, including this one, is an empirical one.
1.5 If the user’s specification requires a defined flash point method, neither this test nor any other method should be substituted
for the prescribed method without obtaining comparative data and an agreement from the specifier.
1.6 The values stated in SI units are to be regarded as standard. No other units of measurement are included in this standard.
1.7 This standard does not purport to address all of the safety concerns, if any, associated with its use. It is the responsibility
of the user of this standard to establish appropriate safety and health practices and determine the applicability of regulatory
limitations prior to use. For specific hazard statements, see Section 7 and the Material Safety Data Sheet for the product being
tested.
2. Referenced Documents
3
2.1 ASTM Standards:
D3828 Test Methods for Flash Point by Small Scale Closed Cup Tester
D4057 Practice for Manual Sampling of Petroleum and Petroleum Products
D4177 Practice for Automatic Sampling of Petroleum and Petroleum Products
1
This test method is under the jurisdiction of ASTM Committee D02 on Petroleum Products, Liquid Fuels, and Lubricants and is the direct responsibility of Subcommittee
D02.08 on Volatility.
Current edition approved Oct. 1, 2013June 1, 2016. Published October 2013July 2016. Originally approved in 2006. Last previous edition approved in 20072013 as
D7236 – 07.D7236 – 07 (2013). DOI: 10.1520/D7236-07R13.10.1520/D7236-16.
2
This test method is being jointly developed and harmonized with the Energy Institute.
3
For referenced ASTM standards, visit the ASTM website, www.astm.org, or contact ASTM Customer Service at service@astm.org. For Annual Book of ASTM Standards
volume information, refer to the standard’s Document Summary page on the ASTM website.
*A Summary of Changes section appears at the end of this standard
Copyright © ASTM International, 100 Barr Harbor Drive, PO Box C700, West Conshohocken, PA 19428-2959. United States
1
---------------------- Page: 1 ----------------------
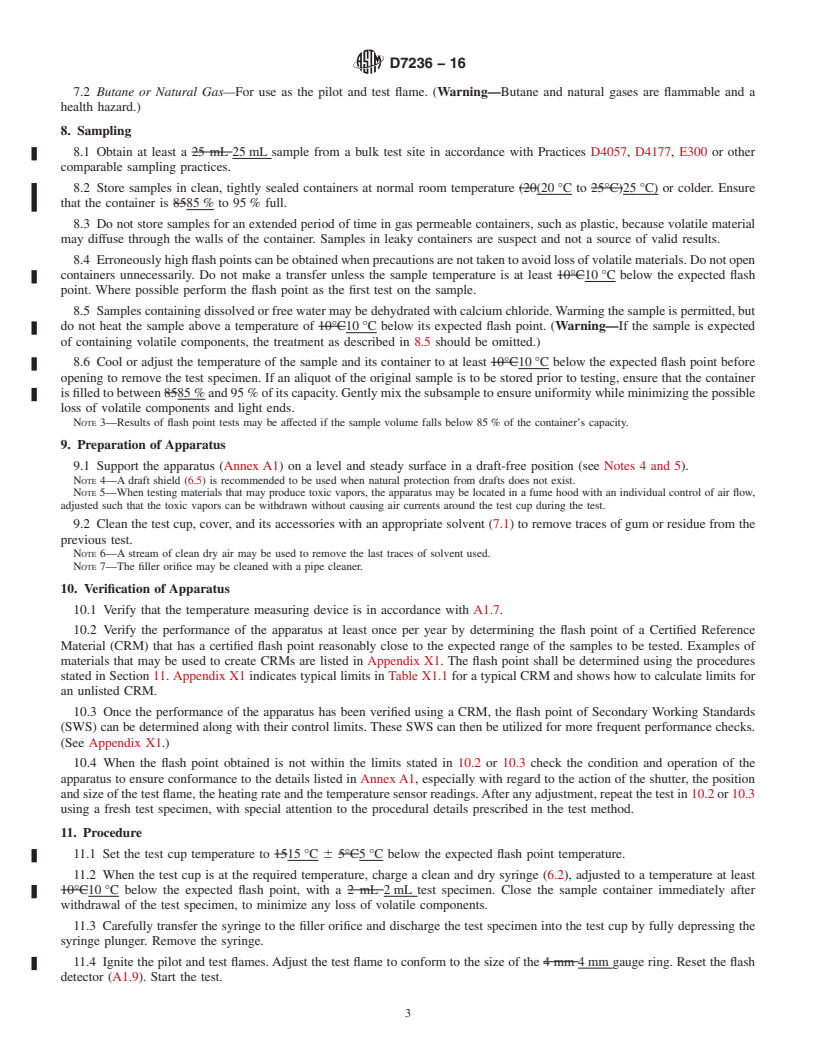
D7236 − 16
D6299 Practice for Applying Statistical Quality Assurance and Control Charting Techniques to Evaluate Analytical Measure-
ment System Performance
D6300 Practice for Determination of Precision and Bias Data for Use in Test Methods for Petroleum Products and Lubricants
E300 Practice for Sampling Industrial Chemicals
4
2.2 ISO Standards:
ISO Guide 34 Quality Systems Guidelines for the Production of Reference
...


Questions, Comments and Discussion
Ask us and Technical Secretary will try to provide an answer. You can facilitate discussion about the standard in here.