ASTM D7012-14
(Test Method)Standard Test Methods for Compressive Strength and Elastic Moduli of Intact Rock Core Specimens under Varying States of Stress and Temperatures
Standard Test Methods for Compressive Strength and Elastic Moduli of Intact Rock Core Specimens under Varying States of Stress and Temperatures
SIGNIFICANCE AND USE
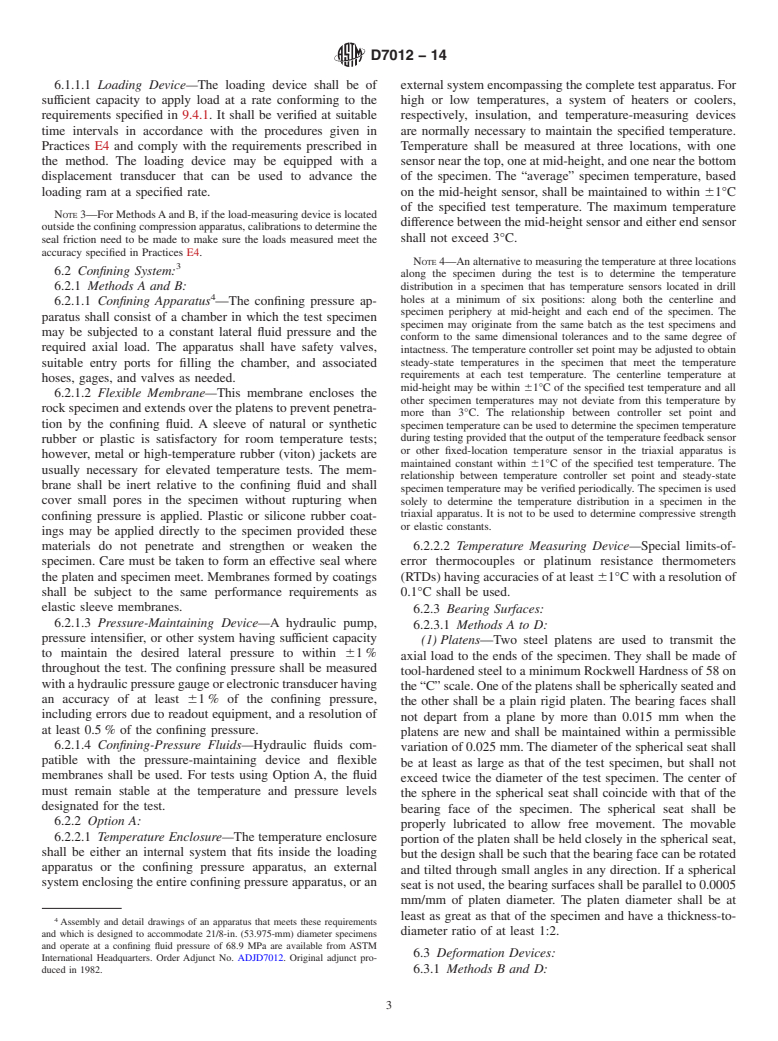
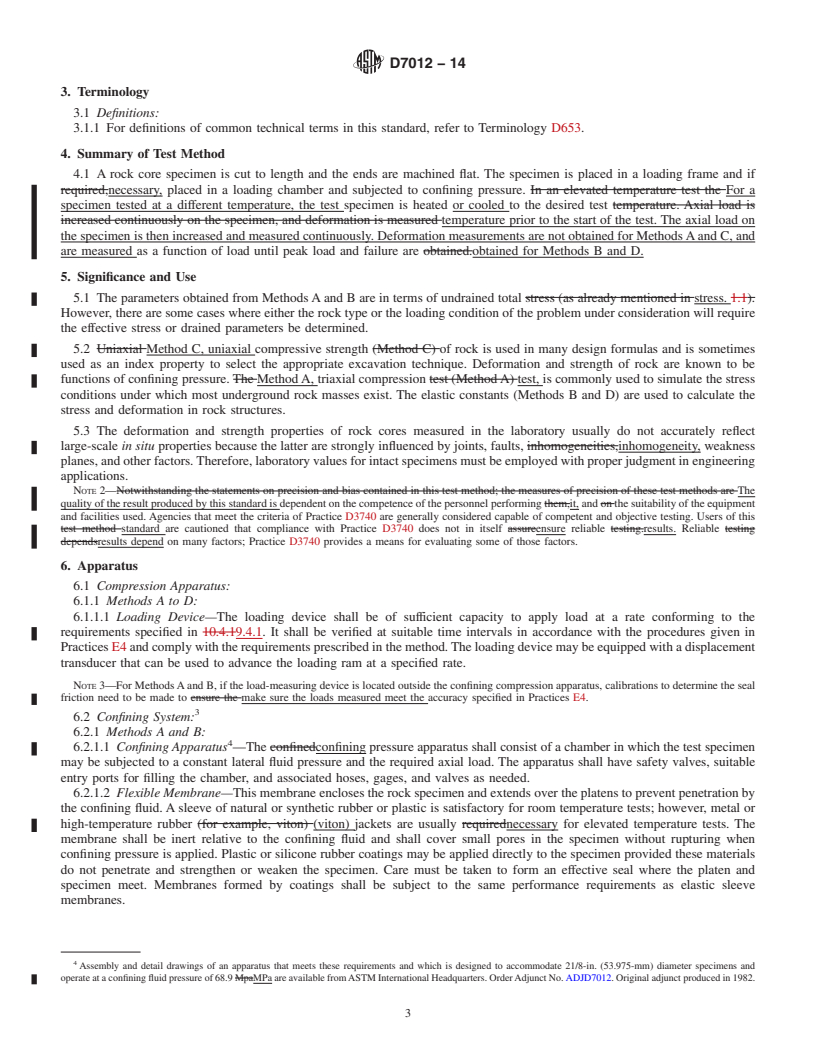
5.1 The parameters obtained from Methods A and B are in terms of undrained total stress. However, there are some cases where either the rock type or the loading condition of the problem under consideration will require the effective stress or drained parameters be determined.
5.2 Method C, uniaxial compressive strength of rock is used in many design formulas and is sometimes used as an index property to select the appropriate excavation technique. Deformation and strength of rock are known to be functions of confining pressure. Method A, triaxial compression test, is commonly used to simulate the stress conditions under which most underground rock masses exist. The elastic constants (Methods B and D) are used to calculate the stress and deformation in rock structures.
5.3 The deformation and strength properties of rock cores measured in the laboratory usually do not accurately reflect large-scale in situ properties because the latter are strongly influenced by joints, faults, inhomogeneity, weakness planes, and other factors. Therefore, laboratory values for intact specimens must be employed with proper judgment in engineering applications.Note 2—The quality of the result produced by this standard is dependent on the competence of the personnel performing it, and the suitability of the equipment and facilities used. Agencies that meet the criteria of Practice D3740 are generally considered capable of competent and objective testing. Users of this standard are cautioned that compliance with Practice D3740 does not in itself ensure reliable results. Reliable results depend on many factors; Practice D3740 provides a means for evaluating some of those factors.
SCOPE
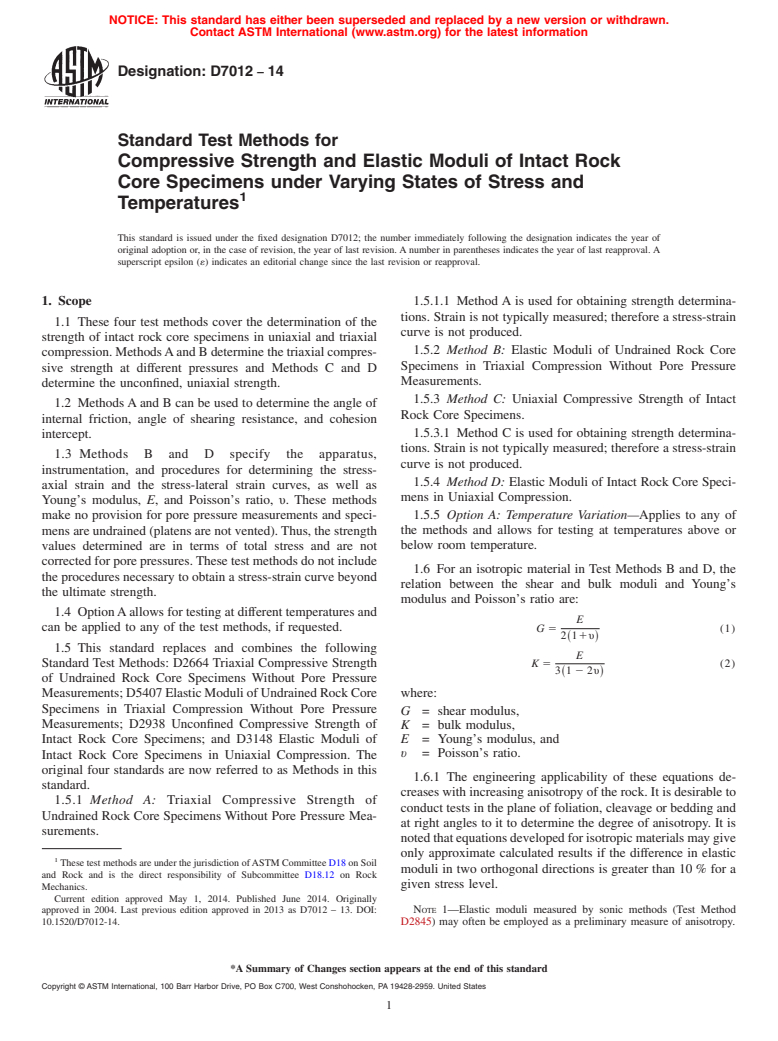
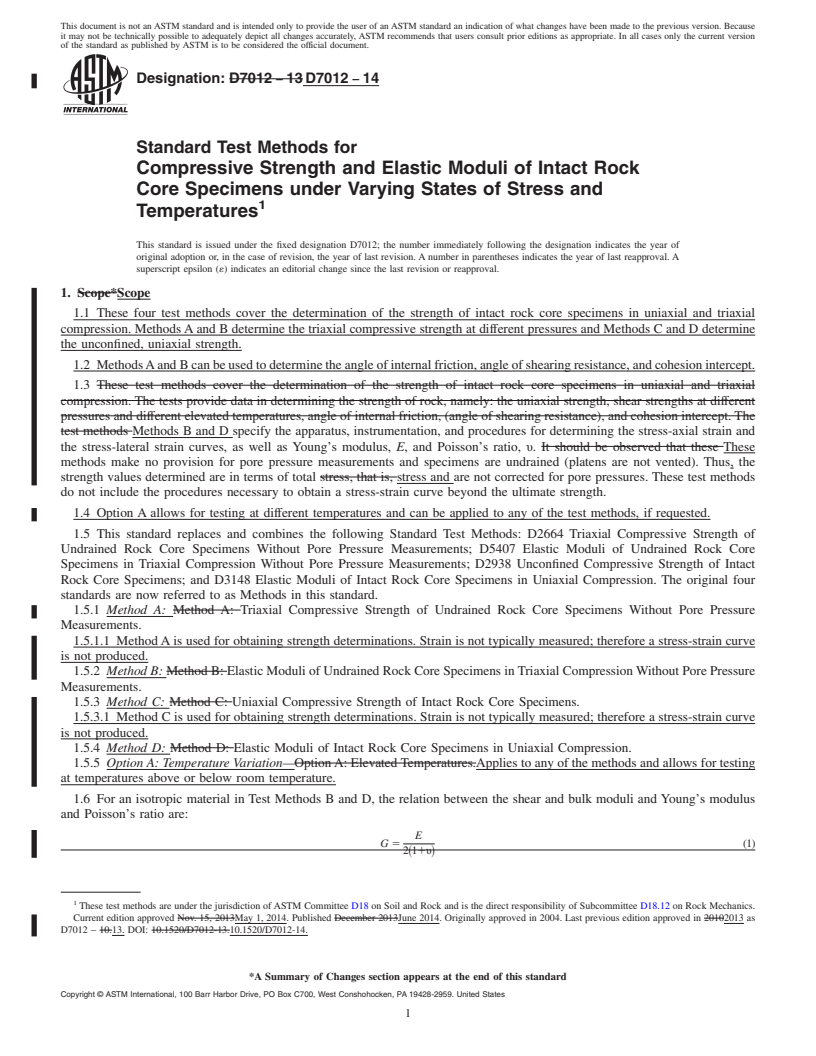
1.1 These four test methods cover the determination of the strength of intact rock core specimens in uniaxial and triaxial compression. Methods A and B determine the triaxial compressive strength at different pressures and Methods C and D determine the unconfined, uniaxial strength.
1.2 Methods A and B can be used to determine the angle of internal friction, angle of shearing resistance, and cohesion intercept.
1.3 Methods B and D specify the apparatus, instrumentation, and procedures for determining the stress-axial strain and the stress-lateral strain curves, as well as Young's modulus, E, and Poisson's ratio, υ. These methods make no provision for pore pressure measurements and specimens are undrained (platens are not vented). Thus, the strength values determined are in terms of total stress and are not corrected for pore pressures. These test methods do not include the procedures necessary to obtain a stress-strain curve beyond the ultimate strength.
1.4 Option A allows for testing at different temperatures and can be applied to any of the test methods, if requested.
1.5 This standard replaces and combines the following Standard Test Methods: D2664 Triaxial Compressive Strength of Undrained Rock Core Specimens Without Pore Pressure Measurements; D5407 Elastic Moduli of Undrained Rock Core Specimens in Triaxial Compression Without Pore Pressure Measurements; D2938 Unconfined Compressive Strength of Intact Rock Core Specimens; and D3148 Elastic Moduli of Intact Rock Core Specimens in Uniaxial Compression. The original four standards are now referred to as Methods in this standard.
1.5.1 Method A:
Triaxial Compressive Strength of Undrained Rock Core Specimens Without Pore Pressure Measurements.
1.5.1.1 Method A is used for obtaining strength determinations. Strain is not typically measured; therefore a stress-strain curve is not produced.
1.5.2 Method B:
Elastic Moduli of Undrained Rock Core Specimens in Triaxial Compression Without Pore Pressure Measurements.
1.5.3 Method C:
Uniaxial Compressive Strength of Intact Rock Core Specimens.
1.5.3.1 Method C is used for obtaining strength determinations. Strain is not typically measured; therefore a stress-strain curve is not produced.
1.5.4 Meth...
General Information
Relations
Buy Standard
Standards Content (Sample)
NOTICE: This standard has either been superseded and replaced by a new version or withdrawn.
Contact ASTM International (www.astm.org) for the latest information
Designation: D7012 − 14
Standard Test Methods for
Compressive Strength and Elastic Moduli of Intact Rock
Core Specimens under Varying States of Stress and
1
Temperatures
This standard is issued under the fixed designation D7012; the number immediately following the designation indicates the year of
original adoption or, in the case of revision, the year of last revision.Anumber in parentheses indicates the year of last reapproval.A
superscript epsilon (´) indicates an editorial change since the last revision or reapproval.
1. Scope 1.5.1.1 Method A is used for obtaining strength determina-
tions. Strain is not typically measured; therefore a stress-strain
1.1 These four test methods cover the determination of the
curve is not produced.
strength of intact rock core specimens in uniaxial and triaxial
1.5.2 Method B: Elastic Moduli of Undrained Rock Core
compression.MethodsAandBdeterminethetriaxialcompres-
Specimens in Triaxial Compression Without Pore Pressure
sive strength at different pressures and Methods C and D
Measurements.
determine the unconfined, uniaxial strength.
1.5.3 Method C: Uniaxial Compressive Strength of Intact
1.2 MethodsAand B can be used to determine the angle of
Rock Core Specimens.
internal friction, angle of shearing resistance, and cohesion
intercept. 1.5.3.1 Method C is used for obtaining strength determina-
tions. Strain is not typically measured; therefore a stress-strain
1.3 Methods B and D specify the apparatus,
curve is not produced.
instrumentation, and procedures for determining the stress-
1.5.4 Method D: Elastic Moduli of Intact Rock Core Speci-
axial strain and the stress-lateral strain curves, as well as
mens in Uniaxial Compression.
Young’s modulus, E, and Poisson’s ratio, υ. These methods
1.5.5 Option A: Temperature Variation—Applies to any of
make no provision for pore pressure measurements and speci-
mensareundrained(platensarenotvented).Thus,thestrength the methods and allows for testing at temperatures above or
values determined are in terms of total stress and are not below room temperature.
correctedforporepressures.Thesetestmethodsdonotinclude
1.6 For an isotropic material in Test Methods B and D, the
theproceduresnecessarytoobtainastress-straincurvebeyond
relation between the shear and bulk moduli and Young’s
the ultimate strength.
modulus and Poisson’s ratio are:
1.4 OptionAallowsfortestingatdifferenttemperaturesand
E
can be applied to any of the test methods, if requested. G 5 (1)
2 11υ
~ !
1.5 This standard replaces and combines the following
E
Standard Test Methods: D2664 Triaxial Compressive Strength
K 5 (2)
3~1 22υ!
of Undrained Rock Core Specimens Without Pore Pressure
Measurements;D5407ElasticModuliofUndrainedRockCore where:
Specimens in Triaxial Compression Without Pore Pressure
G = shear modulus,
Measurements; D2938 Unconfined Compressive Strength of
K = bulk modulus,
E = Young’s modulus, and
Intact Rock Core Specimens; and D3148 Elastic Moduli of
υ = Poisson’s ratio.
Intact Rock Core Specimens in Uniaxial Compression. The
original four standards are now referred to as Methods in this
1.6.1 The engineering applicability of these equations de-
standard.
creaseswithincreasinganisotropyoftherock.Itisdesirableto
1.5.1 Method A: Triaxial Compressive Strength of
conduct tests in the plane of foliation, cleavage or bedding and
Undrained Rock Core Specimens Without Pore Pressure Mea-
at right angles to it to determine the degree of anisotropy. It is
surements.
notedthatequationsdevelopedforisotropicmaterialsmaygive
only approximate calculated results if the difference in elastic
1
ThesetestmethodsareunderthejurisdictionofASTMCommitteeD18onSoil
moduli in two orthogonal directions is greater than 10% for a
and Rock and is the direct responsibility of Subcommittee D18.12 on Rock
given stress level.
Mechanics.
Current edition approved May 1, 2014. Published June 2014. Originally
approved in 2004. Last previous edition approved in 2013 as D7012 – 13. DOI: NOTE 1—Elastic moduli measured by sonic methods (Test Method
10.1520/D7012-14. D2845) may often be employed as a preliminary measure of anisotropy.
*A Summary of Changes section appears at the end of this standard
Copyright © ASTM International, 100 Barr Harbor Drive, PO Box C700, West Conshohocken, PA 19428-2959. United States
1
---------------------- Page: 1 ----------------------
D7012 − 14
3
1.7 Test Methods B and D for determining the elastic 2.2 ASTM Adjunct:
constants do not apply to rocks that undergo significant Triaxial Compression Chamber Drawings (3)
inelastic strains during the test, such as potash and salt. The
3. Terminology
elastic moduli for such rocks should be determined from
3.1 Definitions:
unload-reload cycles that are not covered by these test meth-
3.1.1 For definitions of common technical terms in this
ods.
standard, refer to Termin
...
This document is not an ASTM standard and is intended only to provide the user of an ASTM standard an indication of what changes have been made to the previous version. Because
it may not be technically possible to adequately depict all changes accurately, ASTM recommends that users consult prior editions as appropriate. In all cases only the current version
of the standard as published by ASTM is to be considered the official document.
Designation: D7012 − 13 D7012 − 14
Standard Test Methods for
Compressive Strength and Elastic Moduli of Intact Rock
Core Specimens under Varying States of Stress and
1
Temperatures
This standard is issued under the fixed designation D7012; the number immediately following the designation indicates the year of
original adoption or, in the case of revision, the year of last revision. A number in parentheses indicates the year of last reapproval. A
superscript epsilon (´) indicates an editorial change since the last revision or reapproval.
1. Scope*Scope
1.1 These four test methods cover the determination of the strength of intact rock core specimens in uniaxial and triaxial
compression. Methods A and B determine the triaxial compressive strength at different pressures and Methods C and D determine
the unconfined, uniaxial strength.
1.2 Methods A and B can be used to determine the angle of internal friction, angle of shearing resistance, and cohesion intercept.
1.3 These test methods cover the determination of the strength of intact rock core specimens in uniaxial and triaxial
compression. The tests provide data in determining the strength of rock, namely: the uniaxial strength, shear strengths at different
pressures and different elevated temperatures, angle of internal friction, (angle of shearing resistance), and cohesion intercept. The
test methods Methods B and D specify the apparatus, instrumentation, and procedures for determining the stress-axial strain and
the stress-lateral strain curves, as well as Young’s modulus, E, and Poisson’s ratio, υ. It should be observed that these These
methods make no provision for pore pressure measurements and specimens are undrained (platens are not vented). Thus, the
strength values determined are in terms of total stress, that is, stress and are not corrected for pore pressures. These test methods
do not include the procedures necessary to obtain a stress-strain curve beyond the ultimate strength.
1.4 Option A allows for testing at different temperatures and can be applied to any of the test methods, if requested.
1.5 This standard replaces and combines the following Standard Test Methods: D2664 Triaxial Compressive Strength of
Undrained Rock Core Specimens Without Pore Pressure Measurements; D5407 Elastic Moduli of Undrained Rock Core
Specimens in Triaxial Compression Without Pore Pressure Measurements; D2938 Unconfined Compressive Strength of Intact
Rock Core Specimens; and D3148 Elastic Moduli of Intact Rock Core Specimens in Uniaxial Compression. The original four
standards are now referred to as Methods in this standard.
1.5.1 Method A: Method A: Triaxial Compressive Strength of Undrained Rock Core Specimens Without Pore Pressure
Measurements.
1.5.1.1 Method A is used for obtaining strength determinations. Strain is not typically measured; therefore a stress-strain curve
is not produced.
1.5.2 Method B: Method B: Elastic Moduli of Undrained Rock Core Specimens in Triaxial Compression Without Pore Pressure
Measurements.
1.5.3 Method C: Method C: Uniaxial Compressive Strength of Intact Rock Core Specimens.
1.5.3.1 Method C is used for obtaining strength determinations. Strain is not typically measured; therefore a stress-strain curve
is not produced.
1.5.4 Method D: Method D: Elastic Moduli of Intact Rock Core Specimens in Uniaxial Compression.
1.5.5 Option A: Temperature Variation—Option A: Elevated Temperatures.Applies to any of the methods and allows for testing
at temperatures above or below room temperature.
1.6 For an isotropic material in Test Methods B and D, the relation between the shear and bulk moduli and Young’s modulus
and Poisson’s ratio are:
E
G 5 (1)
2 11υ
~ !
1
These test methods are under the jurisdiction of ASTM Committee D18 on Soil and Rock and is the direct responsibility of Subcommittee D18.12 on Rock Mechanics.
Current edition approved Nov. 15, 2013May 1, 2014. Published December 2013June 2014. Originally approved in 2004. Last previous edition approved in 20102013 as
D7012 – 10.13. DOI: 10.1520/D7012-13.10.1520/D7012-14.
*A Summary of Changes section appears at the end of this standard
Copyright © ASTM International, 100 Barr Harbor Drive, PO Box C700, West Conshohocken, PA 19428-2959. United States
1
---------------------- Page: 1 ----------------------
D7012 − 14
E
K 5 (2)
3~12 2υ!
where:
G = shear modulus,
K = bulk modulus,
E = Young’s modulus, and
υ = Poisson’s ratio.
E
G 5 (1)
2 11υ
~ !
E
K 5 (2)
3~12 2υ!
where:
G = shear modulus,
K = bulk modulus,
E = Young’s modulus, and
υ = Poisson’s ratio.
1.6.1
...


Questions, Comments and Discussion
Ask us and Technical Secretary will try to provide an answer. You can facilitate discussion about the standard in here.