ASTM A710/A710M-02(2013)
(Specification)Standard Specification for Precipitation–Strengthened Low-Carbon Nickel-Copper-Chromium-Molybdenum-Columbium Alloy Structural Steel Plates
Standard Specification for Precipitation–Strengthened Low-Carbon Nickel-Copper-Chromium-Molybdenum-Columbium Alloy Structural Steel Plates
ABSTRACT
This specification covers precipitation-strengthened low carbon nickel copper-chromium-molybdenum-columbium alloy structural steel plates. Precipitation strengthening and precipitation heat treatment shall be performed on the material to enhance and alter the required structural and mechanical properties. Heat analysis shall be used to determine the required chemical composition for carbon, manganese, phosphorus, sulfur, nickel, chromium, molybdenum, copper, columbium, and titanium. Yield strength, tensile strength, and elongation shall be evaluated using tension test and the required toughness shall be evaluated using notch toughness test.
SCOPE
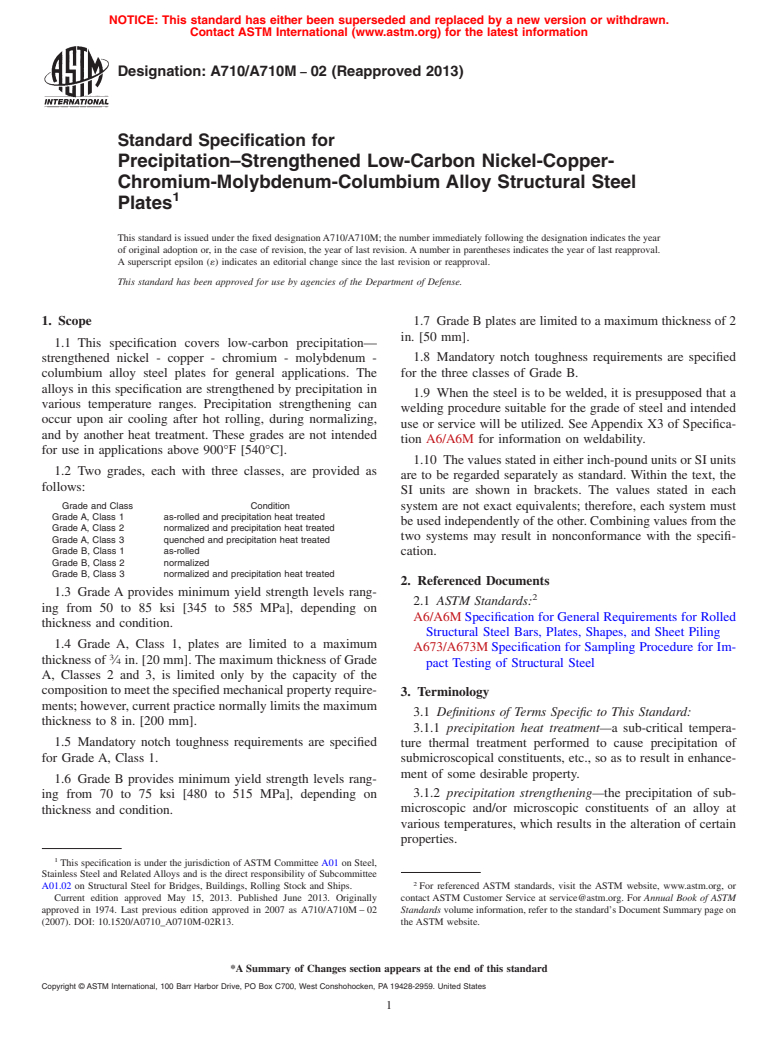
1.1 This specification covers low-carbon precipitation—strengthened nickel - copper - chromium - molybdenum - columbium alloy steel plates for general applications. The alloys in this specification are strengthened by precipitation in various temperature ranges. Precipitation strengthening can occur upon air cooling after hot rolling, during normalizing, and by another heat treatment. These grades are not intended for use in applications above 900°F [540°C].
1.2 Two grades, each with three classes, are provided as follows:
Grade and Class
Condition
Grade A, Class 1
as-rolled and precipitation heat treated
Grade A, Class 2
normalized and precipitation heat treated
Grade A, Class 3
quenched and precipitation heat treated
Grade B, Class 1
as-rolled
Grade B, Class 2
normalized
Grade B, Class 3
normalized and precipitation heat treated
1.3 Grade A provides minimum yield strength levels ranging from 50 to 85 ksi [345 to 585 MPa], depending on thickness and condition.
1.4 Grade A, Class 1, plates are limited to a maximum thickness of 3/4 in. [20 mm]. The maximum thickness of Grade A, Classes 2 and 3, is limited only by the capacity of the composition to meet the specified mechanical property requirements; however, current practice normally limits the maximum thickness to 8 in. [200 mm].
1.5 Mandatory notch toughness requirements are specified for Grade A, Class 1.
1.6 Grade B provides minimum yield strength levels ranging from 70 to 75 ksi [480 to 515 MPa], depending on thickness and condition.
1.7 Grade B plates are limited to a maximum thickness of 2 in. [50 mm].
1.8 Mandatory notch toughness requirements are specified for the three classes of Grade B.
1.9 When the steel is to be welded, it is presupposed that a welding procedure suitable for the grade of steel and intended use or service will be utilized. See Appendix X3 of Specification A6/A6M for information on weldability.
1.10 The values stated in either inch-pound units or SI units are to be regarded separately as standard. Within the text, the SI units are shown in brackets. The values stated in each system are not exact equivalents; therefore, each system must be used independently of the other. Combining values from the two systems may result in nonconformance with the specification.
General Information
Relations
Standards Content (Sample)
NOTICE: This standard has either been superseded and replaced by a new version or withdrawn.
Contact ASTM International (www.astm.org) for the latest information
Designation: A710/A710M −02 (Reapproved 2013)
Standard Specification for
Precipitation–Strengthened Low-Carbon Nickel-Copper-
Chromium-Molybdenum-Columbium Alloy Structural Steel
Plates
This standard is issued under the fixed designationA710/A710M; the number immediately following the designation indicates the year
of original adoption or, in the case of revision, the year of last revision.Anumber in parentheses indicates the year of last reapproval.
A superscript epsilon (´) indicates an editorial change since the last revision or reapproval.
This standard has been approved for use by agencies of the Department of Defense.
1. Scope 1.7 Grade B plates are limited to a maximum thickness of 2
in. [50 mm].
1.1 This specification covers low-carbon precipitation—
strengthened nickel - copper - chromium - molybdenum - 1.8 Mandatory notch toughness requirements are specified
for the three classes of Grade B.
columbium alloy steel plates for general applications. The
alloys in this specification are strengthened by precipitation in
1.9 When the steel is to be welded, it is presupposed that a
various temperature ranges. Precipitation strengthening can
welding procedure suitable for the grade of steel and intended
occur upon air cooling after hot rolling, during normalizing,
use or service will be utilized. See Appendix X3 of Specifica-
and by another heat treatment. These grades are not intended
tion A6/A6M for information on weldability.
for use in applications above 900°F [540°C].
1.10 The values stated in either inch-pound units or SI units
1.2 Two grades, each with three classes, are provided as
are to be regarded separately as standard. Within the text, the
follows:
SI units are shown in brackets. The values stated in each
Grade and Class Condition
system are not exact equivalents; therefore, each system must
Grade A, Class 1 as-rolled and precipitation heat treated
beusedindependentlyoftheother.Combiningvaluesfromthe
Grade A, Class 2 normalized and precipitation heat treated
two systems may result in nonconformance with the specifi-
Grade A, Class 3 quenched and precipitation heat treated
Grade B, Class 1 as-rolled
cation.
Grade B, Class 2 normalized
Grade B, Class 3 normalized and precipitation heat treated
2. Referenced Documents
1.3 Grade A provides minimum yield strength levels rang-
2.1 ASTM Standards:
ing from 50 to 85 ksi [345 to 585 MPa], depending on
A6/A6MSpecification for General Requirements for Rolled
thickness and condition.
Structural Steel Bars, Plates, Shapes, and Sheet Piling
1.4 Grade A, Class 1, plates are limited to a maximum
A673/A673MSpecification for Sampling Procedure for Im-
thickness of ⁄4 in. [20 mm]. The maximum thickness of Grade
pact Testing of Structural Steel
A, Classes 2 and 3, is limited only by the capacity of the
compositiontomeetthespecifiedmechanicalpropertyrequire-
3. Terminology
ments;however,currentpracticenormallylimitsthemaximum
3.1 Definitions of Terms Specific to This Standard:
thickness to 8 in. [200 mm].
3.1.1 precipitation heat treatment—a sub-critical tempera-
1.5 Mandatory notch toughness requirements are specified ture thermal treatment performed to cause precipitation of
for Grade A, Class 1.
submicroscopical constituents, etc., so as to result in enhance-
ment of some desirable property.
1.6 Grade B provides minimum yield strength levels rang-
3.1.2 precipitation strengthening—the precipitation of sub-
ing from 70 to 75 ksi [480 to 515 MPa], depending on
microscopic and/or microscopic constituents of an alloy at
thickness and condition.
various temperatures, which results in the alteration of certain
properties.
This specification is under the jurisdiction ofASTM Committee A01 on Steel,
Stainless Steel and RelatedAlloys and is the direct responsibility of Subcommittee
A01.02 on Structural Steel for Bridges, Buildings, Rolling Stock and Ships. For referenced ASTM standards, visit the ASTM website, www.astm.org, or
Current edition approved May 15, 2013. Published June 2013. Originally contact ASTM Customer Service at service@astm.org. For Annual Book of ASTM
approved in 1974. Last previous edition approved in 2007 as A710/A710M–02 Standards volume information, refer to the standard’s Document Summary page on
(2007). DOI: 10.1520/A0710_A0710M-02R13. the ASTM website.
*A Summary of Changes section appears at the end of this standard
Copyright © ASTM International, 100 Barr Harbor Drive, PO Box C700, West Conshohocken, PA 19428-2959. United States
A710/A710M − 02 (2013)
3.1.3 soak—to hold at temperature after the material has manufacturer shall heat treat the test coupons under conditions
attained the temperature throughout. he considers appropriate. The manufacturer shall inform the
purchaser of the procedure followed in thermally treating the
4. General Requirements for Delivery
test coupons at the mill.
4.1 Material furnished under this specification shall con-
7. Chemical Composition
form to the requirements of the current edition of Specification
7.1 The heat analysis shall conform to the requirements as
A6/A6M, for the ordered material, unless a conflict exists in
to chemical composition prescribed in Table 1.
which case this specification shall prevail.
7.2 The steel shall conform on product analysis to the
5. Materials and Manufacture
requirements prescribed in Table 1, subject to the product
5.1 The steel shall be made to fine grain practice.
analysis tolerance in Specification A6/A6M for alloy steels.
6. Heat Treatment
8. Tension Test
6.1 Grade A, Class 1 material shall be precipitation heat
8.1 The material, as represented by the test specimens, shall
treated in the temperature range from 1000 to 1300°F [540 to
conform to the requirements specified in Table 2.
705°C] for a time to be determined by the material manufac-
8.2 Number of Tests—One tension test shall be taken from a
turer.
corner of each plate as heat treated for each class of material.
6.2 Grade A, Class 2 material shall be normalized at a
For plates ⁄8 in. [10 mm] and under in thickness, a tension test
temperature in the range from 1600 to 1700°F [870 to 925°C]
shall be made from a corner of each of two plates per lot.Alot
andthenprecipitationheattreatedatatemperatureintherange
shall consist of plates from the same heat and thickness, same
from 1000 to 1300°F [540 to 705°C] for a time to be
prior condition and scheduled heat treatment, and shall not
determined by the material manufacturer.
exceed 15 tons [13.6 Mg] in weight. Plates wider than 24 in.
[610 mm] shall be tested in the transverse direction and are
6.3 GradeA, Class 3 material shall be quenched in water or
subject to the modifications for elongation contained in foot-
oil from a temperature in the range from 1600 to 1700°F [870
D
note of Table 2.
to 925°C] and then precipitation heat treated at a temperature
in the range from 1000 to 1300°F [540 to 705°C] for a time to
9. Notch Toughness Requirements
be determined by the material manufacturer.
9.1 Notch Toughness Tests—Grade A, Class 1:
6.4 Grade B, Class 1 shall be hot-rolled.
9.1.1 Notch toughness tests shall be made in accordance
6.5 GradeB,Class2shallbenormalizedafterhotrollingby with Test Frequency H of Specification A673/A673M. Upon
reheatingto1600to1700°F[870to925°C],andt
...


Questions, Comments and Discussion
Ask us and Technical Secretary will try to provide an answer. You can facilitate discussion about the standard in here.