ASTM A673/A673M-17
(Specification)Standard Specification for Sampling Procedure for Impact Testing of Structural Steel
Standard Specification for Sampling Procedure for Impact Testing of Structural Steel
ABSTRACT
This test method deals with the standard sampling procedure for impact testing of structural steel. Covered are the procedures for longitudinal Charpy V-notch testing, which contain two testing frequencies. The two frequencies for testing (H and P), frequency (H) heat testing, and frequency (P) piece testing, are discussed and presented in details.
SCOPE
1.1 This specification covers the procedure for Charpy V-notch testing of structural steel and contains two frequencies of testing. The impact properties of steel can vary within the same heat and piece, be it as-rolled, control-rolled, or heat treated. The purchaser should, therefore, be aware that testing of one plate, bar, or shape does not provide assurance all plates, bars, or shapes of the same heat as processed will be identical in toughness with the product tested. Normalizing or quenching and tempering the product will reduce the degree of variation.
1.2 This specification is intended to supplement specifications for structural steel when so specified.
1.3 This specification does not necessarily apply to all product specifications; therefore, the manufacturer or processor should be consulted for energy absorption levels and minimum testing temperatures that can be expected or supplied.
1.4 Two frequencies of testing (P and H) are prescribed.
1.5 The values stated in either inch-pound units or SI units are to be regarded as standard. Within the text, the SI units are shown in brackets. The values stated in each system are not exact equivalents; therefore, each system must be used independently of the other. Combining values from the two systems may result in nonconformance with this specification.
1.6 This international standard was developed in accordance with internationally recognized principles on standardization established in the Decision on Principles for the Development of International Standards, Guides and Recommendations issued by the World Trade Organization Technical Barriers to Trade (TBT) Committee.
General Information
- Status
- Published
- Publication Date
- 14-Nov-2017
- Technical Committee
- A01 - Steel, Stainless Steel and Related Alloys
Relations
- Effective Date
- 15-Nov-2017
- Effective Date
- 01-Mar-2024
- Effective Date
- 01-Mar-2024
- Effective Date
- 01-Nov-2023
- Effective Date
- 01-Jul-2019
- Refers
ASTM A370-17a - Standard Test Methods and Definitions for Mechanical Testing of Steel Products - Effective Date
- 15-Nov-2017
- Effective Date
- 01-Nov-2017
- Effective Date
- 01-Jan-2017
- Effective Date
- 15-Nov-2016
- Effective Date
- 01-May-2016
- Effective Date
- 01-Nov-2015
- Effective Date
- 15-May-2014
- Effective Date
- 01-May-2014
- Effective Date
- 15-Nov-2013
- Effective Date
- 01-Oct-2013
Overview
ASTM A673/A673M-17: Standard Specification for Sampling Procedure for Impact Testing of Structural Steel establishes a standardized procedure for conducting Charpy V-notch impact testing on structural steel products. Developed by ASTM International, this standard supports quality control and assurance processes by outlining sampling methods and testing frequencies designed to evaluate the impact toughness of steel plates, shapes, and bars used in construction and fabrication. The specification applies to products in various delivery conditions, including as-rolled, control-rolled, normalized, or heat-treated conditions, and ensures consistent reporting and acceptance criteria for impact test results.
Key Topics
- Sampling Methods: ASTM A673/A673M specifies how to select test specimens from structural steel products to accurately represent mechanical properties, especially impact toughness. Specimens are typically taken longitudinally and are oriented in the direction of rolling unless otherwise specified.
- Impact Test Procedure: The standard centers on the Charpy V-notch test, a widely accepted method to determine steel’s ability to absorb energy at different temperatures, reflecting its toughness and resistance to brittle fracture.
- Testing Frequencies:
- Frequency H (Heat Testing): Involves taking impact test specimens from steel products at a rate of one set per 50 tons produced from the same heat.
- Frequency P (Piece Testing): Requires impact testing on each individual plate, bar, or shape, or in set quantities per coil or length, depending on the product type and treatment.
- Energy Absorption Criteria: Specifies minimum absorbed energy values as part of acceptance, with requirements for different specimen sizes and test conditions.
- Test Reporting: The standard outlines the documentation needed, including test results, test temperatures, and material thickness, to provide full traceability and compliance information for purchasers and manufacturers.
- Unit Consistency: Allows the use of either inch-pound or SI units, but explicitly prohibits mixing both in calculations to prevent nonconformance.
- Supplemental Application: Intended to be used alongside product-specific structural steel standards when specified in the purchase order.
Applications
The ASTM A673/A673M-17 standard is essential in sectors where the impact toughness of structural steel is critical for safety and performance, such as:
- Building construction: Ensuring structural integrity of beams, columns, and plates in buildings, especially in regions subject to cold temperatures or seismic activity.
- Bridges: Verifying the toughness of steel used in bridge components to resist dynamic or impact loads.
- Infrastructure projects: Supporting quality assurance in public works such as transportation infrastructure, pipelines, and energy facilities.
- Shipbuilding and heavy equipment: Applying the impact testing procedures to steel used in ships, rolling stock, and heavy machinery, where material failure could lead to significant hazards.
By following ASTM A673/A673M-17, manufacturers, engineers, and procurement specialists can ensure structural steel products meet specified impact values, minimize the risk of brittle fracture, and maintain regulatory and project compliance.
Related Standards
- ASTM A6/A6M: General requirements for rolled structural steel bars, plates, shapes, and sheet piling.
- ASTM A370: Test methods and definitions for mechanical testing of steel products.
- AASHTO T 243: Sampling procedure for impact testing of structural steel (aligned with the principles of ASTM A673/A673M).
- Referenced product standards: Various ASTM standards for specific structural steel grades and types, often cited in conjunction with ASTM A673/A673M for full compliance.
Keywords: Charpy V-notch impact test, structural steel sampling, steel impact testing, ASTM A673/A673M, testing frequency, steel toughness, construction steel standards, quality assurance in structural steel
Buy Documents
ASTM A673/A673M-17 - Standard Specification for Sampling Procedure for Impact Testing of Structural Steel
REDLINE ASTM A673/A673M-17 - Standard Specification for Sampling Procedure for Impact Testing of Structural Steel
Get Certified
Connect with accredited certification bodies for this standard

Element Materials Technology
Materials testing and product certification.

Inštitut za kovinske materiale in tehnologije
Institute of Metals and Technology. Materials testing, metallurgical analysis, NDT.
Sponsored listings
Frequently Asked Questions
ASTM A673/A673M-17 is a technical specification published by ASTM International. Its full title is "Standard Specification for Sampling Procedure for Impact Testing of Structural Steel". This standard covers: ABSTRACT This test method deals with the standard sampling procedure for impact testing of structural steel. Covered are the procedures for longitudinal Charpy V-notch testing, which contain two testing frequencies. The two frequencies for testing (H and P), frequency (H) heat testing, and frequency (P) piece testing, are discussed and presented in details. SCOPE 1.1 This specification covers the procedure for Charpy V-notch testing of structural steel and contains two frequencies of testing. The impact properties of steel can vary within the same heat and piece, be it as-rolled, control-rolled, or heat treated. The purchaser should, therefore, be aware that testing of one plate, bar, or shape does not provide assurance all plates, bars, or shapes of the same heat as processed will be identical in toughness with the product tested. Normalizing or quenching and tempering the product will reduce the degree of variation. 1.2 This specification is intended to supplement specifications for structural steel when so specified. 1.3 This specification does not necessarily apply to all product specifications; therefore, the manufacturer or processor should be consulted for energy absorption levels and minimum testing temperatures that can be expected or supplied. 1.4 Two frequencies of testing (P and H) are prescribed. 1.5 The values stated in either inch-pound units or SI units are to be regarded as standard. Within the text, the SI units are shown in brackets. The values stated in each system are not exact equivalents; therefore, each system must be used independently of the other. Combining values from the two systems may result in nonconformance with this specification. 1.6 This international standard was developed in accordance with internationally recognized principles on standardization established in the Decision on Principles for the Development of International Standards, Guides and Recommendations issued by the World Trade Organization Technical Barriers to Trade (TBT) Committee.
ABSTRACT This test method deals with the standard sampling procedure for impact testing of structural steel. Covered are the procedures for longitudinal Charpy V-notch testing, which contain two testing frequencies. The two frequencies for testing (H and P), frequency (H) heat testing, and frequency (P) piece testing, are discussed and presented in details. SCOPE 1.1 This specification covers the procedure for Charpy V-notch testing of structural steel and contains two frequencies of testing. The impact properties of steel can vary within the same heat and piece, be it as-rolled, control-rolled, or heat treated. The purchaser should, therefore, be aware that testing of one plate, bar, or shape does not provide assurance all plates, bars, or shapes of the same heat as processed will be identical in toughness with the product tested. Normalizing or quenching and tempering the product will reduce the degree of variation. 1.2 This specification is intended to supplement specifications for structural steel when so specified. 1.3 This specification does not necessarily apply to all product specifications; therefore, the manufacturer or processor should be consulted for energy absorption levels and minimum testing temperatures that can be expected or supplied. 1.4 Two frequencies of testing (P and H) are prescribed. 1.5 The values stated in either inch-pound units or SI units are to be regarded as standard. Within the text, the SI units are shown in brackets. The values stated in each system are not exact equivalents; therefore, each system must be used independently of the other. Combining values from the two systems may result in nonconformance with this specification. 1.6 This international standard was developed in accordance with internationally recognized principles on standardization established in the Decision on Principles for the Development of International Standards, Guides and Recommendations issued by the World Trade Organization Technical Barriers to Trade (TBT) Committee.
ASTM A673/A673M-17 is classified under the following ICS (International Classification for Standards) categories: 77.140.10 - Heat-treatable steels. The ICS classification helps identify the subject area and facilitates finding related standards.
ASTM A673/A673M-17 has the following relationships with other standards: It is inter standard links to ASTM A673/A673M-07(2012), ASTM A370-24, ASTM A6/A6M-24, ASTM A6/A6M-23, ASTM A370-19, ASTM A370-17a, ASTM A6/A6M-17a, ASTM A370-17, ASTM A6/A6M-16a, ASTM A6/A6M-16, ASTM A370-15, ASTM A370-14, ASTM A6/A6M-14, ASTM A370-13, ASTM A6/A6M-13a. Understanding these relationships helps ensure you are using the most current and applicable version of the standard.
ASTM A673/A673M-17 is available in PDF format for immediate download after purchase. The document can be added to your cart and obtained through the secure checkout process. Digital delivery ensures instant access to the complete standard document.
Standards Content (Sample)
This international standard was developed in accordance with internationally recognized principles on standardization established in the Decision on Principles for the
Development of International Standards, Guides and Recommendations issued by the World Trade Organization Technical Barriers to Trade (TBT) Committee.
Designation:A673/A673M −17 American Association State Highway
and Transportation Officials
Standard AASHTO No.: T 243
Standard Specification for
Sampling Procedure for Impact Testing of Structural Steel
This standard is issued under the fixed designationA673/A673M; the number immediately following the designation indicates the year
of original adoption or, in the case of revision, the year of last revision. A number in parentheses indicates the year of last reapproval.
A superscript epsilon (´) indicates an editorial change since the last revision or reapproval.
This standard has been approved for use by agencies of the U.S. Department of Defense.
1. Scope* 2. Referenced Documents
2.1 ASTM Standards:
1.1 This specification covers the procedure for Charpy
A6/A6M Specification for General Requirements for Rolled
V-notch testing of structural steel and contains two frequencies
Structural Steel Bars, Plates, Shapes, and Sheet Piling
of testing. The impact properties of steel can vary within the
A370 Test Methods and Definitions for Mechanical Testing
same heat and piece, be it as-rolled, control-rolled, or heat
of Steel Products
treated. The purchaser should, therefore, be aware that testing
ofoneplate,bar,orshapedoesnotprovideassuranceallplates,
3. Ordering Information
bars, or shapes of the same heat as processed will be identical
3.1 The inquiry and order shall indicate the following:
in toughness with the product tested. Normalizing or quench-
3.1.1 Frequency of testing, (P) or (H),
ing and tempering the product will reduce the degree of
3.1.2 Test temperature (see 4.5 and 4.6),
variation.
3.1.3 Minimum average absorbed energy value (see 4.1 and
4.6),
1.2 This specification is intended to supplement specifica-
3.1.4 Transverse impact test orientation for plate widths
tions for structural steel when so specified.
over 24 in. [600 mm], if desired (see 4.2.2),
1.3 This specification does not necessarily apply to all
3.1.5 Alternate core location (see 4.3), if applicable, and
productspecifications;therefore,themanufacturerorprocessor
3.1.6 Condition (as-rolled, stress relieved, normalized, nor-
should be consulted for energy absorption levels and minimum
malized and stress relieved, or quenched and tempered).
testing temperatures that can be expected or supplied.
4. Tests
1.4 Two frequencies of testing (P and H) are prescribed.
4.1 Impact testing shall be in accordance with Test Methods
1.5 The values stated in either inch-pound units or SI units and Definitions A370. An impact test shall consist of testing
three specimens taken from a single test coupon or test
are to be regarded as standard. Within the text, the SI units are
location, the average result of which shall be not less than the
shown in brackets. The values stated in each system are not
minimum average absorbed energy specified in the purchase
exact equivalents; therefore, each system must be used inde-
order, which in no case shall be less than 7 ft·lbf [10 J] for full
pendentlyoftheother.Combiningvaluesfromthetwosystems
size specimens.
may result in nonconformance with this specification.
4.2 Except as allowed by 4.3, specimens for plates and bars
1.6 This international standard was developed in accor-
shall be taken from a location adjacent to the location specified
dance with internationally recognized principles on standard-
forthetensiontestspecimen,andspecimensforshapesshallbe
ization established in the Decision on Principles for the
taken from a location at an end of the shape at a point one third
Development of International Standards, Guides and Recom-
the distance from the outer edge of the flange or leg to the web
mendations issued by the World Trade Organization Technical
or heel of the shape (see Fig. 1 and Fig. 2). For plates produced
Barriers to Trade (TBT) Committee.
from coils, three impact tests shall be taken from the product of
each coil or qualifying coil (see Section 5); one test coupon
shall be obtained from a location adjacent to the location
This specification is under the jurisdiction of ASTM Committee A01 on Steel,
Stainless Steel and Related Alloys and is the direct responsibility of Subcommittee
A01.02 on Structural Steel for Bridges, Buildings, Rolling Stock and Ships. For referenced ASTM standards, visit the ASTM website, www.astm.org, or
Current edition approved Nov. 15, 2017. Published November 2017. Originally contact ASTM Customer Service at service@astm.org. For Annual Book of ASTM
approved in 1972. Last previous edition approved in 2012 as A673/A673M – 07 Standards volume information, refer to the standard’s Document Summary page on
(2012). DOI: 10.1520/A0673_A0673M-17. the ASTM website.
*A Summary of Changes section appears at the end of this standard
Copyright © ASTM International, 100 Barr Harbor Drive, PO Box C700, West Conshohocken, PA 19428-2959. United States
A673/A673M−17
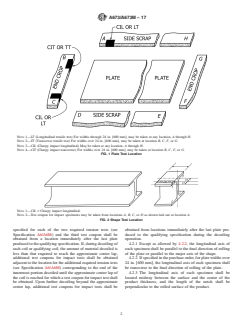
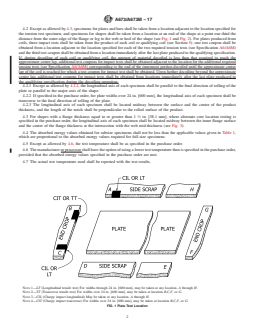
NOTE 1—LT (Longitudinal tensile test) For widths through 24 in. [600 mm], may be taken at any location, A through H.
NOTE 2—TT (Transverse tensile test) For widths over 24 in. [600 mm], may be taken at location B, C, F,or G.
NOTE 3—CIL (Charpy impact longitudinal) May be taken at any location, A through H.
NOTE 4—CIT (Charpy impact transverse) For widths over 24 in. [600 mm], may be taken at location B, C, F,or G.
FIG. 1Plate Test Location
NOTE 1—CIL = Charpy impact longitudinal.
NOTE 2—Test coupon for impact specimens may be taken from locations A, B, C,or D as shown laid out at location A.
FIG. 2Shape Test Location
specified for each of the two required tension tests (see obtained from locations immediately after the last plate pro-
Specification A6/A6M) and the third test coupon shall be duced to the qualifying specification during the decoiling
obtained from a location immediately after the last plate operation.
produced to the qualifying specification. If, during decoiling of 4.2.1 Except as allowed by 4.2.2, the longitudinal axis of
each coil or qualifying coil, the amount of material decoiled is each specimen shall be parallel to the final direction of rolling
less than that required to reach the approximate center lap, of the plate or parallel to the major axis of the shape.
additional test coupons for impact tests shall be obtained 4.2.2 If specified in the purchase order, for plate widths over
adjacent to the location for the additional required tension tests 24 in. [600 mm], the longitudinal axis of each specimen shall
(see Specification A6/A6M) corresponding to the end of the be transverse to the final direction of rolling of the plate.
innermost portion decoiled until the approximate center lap of 4.2.3 The longitudinal axis of each specimen shall be
the coil is reached for which a test coupon for impact test shall located midway between the surface and the center of the
be obtained. Upon further decoiling beyond the approximate product thickness, and the length of the notch shall be
center lap, additional test coupons for impact tests shall be perpendicular to the rolled surface of the product.
A673/A673M−17
4.3 For shapes with a flange thickness equal to or greater steel. When material from one heat differs ⁄16 in. [2 mm] or
than 1 ⁄2 in. [38.1 mm], where alternate core location testing is more in thickness, tests shall be made from both the thickest
specified in the purchase order, the longitudinal axis of each and thinnest material rolled regardless of the number of coils
specimen shall be located midway between the inner flange represented.
surface and the center of the flange thickness at the intersection
5.2 Frequency (P) Piece Testing:
with the web mid-thickness (see Fig. 3).
5.2.1 Plates—One Charpy V-notch impact test (a set of
4.4 The absorbed energy values obtained for subsize speci- three specimens) shall be made from each plate-as-rolled
mens shall not be less than the applicable values given in Table except for material that has been heat treated by quenching and
1, which are proportional to the absorbed energy values tempering, in which case specimens shall be selected from
required for full-size specimens. each heat-treated plate. When plates are produced from coils,
three impact tests shall be taken from each coil.
4.5 Except as allowed by 4.6, the test temperature shall be
5.2.2 Shapes—One Charpy V-notch impact test (a set of
as specified in the purchase order.
three specimens) shall be made from at least each 15 tons [15
4.6 The manufacturer or processor shall have the option of
Mg] or each single length of 15 tons [15 Mg] or more, of the
using a lower test temperature than is specified in the purchase
same nominal shape size, excluding length, from each heat in
order, provided that the absorbed energy values specified in the
the as-rolled condition. If the shapes are heat treated, one test
purchase order are met.
shall be taken from each heat of each furnace lot. For shapes
4.7 The actual test temperature used shall be reported with heat treated in a continuous furnace, a lot shall not exceed 15
the test results. tons [15 Mg].
5.2.3 Bars—One Charpy V-notch impact test (a set of three
5. Frequency of Testing
specimens) shall be made for each 5 tons [5 Mg] of the same
heat and same diameter or thickness if the material is furnished
5.1 Frequency (H) Heat Testing for Plates, Shapes, and
as-rolled or is heat treated in a continuous-type furnace. For
Bars—One impact test (a set of three specimens) shall be made
material heat treated in a noncontinuous furnace, one test shall
for each 50 tons [45 Mg] of the same type of product subje
...
This document is not an ASTM standard and is intended only to provide the user of an ASTM standard an indication of what changes have been made to the previous version. Because
it may not be technically possible to adequately depict all changes accurately, ASTM recommends that users consult prior editions as appropriate. In all cases only the current version
of the standard as published by ASTM is to be considered the official document.
Designation: A673/A673M − 07 (Reapproved 2012) A673/A673M − 17 American Association State Highway
and Transportation Officials
Standard AASHTO No.: T 243
Standard Specification for
Sampling Procedure for Impact Testing of Structural Steel
This standard is issued under the fixed designation A673/A673M; the number immediately following the designation indicates the year
of original adoption or, in the case of revision, the year of last revision. A number in parentheses indicates the year of last reapproval.
A superscript epsilon (´) indicates an editorial change since the last revision or reapproval.
This standard has been approved for use by agencies of the U.S. Department of Defense.
1. Scope Scope*
1.1 This specification covers the procedure for longitudinal Charpy V-notch testing of structural steel and contains two
frequencies of testing. The impact properties of steel can vary within the same heat and piece, be it as rolled, control rolled,
as-rolled, control-rolled, or heat treated. The purchaser should, therefore, be aware that testing of one plate, bar, or shape does not
provide assurance all plates, bars, or shapes of the same heat as processed will be identical in toughness with the product tested.
Normalizing or quenching and tempering the product will reduce the degree of variation.
1.2 This specification is intended to supplement specifications for structural steel when so specified.
1.3 This specification does not necessarily apply to all product specifications; therefore, the manufacturer or processor should
be consulted for energy absorption levels and minimum testing temperatures that can be expected or supplied.
1.4 Two frequencies of testing (P and H) are prescribed.
1.5 The values stated in either inch-pound units or SI units are to be regarded as standard. Within the text, the SI units are shown
in brackets. The values stated in each system are not exact equivalents; therefore, each system must be used independently of the
other. Combining values from the two systems may result in nonconformance with this specification.
1.6 This international standard was developed in accordance with internationally recognized principles on standardization
established in the Decision on Principles for the Development of International Standards, Guides and Recommendations issued
by the World Trade Organization Technical Barriers to Trade (TBT) Committee.
2. Referenced Documents
2.1 ASTM Standards:
A6/A6M Specification for General Requirements for Rolled Structural Steel Bars, Plates, Shapes, and Sheet Piling
A370 Test Methods and Definitions for Mechanical Testing of Steel Products
3. Ordering Information
3.1 The inquiry and order shall indicate the following:
3.1.1 Frequency of testing, (P) or (H),
3.1.2 Test temperature (see 4.5 and 4.6),
3.1.3 Minimum average absorbed energy value (see 4.1 and 4.6),
3.1.4 Transverse impact test orientation for plate widths over 24 in. [600 mm], if desired (see 4.2.2),
3.1.5 Alternate core location (see 4.3), if applicable, and
3.1.6 Condition (as-rolled, stress relieved, normalized, normalized and stress relieved, or quenched and tempered).
4. Tests
4.1 Impact testing shall be in accordance with Test Methods and Definitions A370. An impact test shall consist of testing three
specimens taken from a single test coupon or test location, the average result of which shall be not less than the minimum average
absorbed energy specified in the purchase order, which in no case shall be less than 7 ft·lbf [10 J] for full size specimens.
This specification is under the jurisdiction of ASTM Committee A01 on Steel, Stainless Steel and Related Alloys and is the direct responsibility of Subcommittee A01.02
on Structural Steel for Bridges, Buildings, Rolling Stock and Ships.
Current edition approved March 1, 2012Nov. 15, 2017. Published April 2012November 2017. Originally approved in 1972. Last previous edition approved in 20072012
as A673/A673M – 07.A673/A673M – 07 (2012). DOI: 10.1520/A0673_A0673M-07R12. 10.1520/A0673_A0673M-17.
For referenced ASTM standards, visit the ASTM website, www.astm.org, or contact ASTM Customer Service at service@astm.org. For Annual Book of ASTM Standards
volume information, refer to the standard’s Document Summary page on the ASTM website.
*A Summary of Changes section appears at the end of this standard
Copyright © ASTM International, 100 Barr Harbor Drive, PO Box C700, West Conshohocken, PA 19428-2959. United States
A673/A673M − 17
4.2 Except as allowed by 4.3, specimens for plates and bars shall be taken from a location adjacent to the location specified for
the tension test specimen, and specimens for shapes shall be taken from a location at an end of the shape at a point one third the
distance from the outer edge of the flange or leg to the web or heel of the shape (see Fig. 1 and Fig. 2). For plates produced from
coils, three impact tests shall be taken from the product of each coil or qualifying coil (see Section 5); one test coupon shall be
obtained from a location adjacent to the location specified for each of the two required tension tests (see Specification A6/A6M)
and the third test coupon shall be obtained from a location immediately after the last plate produced to the qualifying specification.
If, during decoiling of each coil or qualifying coil, the amount of material decoiled is less than that required to reach the
approximate center lap, additional test coupons for impact tests shall be obtained adjacent to the location for the additional required
tension tests (see Specification A6/A6M) corresponding to the end of the innermost portion decoiled until the approximate center
lap of the coil is reached for which a test coupon for impact test shall be obtained. Upon further decoiling beyond the approximate
center lap, additional test coupons for impact tests shall be obtained from locations immediately after the last plate produced to
the qualifying specification during the decoiling operation.
4.2.1 Except as allowed by 4.2.2, the longitudinal axis of each specimen shall be parallel to the final direction of rolling of the
plate or parallel to the major axis of the shape.
4.2.2 If specified in the purchase order, for plate widths over 24 in. [600 mm], the longitudinal axis of each specimen shall be
transverse to the final direction of rolling of the plate.
4.2.3 The longitudinal axis of each specimen shall be located midway between the surface and the center of the product
thickness, and the length of the notch shall be perpendicular to the rolled surface of the product.
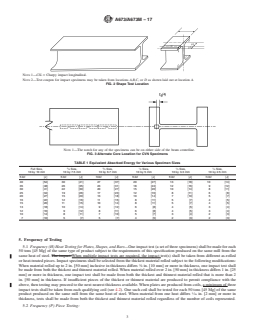
4.3 For shapes with a flange thickness equal to or greater than 1 ⁄2 in. [38.1 mm], where alternate core location testing is
specified in the purchase order, the longitudinal axis of each specimen shall be located midway between the inner flange surface
and the center of the flange thickness at the intersection with the web mid-thickness (see Fig. 3).
4.4 The absorbed energy values obtained for subsize specimens shall not be less than the applicable values given in Table 1,
which are proportional to the absorbed energy values required for full-size specimens.
4.5 Except as allowed by 4.6, the test temperature shall be as specified in the purchase order.
4.6 The manufacturer or processor shall have the option of using a lower test temperature than is specified in the purchase order,
provided that the absorbed energy values specified in the purchase order are met.
4.7 The actual test temperature used shall be reported with the test results.
NOTE 1—LT (Longitudinal tensile test) For widths through 24 in. [600 mm], may be taken at any location, A through H.
NOTE 2—TT (Transverse tensile test) For widths over 24 in. [600 mm], may be taken at location B,C,F, or G.
NOTE 3—CIL (Charpy impact longitudinal) May be taken at any location, A through H.
NOTE 4—CIT (Charpy impact transverse) For widths over 24 in. [600 mm], may be taken at location B,C,F, or G.
FIG. 1 Plate Test Location
A673/A673M − 17
NOTE 1—CIL = Charpy impact longitudinal.
NOTE 2—Test coupon for impact specimens may be taken from locations A,B,C, or D as shown laid out at location A.
FIG. 2 Shape Test Location
NOTE 1—The notch for any of the specimens can be on either side of the beam centerline.
FIG. 3 Alternate Core Location for CVN Specimens
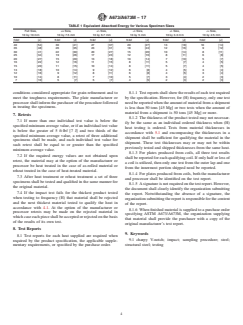
TABLE 1 Equivalent Absorbed Energy for Various Specimen Sizes
3 2 1 1 1
Full Size, ⁄4 Size, ⁄3 Size, ⁄2 Size, ⁄3 Size, ⁄4 Size,
10 by 10 mm 10 by 7.5 mm 10 by 6.7 mm 10 by 5 mm 10 by 3.3 mm 10 by 2.5 mm
ft·lbf [J] ft·lbf [J] ft·lbf [J] ft·lbf [J] ft·lbf [J] ft·lbf [J]
40 [54] 30 [41] 27 [37] 20 [27] 13 [18] 10 [14]
35 [48] 26 [35] 23 [31] 18 [24] 12 [16] 9 [12]
30 [41] 22 [30] 20 [27] 15 [20] 10 [14] 8 [11]
25 [34] 19 [26] 17 [23] 12 [16] 8 [11] 6 [8]
20 [27] 15 [20] 13 [18] 10 [14] 7 [10] 5 [7]
16 [22] 12 [16] 11 [15] 8 [11] 5 [7] 4 [5]
15 [20] 11 [15] 10 [14] 8 [11] 5 [7] 4 [5]
13 [18] 10 [14] 9 [12] 6 [8] 4 [5] 3 [4]
12 [16] 9 [12] 8 [11] 6 [8] 4 [5] 3 [4]
10 [14] 8 [11] 7 [10] 5 [7] 3 [4] 2 [3]
7 [10] 5 [7] 5 [7] 4 [5] 2 [3] 2 [3]
5. Frequency of Testing
5.1 Frequency (H) Heat Testing for Plates, Shapes, and Bars—One impact test (a set of three specimens) shall be made for each
50 tons [45 Mg] of the same type of product subject to the requirements of this specification produced on the same mill from the
same heat of steel. The impact When multiple impact tests are required, the impact test(s) shall be taken from different as-rolled
or heat-treated pieces. Impact specimens shall be selected from the thickest material rolled subject to the following modifications:
When material rolled up to 2
...
Questions, Comments and Discussion
Ask us and Technical Secretary will try to provide an answer. You can facilitate discussion about the standard in here.
Loading comments...