ASTM A472/A472M-23
(Specification)Standard Specification for Heat Stability of Steam Turbine Shafts and Rotor Forgings
Standard Specification for Heat Stability of Steam Turbine Shafts and Rotor Forgings
ABSTRACT
This measurement method covers the procedures for the standard practice of determining the heat stability of steam turbine and rotor forgings to ensure stability at operating temperature. Surface and test band preparation, and heating and cooling procedures prior to stability measurements are detailed. Interpretation of the results of cold and hot measurements is also described.
SCOPE
1.1 This specification covers the determination of heat stability of steam turbine shafts and rotor forgings to ensure stability at operating temperature. This specification is not ordinarily applicable to generator rotor forgings.
1.2 This specification is expressed in both inch-pound units and in SI units; however, unless the purchase order or contract specifies the applicable M specification designation (SI units), the inch-pound units shall apply. The values stated in either inch-pound units or SI units are to be regarded separately as standard. Within the specification, the SI units are shown in brackets. The values stated in each system are not necessarily exact equivalents; therefore, to ensure conformance with the standard, each system shall be used independently of the other, and values from the two systems shall not be combined.
1.3 Supplementary requirements of an optional nature are provided for use at the option of the purchaser. The supplementary requirements shall apply only when specified individually by the purchaser in the purchase order or contract.
1.4 This standard does not purport to address all of the safety concerns, if any, associated with its use. It is the responsibility of the user of this standard to establish appropriate safety, health, and environmental practices and determine the applicability of regulatory limitations prior to use.
1.5 This international standard was developed in accordance with internationally recognized principles on standardization established in the Decision on Principles for the Development of International Standards, Guides and Recommendations issued by the World Trade Organization Technical Barriers to Trade (TBT) Committee.
General Information
- Status
- Published
- Publication Date
- 31-Oct-2023
- Technical Committee
- A01 - Steel, Stainless Steel and Related Alloys
- Drafting Committee
- A01.06 - Steel Forgings and Billets
Relations
- Effective Date
- 01-Nov-2023
- Effective Date
- 01-Mar-2024
- Effective Date
- 01-May-2023
- Effective Date
- 01-Nov-2023
Overview
ASTM A472/A472M-23 establishes the standard specification for assessing the heat stability of steam turbine shafts and rotor forgings. Developed by ASTM International, this standard outlines rigorous methods to determine if turbine forgings maintain dimensional stability at operational temperatures. By specifying test procedures, surface preparation, heating and cooling cycles, and the interpretation of measurement results, ASTM A472/A472M-23 provides essential guidance for manufacturers, suppliers, and purchasers of steam turbine components globally.
Key Topics
Heat Stability Testing
The standard details the methodology for performing heat stability tests on steam turbine shafts and rotor forgings following final heat treatment and machining. This process assesses whether the center movement of the forging remains within acceptable limits after exposure to operational temperatures.Test Band Preparation
ASTM A472/A472M-23 prescribes the layout and machining of circumferential test bands at specific positions on the forging. These bands are critical for accurate measurement of deflections before, during, and after thermal cycling.Measurement Procedures
The standard specifies the technique for taking initial cold, hot, and final cold measurements at predetermined test points, using precise measurement devices to record minute deflections that indicate stability or instability.Heating and Cooling Parameters
Strict control of heating rates, uniform application of heat, and regulated cooling are emphasized to ensure test accuracy and repeatability.Result Interpretation
ASTM A472/A472M-23 sets forth go/no-go limits for dimensional movement based on the difference between hot and cold measurements at each test band, establishing objective acceptance criteria for forgings.Supplementary Requirements
Optional supplementary requirements, such as uniform emissivity coatings, can be specified by the purchaser to address unique technical needs.
Applications
ASTM A472/A472M-23 is essential in power generation and heavy industry sectors where the reliable operation of steam turbines is critical. Its practical value includes:
Steam Turbine Manufacturing
Ensures that rotor forgings and turbine shafts meet stringent heat stability criteria before installation, reducing the risk of in-service dimensional changes that could affect performance or safety.Quality Assurance
Provides a standardized approach for buyers and suppliers to verify that equipment meets contract requirements and international performance expectations.Maintenance and Replacement
Used to evaluate replacement or overhauled turbine rotors, mitigating the risk of future operational instability.Contractual Compliance
Assures conformance with industry best practices and procurement specifications for heat stability, critical in regulated energy markets.
Related Standards
- ASTM A788 - Specification for Steel Forgings, General Requirements: Provides the overarching requirements for steel forgings used in similar applications.
- ASTM A941 - Terminology Relating to Steel, Stainless Steel, Related Alloys, and Ferroalloys: Offers definitions of key terms used in the context of rotor and forging manufacturing.
- International Standards Development
ASTM A472/A472M-23 aligns with globally recognized principles for international standardization, supporting compatibility with transnational trade and regulatory frameworks.
Conclusion
By following ASTM A472/A472M-23, manufacturers and users of steam turbine components can ensure consistent, reliable heat stability across critical rotating elements. This enhances long-term operational integrity, reduces risk of unplanned outages, and meets the demanding requirements of modern industrial and energy sectors. For comprehensive heat stability assessment and best practice in rotor forging quality control, adherence to this standard is highly recommended.
Buy Documents
ASTM A472/A472M-23 - Standard Specification for Heat Stability of Steam Turbine Shafts and Rotor Forgings
REDLINE ASTM A472/A472M-23 - Standard Specification for Heat Stability of Steam Turbine Shafts and Rotor Forgings
Get Certified
Connect with accredited certification bodies for this standard

Element Materials Technology
Materials testing and product certification.

Inštitut za kovinske materiale in tehnologije
Institute of Metals and Technology. Materials testing, metallurgical analysis, NDT.
Sponsored listings
Frequently Asked Questions
ASTM A472/A472M-23 is a technical specification published by ASTM International. Its full title is "Standard Specification for Heat Stability of Steam Turbine Shafts and Rotor Forgings". This standard covers: ABSTRACT This measurement method covers the procedures for the standard practice of determining the heat stability of steam turbine and rotor forgings to ensure stability at operating temperature. Surface and test band preparation, and heating and cooling procedures prior to stability measurements are detailed. Interpretation of the results of cold and hot measurements is also described. SCOPE 1.1 This specification covers the determination of heat stability of steam turbine shafts and rotor forgings to ensure stability at operating temperature. This specification is not ordinarily applicable to generator rotor forgings. 1.2 This specification is expressed in both inch-pound units and in SI units; however, unless the purchase order or contract specifies the applicable M specification designation (SI units), the inch-pound units shall apply. The values stated in either inch-pound units or SI units are to be regarded separately as standard. Within the specification, the SI units are shown in brackets. The values stated in each system are not necessarily exact equivalents; therefore, to ensure conformance with the standard, each system shall be used independently of the other, and values from the two systems shall not be combined. 1.3 Supplementary requirements of an optional nature are provided for use at the option of the purchaser. The supplementary requirements shall apply only when specified individually by the purchaser in the purchase order or contract. 1.4 This standard does not purport to address all of the safety concerns, if any, associated with its use. It is the responsibility of the user of this standard to establish appropriate safety, health, and environmental practices and determine the applicability of regulatory limitations prior to use. 1.5 This international standard was developed in accordance with internationally recognized principles on standardization established in the Decision on Principles for the Development of International Standards, Guides and Recommendations issued by the World Trade Organization Technical Barriers to Trade (TBT) Committee.
ABSTRACT This measurement method covers the procedures for the standard practice of determining the heat stability of steam turbine and rotor forgings to ensure stability at operating temperature. Surface and test band preparation, and heating and cooling procedures prior to stability measurements are detailed. Interpretation of the results of cold and hot measurements is also described. SCOPE 1.1 This specification covers the determination of heat stability of steam turbine shafts and rotor forgings to ensure stability at operating temperature. This specification is not ordinarily applicable to generator rotor forgings. 1.2 This specification is expressed in both inch-pound units and in SI units; however, unless the purchase order or contract specifies the applicable M specification designation (SI units), the inch-pound units shall apply. The values stated in either inch-pound units or SI units are to be regarded separately as standard. Within the specification, the SI units are shown in brackets. The values stated in each system are not necessarily exact equivalents; therefore, to ensure conformance with the standard, each system shall be used independently of the other, and values from the two systems shall not be combined. 1.3 Supplementary requirements of an optional nature are provided for use at the option of the purchaser. The supplementary requirements shall apply only when specified individually by the purchaser in the purchase order or contract. 1.4 This standard does not purport to address all of the safety concerns, if any, associated with its use. It is the responsibility of the user of this standard to establish appropriate safety, health, and environmental practices and determine the applicability of regulatory limitations prior to use. 1.5 This international standard was developed in accordance with internationally recognized principles on standardization established in the Decision on Principles for the Development of International Standards, Guides and Recommendations issued by the World Trade Organization Technical Barriers to Trade (TBT) Committee.
ASTM A472/A472M-23 is classified under the following ICS (International Classification for Standards) categories: 77.140.85 - Iron and steel forgings. The ICS classification helps identify the subject area and facilitates finding related standards.
ASTM A472/A472M-23 has the following relationships with other standards: It is inter standard links to ASTM A472/A472M-07(2022), ASTM A941-24, ASTM A941-23, ASTM A470/A470M-05(2020). Understanding these relationships helps ensure you are using the most current and applicable version of the standard.
ASTM A472/A472M-23 is available in PDF format for immediate download after purchase. The document can be added to your cart and obtained through the secure checkout process. Digital delivery ensures instant access to the complete standard document.
Standards Content (Sample)
This international standard was developed in accordance with internationally recognized principles on standardization established in the Decision on Principles for the
Development of International Standards, Guides and Recommendations issued by the World Trade Organization Technical Barriers to Trade (TBT) Committee.
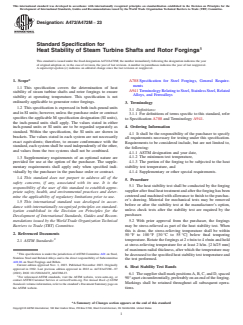
Designation: A472/A472M − 23
Standard Specification for
Heat Stability of Steam Turbine Shafts and Rotor Forgings
This standard is issued under the fixed designation A472/A472M; the number immediately following the designation indicates the year
of original adoption or, in the case of revision, the year of last revision. A number in parentheses indicates the year of last reapproval.
A superscript epsilon (´) indicates an editorial change since the last revision or reapproval.
1. Scope* A788 Specification for Steel Forgings, General Require-
ments
1.1 This specification covers the determination of heat
A941 Terminology Relating to Steel, Stainless Steel, Related
stability of steam turbine shafts and rotor forgings to ensure
Alloys, and Ferroalloys
stability at operating temperature. This specification is not
ordinarily applicable to generator rotor forgings.
3. Terminology
1.2 This specification is expressed in both inch-pound units
3.1 Definitions:
and in SI units; however, unless the purchase order or contract
3.1.1 For definitions of terms specific to this standard, refer
specifies the applicable M specification designation (SI units),
to Specification A788 and Terminology A941.
the inch-pound units shall apply. The values stated in either
inch-pound units or SI units are to be regarded separately as 4. Ordering Information
standard. Within the specification, the SI units are shown in
4.1 It shall be the responsibility of the purchaser to specify
brackets. The values stated in each system are not necessarily
all requirements necessary for testing under this specification.
exact equivalents; therefore, to ensure conformance with the
Requirements to be considered include, but are not limited to,
standard, each system shall be used independently of the other,
the following:
and values from the two systems shall not be combined.
4.1.1 ASTM designation and year date,
1.3 Supplementary requirements of an optional nature are 4.1.2 The minimum test temperature,
4.1.3 The portion of the forging to be subjected to the heat
provided for use at the option of the purchaser. The supple-
mentary requirements shall apply only when specified indi- stability test temperature, and
4.1.4 Supplementary or other special requirements.
vidually by the purchaser in the purchase order or contract.
1.4 This standard does not purport to address all of the
5. Procedure
safety concerns, if any, associated with its use. It is the
5.1 The heat stability test shall be conducted by the forging
responsibility of the user of this standard to establish appro-
supplier after final heat treatment and after the forging has been
priate safety, health, and environmental practices and deter-
centered and machined with allowance to finish to the purchas-
mine the applicability of regulatory limitations prior to use.
er’s drawing. Material for mechanical tests may be removed
1.5 This international standard was developed in accor-
before or after the stability test at the manufacturer’s option,
dance with internationally recognized principles on standard-
unless check tests after the stability test are required by the
ization established in the Decision on Principles for the
purchaser.
Development of International Standards, Guides and Recom-
mendations issued by the World Trade Organization Technical
5.2 With prior approval from the purchaser, the forgings
Barriers to Trade (TBT) Committee. may be stress-relieved as part of the heat stability test. When
this is done, the stress-relieving temperature shall be within
2. Referenced Documents
50 °F to 100 °F [30 °C to 55 °C] below final tempering
temperature. Rotate the forgings at 2 r ⁄min to 4 r/min and hold
2.1 ASTM Standards:
at stress-relieving temperature for at least 2 h/in. [2 h/25 mm]
of maximum radial thickness, after which the temperature may
This specification is under the jurisdiction of ASTM Committee A01 on Steel,
be decreased to the specified heat stability test temperature and
Stainless Steel and Related Alloys and is the direct responsibility of Subcommittee
the test performed.
A01.06 on Steel Forgings and Billets.
Current edition approved Nov. 1, 2023. Published November 2023. Originally
6. Heat Stability Test Bands
approved in 1962. Last previous edition approved in 2022 as A472/A472M – 07
(2022). DOI: 10.1520/A0472_A0472M-23.
6.1 The supplier shall mark positions A, B, C, and D, spaced
For referenced ASTM standards, visit the ASTM website, www.astm.org, or
90° apart circumferentially, preferably on an end of the forging.
contact ASTM Customer Service at service@astm.org. For Annual Book of ASTM
Markings shall be retained throughout all subsequent opera-
Standards volume information, refer to the standard’s Document Summary page on
the ASTM website. tions.
*A Summary of Changes section appears at the end of this standard
Copyright © ASTM International, 100 Barr Harbor Drive, PO Box C700, West Conshohocken, PA 19428-2959. United States
A472/A472M − 23
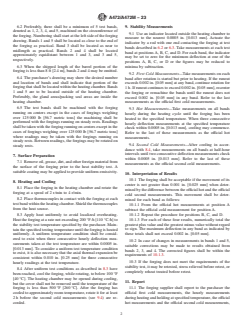
6.2 Preferably, there shall be a minimum of 5 test bands, 9. Stability Measurements
denoted as 1, 2, 3, 4, and 5, machined on the circumference of
9.1 Use an indicator located outside the heating chamber to
the forging. Numbering shall start at the left side of the forging
measure to the nearest 0.0005 in. [0.013 mm]. Actuate the
drawing. Bands 1 and 5 shall be located as close to the end of
indicator by a rod with one end contacting the forging at test
the forging as practical. Band 3 shall be located as near to
bands described in 6.2 or 6.3. Take measurements at each test
midlength as practical. Bands 2 and 4 shall be located
band at positions A, B, C, and D. For each band, the indicator
approximately equidistant between 1 and 3, and 3 and 5,
may be set to zero for the minimum deflection at one of the
respectively.
positions A, B, C, or D or the figures may be reduced to
6.3 When the shipped length of the barrel portion of the
minima by subtraction.
forging is less than 8 ft [2.4 m], bands 2 and 4 may be omitted.
9.2 First Cold Measurements—Take measurements on each
6.4 The purchaser’s drawing may show the desired number
band after rotation is started but prior to heating. If the runout
and location of bands and shall indicate that portion of the
exceeds 0.002 in. [0.05 mm] at any band, continue rotation for
forging that shall be located within the heating chamber. Bands
1 h. If runout continues to exceed 0.002 in. [0.05 mm], recenter
1 and 5 are to be located outside of the heating chamber.
the forging or remachine the bands until the runout does not
Preferably, the gland areas/packing seal areas are inside the
exceed 0.002 in. [0.05 mm] in any band. Refer to the last
heating chamber.
measurements as the official first cold measurements.
6.5 The test bands shall be machined with the forging
9.3 Hot Measurements—Take measurements on all bands
running
...
This document is not an ASTM standard and is intended only to provide the user of an ASTM standard an indication of what changes have been made to the previous version. Because
it may not be technically possible to adequately depict all changes accurately, ASTM recommends that users consult prior editions as appropriate. In all cases only the current version
of the standard as published by ASTM is to be considered the official document.
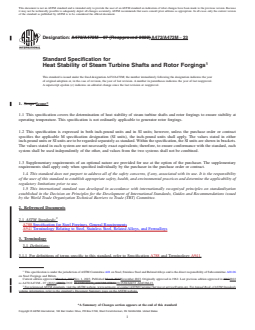
Designation: A472/A472M − 07 (Reapproved 2022) A472/A472M − 23
Standard Specification for
Heat Stability of Steam Turbine Shafts and Rotor Forgings
This standard is issued under the fixed designation A472/A472M; the number immediately following the designation indicates the year
of original adoption or, in the case of revision, the year of last revision. A number in parentheses indicates the year of last reapproval.
A superscript epsilon (´) indicates an editorial change since the last revision or reapproval.
1. Scope Scope*
1.1 This specification covers the determination of heat stability of steam turbine shafts and rotor forgings to ensure stability at
operating temperature. This specification is not ordinarily applicable to generator rotor forgings.
1.2 This specification is expressed in both inch-pound units and in SI units; however, unless the purchase order or contract
specifies the applicable M specification designation (SI units), the inch-pound units shall apply. The values stated in either
inch-pound units or SI units are to be regarded separately as standard. Within the specification, the SI units are shown in brackets.
The values stated in each system are not necessarily exact equivalents; therefore, to ensure conformance with the standard, each
system shall be used independently of the other, and values from the two systems shall not be combined.
1.3 Supplementary requirements of an optional nature are provided for use at the option of the purchaser. The supplementary
requirements shall apply only when specified individually by the purchaser in the purchase order or contract.
1.4 This standard does not purport to address all of the safety concerns, if any, associated with its use. It is the responsibility
of the user of this standard to establish appropriate safety, health, and environmental practices and determine the applicability of
regulatory limitations prior to use.
1.5 This international standard was developed in accordance with internationally recognized principles on standardization
established in the Decision on Principles for the Development of International Standards, Guides and Recommendations issued
by the World Trade Organization Technical Barriers to Trade (TBT) Committee.
2. Referenced Documents
2.1 ASTM Standards:
A788 Specification for Steel Forgings, General Requirements
A941 Terminology Relating to Steel, Stainless Steel, Related Alloys, and Ferroalloys
3. Terminology
3.1 Definitions:
3.1.1 For definitions of terms specific to this standard, refer to Specification A788 and Terminology A941.
This specification is under the jurisdiction of ASTM Committee A01 on Steel, Stainless Steel and Related Alloys and is the direct responsibility of Subcommittee A01.06
on Steel Forgings and Billets.
Current edition approved March 1, 2022Nov. 1, 2023. Published March 2022November 2023. Originally approved in 1962. Last previous edition approved in 20172022
as A472/A472M – 07 (2022).(2017). DOI: 10.1520/A0472_A0472M-07R22.10.1520/A0472_A0472M-23.
For referenced ASTM standards, visit the ASTM website, www.astm.org, or contact ASTM Customer Service at service@astm.org. For Annual Book of ASTM Standards
volume information, refer to the standard’s Document Summary page on the ASTM website.
*A Summary of Changes section appears at the end of this standard
Copyright © ASTM International, 100 Barr Harbor Drive, PO Box C700, West Conshohocken, PA 19428-2959. United States
A472/A472M − 23
4. Ordering Information
4.1 It shall be the responsibility of the purchaser to specify all requirements necessary for testing under this specification.
Requirements to be considered include, but are not limited to, the following:
4.1.1 ASTM designation and year date,
4.1.2 The minimum test temperature,
4.1.3 The portion of the forging to be subjected to the heat stability test temperature, and
4.1.4 Supplementary or other special requirements.
5. Procedure
5.1 The heat stability test shall be conducted by the forging supplier after final heat treatment and after the forging has been
centered and machined with allowance to finish to the purchaser’s drawing. Material for mechanical tests may be removed before
or after the stability test at the manufacturer’s option, unless check tests after the stability test are required by the purchaser.
5.2 With prior approval from the purchaser, the forgings may be stress-relieved as part of the heat stability test. When this is done,
the stress-relieving temperature shall be within 50 °F to 100 °F [30 °C to 55 °C] below final tempering temperature. Rotate the
forgings at 2 r ⁄min to 4 r/min and hold at stress-relieving temperature for at least 2 h/in. [2 h/25 mm] of maximum radial thickness,
after which the temperature may be decreased to the specified heat stability test temperature and the test performed.
6. Heat Stability Test Bands
6.1 The supplier shall mark positions A, B, C, and D, spaced 90° apart circumferentially, preferably on an end of the forging.
Markings shall be retained throughout all subsequent operations.
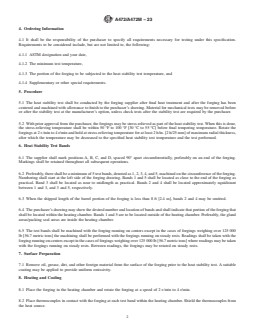
6.2 Preferably, there shall be a minimum of 5 test bands, denoted as 1, 2, 3, 4, and 5, machined on the circumference of the forging.
Numbering shall start at the left side of the forging drawing. Bands 1 and 5 shall be located as close to the end of the forging as
practical. Band 3 shall be located as near to midlength as practical. Bands 2 and 4 shall be located approximately equidistant
between 1 and 3, and 3 and 5, respectively.
6.3 When the shipped length of the barrel portion of the forging is less than 8 ft [2.4 m], bands 2 and 4 may be omitted.
6.4 The purchaser’s drawing may show the desired number and location of bands and shall indicate that portion of the forging that
shall be located within the heating chamber. Bands 1 and 5 are to be located outside of the heating chamber. Preferably, the gland
areas/packing seal areas are inside the heating chamber.
6.5 The test bands shall be machined with the forging running on centers except in the cases of forgings weighing over 125 000
lb [56.7 metric tons] the machining shall be performed with the forgings running on steady rests. Readings shall be taken with the
forging running on centers except in the cases of forgings weighing over 125 000 lb [56.7 metric tons] where readings may be taken
with the forgings running on steady rests. Between readings, the forgings may be rotated on steady rests.
7. Surface Preparation
7.1 Remove oil, grease, dirt, and other foreign material from the surface of the forging prior to the heat stability test. A suitable
coating may be applied to provide uniform emissivity.
8. Heating and Cooling
8.1 Place the forging in the heating chamber and rotate the forging at a speed of 2 r ⁄min to 4 r/min.
8.2 Place thermocouples in contact with the forging at each test band within the heating chamber. Shield the thermoco
...



Questions, Comments and Discussion
Ask us and Technical Secretary will try to provide an answer. You can facilitate discussion about the standard in here.
Loading comments...