ASTM D6247-98(2004)
(Test Method)Standard Test Method for Analysis of Elemental Content in Polyolefins By X-Ray Fluorescence Spectrometry
Standard Test Method for Analysis of Elemental Content in Polyolefins By X-Ray Fluorescence Spectrometry
SIGNIFICANCE AND USE
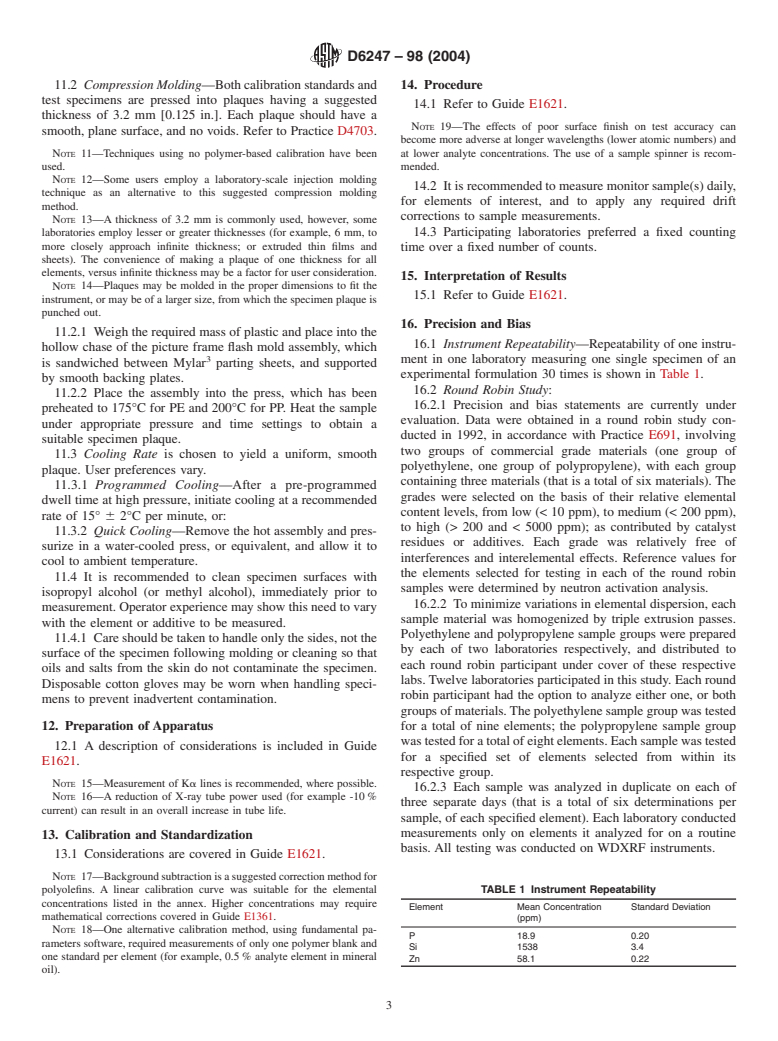
X-ray fluorescence spectrometry is an accurate and relatively fast method to determine multielement concentrations in polyethylene or polypropylene materials, or both. It can be used as a quality control measure for post-reactor studies, for additive levels in formulated resins, and for finished products.
Further elaboration appears in Guide E 1621.
SCOPE
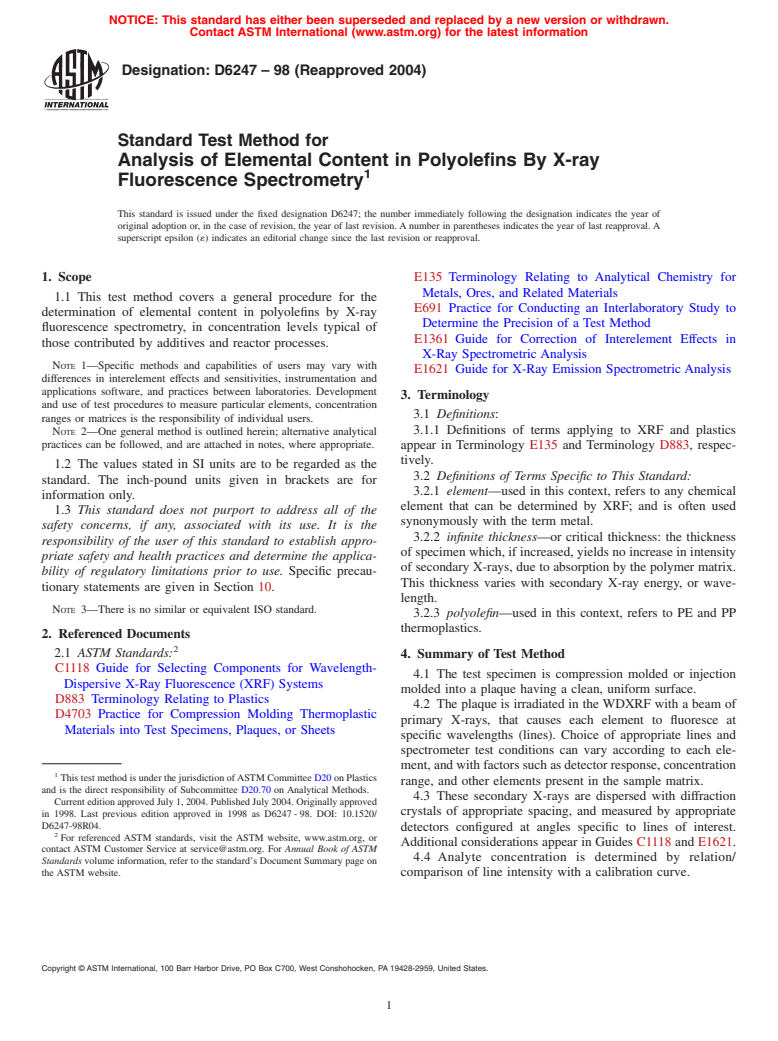
1.1 This test method covers a general procedure for the determination of elemental content in polyolefins by X-ray fluorescence spectrometry, in concentration levels typical of those contributed by additives and reactor processes.
Note 1—Specific methods and capabilities of users may vary with differences in interelement effects and sensitivities, instrumentation and applications software, and practices between laboratories. Development and use of test procedures to measure particular elements, concentration ranges or matrices is the responsibility of individual users.
Note 2—One general method is outlined herein; alternative analytical practices can be followed, and are attached in notes, where appropriate.
1.2 The values stated in SI units are to be regarded as the standard. The inch-pound units given in brackets are for information only.
1.3 This standard does not purport to address all of the safety concerns, if any, associated with its use. It is the responsibility of the user of this standard to establish appropriate safety and health practices and determine the applicability of regulatory limitations prior to use. Specific precautionary statements are given in Section 10.
Note 3—There is no similar or equivalent ISO standard.
General Information
Relations
Standards Content (Sample)
NOTICE: This standard has either been superseded and replaced by a new version or withdrawn.
Contact ASTM International (www.astm.org) for the latest information
Designation: D6247 – 98 (Reapproved 2004)
Standard Test Method for
Analysis of Elemental Content in Polyolefins By X-ray
Fluorescence Spectrometry
This standard is issued under the fixed designation D6247; the number immediately following the designation indicates the year of
original adoption or, in the case of revision, the year of last revision. A number in parentheses indicates the year of last reapproval. A
superscript epsilon (´) indicates an editorial change since the last revision or reapproval.
1. Scope E135 Terminology Relating to Analytical Chemistry for
Metals, Ores, and Related Materials
1.1 This test method covers a general procedure for the
E691 Practice for Conducting an Interlaboratory Study to
determination of elemental content in polyolefins by X-ray
Determine the Precision of a Test Method
fluorescence spectrometry, in concentration levels typical of
E1361 Guide for Correction of Interelement Effects in
those contributed by additives and reactor processes.
X-Ray Spectrometric Analysis
NOTE 1—Specific methods and capabilities of users may vary with
E1621 Guide for X-Ray Emission Spectrometric Analysis
differences in interelement effects and sensitivities, instrumentation and
applications software, and practices between laboratories. Development
3. Terminology
and use of test procedures to measure particular elements, concentration
3.1 Definitions:
ranges or matrices is the responsibility of individual users.
3.1.1 Definitions of terms applying to XRF and plastics
NOTE 2—One general method is outlined herein; alternative analytical
practices can be followed, and are attached in notes, where appropriate.
appear in Terminology E135 and Terminology D883, respec-
tively.
1.2 The values stated in SI units are to be regarded as the
3.2 Definitions of Terms Specific to This Standard:
standard. The inch-pound units given in brackets are for
3.2.1 element—used in this context, refers to any chemical
information only.
element that can be determined by XRF; and is often used
1.3 This standard does not purport to address all of the
synonymously with the term metal.
safety concerns, if any, associated with its use. It is the
3.2.2 infinite thickness—or critical thickness: the thickness
responsibility of the user of this standard to establish appro-
of specimen which, if increased, yields no increase in intensity
priate safety and health practices and determine the applica-
of secondary X-rays, due to absorption by the polymer matrix.
bility of regulatory limitations prior to use. Specific precau-
This thickness varies with secondary X-ray energy, or wave-
tionary statements are given in Section 10.
length.
NOTE 3—There is no similar or equivalent ISO standard.
3.2.3 polyolefin—used in this context, refers to PE and PP
thermoplastics.
2. Referenced Documents
2.1 ASTM Standards:
4. Summary of Test Method
C1118 Guide for Selecting Components for Wavelength-
4.1 The test specimen is compression molded or injection
Dispersive X-Ray Fluorescence (XRF) Systems
molded into a plaque having a clean, uniform surface.
D883 Terminology Relating to Plastics
4.2 The plaque is irradiated in the WDXRF with a beam of
D4703 Practice for Compression Molding Thermoplastic
primary X-rays, that causes each element to fluoresce at
Materials into Test Specimens, Plaques, or Sheets
specific wavelengths (lines). Choice of appropriate lines and
spectrometer test conditions can vary according to each ele-
ment, and with factors such as detector response, concentration
This test method is under the jurisdiction ofASTM Committee D20 on Plastics
range, and other elements present in the sample matrix.
and is the direct responsibility of Subcommittee D20.70 on Analytical Methods.
4.3 These secondary X-rays are dispersed with diffraction
Current edition approved July 1, 2004. Published July 2004. Originally approved
crystals of appropriate spacing, and measured by appropriate
in 1998. Last previous edition approved in 1998 as D6247 - 98. DOI: 10.1520/
D6247-98R04.
detectors configured at angles specific to lines of interest.
For referenced ASTM standards, visit the ASTM website, www.astm.org, or
Additional considerations appear in Guides C1118 and E1621.
contact ASTM Customer Service at service@astm.org. For Annual Book of ASTM
4.4 Analyte concentration is determined by relation/
Standards volume information, refer to the standard’s Document Summary page on
the ASTM website. comparison of line intensity with a calibration curve.
Copyright © ASTM International, 100 Barr Harbor Drive, PO Box C700, West Conshohocken, PA 19428-2959, United States.
D6247 – 98 (2004)
NOTE 4—An alternative method utilizes a fundamental parameters type
8.2 Nitrogen, prepurified grade or equivalent, for purging
calibration.
the melt fusion chamber.
8.3 Elemental Standards—Compounds or additives, or
5. Significance and Use
both, to be melt homogenized into polymer calibration stan-
5.1 X-ray fluorescence spectrometry is an accurate and
dards. Material should be certified as to elemental purity and
relatively fast method to determine multielement concentra-
should be dried and desiccated prior to use.
tions in polyethylene or polypropylene materials, or both. It
9. Reference Materials
can be used as a quality control measure for post-reactor
studies, for additive levels in formulated resins, and for
9.1 Reference Materials, can be prepared by users, as in
finished products.
Section 11.
5.2 Further elaboration appears in Guide E1621.
9.2 Other Materials, appear in Guide E1621.
9.3 Monitor Samples—To account for instrument drift (for
6. Interferences
example, electronic variations or long term X-ray source
6.1 Potential interferences are explained in Guide E1621. degradation).
NOTE 8—Monitor samples are selected for their long-term durability,
7. Apparatus
and should ideally contain elements near to high and low ends of
7.1 Calibration Standards Formulation:
analyticalrange(s)ofinterest.Prefabricatedglassdiscsoutsiderange(s)of
7.1.1 Batch Compounding Equipment, with temperature interest are often used. They are measured before measurement of
calibration standards, and are remeasured periodically (for example,
regulation capabilities, for melt homogenization of elemental
daily). Any drift from original measurements can be accounted for, and
compounds or additives into polyolefin reference standards.
necessary corrections can be applied to maintain calibrations relative to
Equipment can range from small scale torque rheometers
initial conditions.
equipped with mixing head, to larger-scale batch mixers.
Nitrogen purge capabilities are recommended.
10. Safety Precautions
10.1 Occupational Health and Safety Standards for X-rays,
NOTE 5—An alternative method requires a single-screw or twin-screw
laboratory-scale extruder in place of the melt-fusion head, however, more and ionizing radiation shall be observed. It is also recom-
material is required for formulation. Dry homogenization techniques
mended that proper practices be followed, as shown in Guide
which do not require the use of melt-compounding apparatus have been
E1621.
used, however, such are not recommended.
NOTE 9—X-rays are dangerous and can cause serious personal injury.
7.1.2 Analytical Balance, 0.1-mg sensitivity
X-ray beams can be very narrow and difficult to detect. Precautions taken
7.2 Specimen Preparation:
minimize potential radiation exposure include an increase in protective
7.2.1 Thermal Press, for compression-molding of plaques,
shielding, an increase of distance, and a decrease of time near any
and capable of obtaining temperatures, pressures and cooling
suspected source of leakage.
rates, as recommended for PE and PPin Practice D4703 and in
10.2 Chemical—Appropriate precautions for chemical haz-
Section 11 of this test method.
ards shall be observed for any chemicals and materials used in
7.2.2 Flash Type Mold, picture-frame type, described in
preparingcalibrationstandards.Consultthesuppliers’Material
Practice D4703: stainless-steel chase to mold test plaques 3.2
Safety Data Sheets for specific hazards and safety practices.
mm [0.125 in.] thick, uncoated Mylar (polyester film) parting
10.3 Pressurized Gas requires safe and proper handling
sheets, and smooth, stainless steel backing plates of minimum
practices.
2.5 mm thickness.
10.4 Specimen Preparation—Follow appropriate precau-
tions when using hot equipment for homogenization and
NOTE 6—Injection molding apparatus have also been employed, in
place of the thermal press and flash mold.
specimen preparation. Consult manufacturer’s recommenda-
NOTE 7—The recommended thickness of 3.2 mm may vary with user
tions for specific practices.
preference.Othermaterialmaybeusedforpartingsheets,provideditdoes
notadheretothepolymerundersuchthermalconditions.Sometechniques 11. Preparation of Reference Materials and Test
use polished steel backing plates, with chromed surfaces, and no parting
Specimens
sheets. The apparatus used should not introduce contamination of ele-
11.1 Specimen Plaques—Consistent preparation of refer-
ments of interest, and should yield specimens with a plane surface of
ence materials and test specimens is essential. Variations in
adequate smoothness.
sample thickness, surface finish and homogeneity can affect
7.3 Excitation Source, Spectrometer, and Measuring
reliability of results.
System—Requirements for a wavelength-dispersive XRF are
11.1.1 Reference Materials—Atechnique that offers consis-
outlined in Guides C1118 and E1621.
tent elemental dispersion throughout the calibration standard
should be followed. Melt homogenization to ensure uniformity
8. Reagents and Materials
is recommended; see Annex A1.
8.1 P-10 Gas, a mixture of 90 % argon and 10 % methane,
NOTE 10—Resins from actual production runs have been used for
ultra-high purity or equivalent, for use with gas-flow propor-
calibrationstandards,afterverificationbyindependentanalyticalmethods.
tional detectors.
11.1.2 Test Specimens—If elemental dispersion is poor,
homogenize the sample according to Annex A1, Section 2.If
Mylar is a registered trademark of DuPont. elemental dispersion is acceptable, proceed to 11.2.
D6247 – 98 (2004)
11.2 Compression Molding—Both calibration standards and 14. Procedure
test specimens are pressed into plaques having a suggested
14.1 Refer to Guide E1621.
thickness of 3.2 mm [0.125 in.]. Each plaque should have a
NOTE 19—The effects of poor surface finish on test accuracy can
smooth, plane surface, and no voids. Refer to Practice D4703.
become more adverse at longer wavelengths (lower atomic numbers) and
NOTE 11—Techniques using no polymer-based calibration have been at lower analyte concentrations. The use of a sample spinner is recom-
used. mended.
NOTE 12—Some users employ a laboratory-scale injection molding
14.2 It is recommended to measure monitor sample(s) daily,
technique as an alternative to this suggested compression molding
for elements of inte
...


Questions, Comments and Discussion
Ask us and Technical Secretary will try to provide an answer. You can facilitate discussion about the standard in here.