ASTM C1376-10
(Specification)Standard Specification for Pyrolytic and Vacuum Deposition Coatings on Flat Glass
Standard Specification for Pyrolytic and Vacuum Deposition Coatings on Flat Glass
ABSTRACT
This specification covers the optical and aesthetic quality requirements for coatings applied to glass for use in building glazing. The coatings covered are applied to the glass using either pyrolytic or vacuum (sputtering) deposition methods and are typically applied to control solar heat gain, energy performance, comfort level, and condensation and enhance the aesthetic of the building. This specification groups coated glass according to application. These groups are: vision, spandrel/nonvision, and overhead. Coated flat glass furnished under this specification shall be of the following kinds: Kind CV; Kind CO; and Kind CS.
SCOPE
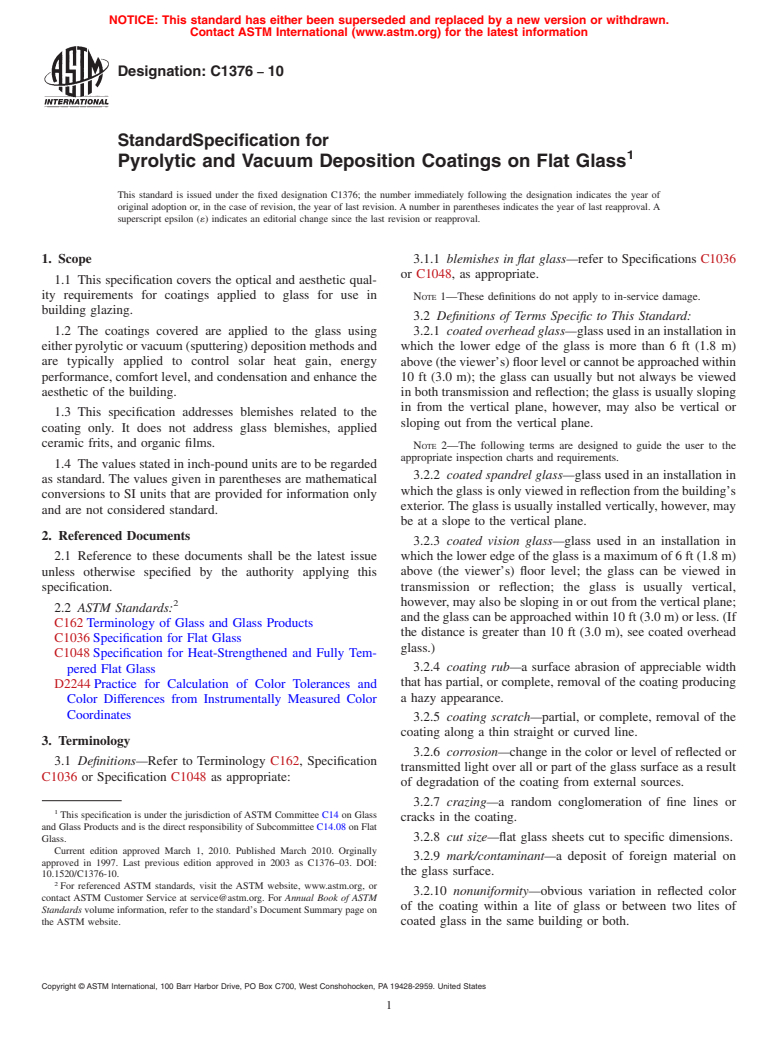
1.1 This specification covers the optical and aesthetic quality requirements for coatings applied to glass for use in building glazing.
1.2 The coatings covered are applied to the glass using either pyrolytic or vacuum (sputtering) deposition methods and are typically applied to control solar heat gain, energy performance, comfort level, and condensation and enhance the aesthetic of the building.
1.3 This specification addresses blemishes related to the coating only. It does not address glass blemishes, applied ceramic frits, and organic films.
1.4 The values stated in inch-pound units are to be regarded as standard. The values given in parentheses are mathematical conversions to SI units that are provided for information only and are not considered standard.
General Information
Relations
Buy Standard
Standards Content (Sample)
NOTICE: This standard has either been superseded and replaced by a new version or withdrawn.
Contact ASTM International (www.astm.org) for the latest information
Designation:C1376 −10
StandardSpecification for
1
Pyrolytic and Vacuum Deposition Coatings on Flat Glass
This standard is issued under the fixed designation C1376; the number immediately following the designation indicates the year of
original adoption or, in the case of revision, the year of last revision. A number in parentheses indicates the year of last reapproval. A
superscript epsilon (´) indicates an editorial change since the last revision or reapproval.
1. Scope 3.1.1 blemishes in flat glass—refer to Specifications C1036
or C1048, as appropriate.
1.1 This specification covers the optical and aesthetic qual-
ity requirements for coatings applied to glass for use in
NOTE 1—These definitions do not apply to in-service damage.
building glazing.
3.2 Definitions of Terms Specific to This Standard:
1.2 The coatings covered are applied to the glass using 3.2.1 coated overhead glass—glass used in an installation in
eitherpyrolyticorvacuum(sputtering)depositionmethodsand
which the lower edge of the glass is more than 6 ft (1.8 m)
are typically applied to control solar heat gain, energy above(theviewer’s)floorlevelorcannotbeapproachedwithin
performance, comfort level, and condensation and enhance the
10 ft (3.0 m); the glass can usually but not always be viewed
aesthetic of the building. in both transmission and reflection; the glass is usually sloping
in from the vertical plane, however, may also be vertical or
1.3 This specification addresses blemishes related to the
sloping out from the vertical plane.
coating only. It does not address glass blemishes, applied
ceramic frits, and organic films.
NOTE 2—The following terms are designed to guide the user to the
appropriate inspection charts and requirements.
1.4 The values stated in inch-pound units are to be regarded
3.2.2 coated spandrel glass—glass used in an installation in
as standard. The values given in parentheses are mathematical
which the glass is only viewed in reflection from the building’s
conversions to SI units that are provided for information only
exterior. The glass is usually installed vertically, however, may
and are not considered standard.
be at a slope to the vertical plane.
2. Referenced Documents
3.2.3 coated vision glass—glass used in an installation in
2.1 Reference to these documents shall be the latest issue which the lower edge of the glass is a maximum of 6 ft (1.8 m)
unless otherwise specified by the authority applying this above (the viewer’s) floor level; the glass can be viewed in
specification. transmission or reflection; the glass is usually vertical,
2 however, may also be sloping in or out from the vertical plane;
2.2 ASTM Standards:
and the glass can be approached within 10 ft (3.0 m) or less. (If
C162 Terminology of Glass and Glass Products
the distance is greater than 10 ft (3.0 m), see coated overhead
C1036 Specification for Flat Glass
glass.)
C1048 Specification for Heat-Strengthened and Fully Tem-
3.2.4 coating rub—a surface abrasion of appreciable width
pered Flat Glass
that has partial, or complete, removal of the coating producing
D2244 Practice for Calculation of Color Tolerances and
a hazy appearance.
Color Differences from Instrumentally Measured Color
Coordinates
3.2.5 coating scratch—partial, or complete, removal of the
coating along a thin straight or curved line.
3. Terminology
3.2.6 corrosion—change in the color or level of reflected or
3.1 Definitions—Refer to Terminology C162, Specification
transmitted light over all or part of the glass surface as a result
C1036 or Specification C1048 as appropriate:
of degradation of the coating from external sources.
3.2.7 crazing—a random conglomeration of fine lines or
1
This specification is under the jurisdiction of ASTM Committee C14 on Glass
cracks in the coating.
and Glass Products and is the direct responsibility of Subcommittee C14.08 on Flat
Glass. 3.2.8 cut size—flat glass sheets cut to specific dimensions.
Current edition approved March 1, 2010. Published March 2010. Orginally
3.2.9 mark/contaminant—a deposit of foreign material on
approved in 1997. Last previous edition approved in 2003 as C1376–03. DOI:
the glass surface.
10.1520/C1376-10.
2
For referenced ASTM standards, visit the ASTM website, www.astm.org, or
3.2.10 nonuniformity—obvious variation in reflected color
contact ASTM Customer Service at service@astm.org. For Annual Book of ASTM
of the coating within a lite of glass or between two lites of
Standards volume information, refer to the standard’s Document Summary page on
the ASTM website. coated glass in the same building or both.
Copyright © ASTM International, 100 Barr Harbor Drive, PO Box C700, West Conshohocken, PA 19428-2959. United States
1
---------------------- Page: 1 ----------------------
C1376−10
3.2.10.1 banding—wide or narrow areas of nonuniformity the glass surfaces that further conforms with
...
This document is not anASTM standard and is intended only to provide the user of anASTM standard an indication of what changes have been made to the previous version. Because
it may not be technically possible to adequately depict all changes accurately, ASTM recommends that users consult prior editions as appropriate. In all cases only the current version
of the standard as published by ASTM is to be considered the official document.
Designation:C1376–03 Designation: C1376 – 10
Standard Specification for
1
Pyrolytic and Vacuum Deposition Coatings on Flat Glass
This standard is issued under the fixed designation C1376; the number immediately following the designation indicates the year of
original adoption or, in the case of revision, the year of last revision. A number in parentheses indicates the year of last reapproval. A
superscript epsilon (´) indicates an editorial change since the last revision or reapproval.
1. Scope
1.1 This specification covers the optical and aesthetic quality requirements for coatings applied to glass for use in building
glazing.
1.2 The coatings covered are applied to the glass using either pyrolytic or vacuum (sputtering) deposition methods and are
typically applied to control solar heat gain, energy performance, comfort level, and condensation and enhance the aesthetic of the
building.
1.3 This specification addresses blemishes related to the coating only. It does not address glass blemishes, applied ceramic frits,
and organic films.
1.4Dimensional values are stated in inch pound units and are to be regarded as the standard units for this specification. The
metric units given in parentheses are for information only.
1.4 The values stated in inch-pound units are to be regarded as standard. The values given in parentheses are mathematical
conversions to SI units that are provided for information only and are not considered standard.
2. Referenced Documents
2.1 Reference to these documents shall be the latest issue unless otherwise specified by the authority applying this specification.
2
2.2 ASTM Standards:
C162 Terminology of Glass and Glass Products
C1036 Specification for Flat Glass
C1048 Specification for Heat-Treated Flat GlassKind HS, Kind FT Coated and Uncoated Glass
D2244 Practice for Calculation of Color Tolerances and Color Differences from Instrumentally Measured Color Coordinates
3. Terminology
3.1 Definitions—Refer to Terminology C162, Specification C1036 or Specification C1048 as appropriate:
3.1.1 blemishes in flat glass—refer to Specifications C1036 or C1048, as appropriate.
NOTE 1—These definitions do not apply to in-service damage.
3.2 Definitions of Terms Specific to This Standard:
3.2.1 coated overhead glass—glass used in an installation in which the lower edge of the glass is more than 6 ft (1.8 m) above
(the viewer’s) floor level or cannot be approached within 10 ft (3.0 m); the glass can usually but not always be viewed in both
transmission and reflection; the glass is usually sloping in from the vertical plane, however, may also be vertical or sloping out
from the vertical plane.
NOTE 2—The following terms are designed to guide the user to the appropriate inspection charts and requirements.
3.2.2 coated spandrel glass—glass used in an installation in which the glass is only viewed in reflection from the building’s
exterior. The glass is usually installed vertically, however, may be at a slope to the vertical plane.
3.2.3 coated vision glass—glass used in an installation in which the lower edge of the glass is a maximum of 6 ft (1.8 m) above
(the viewer’s) floor level; the glass can be viewed in transmission or reflection; the glass is usually vertical, however, may also
be sloping in or out from the vertical plane; and the glass can be approached within 10 ft (3.0 m) or less. (If the distance is greater
than 10 ft (3.0 m), see coated overhead glass.)
1
This specification is under the jurisdiction ofASTM Committee C14 on Glass and Glass Products and is the direct responsibility of Subcommittee C14.08 on Flat Glass.
CurrenteditionapprovedApril10,2003.PublishedMay2003.Orginallyapprovedin1997.Lastpreviouseditionapprovedin1997asC1376–97.DOI:10.1520/C1376-03.
Current edition approved March 1, 2010. Published March 2010. Orginally approved in 1997. Last previous edition approved in 2003 as C1376–03. DOI:
10.1520/C1376-10.
2
For referencedASTM standards, visit theASTM website, www.astm.org, or contactASTM Customer Service at service@astm.org. For Annual Book of ASTM Standards
volume information, refer to the standard’s Document Summary page on the ASTM website.
Copyright © ASTM International, 100 Barr Harbor Drive, PO Box C700, West Conshohocken, PA 19428-2959, United States.
1
---------------------- Page: 1 ----------------------
C1376 – 10
3.2.4 coating rub—a surface abrasion of appreciable width that has partial, or complete, removal of the coating producing a
hazy appearance.
3.2.5 coating scratch—partial, or complete, removal of the coating along a thin straight or curved lin
...


Questions, Comments and Discussion
Ask us and Technical Secretary will try to provide an answer. You can facilitate discussion about the standard in here.