ASTM D1598-02(2009)
(Test Method)Standard Test Method for Time-to-Failure of Plastic Pipe Under Constant Internal Pressure
Standard Test Method for Time-to-Failure of Plastic Pipe Under Constant Internal Pressure
SIGNIFICANCE AND USE
The data obtained by this test method are useful for establishing stress versus failure time relationships in a controlled environment from which the hydrostatic design basis for plastic pipe materials can be computed. (Refer to Test Method D2837 and Practice D2992.)
In order to determine how plastics will perform as pipe, it is necessary to establish the stress-failure time relationships for pipe over 2 or more logarithmic decades of time (hours) in a controlled environment. Because of the nature of the test and specimens employed, no single line can adequately represent the data, and therefore the confidence limits should be established.
Note 3—Some materials may exhibit a nonlinear relationship between log-stress and log-failure time, usually at short failure times. In such cases, the 105-hour stress value computed on the basis of short-term test data may be significantly different than the value obtained when a distribution of data points in accordance with Test Method D2837 is evaluated. However, these data may still be useful for quality control or other applications, provided correlation with long-term data has been established.
The factors that affect creep and long-term strength behavior of plastic pipe are not completely known at this time. This procedure takes into account those factors that are known to have important influences and provides a tool for investigating others.
Creep, or nonrecoverable deformation for pipe made of some plastics, is as important as actual leakage in deciding whether or not a pipe has failed. Specimens that exhibit localized ballooning, however, may lead to erroneous interpretation of the creep results unless a method of determining creep is established that precludes such a possibility. Circumferential measurements at two or three selected positions on a specimen may not be adequate.
Great care must be used to ensure that specimens are representative of the pipe under evaluation. Departure from this assumption...
SCOPE
1.1 This test method covers the determination of the time-to-failure of both thermoplastic and reinforced thermosetting/resin pipe under constant internal pressure.
1.2 This test method provides a method of characterizing plastics in the form of pipe under the conditions prescribed.
1.3 The values stated in SI units are to be regarded as the standard. The values given in parentheses are for information only.
1.4 This standard does not purport to address all of the safety concerns, if any, associated with its use. It is the responsibility of the user of this standard to establish appropriate safety and health practices and determine the applicability of regulatory limitations prior to use.
General Information
Relations
Buy Standard
Standards Content (Sample)
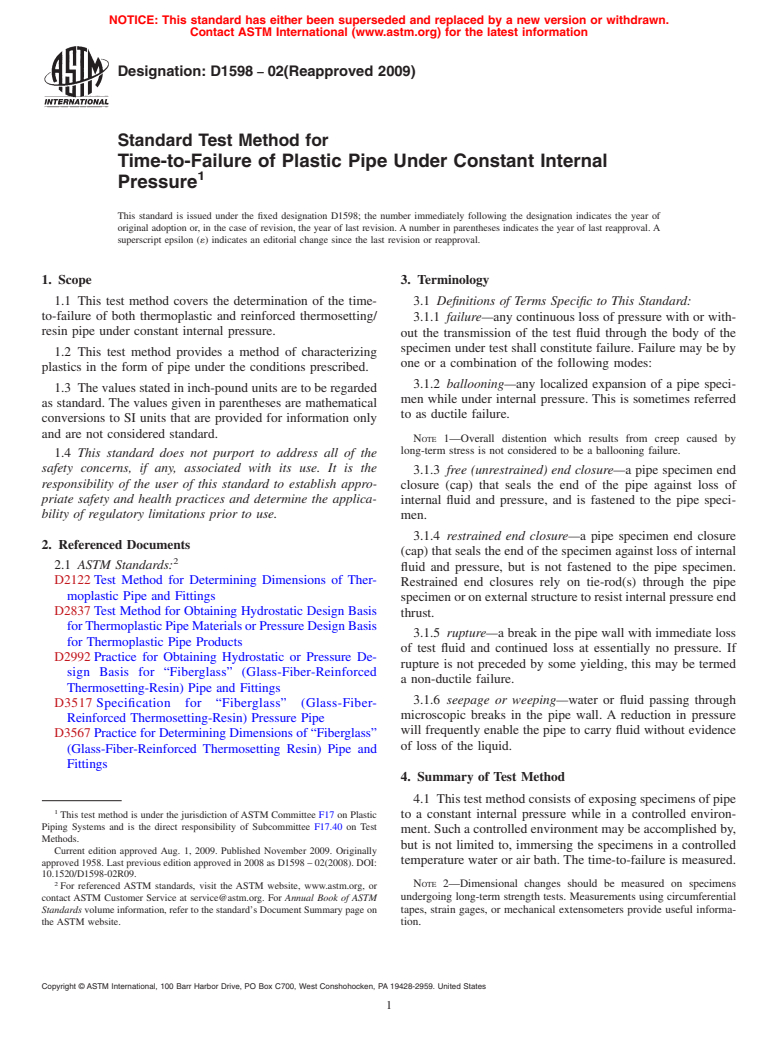
NOTICE: This standard has either been superseded and replaced by a new version or withdrawn.
Contact ASTM International (www.astm.org) for the latest information
Designation: D1598 − 02(Reapproved 2009)
Standard Test Method for
Time-to-Failure of Plastic Pipe Under Constant Internal
Pressure
This standard is issued under the fixed designation D1598; the number immediately following the designation indicates the year of
original adoption or, in the case of revision, the year of last revision.Anumber in parentheses indicates the year of last reapproval.A
superscript epsilon (´) indicates an editorial change since the last revision or reapproval.
1. Scope 3. Terminology
1.1 This test method covers the determination of the time- 3.1 Definitions of Terms Specific to This Standard:
to-failure of both thermoplastic and reinforced thermosetting/
3.1.1 failure—any continuous loss of pressure with or with-
resin pipe under constant internal pressure.
out the transmission of the test fluid through the body of the
specimen under test shall constitute failure. Failure may be by
1.2 This test method provides a method of characterizing
one or a combination of the following modes:
plastics in the form of pipe under the conditions prescribed.
3.1.2 ballooning—any localized expansion of a pipe speci-
1.3 The values stated in inch-pound units are to be regarded
men while under internal pressure. This is sometimes referred
as standard. The values given in parentheses are mathematical
to as ductile failure.
conversions to SI units that are provided for information only
and are not considered standard.
NOTE 1—Overall distention which results from creep caused by
long-term stress is not considered to be a ballooning failure.
1.4 This standard does not purport to address all of the
safety concerns, if any, associated with its use. It is the
3.1.3 free (unrestrained) end closure—a pipe specimen end
responsibility of the user of this standard to establish appro-
closure (cap) that seals the end of the pipe against loss of
priate safety and health practices and determine the applica-
internal fluid and pressure, and is fastened to the pipe speci-
bility of regulatory limitations prior to use.
men.
3.1.4 restrained end closure—a pipe specimen end closure
2. Referenced Documents
(cap) that seals the end of the specimen against loss of internal
2.1 ASTM Standards:
fluid and pressure, but is not fastened to the pipe specimen.
D2122Test Method for Determining Dimensions of Ther-
Restrained end closures rely on tie-rod(s) through the pipe
moplastic Pipe and Fittings
specimenoronexternalstructuretoresistinternalpressureend
D2837Test Method for Obtaining Hydrostatic Design Basis
thrust.
forThermoplasticPipeMaterialsorPressureDesignBasis
3.1.5 rupture—a break in the pipe wall with immediate loss
for Thermoplastic Pipe Products
of test fluid and continued loss at essentially no pressure. If
D2992Practice for Obtaining Hydrostatic or Pressure De-
rupture is not preceded by some yielding, this may be termed
sign Basis for “Fiberglass” (Glass-Fiber-Reinforced
a non-ductile failure.
Thermosetting-Resin) Pipe and Fittings
3.1.6 seepage or weeping—water or fluid passing through
D3517 Specification for “Fiberglass” (Glass-Fiber-
microscopic breaks in the pipe wall. A reduction in pressure
Reinforced Thermosetting-Resin) Pressure Pipe
will frequently enable the pipe to carry fluid without evidence
D3567PracticeforDeterminingDimensionsof“Fiberglass”
of loss of the liquid.
(Glass-Fiber-Reinforced Thermosetting Resin) Pipe and
Fittings
4. Summary of Test Method
4.1 Thistestmethodconsistsofexposingspecimensofpipe
This test method is under the jurisdiction ofASTM Committee F17 on Plastic
to a constant internal pressure while in a controlled environ-
Piping Systems and is the direct responsibility of Subcommittee F17.40 on Test
ment.Suchacontrolledenvironmentmaybeaccomplishedby,
Methods.
but is not limited to, immersing the specimens in a controlled
Current edition approved Aug. 1, 2009. Published November 2009. Originally
temperature water or air bath. The time-to-failure is measured.
approved 1958. Last previous edition approved in 2008 as D1598–02(2008). DOI:
10.1520/D1598-02R09.
NOTE 2—Dimensional changes should be measured on specimens
For referenced ASTM standards, visit the ASTM website, www.astm.org, or
undergoing long-term strength tests. Measurements using circumferential
contact ASTM Customer Service at service@astm.org. For Annual Book of ASTM
Standards volume information, refer to the standard’s Document Summary page on tapes, strain gages, or mechanical extensometers provide useful informa-
the ASTM website. tion.
Copyright © ASTM International, 100 Barr Harbor Drive, PO Box C700, West Conshohocken, PA 19428-2959. United States
D1598 − 02 (2009)
5. Significance and Use 6.4 Timing Device—Atime meter connected to the pressur-
ized fluid side of the system through a pressure or flow switch,
5.1 The data obtained by this test method are useful for
orboth.Thetimingdeviceandpressureorflowswitch,orboth,
establishing stress versus failure time relationships in a con-
together shall be capable of measuring the time when the
trolled environment from which the hydrostatic design basis
specimen is at 98% or more of test pressure with sufficient
for plastic pipe materials can be computed. (Refer to Test
accuracy to meet the tolerance requirements of 6.6.
Method D2837 and Practice D2992.)
6.5 Specimen End Closures—Either free-end or restrained-
5.2 In order to determine how plastics will perform as pipe,
end closures that will withstand the maximum test pressures
it is necessary to establish the stress-failure time relationships
may be used. Closures shall be designed so that they do not
for pipe over 2 or more logarithmic decades of time (hours) in
cause failure of the specimen. Free-end closures shall be used
a controlled environment. Because of the nature of the test and
for referee tests for thermoplastic pipe.
specimens employed, no single line can adequately represent
NOTE 4—Free-end closures fasten to the specimen so that internal
the data, and therefore the confidence limits should be estab-
pressure produces longitudinal tensile stress in addition to hoop. Com-
lished.
pared to free end closure specimens, stresses in the wall of restrained-end
closure specimens act in the hoop and radial directions only. Because of
NOTE 3—Some materials may exhibit a nonlinear relationship between
this difference in loading, the equivalent hoop stress in free-end closure
log-stressandlog-failuretime,usuallyatshortfailuretimes.Insuchcases,
specimens of solid wall thermoplastic pipe are approximately 11% lower
the 10 -hour stress value computed on the basis of short-term test data
than in restrained-end closure specimens tested at the same pressure. The
may be significantly different than the value obtained when a distribution
test results for each specimen and the LTHS will reflect this difference in
of data points in accordance with Test Method D2837 is evaluated.
test method.
However, these data may still be useful for quality control or other
applications, provided correlation with long-term data has been estab-
6.6 Time and Pressure Tolerance—When added together,
lished.
the tolerance for the timing device and the tolerance for the
5.3 The factors that affect creep and long-term strength pressure gage shall not exceed 62%.
behavior of plastic pipe are not completely known at this time.
7. Test Specimens
This procedure takes into account those factors that are known
7.1 Pipe Specimen Length—Forpipesizesof6in.(150mm)
to have important influences and provides a tool for investi-
or less, the specimen length between end closures shall be not
gating others.
less than five times the nominal outside diameter of the pipe,
5.4 Creep, or nonrecoverable deformation for pipe made of
but in no case less than 12 in. (300 mm). The 12 in. (300 mm)
some plastics, is as important as actual leakage in deciding
minimum specimen length requirement shall not apply to
whether or not a pipe has failed. Specimens that exhibit
molded specimens. For larger sizes of pipe, the minimum
localized ballooning, however, may lead to erroneous interpre-
length between end closures shall be not less than three times
tationofthecreepresultsunlessamethodofdeterminingcreep
the nominal outside diameter but in no case less than 30 in.
isestablishedthatprecludessuchapossibility.Circumferential
(760 mm).
measurements at two or three selected positions on a specimen
7.2 Measurements—Dimensions shall be determined in ac-
may not be adequate.
cordance with Test Method D2122 or Practice D3567.
5.5 Great care must be used to ensure that specimens are
8. Conditioning
representative of the pipe under evaluation. Departure from
this assumption may introduce discrepancies as great as, if not
8.1 Specimens to be tested at 23°C shall be conditioned at
greater than, those due to departure from details of procedure
test temperatures in a liquid bath for a minimum of 1 h or in a
outlined in this test method.
gaseous medium for a minimum of 16 h before pressurizing.
8.2 Whenspecimensaretobetestedathighertemperatures,
6. Apparatus
condition them in the elevated temperature environment until
6.
...
This document is not anASTM standard and is intended only to provide the user of anASTM standard an indication of what changes have been made to the previous version. Because
it may not be technically possible to adequately depict all changes accurately, ASTM recommends that users consult prior editions as appropriate. In all cases only the current version
of the standard as published by ASTM is to be considered the official document.
An American National Standard
Designation:D1598–02 (Reapproved 2008) Designation: D1598 – 02 (Reapproved 2009)
Standard Test Method for
Time-to-Failure of Plastic Pipe Under Constant Internal
Pressure
This standard is issued under the fixed designation D1598; the number immediately following the designation indicates the year of
original adoption or, in the case of revision, the year of last revision.Anumber in parentheses indicates the year of last reapproval.A
superscript epsilon (´) indicates an editorial change since the last revision or reapproval.
This standard has been approved for use by agencies of the Department of Defense.
1. Scope
1.1 This test method covers the determination of the time-to-failure of both thermoplastic and reinforced thermosetting/resin
pipe under constant internal pressure.
1.2 This test method provides a method of characterizing plastics in the form of pipe under the conditions prescribed.
1.3
1.3 The values stated in inch-pound units are to be regarded as standard. The values given in parentheses are mathematical
conversions to SI units that are provided for information only and are not considered standard.
1.4 This standard does not purport to address all of the safety concerns, if any, associated with its use. It is the responsibility
of the user of this standard to establish appropriate safety and health practices and determine the applicability of regulatory
limitations prior to use.
2. Referenced Documents
2.1 ASTM Standards:
D2122 Test Method for Determining Dimensions of Thermoplastic Pipe and Fittings
D2837 Test Method for Obtaining Hydrostatic Design Basis for Thermoplastic Pipe Materials or Pressure Design Basis for
Thermoplastic Pipe Products
D2992 Practice for Obtaining Hydrostatic or Pressure Design Basis for Fiberglass (Glass-Fiber-Reinforced Thermosetting-
Resin) Pipe and Fittings
D3517 Specification for Fiberglass (Glass-Fiber-Reinforced Thermosetting-Resin) Pressure Pipe
D3567 Practice for Determining Dimensions of Fiberglass (Glass-Fiber-Reinforced Thermosetting Resin) Pipe and Fittings
3. Terminology
3.1 Definitions of Terms Specific to This Standard:
3.1.1 failure—anycontinuouslossofpressurewithorwithoutthetransmissionofthetestfluidthroughthebodyofthespecimen
under test shall constitute failure. Failure may be by one or a combination of the following modes:
3.1.2 ballooning—any localized expansion of a pipe specimen while under internal pressure. This is sometimes referred to as
ductile failure.
NOTE 1—Overall distention which results from creep caused by long-term stress is not considered to be a ballooning failure.
3.1.3 free (unrestrained) end closure—a pipe specimen end closure (cap) that seals the end of the pipe against loss of internal
fluid and pressure, and is fastened to the pipe specimen.
3.1.4 restrained end closure—a pipe specimen end closure (cap) that seals the end of the specimen against loss of internal fluid
and pressure, but is not fastened to the pipe specimen. Restrained end closures rely on tie-rod(s) through the pipe specimen or on
external structure to resist internal pressure end thrust.
3.1.5 rupture—abreakinthepipewallwithimmediatelossoftestfluidandcontinuedlossatessentiallynopressure.Ifrupture
is not preceded by some yielding, this may be termed a non-ductile failure.
This test method is under the jurisdiction ofASTM Committee F17 on Plastic Piping Systems and is the direct responsibility of Subcommittee F17.40 onTest Methods.
Current edition approved March 1, 2008. Published May 2008. Originally approved 1958. Last previous edition approved in 2002 as D1598–02. DOI:
10.1520/D1598-02R08.
Current edition approved Aug. 1, 2009. Published November 2009. Originally approved 1958. Last previous edition approved in 2008 as D1598–02(2008). DOI:
10.1520/D1598-02R09.
ForreferencedASTMstandards,visittheASTMwebsite,www.astm.org,orcontactASTMCustomerServiceatservice@astm.org.For Annual Book of ASTM Standards
volume information, refer to the standard’s Document Summary page on the ASTM website.
Copyright © ASTM International, 100 Barr Harbor Drive, PO Box C700, West Conshohocken, PA 19428-2959, United States.
D1598 – 02 (2009)
3.1.6 seepage or weeping—water or fluid passing through microscopic breaks in the pipe wall. A reduction in pressure will
frequently enable the pipe to carry fluid without evidence of loss of the liquid.
4. Summary of Test Method
4.1 This test method consists of exposing specimens of pipe to a constant internal pressure while in a controlled environment.
Suchacontrolledenvironmentmaybeaccomplishedby,butisnotlimitedto,immersingthespecimensinacontrolledtemperature
water or air bath. The time-to-failure is measured.
NOTE 2—Dimensional changes should be measured on specimens undergoing long-term strength tests. Measurements using circumferential tapes,
strain gages, or mechanical extensometers provide useful information.
5. Significance and Use
5.1 The data obtained by this test method are useful for establishing stress versus failure time relationships in a controlled
environmentfromwhichthehydrostaticdesignbasisforplasticpipematerialscanbecomputed.(RefertoTestMethodD2837and
Practice D2992.)
5.2 In order to determine how plastics will perform as pipe, it is necessary to establish the stress-failure time relationships for
pipe over 2 or more logarithmic decades of time (hours) in a controlled environment. Because of the nature of the test and
specimens employed, no single line can adequately represent the data, and therefore the confidence limits should be established.
NOTE 3—Some materials may exhibit a nonlinear relationship between log-stress and log-failure time, usually at short failure times. In such cases, the
10 -hourstressvaluecomputedonthebasisofshort-termtestdatamaybesignificantlydifferentthanthevalueobtainedwhenadistributionofdatapoints
inaccordancewithTestMethodD2837isevaluated.However,thesedatamaystillbeusefulforqualitycontrolorotherapplications,providedcorrelation
with long-term data has been established.
5.3 The factors that affect creep and long-term strength behavior of plastic pipe are not completely known at this time. This
proceduretakesintoaccountthosefactorsthatareknowntohaveimportantinfluencesandprovidesatoolforinvestigatingothers.
5.4 Creep,ornonrecoverabledeformationforpipemadeofsomeplastics,isasimportantasactualleakageindecidingwhether
or not a pipe has failed. Specimens that exhibit localized ballooning, however, may lead to erroneous interpretation of the creep
results unless a method of determining creep is established that precludes such a possibility. Circumferential measurements at two
or three selected positions on a specimen may not be adequate.
5.5 Great care must be used to ensure that specimens are representative of the pipe under evaluation. Departure from this
assumption may introduce discrepancies as great as, if not greater than, those due to departure from details of procedure outlined
in this test method.
6. Apparatus
6.1 Constant-Temperature System—A water bath or other fluid bath equipped so that uniform temperature is maintained
throughout the bath. This may require agitation. If an air or other gaseous environment is used, provision shall be made for
adequate circulation. The test may be conducted at 23°C (73°F) or other selected temperatures as required and the temperature
tolerance requirements shall be 62°C (63.6°F).
6.2 Pressurizing System—Any device that is capable of continuously applying constant internal pressure on the specimen may
be used. The device shall be capable of reaching the test pressure without exceeding it and of holding the pressure within the
tolerance shown in 6.6 for the duration of the test.
6.3 Pressure Gage—A pressure gage having an accuracy sufficient to meet the pressure tolerance requirements of 6.6 is
required.
6.4 Timing Device—A time meter connected to the pressurized fluid side of the system through a pressure or flow switch, or
both. The timing device and pressure or flow switch, or both, together shall be capable of measuring the time when the specimen
is at 98% or more of test pressure with sufficient accuracy to meet the tolerance requirements of 6.6.
6.5 Specimen End Closures—Either free-end or restrained-end closures that will withstand the maximum test pressures may be
used. Closures shall be designed so that they do not cause failure of the specimen. Free-end closures shall be used for referee tests
for thermoplastic pipe.
NOTE 4—Free-end closures fasten to the specimen so that internal pressure produces longitudinal tensile stress in addition to hoop. Compared to free
end closure specimens, stresses in the wall of restrained-end closure specimens act in the hoop and radial directions only. Because of this differencein
loading, the equivalent hoop stress in free-end closure specimens of solid wall thermoplastic pipe are approximately 11% lower than in restrained-end
closure specimens tested at the same pressure. The test results for each specimen and the LTHS will reflect this difference in test method.
6.6 Time and
...


Questions, Comments and Discussion
Ask us and Technical Secretary will try to provide an answer. You can facilitate discussion about the standard in here.