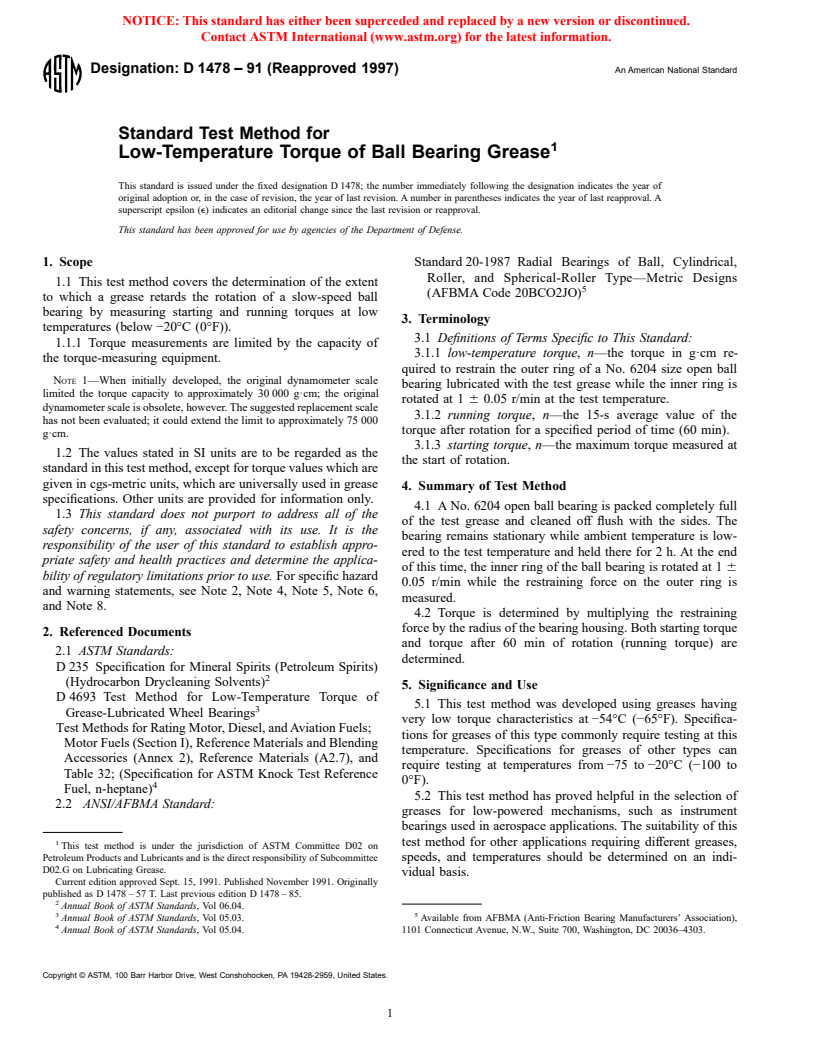
ASTM D1478-91(1997)
(Test Method)Standard Test Method for Low-Temperature Torque of Ball Bearing Grease
Standard Test Method for Low-Temperature Torque of Ball Bearing Grease
SCOPE
1.1 This test method covers the determination of the extent to which a grease retards the rotation of a slow-speed ball bearing by measuring starting and running torques at low temperatures (below -20°C (0°F)).
1.1.1 Torque measurements are limited by the capacity of the torque-measuring equipment. Note 1-When initially developed, the original dynamometer scale limited the torque capacity to approximately 30000 g[dot]cm; the original dynamometer scale is obsolete, however. The suggested replacement scale has not been evaluated; it could extend the limit to approximately 75000 g[dot]cm.
1.2 The values stated in SI units are to be regarded as the standard in this test method, except for torque values which are given in cgs-metric units, which are universally used in grease specifications. Other units are provided for information only.
1.3 This standard does not purport to address all of the safety problems, if any, associated with its use. It is the responsibility of the user of this standard to establish appropriate safety and health practices and determine the applicability of regulatory limitations prior to use. For specific hazard and warning statements, see Notes 2, 4, 5, 6, and 8.
General Information
Relations
Standards Content (Sample)
NOTICE: This standard has either been superceded and replaced by a new version or discontinued.
Contact ASTM International (www.astm.org) for the latest information.
Designation: D 1478 – 91 (Reapproved 1997) An American National Standard
Standard Test Method for
Low-Temperature Torque of Ball Bearing Grease
This standard is issued under the fixed designation D 1478; the number immediately following the designation indicates the year of
original adoption or, in the case of revision, the year of last revision. A number in parentheses indicates the year of last reapproval. A
superscript epsilon (e) indicates an editorial change since the last revision or reapproval.
This standard has been approved for use by agencies of the Department of Defense.
1. Scope Standard 20-1987 Radial Bearings of Ball, Cylindrical,
Roller, and Spherical-Roller Type—Metric Designs
1.1 This test method covers the determination of the extent
(AFBMA Code 20BCO2JO)
to which a grease retards the rotation of a slow-speed ball
bearing by measuring starting and running torques at low
3. Terminology
temperatures (below −20°C (0°F)).
3.1 Definitions of Terms Specific to This Standard:
1.1.1 Torque measurements are limited by the capacity of
3.1.1 low-temperature torque, n—the torque in g·cm re-
the torque-measuring equipment.
quired to restrain the outer ring of a No. 6204 size open ball
NOTE 1—When initially developed, the original dynamometer scale
bearing lubricated with the test grease while the inner ring is
limited the torque capacity to approximately 30 000 g·cm; the original
rotated at 1 6 0.05 r/min at the test temperature.
dynamometer scale is obsolete, however. The suggested replacement scale
3.1.2 running torque, n—the 15-s average value of the
has not been evaluated; it could extend the limit to approximately 75 000
torque after rotation for a specified period of time (60 min).
g·cm.
3.1.3 starting torque, n—the maximum torque measured at
1.2 The values stated in SI units are to be regarded as the
the start of rotation.
standard in this test method, except for torque values which are
given in cgs-metric units, which are universally used in grease
4. Summary of Test Method
specifications. Other units are provided for information only.
4.1 A No. 6204 open ball bearing is packed completely full
1.3 This standard does not purport to address all of the
of the test grease and cleaned off flush with the sides. The
safety concerns, if any, associated with its use. It is the
bearing remains stationary while ambient temperature is low-
responsibility of the user of this standard to establish appro-
ered to the test temperature and held there for 2 h. At the end
priate safety and health practices and determine the applica-
of this time, the inner ring of the ball bearing is rotated at 1 6
bility of regulatory limitations prior to use. For specific hazard
0.05 r/min while the restraining force on the outer ring is
and warning statements, see Note 2, Note 4, Note 5, Note 6,
measured.
and Note 8.
4.2 Torque is determined by multiplying the restraining
force by the radius of the bearing housing. Both starting torque
2. Referenced Documents
and torque after 60 min of rotation (running torque) are
2.1 ASTM Standards:
determined.
D 235 Specification for Mineral Spirits (Petroleum Spirits)
(Hydrocarbon Drycleaning Solvents)
5. Significance and Use
D 4693 Test Method for Low-Temperature Torque of
5.1 This test method was developed using greases having
Grease-Lubricated Wheel Bearings
very low torque characteristics at −54°C (−65°F). Specifica-
Test Methods for Rating Motor, Diesel, and Aviation Fuels;
tions for greases of this type commonly require testing at this
Motor Fuels (Section I), Reference Materials and Blending
temperature. Specifications for greases of other types can
Accessories (Annex 2), Reference Materials (A2.7), and
require testing at temperatures from −75 to −20°C (−100 to
Table 32; (Specification for ASTM Knock Test Reference
0°F).
Fuel, n-heptane)
5.2 This test method has proved helpful in the selection of
2.2 ANSI/AFBMA Standard:
greases for low-powered mechanisms, such as instrument
bearings used in aerospace applications. The suitability of this
1 test method for other applications requiring different greases,
This test method is under the jurisdiction of ASTM Committee D02 on
speeds, and temperatures should be determined on an indi-
Petroleum Products and Lubricants and is the direct responsibility of Subcommittee
D02.G on Lubricating Grease.
vidual basis.
Current edition approved Sept. 15, 1991. Published November 1991. Originally
published as D 1478 – 57 T. Last previous edition D 1478 – 85.
Annual Book of ASTM Standards, Vol 06.04.
3 5
Annual Book of ASTM Standards, Vol 05.03. Available from AFBMA (Anti-Friction Bearing Manufacturers’ Association),
Annual Book of ASTM Standards, Vol 05.04. 1101 Connecticut Avenue, N.W., Suite 700, Washington, DC 20036–4303.
Copyright © ASTM, 100 Barr Harbor Drive, West Conshohocken, PA 19428-2959, United States.
NOTICE: This standard has either been superceded and replaced by a new version or discontinued.
Contact ASTM International (www.astm.org) for the latest information.
D 1478
mately 200 mm (8 in.), or larger) and a suitable connecting
cord.
NOTE 3—Substitution of other suitable torque-measuring equipment,
such as a strain-gage load cell, is permitted.
6.1.5 Spindle and Grease Cup, as shown in Fig. 4 and Fig.
5, respectively.
7. Materials
7.1 Test Bearing—No. 6204 size open ball bearing
(Standard 20-1987, AFBMA Code 20BCO2JO) containing
eight 7.9 mm ( ⁄16 in.) balls, separated by a two-piece, pressed
steel cage, and manufactured to ABEC-3 (Annular Bearing
Engineering Committee) tolerances with the standard radial
clearance of 0.021 to 0.028 mm (0.0008 to 0.0011 in.).
7.2 Stoddard Solvent, conforming to Specification D 235,
FIG. 1 Torque Test Apparatus Assembly
Type I.
NOTE 4—Warning: Combustible. Health Hazard.
5.3 Test Method D 4693 may be better suited for applica-
7.3 n-Heptane, commercial grade or ASTM Knock Test
tions using larger bearings or greater loads. However, greases
Reference Fuel, n-heptane.
having such characteristics that permit torque evaluations by
either this test method or Test Method D 4693 will not give the
NOTE 5—Warning: Flammable. Health Hazard.
same values in the two test methods (even when converted to
8. Procedure
the same torque units) because the apparatus and test bearings
are different.
8.1 Wash the selected test bearing thoroughly in Stoddard
solvent and rinse it in a beaker of n-heptane. Dry the bearing
6. Apparatus
for approximately 20 min in a warm oven (not over 100°C
6.1 Fig. 1 shows a suitable torque test apparatus assembly.
(212°F)). Permit the bearing to cool to room temperature
It consists of the components described in 6.1.1-6.1.5. before proceeding.
6.1.1 Low-Temperature Box—Any well-insulated box of at
8.2 Lubricate the bearing with five drops of oil having a
3 3
least 0.03 m (1 ft ) interior volume, in which the air tempera- viscosity of 28 to 32 cSt at 100°C (135 to 150 SUS at 210°F).
ture can be controlled and maintained within 0.5°C (1°F) of the
The bearing shall then show no roughness or catching when
test temperature. rotated between the fingers while applying light pressure
axially and then radially. Use the dynamometer to determine
NOTE 2—Caution: Direct impact on the test bearing by an air stream
the running torque at room temperature; note the average and
colder than the test temperature must be avoided to preclude erroneous
maximum running torque peaks. The average shall not exceed
results. Baffles should be used where necessary to prevent such direct
impact. The drive mechanism can be mounted externally as shown in Fig. 20 g·cm (2.0 mN·m), and no peak shall exceed 25 g·cm (2.5
2, or the entire drive mechanism can be inserted directly into the box.
mN·m). If torque values fall below these limits, the bearing is
When the drive is mounted externally, the temperature measured at a point
suitable for the grease torque test. If torque values exceed these
on the surface of the test shaft between the test bearing and wall of the box
limits, the bearing should be recleaned and retested or dis-
shall be not more than 0.5°C (1°F) above the test temperature.
carded.
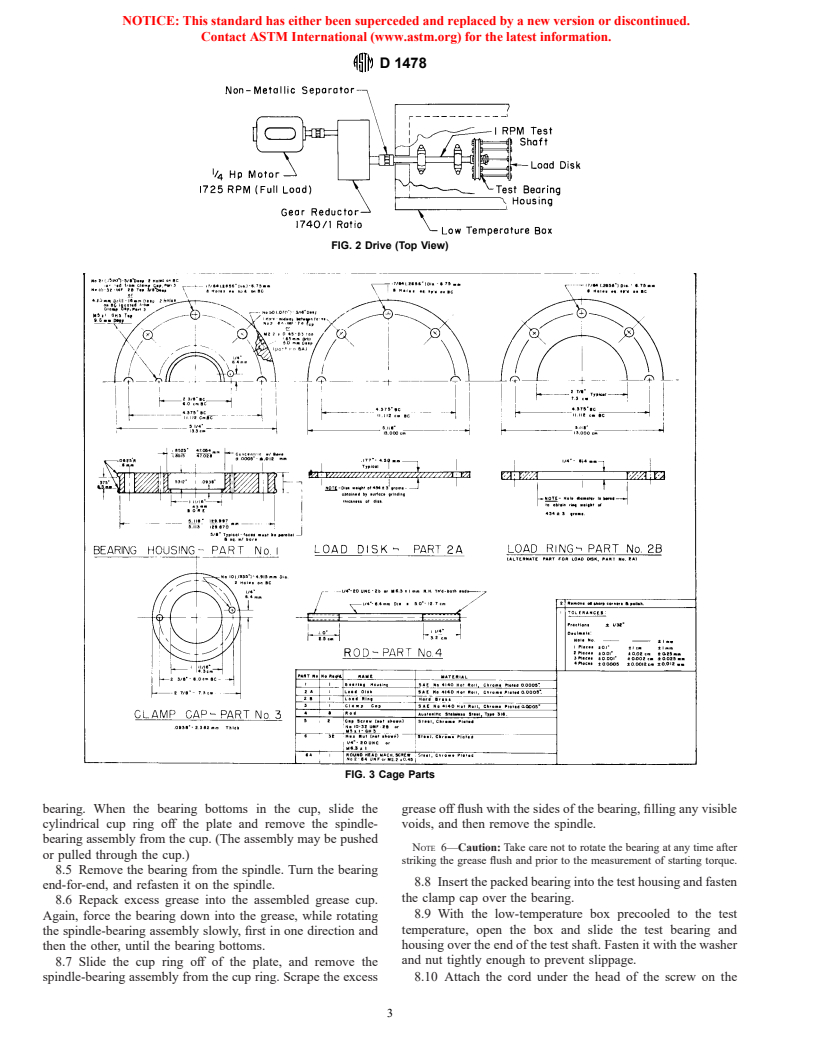
6.1.2 Drive Assembly, as shown in Fig. 2, including drive
8.3 Clean and dry a bearing that has been determined to be
motor, gear reductor, and test shaft. The test shaft shall receive
acceptable (8.2). Mount the bearing on a hand spindle (Fig. 4),
the test bearing against a shoulder having a diameter smaller
fastening the inner race by means of the washer and screw. Fill
than the inner race shoulder of the bearing. Use a spacer
the grease cup (Fig. 5) at least three-fourths full of the test
washer of the same diameter and at least 1.6 mm ( ⁄16 in.) thick,
grease, using a clean steel spatula. Minimize the inclusion of
along with a test bearing lock nut, to clamp the inner ring of the
air.
test bearing to the 1 r/min shaft.
8.4 Force the bearing down into the grease and rotate the
6.1.3 Housing (Cage)—Bearing housing, load disk, load
spindle-bearing assembly slowly, first in one direction and then
ring, clamp rod, and associated parts made in accordance with
the other, to ensure that grease is worked into all parts of the
Fig. 3. Adjust the housing mass to 454 6 3g.
6.1.4 Torque-Measuring Equipment—A calibrated dyna-
mometer scale having a range of approximately 0 to 10 kg, 0
Any suitable cord of sufficient length is acceptable. Braided metallic cable,
such as Minneapolis-Honeywell Drive Cable No. 77050-1, fitted with a ring or loop
to 100 N, or 0 to 25 lb, with a large face diameter (approxi-
on each end, is recommended. A15-kg (35-lb) test string saturated with silicone oil
also has been found satisfactory.
The ball bearing has been standardized by Subcommittee D02.G and is
Low Temperature Torque Apparatus available from Koehler Instrument Com- available from ASTM Headquarters for a nominal cost by specifying ADJD3336.
pany, 1595 Sycamore Ave., Bohemia, NY 11716. Copies of correspondence
...


Questions, Comments and Discussion
Ask us and Technical Secretary will try to provide an answer. You can facilitate discussion about the standard in here.