ASTM E1634-11
(Guide)Standard Guide for Performing Sputter Crater Depth Measurements
Standard Guide for Performing Sputter Crater Depth Measurements
SIGNIFICANCE AND USE
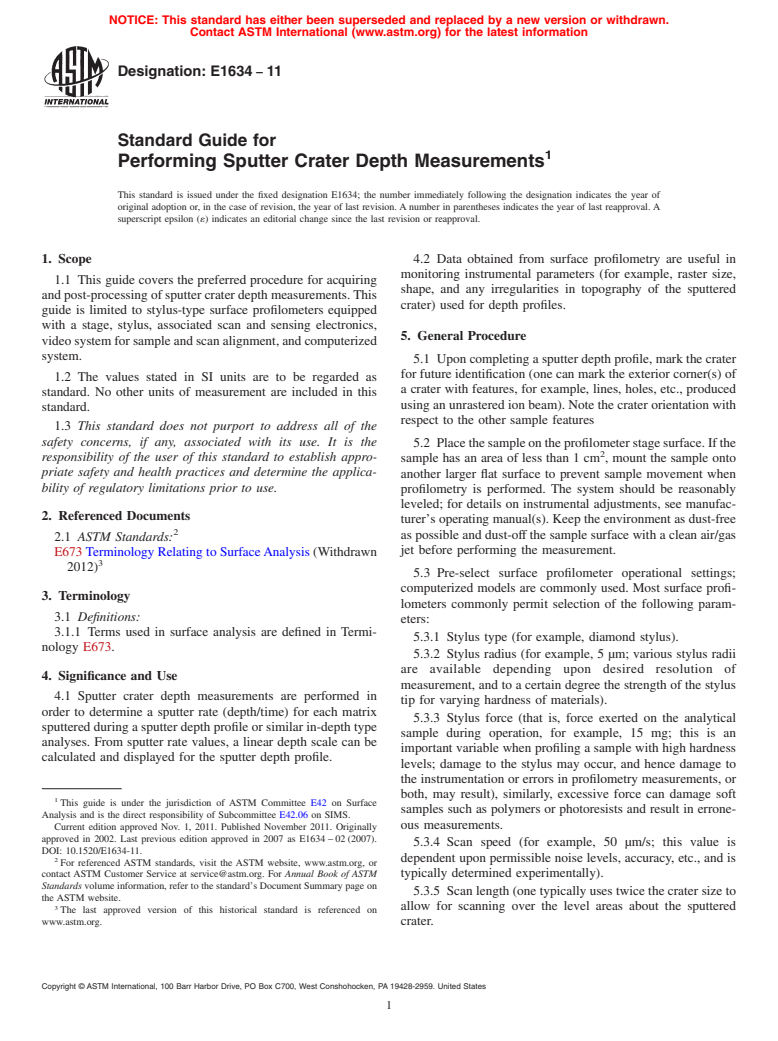
Sputter crater depth measurements are performed in order to determine a sputter rate (depth/time) for each matrix sputtered during a sputter depth profile or similar in-depth type analyses. From sputter rate values, a linear depth scale can be calculated and displayed for the sputter depth profile.
Data obtained from surface profilometry are useful in monitoring instrumental parameters (for example, raster size, shape, and any irregularities in topography of the sputtered crater) used for depth profiles.
SCOPE
1.1 This guide covers the preferred procedure for acquiring and post-processing of sputter crater depth measurements. This guide is limited to stylus-type surface profilometers equipped with a stage, stylus, associated scan and sensing electronics, video system for sample and scan alignment, and computerized system.
1.2 The values stated in SI units are to be regarded as standard. No other units of measurement are included in this standard.
1.3 This standard does not purport to address all of the safety concerns, if any, associated with its use. It is the responsibility of the user of this standard to establish appropriate safety and health practices and determine the applicability of regulatory limitations prior to use.
General Information
Relations
Buy Standard
Standards Content (Sample)
NOTICE: This standard has either been superseded and replaced by a new version or withdrawn.
Contact ASTM International (www.astm.org) for the latest information
Designation:E1634 −11
Standard Guide for
1
Performing Sputter Crater Depth Measurements
This standard is issued under the fixed designation E1634; the number immediately following the designation indicates the year of
original adoption or, in the case of revision, the year of last revision. A number in parentheses indicates the year of last reapproval. A
superscript epsilon (´) indicates an editorial change since the last revision or reapproval.
1. Scope 4.2 Data obtained from surface profilometry are useful in
monitoring instrumental parameters (for example, raster size,
1.1 This guide covers the preferred procedure for acquiring
shape, and any irregularities in topography of the sputtered
and post-processing of sputter crater depth measurements.This
crater) used for depth profiles.
guide is limited to stylus-type surface profilometers equipped
with a stage, stylus, associated scan and sensing electronics,
5. General Procedure
videosystemforsampleandscanalignment,andcomputerized
system.
5.1 Upon completing a sputter depth profile, mark the crater
for future identification (one can mark the exterior corner(s) of
1.2 The values stated in SI units are to be regarded as
a crater with features, for example, lines, holes, etc., produced
standard. No other units of measurement are included in this
using an unrastered ion beam). Note the crater orientation with
standard.
respect to the other sample features
1.3 This standard does not purport to address all of the
safety concerns, if any, associated with its use. It is the
5.2 Placethesampleontheprofilometerstagesurface.Ifthe
2
responsibility of the user of this standard to establish appro-
sample has an area of less than 1 cm , mount the sample onto
priate safety and health practices and determine the applica-
another larger flat surface to prevent sample movement when
bility of regulatory limitations prior to use.
profilometry is performed. The system should be reasonably
leveled; for details on instrumental adjustments, see manufac-
2. Referenced Documents
turer’s operating manual(s). Keep the environment as dust-free
2
as possible and dust-off the sample surface with a clean air/gas
2.1 ASTM Standards:
jet before performing the measurement.
E673 Terminology Relating to SurfaceAnalysis (Withdrawn
3
2012)
5.3 Pre-select surface profilometer operational settings;
computerized models are commonly used. Most surface profi-
3. Terminology
lometers commonly permit selection of the following param-
3.1 Definitions:
eters:
3.1.1 Terms used in surface analysis are defined in Termi-
5.3.1 Stylus type (for example, diamond stylus).
nology E673.
5.3.2 Stylus radius (for example, 5 µm; various stylus radii
are available depending upon desired resolution of
4. Significance and Use
measurement, and to a certain degree the strength of the stylus
4.1 Sputter crater depth measurements are performed in
tip for varying hardness of materials).
order to determine a sputter rate (depth/time) for each matrix
5.3.3 Stylus force (that is, force exerted on the analytical
sputtered during a sputter depth profile or similar in-depth type
sample during operation, for example, 15 mg; this is an
analyses. From sputter rate values, a linear depth scale can be
important variable when profiling a sample with high hardness
calculated and displayed for the sputter depth profile.
levels; damage to the stylus may occur, and hence damage to
the instrumentation or errors in profilometry measurements, or
both, may result), similarly, excessive force can damage soft
1
This guide is under the jurisdiction of ASTM Committee E42 on Surface
samples such as polymers or photoresists and result in errone-
Analysis and is the direct responsibility of Subcommittee E42.06 on SIMS.
Current edition approved Nov. 1, 2011. Published November 2011. Originally ous measurements.
approved in 2002. Last previous edition approved in 2007 as E1634 – 02 (2007).
5.3.4 Scan speed (for example, 50 µm/s; this value is
DOI: 10.1520/E1634-11.
dependent upon permissible noise levels, accuracy, etc., and is
2
For referenced ASTM standards, visit the ASTM website, www.astm.org, or
contact ASTM Customer Service at service@astm.org. For Annual Book of ASTM typically determined experimentally).
Standards volume information, refer to the standard’s Document Summary page on
5.3.5 Scan length (one typically uses twice the crater size to
the ASTM website.
3
allow for scanning over the level areas about the sputtered
The last approved version of this historical standard is referenced on
www.astm.org. crater.
Copyright © ASTM International, 100 Barr Harbor Drive, PO Box C700, West Conshohocken, PA 19428-2959. United States
1
---------------------- Page: 1 ----------------------
E1634−11
ing top and bottom surface(s), etc. In the leveling process, one
normally chooses a cursor position on the top l
...
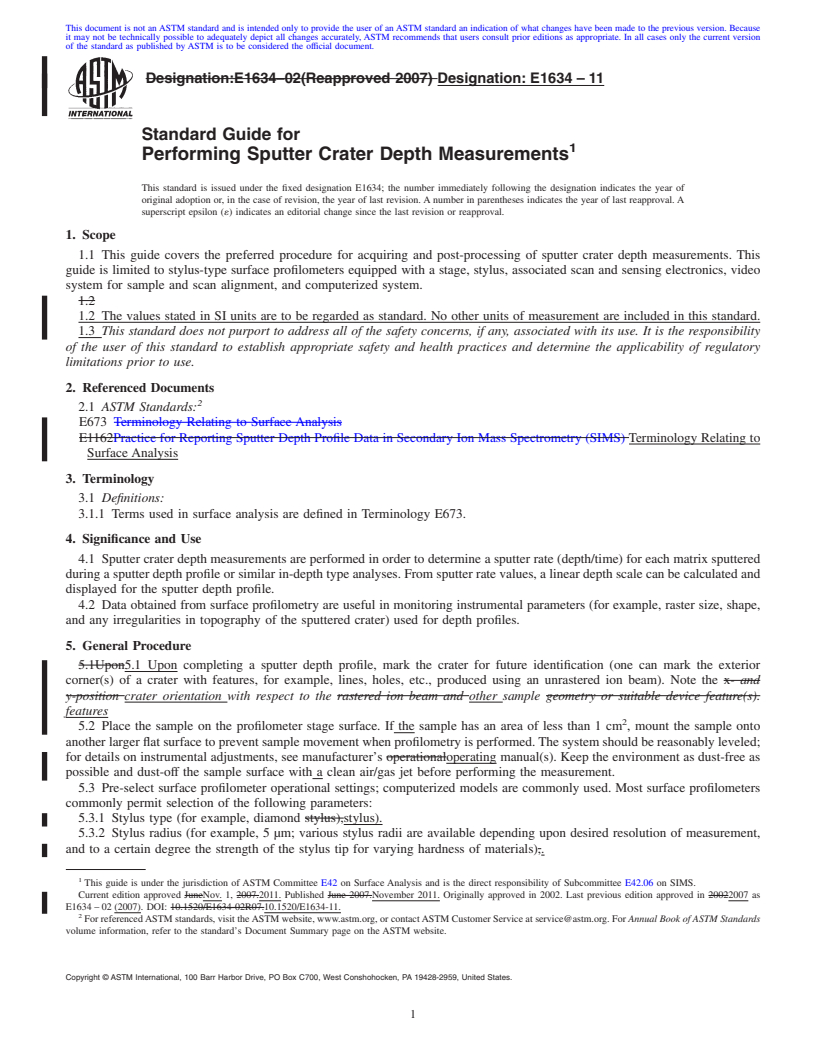
This document is not anASTM standard and is intended only to provide the user of anASTM standard an indication of what changes have been made to the previous version. Because
it may not be technically possible to adequately depict all changes accurately, ASTM recommends that users consult prior editions as appropriate. In all cases only the current version
of the standard as published by ASTM is to be considered the official document.
Designation:E1634–02(Reapproved 2007) Designation: E1634 – 11
Standard Guide for
1
Performing Sputter Crater Depth Measurements
This standard is issued under the fixed designation E1634; the number immediately following the designation indicates the year of
original adoption or, in the case of revision, the year of last revision. A number in parentheses indicates the year of last reapproval. A
superscript epsilon (´) indicates an editorial change since the last revision or reapproval.
1. Scope
1.1 This guide covers the preferred procedure for acquiring and post-processing of sputter crater depth measurements. This
guide is limited to stylus-type surface profilometers equipped with a stage, stylus, associated scan and sensing electronics, video
system for sample and scan alignment, and computerized system.
1.2
1.2 The values stated in SI units are to be regarded as standard. No other units of measurement are included in this standard.
1.3 This standard does not purport to address all of the safety concerns, if any, associated with its use. It is the responsibility
of the user of this standard to establish appropriate safety and health practices and determine the applicability of regulatory
limitations prior to use.
2. Referenced Documents
2
2.1 ASTM Standards:
E673 Terminology Relating to Surface Analysis
E1162Practice for Reporting Sputter Depth Profile Data in Secondary Ion Mass Spectrometry (SIMS) Terminology Relating to
Surface Analysis
3. Terminology
3.1 Definitions:
3.1.1 Terms used in surface analysis are defined in Terminology E673.
4. Significance and Use
4.1 Sputter crater depth measurements are performed in order to determine a sputter rate (depth/time) for each matrix sputtered
during a sputter depth profile or similar in-depth type analyses. From sputter rate values, a linear depth scale can be calculated and
displayed for the sputter depth profile.
4.2 Data obtained from surface profilometry are useful in monitoring instrumental parameters (for example, raster size, shape,
and any irregularities in topography of the sputtered crater) used for depth profiles.
5. General Procedure
5.1Upon5.1 Upon completing a sputter depth profile, mark the crater for future identification (one can mark the exterior
corner(s) of a crater with features, for example, lines, holes, etc., produced using an unrastered ion beam). Note the x- and
y-position crater orientation with respect to the rastered ion beam and other sample geometry or suitable device feature(s).
features
2
5.2 Place the sample on the profilometer stage surface. If the sample has an area of less than 1 cm , mount the sample onto
another larger flat surface to prevent sample movement when profilometry is performed.The system should be reasonably leveled;
for details on instrumental adjustments, see manufacturer’s operationaloperating manual(s). Keep the environment as dust-free as
possible and dust-off the sample surface with a clean air/gas jet before performing the measurement.
5.3 Pre-select surface profilometer operational settings; computerized models are commonly used. Most surface profilometers
commonly permit selection of the following parameters:
5.3.1 Stylus type (for example, diamond stylus),stylus).
5.3.2 Stylus radius (for example, 5 µm; various stylus radii are available depending upon desired resolution of measurement,
and to a certain degree the strength of the stylus tip for varying hardness of materials),.
1
This guide is under the jurisdiction of ASTM Committee E42 on Surface Analysis and is the direct responsibility of Subcommittee E42.06 on SIMS.
Current edition approved JuneNov. 1, 2007.2011. Published June 2007.November 2011. Originally approved in 2002. Last previous edition approved in 20022007 as
E1634 – 02 (2007). DOI: 10.1520/E1634-02R07.10.1520/E1634-11.
2
For referencedASTM standards, visit theASTM website, www.astm.org, or contactASTM Customer Service at service@astm.org. For Annual Book of ASTM Standards
volume information, refer to the standard’s Document Summary page on the ASTM website.
Copyright © ASTM International, 100 Barr Harbor Drive, PO Box C700, West Conshohocken, PA 19428-2959, United States.
1
---------------------- Page: 1 ----------------------
E1634 – 11
5.3.3 Stylus force (that is, force exerted on the analytical sample during operation, for example, 15 mg; this is an important
variable when profiling a sample with high hardness levels; damage to the stylus may occur, and hence damage to the
instrumentation or errors in profilometry measurements, or both, may result), similarly, exce
...


Questions, Comments and Discussion
Ask us and Technical Secretary will try to provide an answer. You can facilitate discussion about the standard in here.