ASTM A608/A608M-20
(Specification)Standard Specification for Centrifugally Cast Iron-Chromium-Nickel High-Alloy Tubing for Pressure Application at High Temperatures
Standard Specification for Centrifugally Cast Iron-Chromium-Nickel High-Alloy Tubing for Pressure Application at High Temperatures
ABSTRACT
This specification covers the standard for iron-chromium-nickel, high-alloy tubes made by the centrifugal casting process intended for use under pressure at high temperatures. The tubing shall be supplied in the as cast condition or as cast with machining on the outside or inside surfaces. The material shall conform to the required chemical composition in carbon, manganese, silicon, chromium, nickel, phosphorus, sulfur, and molybdenum. Tension test shall be performed in the tubing at elevated temperature and shall conform to the required values in tensile strength and elongation. Tubing shall meet several tests such as; pressure test, flattening test, and mechanical test.
SCOPE
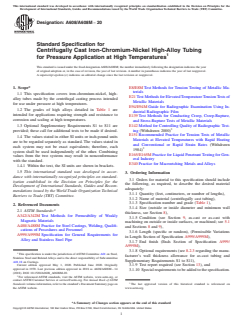
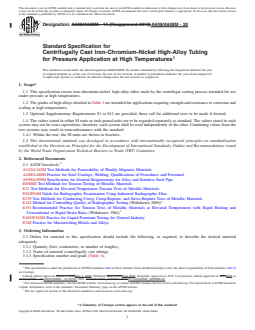
1.1 This specification covers iron-chromium-nickel, high-alloy tubes made by the centrifugal casting process intended for use under pressure at high temperatures.
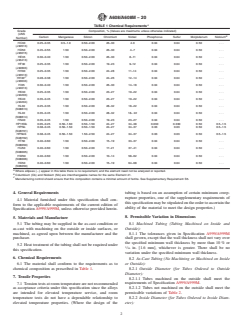
1.2 The grades of high alloys detailed in Table 1 are intended for applications requiring strength and resistance to corrosion and scaling at high temperatures.
1.3 Optional Supplementary Requirements S1 to S11 are provided; these call for additional tests to be made if desired.
1.4 The values stated in either SI units or inch-pound units are to be regarded separately as standard. The values stated in each system may not be exact equivalents; therefore, each system shall be used independently of the other. Combining values from the two systems may result in nonconformance with the standard.
1.4.1 Within the text, the SI units are shown in brackets.
1.5 This international standard was developed in accordance with internationally recognized principles on standardization established in the Decision on Principles for the Development of International Standards, Guides and Recommendations issued by the World Trade Organization Technical Barriers to Trade (TBT) Committee.
General Information
- Status
- Published
- Publication Date
- 30-Apr-2020
- Technical Committee
- A01 - Steel, Stainless Steel and Related Alloys
- Drafting Committee
- A01.18 - Castings
Relations
- Effective Date
- 01-May-2020
- Effective Date
- 01-Mar-2024
- Effective Date
- 01-Jan-2024
- Effective Date
- 15-Nov-2023
- Effective Date
- 01-Jul-2018
- Effective Date
- 01-Jul-2018
- Effective Date
- 01-Sep-2017
- Effective Date
- 01-May-2017
- Effective Date
- 01-Sep-2016
- Effective Date
- 15-Jul-2016
- Effective Date
- 01-Mar-2016
- Effective Date
- 01-Dec-2015
- Effective Date
- 01-Feb-2015
- Effective Date
- 01-Jun-2013
- Effective Date
- 01-Apr-2013
Overview
ASTM A608/A608M-20 is the internationally recognized standard specification developed by ASTM International for centrifugally cast iron-chromium-nickel high-alloy tubing. This standard is specifically designed for tubes intended to operate under pressure at high temperatures. The specification details material requirements, manufacturing processes, permissible variations, testing protocols, and marking instructions to ensure suitability for demanding industrial applications. Tubes produced according to ASTM A608/A608M-20 exhibit enhanced strength, corrosion resistance, and scaling resistance, making them essential in operations involving extreme heat and pressure.
Key Topics
- Material Scope: Covers iron-chromium-nickel high-alloy tubing manufactured by the centrifugal casting process, supplied in as-cast or machined conditions.
- Chemical Composition: Specifies required ranges for elements such as carbon, manganese, silicon, chromium, nickel, phosphorus, sulfur, molybdenum, and, where required, niobium.
- Grades: Includes a range of high alloys (e.g., HC30, HD50, HE35, HF30, HH30, HK40, HL40, HPNb) tailored for various levels of strength and resistance to heat and corrosion.
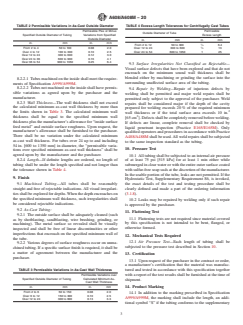
- Dimensional Requirements: Details on permissible variations in diameter, wall thickness, and length for both as-cast and machined tubes.
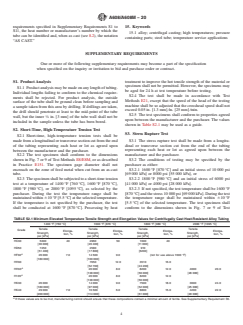
- Mechanical and Pressure Testing: Mandates pressure testing of every tube length, as well as optional high-temperature tension and stress rupture tests.
- Surface Finish & Inspection: Outlines conditions for as-cast and machined finishes, inspection procedures, and repair protocols-including weld repair guidelines approved by the purchaser.
- Certification and Traceability: Requires clear product marking and, when requested, manufacturer’s certification and test reports.
Applications
ASTM A608/A608M-20 alloy tubing is critical for industries requiring robust, heat-resistant tubing capable of withstanding internal pressures at elevated temperatures. Applications include:
- Petrochemical and Refining: Heat exchangers, reformer tubes, and furnace components where durability at temperature is vital.
- Power Generation: Boiler tubes and superheater elements subjected to high-pressure, high-temperature steam or flue gases.
- Chemical Processing: Piping systems and reactors for corrosive environments.
- Industrial Furnaces: Muffle tubes, radiant heater tubes, and rolls subjected to cyclic thermal stresses and oxidation.
Tubes produced according to this specification offer reliable performance, extended operational life, and reduced maintenance costs in harsh service conditions.
Related Standards
For comprehensive quality assurance and compatibility, ASTM A608/A608M-20 references or is associated with several other key standards in the steel and alloy industry, including:
- ASTM A999/A999M: General requirements for alloy and stainless steel pipe
- ASTM E8/E8M: Tension testing of metallic materials
- ASTM E21: Elevated temperature tension tests of metallic materials
- ASTM E139: Creep and stress-rupture tests of metallic materials
- ASTM A342/A342M: Permeability of weakly magnetic materials
- ASTM A488/A488M: Welding procedures for steel castings
- ASTM E94/E94M & E165/E165M: Radiographic and liquid penetrant testing methods
- ASTM E340: Macroetching metals and alloys
These referenced documents reinforce the consistent production, inspection, and reliability of centrifugally cast high-alloy tubing for pressure applications in high temperature environments.
Keywords: ASTM A608, centrifugally cast tubing, iron-chromium-nickel alloy, high-temperature pressure tubing, industrial furnace tubes, corrosion-resistant tubing, heat-resistant alloy tube specification.
Buy Documents
ASTM A608/A608M-20 - Standard Specification for Centrifugally Cast Iron-Chromium-Nickel High-Alloy Tubing for Pressure Application at High Temperatures
REDLINE ASTM A608/A608M-20 - Standard Specification for Centrifugally Cast Iron-Chromium-Nickel High-Alloy Tubing for Pressure Application at High Temperatures
Get Certified
Connect with accredited certification bodies for this standard

Institut za varilstvo d.o.o. (Welding Institute)
Slovenia's leading welding institute since 1952. ISO 3834, EN 1090, pressure equipment certification, NDT personnel, welder qualification. Only IIW Au
Sponsored listings
Frequently Asked Questions
ASTM A608/A608M-20 is a technical specification published by ASTM International. Its full title is "Standard Specification for Centrifugally Cast Iron-Chromium-Nickel High-Alloy Tubing for Pressure Application at High Temperatures". This standard covers: ABSTRACT This specification covers the standard for iron-chromium-nickel, high-alloy tubes made by the centrifugal casting process intended for use under pressure at high temperatures. The tubing shall be supplied in the as cast condition or as cast with machining on the outside or inside surfaces. The material shall conform to the required chemical composition in carbon, manganese, silicon, chromium, nickel, phosphorus, sulfur, and molybdenum. Tension test shall be performed in the tubing at elevated temperature and shall conform to the required values in tensile strength and elongation. Tubing shall meet several tests such as; pressure test, flattening test, and mechanical test. SCOPE 1.1 This specification covers iron-chromium-nickel, high-alloy tubes made by the centrifugal casting process intended for use under pressure at high temperatures. 1.2 The grades of high alloys detailed in Table 1 are intended for applications requiring strength and resistance to corrosion and scaling at high temperatures. 1.3 Optional Supplementary Requirements S1 to S11 are provided; these call for additional tests to be made if desired. 1.4 The values stated in either SI units or inch-pound units are to be regarded separately as standard. The values stated in each system may not be exact equivalents; therefore, each system shall be used independently of the other. Combining values from the two systems may result in nonconformance with the standard. 1.4.1 Within the text, the SI units are shown in brackets. 1.5 This international standard was developed in accordance with internationally recognized principles on standardization established in the Decision on Principles for the Development of International Standards, Guides and Recommendations issued by the World Trade Organization Technical Barriers to Trade (TBT) Committee.
ABSTRACT This specification covers the standard for iron-chromium-nickel, high-alloy tubes made by the centrifugal casting process intended for use under pressure at high temperatures. The tubing shall be supplied in the as cast condition or as cast with machining on the outside or inside surfaces. The material shall conform to the required chemical composition in carbon, manganese, silicon, chromium, nickel, phosphorus, sulfur, and molybdenum. Tension test shall be performed in the tubing at elevated temperature and shall conform to the required values in tensile strength and elongation. Tubing shall meet several tests such as; pressure test, flattening test, and mechanical test. SCOPE 1.1 This specification covers iron-chromium-nickel, high-alloy tubes made by the centrifugal casting process intended for use under pressure at high temperatures. 1.2 The grades of high alloys detailed in Table 1 are intended for applications requiring strength and resistance to corrosion and scaling at high temperatures. 1.3 Optional Supplementary Requirements S1 to S11 are provided; these call for additional tests to be made if desired. 1.4 The values stated in either SI units or inch-pound units are to be regarded separately as standard. The values stated in each system may not be exact equivalents; therefore, each system shall be used independently of the other. Combining values from the two systems may result in nonconformance with the standard. 1.4.1 Within the text, the SI units are shown in brackets. 1.5 This international standard was developed in accordance with internationally recognized principles on standardization established in the Decision on Principles for the Development of International Standards, Guides and Recommendations issued by the World Trade Organization Technical Barriers to Trade (TBT) Committee.
ASTM A608/A608M-20 is classified under the following ICS (International Classification for Standards) categories: 23.040.10 - Iron and steel pipes; 23.040.40 - Metal fittings. The ICS classification helps identify the subject area and facilitates finding related standards.
ASTM A608/A608M-20 has the following relationships with other standards: It is inter standard links to ASTM A608/A608M-14(2018), ASTM A488/A488M-24, ASTM E8/E8M-24, ASTM E340-23, ASTM A488/A488M-18e1, ASTM A488/A488M-18, ASTM A999/A999M-17, ASTM A488/A488M-17, ASTM A999/A999M-16, ASTM E8/E8M-16, ASTM A488/A488M-16, ASTM A999/A999M-15, ASTM E8/E8M-15, ASTM E8/E8M-13, ASTM A999/A999M-13. Understanding these relationships helps ensure you are using the most current and applicable version of the standard.
ASTM A608/A608M-20 is available in PDF format for immediate download after purchase. The document can be added to your cart and obtained through the secure checkout process. Digital delivery ensures instant access to the complete standard document.
Standards Content (Sample)
This international standard was developed in accordance with internationally recognized principles on standardization established in the Decision on Principles for the
Development of International Standards, Guides and Recommendations issued by the World Trade Organization Technical Barriers to Trade (TBT) Committee.
Designation:A608/A608M −20
Standard Specification for
Centrifugally Cast Iron-Chromium-Nickel High-Alloy Tubing
for Pressure Application at High Temperatures
This standard is issued under the fixed designationA608/A608M; the number immediately following the designation indicates the year
of original adoption or, in the case of revision, the year of last revision. A number in parentheses indicates the year of last reapproval.
A superscript epsilon (´) indicates an editorial change since the last revision or reapproval.
1. Scope* E8/E8M Test Methods for Tension Testing of Metallic Ma-
terials
1.1 This specification covers iron-chromium-nickel, high-
E21 TestMethodsforElevatedTemperatureTensionTestsof
alloy tubes made by the centrifugal casting process intended
Metallic Materials
for use under pressure at high temperatures.
E94/E94M Guide for Radiographic Examination Using In-
1.2 The grades of high alloys detailed in Table 1 are
dustrial Radiographic Film
intended for applications requiring strength and resistance to
E139 Test Methods for Conducting Creep, Creep-Rupture,
corrosion and scaling at high temperatures.
and Stress-Rupture Tests of Metallic Materials
1.3 Optional Supplementary Requirements S1 to S11 are E142 Method for Controlling Quality of Radiographic Test-
ing (Withdrawn 2000)
provided; these call for additional tests to be made if desired.
E151 Recommended Practice for Tension Tests of Metallic
1.4 The values stated in either SI units or inch-pound units
Materials at Elevated Temperatures with Rapid Heating
are to be regarded separately as standard. The values stated in
and Conventional or Rapid Strain Rates (Withdrawn
each system may not be exact equivalents; therefore, each
1984)
system shall be used independently of the other. Combining
E165/E165M Practice for Liquid Penetrant Testing for Gen-
values from the two systems may result in nonconformance
eral Industry
with the standard.
E340 Practice for Macroetching Metals and Alloys
1.4.1 Within the text, the SI units are shown in brackets.
1.5 This international standard was developed in accor-
3. Ordering Information
dance with internationally recognized principles on standard-
3.1 Orders for material to this specification should include
ization established in the Decision on Principles for the
the following, as required, to describe the desired material
Development of International Standards, Guides and Recom-
adequately:
mendations issued by the World Trade Organization Technical
3.1.1 Quantity (feet, centimeters, or number of lengths),
Barriers to Trade (TBT) Committee.
3.1.2 Name of material (centrifugally cast tubing),
3.1.3 Specification number and grade (Table 1),
2. Referenced Documents
3.1.4 Size (outside or inside diameter and minimum wall
2.1 ASTM Standards:
thickness, see Section 8),
A342/A342M Test Methods for Permeability of Weakly
3.1.5 Condition (see Section 9, as-cast or as-cast with
Magnetic Materials
machining on outside or inside surfaces, or machined; see 5.1
A488/A488M Practice for Steel Castings, Welding, Qualifi-
and Sections 8 and 9),
cations of Procedures and Personnel
3.1.6 Length (specific or random), (Permissible Variations
A999/A999M Specification for General Requirements for
in Length Section of Specification A999/A999M),
Alloy and Stainless Steel Pipe
3.1.7 End finish (Ends Section of Specification A999/
A999M),
3.1.8 Optional requirements (see 8.2.3 regarding the manu-
This specification is under the jurisdiction of ASTM Committee A01 on Steel,
facturer’s wall thickness allowance for as-cast tubing and
Stainless Steel and Related Alloys and is the direct responsibility of Subcommittee
Supplementary Requirements S1 to S11),
A01.18 on Castings.
Current edition approved May 1, 2020. Published June 2020. Originally 3.1.9 Test report required (see Section 13), and
approved in 1970. Last previous edition approved in 2018 as A608/A608M – 14
3.1.10 Special requirements to be added to the specification.
(2018). DOI: 10.1520/A0608_A0608M-20.
For referenced ASTM standards, visit the ASTM website, www.astm.org, or
contact ASTM Customer Service at service@astm.org. For Annual Book of ASTM
Standards volume information, refer to the standard’s Document Summary page on The last approved version of this historical standard is referenced on
the ASTM website. www.astm.org.
*A Summary of Changes section appears at the end of this standard
Copyright © ASTM International, 100 Barr Harbor Drive, PO Box C700, West Conshohocken, PA 19428-2959. United States
A608/A608M−20
A
TABLE 1 Chemical Requirements
Grade
Composition, % (Values are maximums unless otherwise indicated)
(UNS
B
Carbon Manganese Silicon Chromium Nickel Phosphorus Sulfur Molybdenum Niobium
Number)
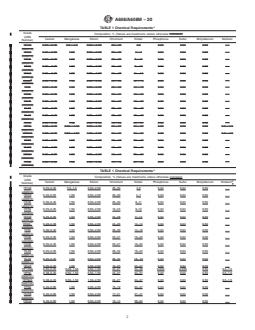
HC30 0.25–0.35 0.5–1.0 0.50–2.00 26–30 4.0 0.04 0.04 0.50 . . .
(J92613)
HD50 0.45–0.55 1.50 0.50–2.00 26–30 4–7 0.04 0.04 0.50 . . .
(J93015)
HE35 0.30–0.40 1.50 0.50–2.00 26–30 8–11 0.04 0.04 0.50 . . .
(J93413)
HF30 0.25–0.35 1.50 0.50–2.00 19–23 9–12 0.04 0.04 0.50 . . .
(J92803)
HH30 0.25–0.35 1.50 0.50–2.00 24–28 11–14 0.04 0.04 0.50 . . .
(J93513)
C
HH33 0.28–0.38 1.50 0.50–2.00 24–26 12–14 0.04 0.04 0.50 . . .
(J93633)
HI35 0.30–0.40 1.50 0.50–2.00 26–30 14–18 0.04 0.04 0.50 . . .
(J94013)
HK30 0.25–0.35 1.50 0.50–2.00 23–27 19–22 0.04 0.04 0.50 . . .
(J94203)
HK40 0.35–0.45 1.50 0.50–2.00 23–27 19–22 0.04 0.04 0.50 . . .
(J94204)
HL30 0.25–0.35 1.50 0.50–2.00 28–32 18–22 0.04 0.04 0.50 . . .
(N08613)
HL40 0.35–0.45 1.50 0.50–2.00 28–32 18– 22 0.04 0.04 0.50 . . .
(N08614)
HN40 0.35–0.45 1.50 0.50–2.00 19–23 23–27 0.04 0.04 0.50 . . .
HP15Nb 0.05–0.25 0.50–1.60 0.50–1.50 24–27 34–38 0.030 0.030 0.50 0.5–1.5
HPNb 0.38–0.45 0.50–1.50 0.50–1.50 24–27 34–37 0.03 0.03 0.50 0.5–1.5
(N28701)
HPNbS 0.38–0.45 0.50–1.50 1.50–2.50 24–27 34–37 0.03 0.03 0.50 0.5–1.5
(N28702)
HT50 0.40–0.60 1.50 0.50–2.00 15–19 33–37 0.04 0.04 0.50 . . .
(N08050)
HU50 0.40–0.60 1.50 0.50–2.00 17–21 37–41 0.04 0.04 0.50 . . .
(N08005)
HW50 0.40–0.60 1.50 0.50–2.00 10–14 58–62 0.04 0.04 0.50 . . .
(N08006)
HX50 0.40–0.60 1.50 0.50–2.00 15–19 64–68 0.04 0.04 0.50 . . .
(N06050)
A
Where ellipses (.) appear in this table there is no requirement, and the element need not be analyzed or reported.
B
Columbium (Cb) and Niobium (Nb) are interchangeable names for the same Element 41.
C
Manufacturing control should ensure that this composition contains a minimal amount of ferrite. See Supplementary Requirement S5.
4. General Requirements tubing is based on an assumption of certain minimum creep-
rupture properties, one of the supplementary requirements of
4.1 Material furnished under this specification shall con-
thisspecificationmaybestipulatedontheordertoascertainthe
form to the applicable requirements of the current edition of
ability of the material to meet the design properties.)
Specification A999/A999M, unless otherwise provided herein.
5. Materials and Manufacture 8. Permissible Variation in Dimensions
5.1 The tubing may be supplied in the as-cast condition or 8.1 Machined Tubing (Tubing Machined on Inside and
as-cast with machining on the outside or inside surfaces, or Outside):
machined, as agreed upon between the manufacturer and the 8.1.1 The tolerances given in Specification A999/A999M
purchaser. shall govern, except that the wall thickness shall not vary over
the specified minimum wall thickness by more than 10 % or
5.2 Heat treatment of the tubing shall not be required under
⁄16 in. [1.6 mm], whichever is greater. There shall be no
this specification.
variation under the specified minimum wall thickness.
6. Chemical Requirements
8.2 As-Cast Tubing (No Machining or Machined on Inside
6.1 The material shall conform to the requirements as to or Outside):
chemical composition as prescribed in Table 1. 8.2.1 Outside Diameter (for Tubes Ordered to Outside
Diameter):
7. Tensile Properties
8.2.1.1 Tubes machined on the outside shall meet the
requirements of Specification A999/A999M.
7.1 Tension tests at room temperature are not recommended
8.2.1.2 Tubes not machined on the outside shall meet the
as acceptance criteria under this specification since the alloys
are intended for elevated temperature service, and room permissible variations of Table 2.
temperature tests do not have a dependable relationship to 8.2.2 Inside Diameter (for Tubes Ordered to Inside Diam-
elevated temperature properties. (Where the design of the eter):
A608/A608M−20
TABLE 2 Permissible Variations in As-Cast Outside Diameter TABLE 4 Excess Length Tolerances for Centrifugally Cast Tubes
Permissible Plus or Minus Permissible
Outside Diameter of Tube
Specified Outside Diameter of Tubing Variations from Specified Excess Length
Outside Diameter
in. mm in. mm
in. mm in. mm
From2to12 50to300 ⁄4 6.4
From 2 to 4 50 to 100 0.08 2.0 Over 12 to 24 300 to 600 ⁄2 13
Over 4 to 12 100 to 300 0.10 2.5
Over 24 to 54 600 to 1350 1 25
Over 12 to 24 300 to 600 0.12 3.0
Over 24 to 36 600 to 900 0.16 4.1
Over 36 to 54 900 to 1350 0.25 6.4
9.3 Surface Irregularities Not Classified as Rejectable—
Visual surface defects that have been explored and that do not
encroach on the minimum sound wall thickness shall be
blended either by machining or grinding the surface into the
8.2.2.1 Tubesmachinedontheinsideshallmeettherequire-
surrounding unaffected surface area of the tubing.
ments of Specification A999/A999M.
8.2.2.2 Tubes not machined on the inside shall have permis-
9.4 Repair by Welding—Repair of injurious defects by
sible variations as agreed upon by the purchaser and the
welding shall be permitted and major weld repairs shall be
manufacturer.
permitted only subject to the approval of the purchaser. Weld
8.2.3 Wall Thickness—The wall thickness shall not exceed
repairs shall be considered major if the depth of the cavity
the calculated minimum as-cast wall thickness by more than
prepared for welding exceeds 20 % of the required minimum
the limits shown in Table 3. The calculated minimum wall
wall thickness or if the total surface area exceeds 10 in.
thickness shall be equal to the specified minimum wall
[65 cm ].Defectsshallbecompletelyremovedbeforewelding.
thicknessplusthemanufacturer’sallowancefor“insidesurface
If defects are linear, complete removal shall be checked by
feed metal” and outside surface roughness. Upon request, the
liquid penetrant inspection (Practice E165/E165M). Only
manufacturer’s allowance shall be furnished to the purchaser.
qualified operators and procedures in accordance with Practice
There shall be no variation under the calculated minimum
A488/A488M shall be used.All weld repairs shall be subjected
as-cast wall thickness. For tubes over 24 up to and including
to the same inspection standard as the tubing.
54 in. [600 to 1350 mm] in diameter, the “permissible varia-
10. Pressure Test
tions over specified minimum as-cast wall thickness” shall be
agreed upon by the manufacturer and the purchaser.
10.1 All tubing shall be subjected to an internal air pressure
8.2.4 Length—If definite lengths are ordered, no length of
of at least 75 psi [515 kPa] for at least 1 min either while
tubing shall be under the length specified and not longer than
submergedinclearwaterorwiththeentireoutersurfacecoated
the tolerance shown in Table 4.
with sulfur-free soap suds at the discretion of the manufacturer.
In the usable portion of the tube, leaks are not permitted. If the
9. Finish
Hydrostatic Test, Supplementary Requirement S6, is invoked,
the exact details of the test and testing procedure shall be
9.1 Machined Tubing—All tubes shall be reasonably
clearly defined and made a part of the ordering information
straight and free of rejectable indications.All visual irregulari-
(3.1.8).
tiesshallbeexploredfordepths.Whenthedepthencroacheson
the specified minimum wall thickness, such irregularities shall
10.2 Leaks may be repaired by welding only if such repair
be considered rejectable indications.
is approved by the purchaser.
9.2 As-Cast Tubing:
11. Flattening Test
9.2.1 The outside surface shall be adequately cleaned (such
11.1 Flattening tests are not required since material covered
as by shotblasting, sandblasting, wire brushing, grinding, or
by this specification is not intended to be bent, flanged, or
machining). The metal surface so revealed shall be visually
otherwise formed.
inspected and shall be free of linear discontinuities or other
imperfections that encroach on the specified minimum wall of
12. Mechanical Tests Required
the tube.
12.1 Air Pressure Test—Each length of tubing shall be
9.2.2 Various degrees of surface roughness occur on unma-
subjected to the pressure test described in Section 10.
chined tubing. If a specific surface finish is required, it
...
This document is not an ASTM standard and is intended only to provide the user of an ASTM standard an indication of what changes have been made to the previous version. Because
it may not be technically possible to adequately depict all changes accurately, ASTM recommends that users consult prior editions as appropriate. In all cases only the current version
of the standard as published by ASTM is to be considered the official document.
Designation: A608/A608M − 14 (Reapproved 2018) A608/A608M − 20
Standard Specification for
Centrifugally Cast Iron-Chromium-Nickel High-Alloy Tubing
for Pressure Application at High Temperatures
This standard is issued under the fixed designation A608/A608M; the number immediately following the designation indicates the year
of original adoption or, in the case of revision, the year of last revision. A number in parentheses indicates the year of last reapproval.
A superscript epsilon (´) indicates an editorial change since the last revision or reapproval.
1. Scope*
1.1 This specification covers iron-chromium-nickel, high-alloy tubes made by the centrifugal casting process intended for use
under pressure at high temperatures.
1.2 The grades of high alloys detailed in Table 1 are intended for applications requiring strength and resistance to corrosion and
scaling at high temperatures.
1.3 Optional Supplementary Requirements S1 to S11 are provided; these call for additional tests to be made if desired.
1.4 The values stated in either SI units or inch-pound units are to be regarded separately as standard. The values stated in each
system may not be exact equivalents; therefore, each system shall be used independently of the other. Combining values from the
two systems may result in nonconformance with the standard.
1.4.1 Within the text, the SI units are shown in brackets.
1.5 This international standard was developed in accordance with internationally recognized principles on standardization
established in the Decision on Principles for the Development of International Standards, Guides and Recommendations issued
by the World Trade Organization Technical Barriers to Trade (TBT) Committee.
2. Referenced Documents
2.1 ASTM Standards:
A342/A342M Test Methods for Permeability of Weakly Magnetic Materials
A488/A488M Practice for Steel Castings, Welding, Qualifications of Procedures and Personnel
A999/A999M Specification for General Requirements for Alloy and Stainless Steel Pipe
E8/E8M Test Methods for Tension Testing of Metallic Materials
E21 Test Methods for Elevated Temperature Tension Tests of Metallic Materials
E94/E94M Guide for Radiographic Examination Using Industrial Radiographic Film
E139 Test Methods for Conducting Creep, Creep-Rupture, and Stress-Rupture Tests of Metallic Materials
E142 Method for Controlling Quality of Radiographic Testing (Withdrawn 2000)
E151 Recommended Practice for Tension Tests of Metallic Materials at Elevated Temperatures with Rapid Heating and
Conventional or Rapid Strain Rates (Withdrawn 1984)
E165/E165M Practice for Liquid Penetrant Testing for General Industry
E340 Practice for Macroetching Metals and Alloys
3. Ordering Information
3.1 Orders for material to this specification should include the following, as required, to describe the desired material
adequately:
3.1.1 Quantity (feet, centimeters, or number of lengths),
3.1.2 Name of material (centrifugally cast tubing),
3.1.3 Specification number and grade (Table 1),
This specification is under the jurisdiction of ASTM Committee A01 on Steel, Stainless Steel and Related Alloys and is the direct responsibility of Subcommittee A01.18
on Castings.
Current edition approved March 1, 2018May 1, 2020. Published March 2018June 2020. Originally approved in 1970. Last previous edition approved in 20142018 as
A608/A608M – 14.A608/A608M – 14 (2018). DOI: 10.1520/A0608_A0608M-14R18.10.1520/A0608_A0608M-20.
For referenced ASTM standards, visit the ASTM website, www.astm.org, or contact ASTM Customer Service at service@astm.org. For Annual Book of ASTM Standards
volume information, refer to the standard’s Document Summary page on the ASTM website.
The last approved version of this historical standard is referenced on www.astm.org.
*A Summary of Changes section appears at the end of this standard
Copyright © ASTM International, 100 Barr Harbor Drive, PO Box C700, West Conshohocken, PA 19428-2959. United States
A608/A608M − 20
A
TABLE 1 Chemical Requirements
Grade
Composition, % (Values are maximums unless otherwise indicated.)
(UNS
Carbon Manganese Silicon Chromium Nickel Phosphorus Sulfur Molybdenum Niobium
Number)
HC30 0.25 – 0.35 0.5 – 1.0 0.50 – 2.00 26 – 30 4.0 0.04 0.04 0.50 . . .
(J92613)
HD50 0.45 – 0.55 1.50 0.50 – 2.00 26 – 30 4 – 7 0.04 0.04 0.50 . . .
(J93015)
HE35 0.30 – 0.40 1.50 0.50 – 2.00 26 – 30 8 – 11 0.04 0.04 0.50 . . .
(J93413)
HF30 0.25 – 0.35 1.50 0.50 – 2.00 19 – 23 9 – 12 0.04 0.04 0.50 . . .
(J92803)
HH30 0.25 – 0.35 1.50 0.50 – 2.00 24 – 28 11 – 14 0.04 0.04 0.50 . . .
(J93513)
B
HH33 0.28 – 0.38 1.50 0.50 – 2.00 24 – 26 12 – 14 0.04 0.04 0.50 . . .
(J93633)
HI35 0.30 – 0.40 1.50 0.50 – 2.00 26 – 30 14 – 18 0.04 0.04 0.50 . . .
(J94013)
HK30 0.25 – 0.35 1.50 0.50 – 2.00 23 – 27 19 – 22 0.04 0.04 0.50 . . .
(J94203)
HK40 0.35 – 0.45 1.50 0.50 – 2.00 23 – 27 19 – 22 0.04 0.04 0.50 . . .
(J94204)
HL30 0.25 – 0.35 1.50 0.50 – 2.00 28 – 32 18 – 22 0.04 0.04 0.50 . . .
(N08613)
HL40 0.35 – 0.45 1.50 0.50 – 2.00 28 – 32 18 – 22 0.04 0.04 0.50 . . .
(N08614)
HN40 0.35 – 0.45 1.50 0.50 – 2.00 19 – 23 23 – 27 0.04 0.04 0.50 . . .
HPNb 0.38 – 0.45 0.50 – 1.50 0.50 – 1.50 24 – 27 34 – 37 0.03 0.03 0.50 0.5 – 1.5
(N28701)
HPNbS 0.38 – 0.45 0.50 – 1.50 1.50 – 2.50 24 – 27 34 – 37 0.03 0.03 0.50 0.5 – 1.5
(N28702)
HT50 0.40 – 0.60 1.50 0.50 – 2.00 15 – 19 33 – 37 0.04 0.04 0.50 . . .
(N08050)
HU50 0.40 – 0.60 1.50 0.50 – 2.00 17 – 21 37 – 41 0.04 0.04 0.50 . . .
(N08005)
HW50 0.40 – 0.60 1.50 0.50 – 2.00 10 – 14 58 – 62 0.04 0.04 0.50 . . .
(N08006)
HX50 0.40 – 0.60 1.50 0.50 – 2.00 15 – 19 64 – 68 0.04 0.04 0.50 . . .
(N06050)
A
TABLE 1 Chemical Requirements
Grade
Composition, % (Values are maximums unless otherwise indicated)
(UNS
B
Carbon Manganese Silicon Chromium Nickel Phosphorus Sulfur Molybdenum Niobium
Number)
HC30 0.25–0.35 0.5–1.0 0.50–2.00 26–30 4.0 0.04 0.04 0.50 . . .
(J92613)
HD50 0.45–0.55 1.50 0.50–2.00 26–30 4–7 0.04 0.04 0.50 . . .
(J93015)
HE35 0.30–0.40 1.50 0.50–2.00 26–30 8–11 0.04 0.04 0.50 . . .
(J93413)
HF30 0.25–0.35 1.50 0.50–2.00 19–23 9–12 0.04 0.04 0.50 . . .
(J92803)
HH30 0.25–0.35 1.50 0.50–2.00 24–28 11–14 0.04 0.04 0.50 . . .
(J93513)
C
HH33 0.28–0.38 1.50 0.50–2.00 24–26 12–14 0.04 0.04 0.50 . . .
(J93633)
HI35 0.30–0.40 1.50 0.50–2.00 26–30 14–18 0.04 0.04 0.50 . . .
(J94013)
HK30 0.25–0.35 1.50 0.50–2.00 23–27 19–22 0.04 0.04 0.50 . . .
(J94203)
HK40 0.35–0.45 1.50 0.50–2.00 23–27 19–22 0.04 0.04 0.50 . . .
(J94204)
HL30 0.25–0.35 1.50 0.50–2.00 28–32 18–22 0.04 0.04 0.50 . . .
(N08613)
HL40 0.35–0.45 1.50 0.50–2.00 28–32 18– 22 0.04 0.04 0.50 . . .
(N08614)
HN40 0.35–0.45 1.50 0.50–2.00 19–23 23–27 0.04 0.04 0.50 . . .
HP15Nb 0.05–0.25 0.50–1.60 0.50–1.50 24–27 34–38 0.030 0.030 0.50 0.5–1.5
HPNb 0.38–0.45 0.50–1.50 0.50–1.50 24–27 34–37 0.03 0.03 0.50 0.5–1.5
(N28701)
HPNbS 0.38–0.45 0.50–1.50 1.50–2.50 24–27 34–37 0.03 0.03 0.50 0.5–1.5
(N28702)
HT50 0.40–0.60 1.50 0.50–2.00 15–19 33–37 0.04 0.04 0.50 . . .
(N08050)
HU50 0.40–0.60 1.50 0.50–2.00 17–21 37–41 0.04 0.04 0.50 . . .
(N08005)
HW50 0.40–0.60 1.50 0.50–2.00 10–14 58–62 0.04 0.04 0.50 . . .
A608/A608M − 20
Grade
Composition, % (Values are maximums unless otherwise indicated)
(UNS
B
Carbon Manganese Silicon Chromium Nickel Phosphorus Sulfur Molybdenum Niobium
Number)
(N08006)
HX50 0.40–0.60 1.50 0.50–2.00 15–19 64–68 0.04 0.04 0.50 . . .
(N06050)
A
Where ellipses (.) appear in this table there is no requirement, and the element need not be analyzed or reported.
B
Columbium (Cb) and Niobium (Nb) are interchangeable names for the same Element 41.
C
Manufacturing control should ensure that this composition contains a minimal amount of ferrite. See Supplementary Requirement S5.
3.1.4 Size (outside or inside diameter and minimum wall thickness, see Section 8).),
3.1.5 Condition (see Section 9, as-cast or as-cast with machining on outside or inside surfaces, or machined; see 5.1 and
Sections 8 and 9),
3.1.6 Length (specific or random), (Permissible Variations in Length Section of Specification A999/A999M),
3.1.7 End finish (Ends Section of Specification A999/A999M),
3.1.8 Optional requirements (see 8.2.3 regarding the manufacturer’s wall thickness allowance for as-cast tubing and
Supplementary Requirements S1 to S11),
3.1.9 Test report required (see Section 13), and
3.1.10 Special requirements to be added to the specification.
4. General Requirements
4.1 Material furnished under this specification shall conform to the applicable requirements of the current edition of
Specification A999/A999M, unless otherwise provided herein.
5. Materials and Manufacture
5.1 The tubing may be supplied in the as-cast condition or as-cast with machining on the outside or inside surfaces, or machined,
as agreed upon between the manufacturer and the purchaser.
5.2 Heat treatment of the tubing shall not be required under this specification.
6. Chemical Requirements
6.1 The material shall conform to the requirements as to chemical composition as prescribed in Table 1.
7. Tensile Properties
7.1 Tension tests at room temperature are not recommended as acceptance criteria under this specification since the alloys are
intended for elevated temperature service, and room temperature tests do not have a dependable relationship to elevated
temperature properties. (Where the design of the tubing is based on an assumption of certain minimum creep-rupture properties,
one of the supplementary requirements of this specification may be stipulated on the order to ascertain the ability of the material
to meet the design properties.)
8. Permissible Variation in Dimensions
8.1 Machined Tubing (Tubing Machined on Inside and Outside):
8.1.1 The tolerances given in Specification A999/A999M shall govern, except that the wall thickness shall not vary over the
specified minimum wall thickness by more than 10 % or ⁄16 in. [1.6 mm], whichever is greater. There shall be no variation under
the specified minimum wall thickness.
8.2 As-Cast Tubing (No Machining or Machined on Inside or Outside):
8.2.1 Outside Diameter (For(for Tubes Ordered to Outside Diameter):
8.2.1.1 Tubes machined on the outside shall meet the requirements of Specification A999/A999M.
8.2.1.2 Tubes not machined on the outside shall meet the permissible variations of Table 2.
8.2.2 Inside Diameter (For(for Tubes Ordered to Inside Diameter):
8.2.2.1 Tubes machined on the inside shall meet the requirements of Specification A999/A999M.
8.2.2.2 Tubes not machined on the inside shall have permissible variations as agreed upon by the purchaser and the
manufacturer.
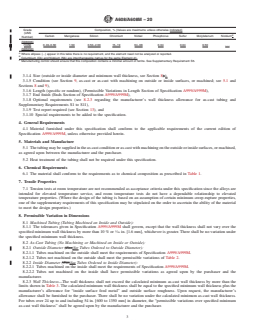
8.2.3 Wall Thickness—The wall thickness shall not exceed the calculated minimum as-cast wall thickness by more than the
limits shown in Table 3. The calculated minimum wall thickness shall be equal to the specified minimum wall thickness plus the
manufacturer’s allowance for “inside surface feed metal” and outside surface roughness. Upon request, the manufacturer’s
allowance shall be furnished to the purchaser. There shall be no variation under the calculated minimum as-cast wall thickness.
For tubes over 24 up to and including 54 in. [600 to 1350 mm] in diameter, the “permissible variations over specified minimum
as-cast wall thickness” shall be agreed upon by the manufacturer and the purchaser.
A608/A608M − 20
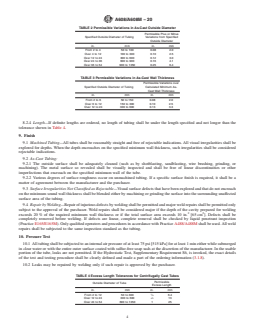
TABLE 2 Permissible Variations in As-Cast Outside Diameter
Permissible Plus or Minus
Specified Outside Diameter of Tubing Variations from Specified
Outside Diameter
in. mm in. mm
From 2 to 4 50 to 100 0.08 2.0
Over 4 to 12 100 to 300 0.10 2.5
Over 12 to 24 300 to 600 0.12 3.0
Over 24 to 36 600 to 900 0.16 4.1
Over 36 to 54 900 to 1350 0.25 6.4
TABLE 3 Permissible Variations in As-Cast Wall Thickness
Permissible Variations over
Specified Outside Diameter of Tubing Calculated Minimum As-
Cast Wall Thickness
in. mm in. mm
From 2 to 6 50 to 150 0.08 2.0
Over 6 to 12 150 to 300 0.10 2.5
Over 12 to 24 300 to 600 0.13 3.3
8.2.4 Length—If definite lengths are ordered, no length of tubing shall be under the length specified and not longer than the
tolerance shown in Table 4.
9. Finish
9.1 Machined Tubing—All tubes shall be reasonably straight and free of rejectable indications. All visual irregularities shall be
explored for depths. When the depth encroaches on the specified minimum wall thickness, such irregularities shall be considered
rejectable indications.
9.2 As-Cast Tubing:
9.2.1 The outside surface shall be adequately cleaned (such as by shotblasting, sandblasting, wire brushing, grinding, or
machining). The metal surface so revealed shall be visually inspected and shall be free of linear discontinuities or other
imperfections that encroach on the specified minimum wall of the tube.
9.2.2 Various degrees of surface roughness occur on unmachined tubing. If a specific surface finish is required, it shall be a
matter of agreement between the manufacturer and the purchaser.
9.3 Surface Irregularities Not Classified as Rejectable—Visual surface defects that have been explored and that do not encroach
on the minimum sound wall thickness shall be blended either by machining or grinding the surface into the surrounding unaffected
surface area of the tubing.
9.4 Repair by Welding—Repair of injurious defects by welding shall be permitted and major weld repairs shall be permitted only
subject to the approval of the purchaser. Weld repairs shall be considered major if the depth of the cavity prepared for welding
2 2
exceeds 20 % of the required minimum wall thickness or if the total surface area exceeds 10 in. [65 cm ]. Defects shall be
completely removed before welding. If defects are linear, complete removal shall be checked by liquid penetrant inspection
(Practice E165/E165M). Only qualified operators and procedures in accordance with Practice A488/A488M shall be used. All weld
repairs shall be subjected to the same inspection standard as the tubing.
10. Pressure Test
10.1 All tubing shall be subjected to an internal air pressure of at least 75 psi [515 kPa] for at least 1 min either while submerged
in clear water or with the entire outer surface coated with sulfur-free soap suds at the discretion of the manufacturer. In the usable
portion of the tube, leaks are not permitted. If the Hydrostatic Test, Supplementar
...
Questions, Comments and Discussion
Ask us and Technical Secretary will try to provide an answer. You can facilitate discussion about the standard in here.
Loading comments...