ISO/TS 24348:2014
(Main)Ophthalmic optics — Spectacle frames — Method for the simulation of wear and detection of nickel release from metal and combination spectacle frames
Ophthalmic optics — Spectacle frames — Method for the simulation of wear and detection of nickel release from metal and combination spectacle frames
ISO/TS 24348:2014 specifies methods for accelerated wear and corrosion, to be used prior to the detection of nickel release from coated metal and combination spectacle frames, and for detecting the release of nickel from those parts of metal and combination spectacle frames, whether coated or not, intended to come into direct and prolonged contact with the skin, in order to determine whether such parts release nickel at a rate greater than 0,5 µg/cm2/week.
Optique ophtalmique — Montures de lunettes — Méthode de simulation de l'usure et de détection de la libération du nickel de montures de lunettes en métal et combinées
General Information
- Status
- Withdrawn
- Publication Date
- 02-Feb-2014
- Technical Committee
- ISO/TC 172/SC 7 - Ophthalmic optics and instruments
- Drafting Committee
- ISO/TC 172/SC 7/WG 2 - Spectacle frames
- Current Stage
- 9599 - Withdrawal of International Standard
- Start Date
- 03-Apr-2023
- Completion Date
- 12-Feb-2026
Relations
- Effective Date
- 07-Apr-2012
Get Certified
Connect with accredited certification bodies for this standard

BSI Group
BSI (British Standards Institution) is the business standards company that helps organizations make excellence a habit.

TÜV Rheinland
TÜV Rheinland is a leading international provider of technical services.

TÜV SÜD
TÜV SÜD is a trusted partner of choice for safety, security and sustainability solutions.
Sponsored listings
Frequently Asked Questions
ISO/TS 24348:2014 is a technical specification published by the International Organization for Standardization (ISO). Its full title is "Ophthalmic optics — Spectacle frames — Method for the simulation of wear and detection of nickel release from metal and combination spectacle frames". This standard covers: ISO/TS 24348:2014 specifies methods for accelerated wear and corrosion, to be used prior to the detection of nickel release from coated metal and combination spectacle frames, and for detecting the release of nickel from those parts of metal and combination spectacle frames, whether coated or not, intended to come into direct and prolonged contact with the skin, in order to determine whether such parts release nickel at a rate greater than 0,5 µg/cm2/week.
ISO/TS 24348:2014 specifies methods for accelerated wear and corrosion, to be used prior to the detection of nickel release from coated metal and combination spectacle frames, and for detecting the release of nickel from those parts of metal and combination spectacle frames, whether coated or not, intended to come into direct and prolonged contact with the skin, in order to determine whether such parts release nickel at a rate greater than 0,5 µg/cm2/week.
ISO/TS 24348:2014 is classified under the following ICS (International Classification for Standards) categories: 11.040.70 - Ophthalmic equipment. The ICS classification helps identify the subject area and facilitates finding related standards.
ISO/TS 24348:2014 has the following relationships with other standards: It is inter standard links to ISO/TS 24348:2007. Understanding these relationships helps ensure you are using the most current and applicable version of the standard.
ISO/TS 24348:2014 is available in PDF format for immediate download after purchase. The document can be added to your cart and obtained through the secure checkout process. Digital delivery ensures instant access to the complete standard document.
Standards Content (Sample)
TECHNICAL ISO/TS
SPECIFICATION 24348
Third edition
2014-02-01
Ophthalmic optics — Spectacle frames
— Method for the simulation of wear
and detection of nickel release from
metal and combination spectacle
frames
Optique ophtalmique — Montures de lunettes — Méthode de
simulation de l’usure et de détection de la libération du nickel de
montures de lunettes en métal et combinées
Reference number
©
ISO 2014
© ISO 2014
All rights reserved. Unless otherwise specified, no part of this publication may be reproduced or utilized otherwise in any form
or by any means, electronic or mechanical, including photocopying, or posting on the internet or an intranet, without prior
written permission. Permission can be requested from either ISO at the address below or ISO’s member body in the country of
the requester.
ISO copyright office
Case postale 56 • CH-1211 Geneva 20
Tel. + 41 22 749 01 11
Fax + 41 22 749 09 47
E-mail copyright@iso.org
Web www.iso.org
Published in Switzerland
ii © ISO 2014 – All rights reserved
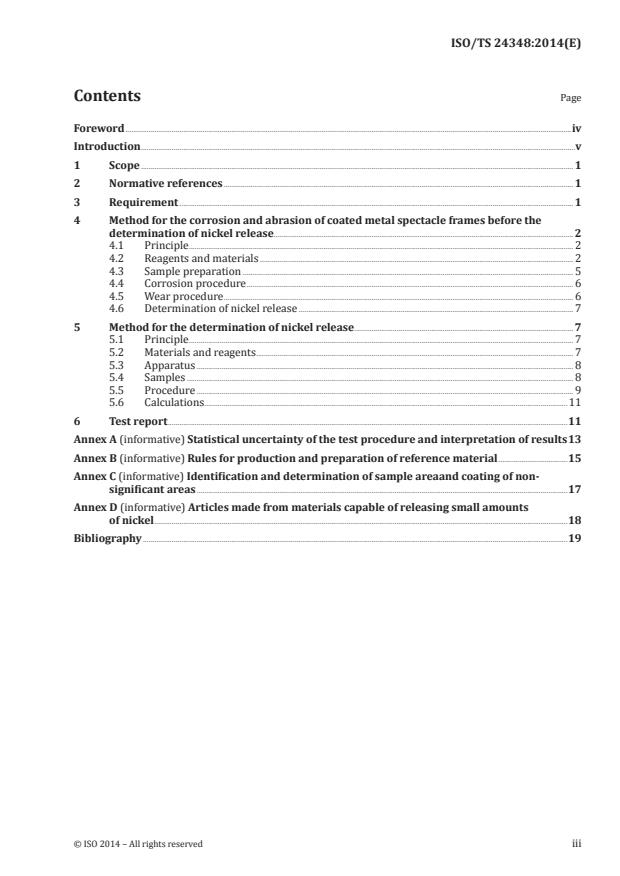
Contents Page
Foreword .iv
Introduction .v
1 Scope . 1
2 Normative references . 1
3 Requirement . 1
4 Method for the corrosion and abrasion of coated metal spectacle frames before the
determination of nickel release. 2
4.1 Principle . 2
4.2 Reagents and materials . 2
4.3 Sample preparation . 5
4.4 Corrosion procedure . 6
4.5 Wear procedure . 6
4.6 Determination of nickel release . 7
5 Method for the determination of nickel release . 7
5.1 Principle . 7
5.2 Materials and reagents . 7
5.3 Apparatus . 8
5.4 Samples . 8
5.5 Procedure . 9
5.6 Calculations .11
6 Test report .11
Annex A (informative) Statistical uncertainty of the test procedure and interpretation of results 13
Annex B (informative) Rules for production and preparation of reference material .15
Annex C (informative) Identification and determination of sample areaand coating of non-
significant areas .17
Annex D (informative) Articles made from materials capable of releasing small amounts
of nickel .18
Bibliography .19
Foreword
ISO (the International Organization for Standardization) is a worldwide federation of national standards
bodies (ISO member bodies). The work of preparing International Standards is normally carried out
through ISO technical committees. Each member body interested in a subject for which a technical
committee has been established has the right to be represented on that committee. International
organizations, governmental and non-governmental, in liaison with ISO, also take part in the work.
ISO collaborates closely with the International Electrotechnical Commission (IEC) on all matters of
electrotechnical standardization.
The procedures used to develop this document and those intended for its further maintenance are
described in the ISO/IEC Directives, Part 1. In particular the different approval criteria needed for the
different types of ISO documents should be noted. This document was drafted in accordance with the
editorial rules of the ISO/IEC Directives, Part 2. www.iso.org/directives
Attention is drawn to the possibility that some of the elements of this document may be the subject of
patent rights. ISO shall not be held responsible for identifying any or all such patent rights. Details of
any patent rights identified during the development of the document will be in the Introduction and/or
on the ISO list of patent declarations received. www.iso.org/patents
Any trade name used in this document is information given for the convenience of users and does not
constitute an endorsement.
For an explanation on the meaning of ISO specific terms and expressions related to conformity
assessment, as well as information about ISO’s adherence to the WTO principles in the Technical Barriers
to Trade (TBT) see the following URL: Foreword - Supplementary information
The committee responsible for this document is ISO/TC 172, Optics and photonics, Subcommittee SC 7,
Ophthalmic optics and instruments.
This third edition cancels and replaces the second edition (ISO/TS 24348:2007), which has been
technically revised.
iv © ISO 2014 – All rights reserved
Introduction
Adverse skin reaction to nickel has been known for many decades. Nickel is now the most frequent
cause of contact allergy, and a significant proportion of the female population is allergic to nickel.
Skin absorption of nickel ions, which are released from some nickel-containing materials in direct and
prolonged contact with the skin, causes sensitization. Further exposure to soluble nickel salts results
in allergic contact dermatitis. It is known that sensitization to nickel requires higher exposure levels
than does the elicitation in already sensitized individuals. There is a large variation in the degree of
sensitivity to nickel between individuals.
This widespread health problem has forced the introduction of a number of measures designed to
reduce its prevalence. They include this Technical Specification which provides two procedures for
testing those parts of metal and combination spectacle frames that come into direct and prolonged
contact with the skin.
Clause 4 specifies a method for accelerated wear to simulate two years’ use of coated metal and
combination spectacle frames. The coatings might include rolled gold covering, electro- and other plating
methods, varnish and other organic treatments. Clause 5 attempts to provide an in vitro chemical test
that correlates as far as possible with the variable human biological reactions that occur when metallic
articles containing nickel are in direct and prolonged contact with the skin. It provides a measure of the
amount of nickel release from a spectacle frame when immersed for one week in artificial sweat.
Clinical patch-testing of a selection of nickel-containing alloys and coatings on nickel-sensitized persons
indicates that high and low results achieved with the analytical method in this Technical Specification
correspond closely with patch-test reactivity. Moreover, a nickel release rate threshold of 0,5 µg/cm /
week was set in the European Parliament and Council, originally in Directive 94/27/EC (OJ No. L188
of 1994-07-22) and transferred to Regulation (EC) 1907/2006 (OJ No. L396/1 of 2006-12-30, REACH).
[6]
In order to ensure that articles yielding values near this figure are not unnecessarily excluded from
European trade as a result of the difficulties inherent in the test method, particularly when applied
to intricately shaped articles, the measured release figures are multiplied by a factor of 0,1. Materials
recognized as causing sensitization to nickel would not become acceptable by use of this adjustment.
Application of this Technical Specification is confidently expected to significantly reduce the development
of allergic contact dermatitis due to nickel.
NOTE Experience of its use and further epidemiological and clinical research can justify changes to test
procedure and/or interpretation of the test result
TECHNICAL SPECIFICATION ISO/TS 24348:2014(E)
Ophthalmic optics — Spectacle frames — Method for the
simulation of wear and detection of nickel release from
metal and combination spectacle frames
1 Scope
This Technical Specification specifies methods for accelerated wear and corrosion, to be used prior to
the detection of nickel release from coated metal and combination spectacle frames, and for detecting
the release of nickel from those parts of metal and combination spectacle frames, whether coated or not,
intended to come into direct and prolonged contact with the skin, in order to determine whether such
parts release nickel at a rate greater than 0,5 µg/cm /week.
This Technical Specification aims to control those spectacle frames which, if produced with materials
and/or surface treatments containing nickel, can be worn by nickel-sensitized persons.
2 Normative references
The following documents, in whole or in part, are normatively referenced in this document and are
indispensable to its application. For dated references, only the edition cited applies. For undated
references, the latest edition of the referenced document (including any amendments) applies.
ISO 12870, Ophthalmic optics — Spectacle frames — Requirements and test methods
3 Requirement
Those parts of metal and combination spectacle frames that come into direct and prolonged contact
with the skin of the wearer shall not have a nickel release greater than 0,5 µg/cm /week when tested
according to this Technical Specification.
Spectacle frames having a non-nickel coating shall be subjected to the corrosion and wear pretreatment
in Clause 4 which simulate two years’ typical wear.
For spectacle frames that are made of homogeneous alloy or pure metal and are uncoated, go directly to
the nickel release test procedure in Clause 5.
See also Annex D.
The parts to be tested shall include:
— the rear surface of rims;
— the rear and lower surface of the bridge, the rear and upper surface of any brace bar and any other
nasal-bearing surfaces, including metal nose pads;
— sides, excluding the joints and the zone immediately around the joints, and parts intended to be
protected by plastic endcovers (tips).
4 Method for the corrosion and abrasion of coated metal spectacle frames be-
fore the determination of nickel release
4.1 Principle
The items to be tested are exposed to a corrosive atmosphere before being placed in a tumbling barrel
together with a wear medium of abrasive paste and granules. The barrel is rotated so as to subject the
test pieces to wear from the wear medium. The items are then tested for nickel release in accordance
with Clause 5.
4.2 Reagents and materials
4.2.1 General
Except where indicated, all reagents and materials that can come into contact with samples or reagents
shall be demonstrably free of nickel, and all reagents shall be of recognized analytical grade or better.
4.2.2 Reagents and materials for the corrosion procedure
4.2.2.1 Container, with a lid and a device for suspending the test pieces, and all parts made of inert
material (e.g. glass or plastic).
4.2.2.2 Corrosive medium, prepared by dissolving 50 g DL-lactic acid, >85 % purity, and 100 g sodium
chloride in 1 000 ml deionized water.
4.2.2.3 Degreasing solution, being an appropriately diluted, neutral, commercially available detergent,
e.g. a 0,5 % aqueous solution of sodium dodecylbenzene sulfonate.
4.2.2.4 Deionized water, specific conductivity maximum 1 µS/cm.
4.2.2.5 Laboratory oven, capable of maintaining a temperature of (50 ± 2) °C.
4.2.3 Reagents and materials for the wear procedure
4.2.3.1 Tumbling barrel and retaining assembly, in accordance with the following description:
— barrel of hexagonal cross-section and internal diameter of 19 cm perpendicular distance between
opposite sides designed to rotate around its axis, which is orientated horizontally (see Figure 1);
— retaining assembly, suitable for attaching the test items so that they do not come into contact with
each other during tumbling;
— retaining assembly, with items attached, to be inserted into the barrel for tumbling.
NOTE Information on sourcing suitable equipment is available from the ISO Central Secretariat.
4.2.3.2 Rotating system, capable of imparting to the barrel (4.2.3.1) a constant (30 ± 2) rotations per
minute. The rotating system shall be capable of allowing the direction of rotation to be reversed.
NOTE Information on sourcing suitable equipment is available from the ISO Central Secretariat.
2 © ISO 2014 – All rights reserved
Dimensions in millimetres
Key
l length of barrel, as required
a
Axis of rotation.
Figure 1 — View of tumbling barrel
4.2.3.3 Abrasive paste, produced for dry-tumbling barrels and comprising:
— 6 % to 8 % ester wax of montanic acids – Wax E [CAS No. 73138-45-1];
— 3 % octadecanoic acid (stearic acid) [CAS No. 57-11-4];
— 30 % to 35 % petroleum distillates, hydrotreated light paraffinic [CAS No. 64742-55-8];
— 2 % polyethylene glycol cetyl/oleyl ether [CAS No. 68920-66-1] or triethanolamine [CAS No. 102-71-
6];
— 48 % silicon dioxide (quartz) 200 µm mesh size [CAS No. 14808-60-7];
— 6 % to 9 % deionized water.
NOTE Information on sourcing a suitable paste is available from the ISO Central Secretariat.
4.2.3.4 Granules, composed of outer shells of coconuts, walnuts, peanuts and almonds, mixed in a
ratio 1:1:1:1 by weight, ground and sieved to give a mixture of particles having dimensions of between
0,8 mm and 1,3 mm.
NOTE Information on sourcing suitable granules is available from the ISO Central Secretariat.
4.2.3.5 Wear medium, composed of abrasive paste (4.2.3.3) and wear granules (4.2.3.4) which are
mixed as indicated in 4.5.1. Before use, the required amount of granulate shall be conditioned in standard
laboratory conditions for at least 24 h.
4.2.3.6 Retaining assembly, consisting of a threaded rod which carries three metal hexagonal plates
(see Figures 2 and 3). The end plate, A, is drilled part way through with holes of nominal diameter 1,5 mm,
or as appropriate, positioned 10 mm to 15 mm from the edge of the plate, to take the ends of the tips of the
sides. The next plate, B, is perforated with holes of nominal diameter 5,0 mm, or as appropriate, positioned
10 mm to 15 mm from the edge of the plate, to take the joint ends of the sides, together with an aperture
of 40 mm nominal diameter to act as a filling hole for the abrasive mixture. A silicone rubber sheet with
small holes matching the position of those in plate B holds the sides to prevent them from rotating in the
assembly. The final plate, C, is undrilled apart from the hole for the threaded rod. A threaded nut on the
inside of the last two plates holds them the required distance from plate A, while a second nut on the
outside clamps the assembly together. The volume between plates A and B is approximately 5 l ± 0,5 l, but
will vary depending upon the length of the sides or width of the spectacle fronts to be tested.
Dimensions in millimetres
Figure 2 — Plan view of the upper part of the tumbling barrel — Component B
4 © ISO 2014 – All rights reserved
Key
1 sample side 4 fill hole
2 silicone sheet, perforated 5 adjust as required
3 silicone sheet, plain
Figure 3 — Exploded diagram of retaining assembly for spectacle sides
4.3 Sample preparation
Before being subjected to the corrosion procedure (see 4.4) and the wear procedure (see 4.5), spectacle
sides and fronts shall be separated from each other, and endcovers (side tips) removed from sides and
nose pads from fronts where appropriate. If the spectacle frame is to be subject to the accelerated wear
procedure given in this Technical Specification, then it shall be fitted with test lenses as specified in
ISO 12870 before being subjected to the accelerated wear procedure.
NOTE 1 Parts of items which are not intended to come into prolonged contact with the skin can be removed
before being subjected to corrosion and/or wear.
Gently swirl the sample(s) for 2 min in degreasing solution (4.2.2.3) at room temperature. Rinse
thoroughly with deionized water (4.2.2.4) and gently dry with absorbent paper. After degreasing,
samples should be handled with plastic forceps or clean protective gloves.
NOTE 2 This cleaning stage is intended to remove extraneous grease and skin secretions due to handling, but
not any protective coatings.
4.4 Corrosion procedure
Suspend the items to be tested a few centimetres above the corrosive medium (4.2.2.2) in a closed
container (4.2.2.1) placed in the laboratory oven (4.2.2.5) for 2 h at 50 °C. Remove the container from the
oven and carefully open it under a fume hood. Rinse the items with deionized water (4.2.2.4). Place on
absorbent paper and allow to dry at room temperature for about 1 h, then perform the wear procedure
specified in 4.5 without delay.
NOTE This stage is intended to affect metallic coatings as well as lacquers and plastic coatings.
4.5 Wear procedure
4.5.1 Preparation of wear medium
Weigh a sufficient quantity of wear granules (4.2.3.4) in order to fill the tumbling barrel (4.2.3.1) to half
its depth. Add 7,5 g of abrasive paste (4.2.3.3) for every kilogram of wear granules and homogenize by
rotating in the barrel for 5 h. If the wear medium has not been used within 1 week, re-homogenize by
rotating it in the barrel for 1 h.
NOTE This procedure coats the granules with the abrasive paste, forming the wear medium that is used to
simulate wear.
Keep the wear medium in a closed container until use and between uses.
After two wear procedures, add 7,5 g more abrasive paste for every kilogram of wear medium. Re-
homogenize the wear medium by rotating it in the barrel for a further 5 h.
After a total of four wear procedures, discard the wear medium and prepare fresh material.
4.5.2 Attachment of test items
Attach the items inside the retaining assembly so that they cannot come into contact with each other or
collide with the barrel walls or other parts that could cause damage during tumbling.
Fix the test samples into the two hexagonal flanges of the barrel, positioning them with the inside
surface of sides or the back surface of fronts turned towards the rotation axis. Fit the samples so that
they do not move. Fill any vacant positions with waste samples.
Sides shall be fitted into the holes in plates A and B, the silicone rubber sheets holding the sides firmly to
prevent them from rotating in the assembly.
Spectacle fronts shall be mounted so that one of the lugs is inserted into the holes in plate B. It may be
necessary to straighten the lug or twist the rim immediately either side of the lug so that the lug fits into
the hole. The opposite lug should be firmly secured to plate A using adhesive tape. Alternatively, the
spectacle fronts may be held to the plates using adhesive tape at both ends. Whatever method is used to
fix spectacle fronts (e.g. using only adhesive tape), it is important to ensure that parts of the sample to
be tested are not covered or protected.
4.5.3 Tumbling
After fitting the test samples between plates A and B, place the retaining assembly into the empty
tumbling barrel (4.2.3.1), then fill the tumbling barrel to half its depth with the wear medium (4.2.3.5).
Then fit the second silicone rubber sheet and plate C together with its retaining nut. Close the tumbling
barrel and place it horizontally on the rotating system (4.2.3.2).
Rotate the tumbling barrel at a speed of (30 ± 2) rotations per minute for a total of 5 h ± 5 min. The
direction of the rotation shall be reversed after 2,5 h ± 5 min.
NOTE After tumbling, it is permissible to leave the items in the barrel overnight.
6 © ISO 2014 – All rights reserved
4.6 Determination of nickel release
Remove the retaining assembly from the barrel and detach the items. Gently wipe off any remaining
wear medium using a soft cloth or paper tissues.
Check the items for unexpected damage, e.g. test lenses fallen out of the fronts. If necessary and justified,
exclude item(s) from further testing. Test the items for nickel release in accordance with Clause 5.
NOTE If only indicative information on the extent of nickel release is required, such information can be
[4]
obtained by performing one of the tests specified in CEN/CR 12471.
5 Method for the determination of nickel release
5.1 Principle
The parts to be tested for nickel release are placed in an artificial sweat test solution for one week.
The concentration of dissolved nickel in the solution is determined by atomic absorption spectrometry,
inductively coupled plasma spectrometry or other appropriate analytical method. The nickel release is
expressed in micrograms per square centimetre per week (µg/cm /week).
5.2 Materials and reagents
Except where indicated, all reagents shall be of recognized pro analysis, p.a. grade or better, and shall
be free of nickel.
5.2.1 Deionized and aerated water: fill a tall-form 2-l-beaker with deionized water, specific
conductivity ≤ 1 µS/cm. Saturate with air by attaching a gas distribution tube (porosity 1) to a cork and
positioning the lower end of the tube on the bottom of the beaker. Allow grease-free air to flow at a rate
of at least 150 ml/min. for 30 min.
5.2.2 Sodium chloride.
5.2.3 DL-lactic acid, ρ = 1,21 g/ml, > 85 % (mass fraction).
5.2.4 Urea.
5.2.5 Ammonia solution, ρ = 0,91 g/ml, 25 % (mass fraction).
5.2.6 Dilute ammonia solution [1 % (mass fraction)]: transfer 10 ml of ammonia solution (5.2.5) into
a 250 ml beaker containing 100 ml of deionized water. Stir and cool to room temperature. Transfer the
solution to a 250 ml volumetric flask and make up to volume with deionized water.
5.2.7 Nitric acid, ρ = 1,40 g/ml, 65 % (mass fraction).
5.2.8 Dilute nitric acid, approximately 5 % (mass fraction): transfer 30 ml of nitric acid (5.2.7) into a
500 ml beaker containing 350 ml o
...


Questions, Comments and Discussion
Ask us and Technical Secretary will try to provide an answer. You can facilitate discussion about the standard in here.
Loading comments...