ISO 3455:2007
(Main)Hydrometry — Calibration of current-meters in straight open tanks
Hydrometry — Calibration of current-meters in straight open tanks
ISO 3455:2007 specifies the procedure of calibration of current-meters of rotating-element type as well as stationary-sensor type (electromagnetic type) in straight open tanks. It also specifies the types of tank, rating carriage and equipment to be used and the method of presenting the results. The procedure does not take into account any possible difference existing between the behaviour of a current-meter moving in motionless water and that of a fixed current-meter in turbulent flow.
Durchflußmessung in offenen Gerinnen - Eichung von Strömungsmessern mit rotierendem Meßelement in einfachen offenen Versuchstanks
Hydrométrie — Étalonnage des moulinets en bassins découverts rectilignes
Hidrometrija - Kalibracija merilnikov tokov v ravnih odprtih cisternah
Ta mednarodni standard določa postopek kalibracije merilnikov tokov z vrtečim delom in s stacionarnim senzorjem (elektromagnetni) v ravnih odprtih cisternah. Določa tudi vrste cistern, merilnih vozičkov in opreme, ki jih je treba uporabiti, ter metodo za predstavitev rezultatov. Postopek ne upošteva možnih razlik med obnašanjem merilnika tokov v mirni vodi in pritrjenega merilnika tokov v vodi z močnim pretokom.
General Information
- Status
- Withdrawn
- Publication Date
- 17-May-2007
- Withdrawal Date
- 17-May-2007
- Technical Committee
- ISO/TC 113/SC 5 - Instruments, equipment and data management
- Drafting Committee
- ISO/TC 113/SC 5 - Instruments, equipment and data management
- Current Stage
- 9599 - Withdrawal of International Standard
- Start Date
- 08-Jan-2021
- Completion Date
- 12-Feb-2026
Relations
- Effective Date
- 17-Sep-2016
- Effective Date
- 15-Apr-2008
Get Certified
Connect with accredited certification bodies for this standard

BSMI (Bureau of Standards, Metrology and Inspection)
Taiwan's standards and inspection authority.
Sponsored listings
Frequently Asked Questions
ISO 3455:2007 is a standard published by the International Organization for Standardization (ISO). Its full title is "Hydrometry — Calibration of current-meters in straight open tanks". This standard covers: ISO 3455:2007 specifies the procedure of calibration of current-meters of rotating-element type as well as stationary-sensor type (electromagnetic type) in straight open tanks. It also specifies the types of tank, rating carriage and equipment to be used and the method of presenting the results. The procedure does not take into account any possible difference existing between the behaviour of a current-meter moving in motionless water and that of a fixed current-meter in turbulent flow.
ISO 3455:2007 specifies the procedure of calibration of current-meters of rotating-element type as well as stationary-sensor type (electromagnetic type) in straight open tanks. It also specifies the types of tank, rating carriage and equipment to be used and the method of presenting the results. The procedure does not take into account any possible difference existing between the behaviour of a current-meter moving in motionless water and that of a fixed current-meter in turbulent flow.
ISO 3455:2007 is classified under the following ICS (International Classification for Standards) categories: 17.120.20 - Flow in open channels. The ICS classification helps identify the subject area and facilitates finding related standards.
ISO 3455:2007 has the following relationships with other standards: It is inter standard links to ISO 3455:2021, ISO 3455:1976. Understanding these relationships helps ensure you are using the most current and applicable version of the standard.
ISO 3455:2007 is available in PDF format for immediate download after purchase. The document can be added to your cart and obtained through the secure checkout process. Digital delivery ensures instant access to the complete standard document.
Standards Content (Sample)
2003-01.Slovenski inštitut za standardizacijo. Razmnoževanje celote ali delov tega standarda ni dovoljeno.Hidrometrija - Kalibracija merilnikov tokov v ravnih odprtih cisternahDurchflußmessung in offenen Gerinnen - Eichung von Strömungsmessern mit rotierendem Meßelement in einfachen offenen VersuchstanksHydrométrie - Étalonnage des moulinets en bassins découverts rectilignesHydrometry - Calibration of current-meters in straight open tanks17.120.20Pretok v odprtih kanalihFlow in open channelsICS:Ta slovenski standard je istoveten z:ISO 3455:2007SIST ISO 3455:2013en01-april-2013SIST ISO 3455:2013SLOVENSKI
STANDARD
Reference numberISO 3455:2007(E)© ISO 2007
INTERNATIONAL STANDARD ISO3455Second edition2007-06-01Hydrometry — Calibration of current-meters in straight open tanks Hydrométrie — Étalonnage des moulinets en bassins découverts rectilignes
©
ISO 2007 All rights reserved. Unless otherwise specified, no part of this publication may be reproduced or utilized in any form or by any means, electronic or mechanical, including photocopying and microfilm, without permission in writing from either ISO at the address below or ISO's member body in the country of the requester. ISO copyright office Case postale 56 • CH-1211 Geneva 20 Tel.
+ 41 22 749 01 11 Fax
+ 41 22 749 09 47 E-mail
copyright@iso.org Web
www.iso.org Published in Switzerland
ii
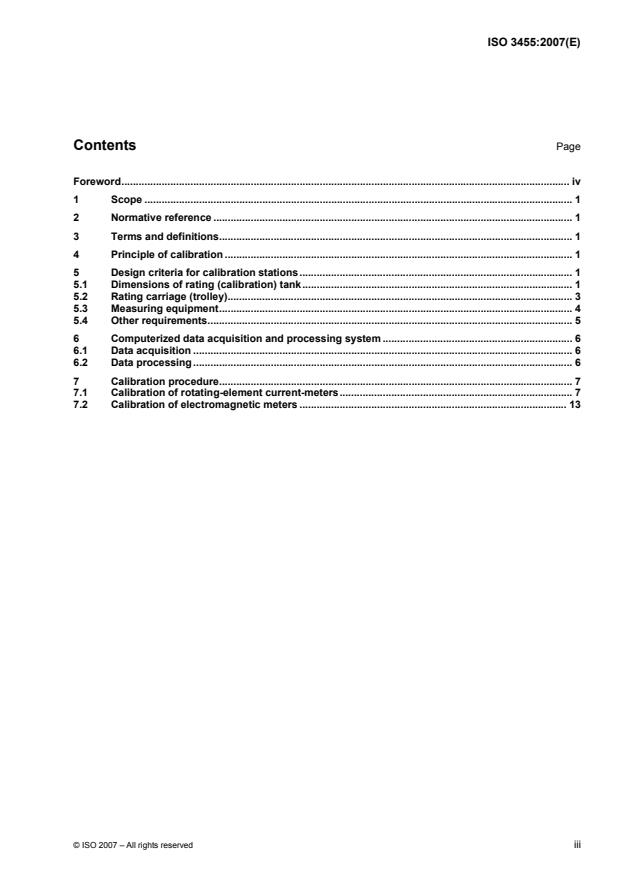
iiiContents Page Foreword.iv 1 Scope.1 2 Normative reference.1 3 Terms and definitions.1 4 Principle of calibration.1 5 Design criteria for calibration stations.1 5.1 Dimensions of rating (calibration) tank.1 5.2 Rating carriage (trolley).3 5.3 Measuring equipment.4 5.4 Other requirements.5 6 Computerized data acquisition and processing system.6 6.1 Data acquisition.6 6.2 Data processing.6 7 Calibration procedure.7 7.1 Calibration of rotating-element current-meters.7 7.2 Calibration of electromagnetic meters.13
INTERNATIONAL STANDARD ISO 3455:2007(E) © ISO 2007 – All rights reserved
1Hydrometry — Calibration of current-meters in straight open tanks 1 Scope This International Standard specifies the procedure of calibration of current-meters of rotating-element type as well as stationary-sensor type (electromagnetic type) in straight open tanks. It also specifies the types of tank, rating carriage and equipment to be used and the method of presenting the results. The procedure does not take into account any possible difference existing between the behaviour of a current-meter moving in motionless water and that of a fixed current-meter in turbulent flow. 2 Normative reference The following referenced documents are indispensable for the application of this document. For dated references, only the edition cited applies. For undated references, the latest edition of the referenced document (including any amendments) applies. ISO 772, Hydrometric determinations — Vocabulary and symbols ISO 2537, Hydrometry — Rotating-element current-meters 3 Terms and definitions For the purposes of this document, the terms and definitions given in ISO 772 apply. 4 Principle of calibration Calibration of a current-meter means experimental determination of the relationship between liquid velocity and either the rate of revolution of the rotating element or the velocity directly indicated by the current-meter. For this purpose, the current-meter is mounted on a towing carriage and drawn through still water contained in a straight tank of a uniform cross section at a number of steady speeds of the towing carriage. Simultaneous measurements of the speed of the towing carriage and the rate of revolution of the rotating element or the velocity indicated by the current-meter are made. In the case of rotating-element current-meters, the two parameters are related by one or more equations, the limits of validity of which are stated. In the case of stationary-sensor type current-meters, the velocity indicated by its display unit is compared with the corresponding carriage speed to know the error in measurement. 5 Design criteria for calibration stations 5.1 Dimensions of rating (calibration) tank 5.1.1 General The dimensions of the tank and the number and relative position of current-meters in the tank cross section shall be chosen so that the test results are not affected. SIST ISO 3455:2013
35.2 Rating carriage (trolley) 5.2.1 General During calibration, the current-meter is suspended from the carriage and immersed in the water at specified depth and the carriage travels along the length of the tank at known and accurate speeds in the measuring section. 5.2.2 Carriage track system The carriage may run on two parallel rails which must be accurately aligned with both the length of the tank and the surface of the water in the tank. It is essential that the rails are straight and that the rails and the wheels of the carriage are free of irregularities, otherwise the carriage will move with irregular motion and cause vibration which may be transmitted to the current-meter(s) and disturb the rating. The material and hardness of the rails and the driving wheels should be chosen so that there shall not be undue wear and tear of the wheels. In the case of rubber tire wheels, provision shall be made to lift the wheels above the rail surface when not in use for a long time. Another track system may have toothed belts, mounted on both sides of the tank, driven by the guiding rollers and used for transportation of the carriage. If this system is adopted, it shall be ensured that there is no slippage or sag of the belt and in case the slippage or sag occurs, it shall be possible to remove it manually. The belts shall be strong enough to withstand the load of the carriage they have to transport during calibration and the climatic conditions prevailing at the rating laboratory. 5.2.3 Types of rating carriages The following types of rating carriages are in common usage. a) The towed carriage which is moved along the track by a cable driven from a constant speed motor standing apart from the moving carriage. The towed carriage may be lighter in construction with the consequent advantage of high acceleration and quick braking, but the elasticity of the towing cable can cause irregularities in the running of the carriage thereby affecting the accuracy of current-meter calibration. b) The self-propelled carriage which is moved along the track by internally mounted electric motor(s). The power to the carriage may be fed by a trailing wire track system or by an overhead conductor system or other systems specially designed for the purpose. The self-propelled carriage will be heavier in construction as it has to carry the driving motors. This results in greater inertia of the carriage and assists in smoothing out the running irregularities of the carriage. The weight of the rating carriage can substantially be reduced by using light but rugged material for its construction. The lightweight carriage can achieve a high rate of acceleration/deceleration resulting in relatively smaller length of tank. 5.2.4 Carriage operation The carriage shall travel smoothly and at constant speed in the measuring section of the rating tank ensuring that oscillatory motion is not transmitted to the current-meters under calibration. The carriage shall remain stable during acceleration, deceleration and braking. There shall not be any forward/backward or sideways rocking, or slippage during peak acceleration/deceleration and during normal operation at any speed in specified range. The carriage shall have smooth operational capability in both forward and reverse directions. An interlock shall be provided in the system to ensure that the direction of start up is correct. SIST ISO 3455:2013
In addition to normal braking, an alternate brake system shall also be provided on the carriage which would automatically activate during an emergency. 5.2.5 Carriage control The carriage may be manned or unmanned. In the case of a manned carriage, an operator on-board controls various functions of the carriage. The unmanned carriage is operated remotely without any operator on board. An on-board programmable controller unit controls various functions of the carriage, i.e., speed, acceleration, deceleration, braking, etc. The controller exchanges control signals with the supervisory computer, installed in a control room through suitable digital communication system. 5.3 Measuring equipment 5.3.1 General The calibration of a current-meter calls for the simultaneous measurement of the following three parameters: a) distance covered by the carriage; b) time; and c) number of signals (pulses) delivered by the current-meter. The towing speed is calculated from the simultaneous measurement of distance and time and, in case of rotating-element current-meter, the rate of current-meter revolutions (rotations) is obtained by the simultaneous measurement of the number of signals (pulses) and the time. For acquisition of calibration data, a strip chart recorder or magnetic tape or a computerized data acquisition system as described in 6.1 may be used. 5.3.2 Distance measurement Different methods are available for measurement of distance to the specified measurement uncertainty (see 5.3.5). Two of the most common methods are as follows: a) the establishment of light barriers (markers) at regular intervals along the length of the tank which actuate mechanical or optical pulse transmitters fitted to the carriage; b) the use of measuring wheels with mechanical or photoelectric pulse transmitters/optical encoders which are drawn along the track by the carriage. In the case of use of a measuring wheel, it shall be ensured that there is no slippage during travel. An additional method of precise speed measurement shall also be provided to check the accuracy of the measuring wheel on a regular basis. SIST ISO 3455:2013
55.3.3 Time measurement A variety of methods are available by which time can be precisely measured. Two of the most common methods are as follows: a) a clock giving a contact pulse after one or several seconds (These time pulses are usually recorded on a graph of a strip chart recorder or magnetic tape together with the pulses of the current-meter and distances. The time corresponding to an integral number of pulses from the current-meter is usually determined by interpolation of the time pulse.); b) electronic clocks, capable of measuring fractions of a second, which time and display a preset number of distance intervals and a corresponding number of pulses from the current-meter. 5.3.4 Current-meter signal measurement The carriage shall be provided with a suitable recording device for the measurement of current-meter signals. In the case of rotating-element current-meters, the sensor of the current-meter shall generate a clear and positive signal corresponding to the rotor revolutions. Normally, as per the design of the system, the signals are generated once per revolution, twice per revolution or in some cases once for five revolutions or even once for ten revolutions. The signals received from the current-meter(s) may be counted using the counting device of the current-meter or recorded on strip chart recorder or magnetic tape. In measuring the number of current-meter revolutions in a given time, it is important to measure between identical points on the current-meter signal. It shall be ensured that none of the signals are missed. When a recording of current-meter signals is made, the speed of the recording media shall be adjustable so that the separation of the current-meter signal shall be compatible with the speed of the carriage and the required accuracy of the measurement. In the case of an electromagnetic current-meter, the electrical signals from its sensor are collected by its control unit (7.2.1) and displayed in the form of average value of velocity. 5.3.5 Measurement uncertainty The uncertainty of measurement of distance travelled by the carriage shall be within 0,1 % of the actual value at 95 % confidence level. The uncertainty of measurement of time shall be within 0,1 % of the actual value at the 95 % confidence level. The uncertainty of measurement of current-meter signals shall be within 0,1 % of the actual value at the 95 % confidence level. 5.4 Other requirements In order to increase the efficiency of the calibration process, provision of the following ancillary equipment at the rating laboratory is desirable: a) filtering, dosing and scum-removing equipment for the cleansing of the water and for keeping it free from algal growth; b) spending beaches, stilling devices or other similar devices to reduce the reflection of disturbance in the water by the end walls of the tank (Alternatively, transverse curtains can be installed at intervals along the tank and lowered to the bottom of the tank before the start of each run.); c) means for checking that a cable-suspended current-meter is properly aligned at the start of a run and that the current-meter is not swinging when measurements are started shall be available when the installation is operated from a control room [Closed circuit television is useful for this purpose and also for observing the behaviour of the rotating-element current-meters at speeds close to their minimum speed of response (see 7.1.3.1).]; d) means for checking the orientation of the stationary-sensor type current-meters. e) a hand-held thermometer to measure the temperature of the water in the tank. SIST ISO 3455:2013
...
INTERNATIONAL ISO
STANDARD 3455
Second edition
2007-06-01
Hydrometry — Calibration of current-
meters in straight open tanks
Hydrométrie — Étalonnage des moulinets en bassins découverts
rectilignes
Reference number
©
ISO 2007
PDF disclaimer
This PDF file may contain embedded typefaces. In accordance with Adobe's licensing policy, this file may be printed or viewed but
shall not be edited unless the typefaces which are embedded are licensed to and installed on the computer performing the editing. In
downloading this file, parties accept therein the responsibility of not infringing Adobe's licensing policy. The ISO Central Secretariat
accepts no liability in this area.
Adobe is a trademark of Adobe Systems Incorporated.
Details of the software products used to create this PDF file can be found in the General Info relative to the file; the PDF-creation
parameters were optimized for printing. Every care has been taken to ensure that the file is suitable for use by ISO member bodies. In
the unlikely event that a problem relating to it is found, please inform the Central Secretariat at the address given below.
© ISO 2007
All rights reserved. Unless otherwise specified, no part of this publication may be reproduced or utilized in any form or by any means,
electronic or mechanical, including photocopying and microfilm, without permission in writing from either ISO at the address below or
ISO's member body in the country of the requester.
ISO copyright office
Case postale 56 • CH-1211 Geneva 20
Tel. + 41 22 749 01 11
Fax + 41 22 749 09 47
E-mail copyright@iso.org
Web www.iso.org
Published in Switzerland
ii © ISO 2007 – All rights reserved
Contents Page
Foreword. iv
1 Scope . 1
2 Normative reference . 1
3 Terms and definitions. 1
4 Principle of calibration . 1
5 Design criteria for calibration stations. 1
5.1 Dimensions of rating (calibration) tank. 1
5.2 Rating carriage (trolley). 3
5.3 Measuring equipment. 4
5.4 Other requirements. 5
6 Computerized data acquisition and processing system . 6
6.1 Data acquisition . 6
6.2 Data processing. 6
7 Calibration procedure. 7
7.1 Calibration of rotating-element current-meters. 7
7.2 Calibration of electromagnetic meters . 13
Foreword
ISO (the International Organization for Standardization) is a worldwide federation of national standards bodies
(ISO member bodies). The work of preparing International Standards is normally carried out through ISO
technical committees. Each member body interested in a subject for which a technical committee has been
established has the right to be represented on that committee. International organizations, governmental and
non-governmental, in liaison with ISO, also take part in the work. ISO collaborates closely with the
International Electrotechnical Commission (IEC) on all matters of electrotechnical standardization.
International Standards are drafted in accordance with the rules given in the ISO/IEC Directives, Part 2.
The main task of technical committees is to prepare International Standards. Draft International Standards
adopted by the technical committees are circulated to the member bodies for voting. Publication as an
International Standard requires approval by at least 75 % of the member bodies casting a vote.
Attention is drawn to the possibility that some of the elements of this document may be the subject of patent
rights. ISO shall not be held responsible for identifying any or all such patent rights.
ISO 3455 was prepared by Technical Committee ISO/TC 113, Hydrometry, Subcommittee SC 5, Instruments,
equipment and data management.
This second edition cancels and replaces the first edition (ISO 3455:1976), which has been technically revised.
iv © ISO 2007 – All rights reserved
INTERNATIONAL STANDARD ISO 3455:2007(E)
Hydrometry — Calibration of current-meters in straight open
tanks
1 Scope
This International Standard specifies the procedure of calibration of current-meters of rotating-element type as
well as stationary-sensor type (electromagnetic type) in straight open tanks. It also specifies the types of tank,
rating carriage and equipment to be used and the method of presenting the results.
The procedure does not take into account any possible difference existing between the behaviour of a current-
meter moving in motionless water and that of a fixed current-meter in turbulent flow.
2 Normative reference
The following referenced documents are indispensable for the application of this document. For dated
references, only the edition cited applies. For undated references, the latest edition of the referenced
document (including any amendments) applies.
ISO 772, Hydrometric determinations — Vocabulary and symbols
ISO 2537, Hydrometry — Rotating-element current-meters
3 Terms and definitions
For the purposes of this document, the terms and definitions given in ISO 772 apply.
4 Principle of calibration
Calibration of a current-meter means experimental determination of the relationship between liquid velocity
and either the rate of revolution of the rotating element or the velocity directly indicated by the current-meter.
For this purpose, the current-meter is mounted on a towing carriage and drawn through still water contained in
a straight tank of a uniform cross section at a number of steady speeds of the towing carriage. Simultaneous
measurements of the speed of the towing carriage and the rate of revolution of the rotating element or the
velocity indicated by the current-meter are made. In the case of rotating-element current-meters, the two
parameters are related by one or more equations, the limits of validity of which are stated. In the case of
stationary-sensor type current-meters, the velocity indicated by its display unit is compared with the
corresponding carriage speed to know the error in measurement.
5 Design criteria for calibration stations
5.1 Dimensions of rating (calibration) tank
5.1.1 General
The dimensions of the tank and the number and relative position of current-meters in the tank cross section
shall be chosen so that the test results are not affected.
5.1.2 Length
The length of a rating tank can be considered as comprising accelerating, stabilizing, measuring and braking
sections.
The length of the accelerating and braking sections depends on the design of the carriage, the maximum
acceleration and deceleration achievable at maximum payload and the maximum speed at which the payload
is to be towed along the tank. Safety requirements of the carriage need to be taken into account while working
out the length of the braking section. The length of the measuring section shall be such that the calibration
error, which is composed of inaccuracies in the measurement of time, distance covered and rate of revolution,
does not exceed the desired tolerance at any velocity. The required length will, therefore, depend on the type
of current-meter being calibrated, type of carriage and the way the signals are produced and transmitted.
For example, if measured times both for distance covered by the carriage and for the revolutions counted are
accurate to 0,01 s in order to limit the error in time measurement to 0,1 % at the 95 % confidence level, the
duration of the test shall be at least 10 s at maximum speed. If the maximum speed is 6 m/s, the measuring
section of the tank would be 60 m long. The total length of the tank would be about 100 m of which about
20 m would be for acceleration and stabilizing and 20 m for braking.
5.1.3 Depth and width
The depth of the tank can have an influence on the test results which cannot be regarded as negligible, more
particularly when the towing speed coincides with the velocity of propagation of the surface wave. The
dependence of this critical velocity, v , on tank depth is given by the Equation (1):
c
vg= d (1)
c
where
g is the acceleration due to gravity;
d is the depth of water.
The wave crest produced by the current-meter and its means of suspension, which moves forward with the
instrument, causes an increase in the height of the wetted cross section and thus, in accordance with the
continuity equation, a reduction of the relative velocity. This phenomenon, known as the Epper effect, may
cause an error in calibration within a narrow band in the velocity range from 0,5 v to 1,5 v . The magnitude of
c c
the Epper effect depends on the size of the current-meter(s) and suspension equipment, relative to the cross-
sectional area of the tank. It may be little more than the uncertainty of a single calibration point. It is a
systematic and not a random error. It may be negligible when a very small current-meter is being calibrated.
The depth of the tank shall therefore be chosen to suit the size and the maximum velocity limits of the current-
meters to be calibrated. Care shall be taken to ensure that either the calibration velocities in higher range are
attained before the interference or that they exceed it sufficiently for the critical zone to be bridged without
extrapolation.
The width of the tank is of importance because the Epper effect is more pronounced in a narrower tank. The
width also limits the number of instruments that can be calibrated simultaneously and has an effect on the
stilling characteristics (time taken for the water to become reasonably still).
For example, when a field type current-meter on rod suspension is being calibrated in a tank 1,83 m wide in
which the depth of water is 1,83 m, the Epper effect is greater at a speed of about 4 m/s ( 9,81×1,83 ) and
amounts to 0,3 %. The size of the effect dies away on either side of the critical velocity, but is detectable at
velocities between 3 m/s and 5 m/s.
2 © ISO 2007 – All rights reserved
5.2 Rating carriage (trolley)
5.2.1 General
During calibration, the current-meter is suspended from the carriage and immersed in the water at specified
depth and the carriage travels along the length of the tank at known and accurate speeds in the measuring
section.
5.2.2 Carriage track system
The carriage may run on two parallel rails which must be accurately aligned with both the length of the tank
and the surface of the water in the tank. It is essential that the rails are straight and that the rails and the
wheels of the carriage are free of irregularities, otherwise the carriage will move with irregular motion and
cause vibration which may be transmitted to the current-meter(s) and disturb the rating. The material and
hardness of the rails and the driving wheels should be chosen so that there shall not be undue wear and tear
of the wheels. In the case of rubber tire wheels, provision shall be made to lift the wheels above the rail
surface when not in use for a long time.
Another track system may have toothed belts, mounted on both sides of the tank, driven by the guiding rollers
and used for transportation of the carriage. If this system is adopted, it shall be ensured that there is no
slippage or sag of the belt and in case the slippage or sag occurs, it shall be possible to remove it manually.
The belts shall be strong enough to withstand the load of the carriage they have to transport during calibration
and the climatic conditions prevailing at the rating laboratory.
5.2.3 Types of rating carriages
The following types of rating carriages are in common usage.
a) The towed carriage which is moved along the track by a cable driven from a constant speed motor
standing apart from the moving carriage. The towed carriage may be lighter in construction with the
consequent advantage of high acceleration and quick braking, but the elasticity of the towing cable can
cause irregularities in the running of the carriage thereby affecting the accuracy of current-meter
calibration.
b) The self-propelled carriage which is moved along the track by internally mounted electric motor(s). The
power to the carriage may be fed by a trailing wire track system or by an overhead conductor system or
other systems specially designed for the purpose. The self-propelled carriage will be heavier in
construction as it has to carry the driving motors. This results in greater inertia of the carriage and assists
in smoothing out the running irregularities of the carriage.
The weight of the rating carriage can substantially be reduced by using light but rugged material for its
construction. The lightweight carriage can achieve a high rate of acceleration/deceleration resulting in
relatively smaller length of tank.
5.2.4 Carriage operation
The carriage shall travel smoothly and at constant speed in the measuring section of the rating tank ensuring
that oscillatory motion is not transmitted to the current-meters under calibration.
The carriage shall remain stable during acceleration, deceleration and braking. There shall not be any
forward/backward or sideways rocking, or slippage during peak acceleration/deceleration and during normal
operation at any speed in specified range.
The carriage shall have smooth operational capability in both forward and reverse directions.
An interlock shall be provided in the system to ensure that the direction of start up is correct.
During calibration, the measuring equipment, sensors and other instruments shall not be affected by noise
and spurious signals induced by the mains power supply or carriage drive and control system or otherwise by
electrical equipment installed in the rating tank building and vicinity.
Normal braking of the carriage shall be accomplished by dynamic braking through the drive system. In
addition to normal braking, an alternate brake system shall also be provided on the carriage which would
automatically activate during an emergency.
5.2.5 Carriage control
The carriage may be manned or unmanned. In the case of a manned carriage, an operator on-board controls
various functions of the carriage.
The unmanned carriage is operated remotely without any operator on board. An on-board programmable
controller unit controls various functions of the carriage, i.e., speed, acceleration, deceleration, braking, etc.
The controller exchanges control signals with the supervisory computer, installed in a control room through
suitable digital communication system.
5.3 Measuring equipment
5.3.1 General
The calibration of a current-meter calls for the simultaneous measurement of the following three parameters:
a) distance covered by the carriage;
b) time; and
c) number of signals (pulses) delivered by the current-meter.
The towing speed is calculated from the simultaneous measurement of distance and time and, in case of
rotating-element current-meter, the rate of current-meter revolutions (rotations) is obtained by the
simultaneous measurement of the number of signals (pulses) and the time.
For acquisition of calibration data, a strip chart recorder or magnetic tape or a computerized data acquisition
system as described in 6.1 may be used.
5.3.2 Distance measurement
Different methods are available for measurement of distance to the specified measurement uncertainty
(see 5.3.5). Two of the most common methods are as follows:
a) the establishment of light barriers (markers) at regular intervals along the length of the tank which actuate
mechanical or optical pulse transmitters fitted to the carriage;
b) the use of measuring wheels with mechanical or photoelectric pulse transmitters/optical encoders which
are drawn along the track by the carriage.
In the case of use of a measuring wheel, it shall be ensured that there is no slippage during travel. An
additional method of precise speed measurement shall also be provided to check the accuracy of the
measuring wheel on a regular basis.
4 © ISO 2007 – All rights reserved
5.3.3 Time measurement
A variety of methods are available by which time can be precisely measured. Two of the most common
methods are as follows:
a) a clock giving a contact pulse after one or several seconds (These time pulses are usually recorded on a
graph of a strip chart recorder or magnetic tape together with the pulses of the current-meter and
distances. The time corresponding to an integral number of pulses from the current-meter is usually
determined by interpolation of the time pulse.);
b) electronic clocks, capable of measuring fractions of a second, which time and display a preset number of
distance intervals and a corresponding number of pulses from the current-meter.
5.3.4 Current-meter signal measurement
The carriage shall be provided with a suitable recording device for the measurement of current-meter signals.
In the case of rotating-element current-meters, the sensor of the current-meter shall generate a clear and
positive signal corresponding to the rotor revolutions. Normally, as per the design of the system, the signals
are generated once per revolution, twice per revolution or in some cases once for five revolutions or even
once for ten revolutions. The signals received from the current-meter(s) may be counted using the counting
device of the current-meter or recorded on strip chart recorder or magnetic tape. In measuring the number of
current-meter revolutions in a given time, it is important to measure between identical points on the current-
meter signal. It shall be ensured that none of the signals are missed.
When a recording of current-meter signals is made, the speed of the recording media shall be adjustable so
that the separation of the current-meter signal shall be compatible with the speed of the carriage and the
required accuracy of the measurement.
In the case of an electromagnetic current-meter, the electrical signals from its sensor are collected by its
control unit (7.2.1) and displayed in the form of average value of velocity.
5.3.5 Measurement uncertainty
The uncertainty of measurement of distance travelled by the carriage shall be within 0,1 % of the actual value
at 95 % confidence level.
The uncertainty of measurement of time shall be within 0,1 % of the actual value at the 95 % confidence level.
The uncertainty of measurement of current-meter signals shall be within 0,1 % of the actual value at the 95 %
confidence level.
5.4 Other requirements
In order to increase the efficiency of the calibration process, provision of the following ancillary equipment at
the rating laboratory is desirable:
a) filtering, dosing and scum-removing equipment for the cleansing of the water and for keeping it free from
algal growth;
b) spending beaches, stilling devices or other similar devices to reduce the reflection of disturbance in the
water by the end walls of the tank (Alternatively, transverse curtains can be installed at intervals along the
tank and lowered to the bottom of the tank before the start of each run.);
c) means for checking that a cable-suspended current-meter is properly aligned at the start of a run and that
the current-meter is not swinging when measurements are started shall be available when the installation
is operated from a control room [Closed circuit television is useful for this purpose and also for observing
the behaviour of the rotating-element current-meters at speeds close to their minimum speed of response
(see 7.1.3.1).];
d) means for checking the orientation of the stationary-sensor type current-meters.
e) a hand-held thermometer to measure the temperature of the water in the tank.
6 Computerized data acquisition and processing system
6.1 Data acquisition
In order to facilitate automation and greater accuracy in measurement, a computerized data acquisition
system may be provided on the carriage.
The on-board computer used for data acquisition shall take care of simultaneous logging of data of distance
covered by the trolley, time and signals received from various types of current-meters being calibrated.
The data acquisition software shall be interactive, user friendly and shall be well designed to accept the
following input data:
⎯ date and time of calibration;
⎯ make and type of current-meter;
⎯ serial number of current-meter and each rotor;
⎯ job number allotted by the rating laboratory;
⎯ position of current-meter
...


Questions, Comments and Discussion
Ask us and Technical Secretary will try to provide an answer. You can facilitate discussion about the standard in here.
Loading comments...