ISO 13142:2015
(Main)Electro-optical systems — Cavity ring-down technique for high-reflectance measurement
Electro-optical systems — Cavity ring-down technique for high-reflectance measurement
ISO 13142:2015 specifies measurement procedures for the precise determination of the high reflectance of optical laser components. Up to now, the ISO standardized testing methods for reflectance of optical laser components have the accuracy limit of approximately 0,01 % (for measurement of absolute reflectance) which are not appropriate for measuring the reflectance higher than 99,99 % or, in some cases, measurement accuracy better than 0,01 % is required. The range of application of this standardized test method is reflectance 99 % and higher (theoretically up to 100 %). The methods given in ISO 13142:2015 are intended to be used for the testing and characterization of high reflectance of both concave and plane mirrors used in laser systems and laser-based instruments. The reflectance of convex mirrors can also be tested by taking into consideration the radius of curvature of the mirror surface.
Systèmes électro-optiques — Technique d'alternance de la cavité pour le mesurage du facteur de réflexion
General Information
- Status
- Withdrawn
- Publication Date
- 28-Jun-2015
- Withdrawal Date
- 28-Jun-2015
- Technical Committee
- ISO/TC 172/SC 9 - Laser and electro-optical systems
- Drafting Committee
- ISO/TC 172/SC 9 - Laser and electro-optical systems
- Current Stage
- 9599 - Withdrawal of International Standard
- Start Date
- 10-Jun-2021
- Completion Date
- 12-Feb-2026
Relations
- Effective Date
- 19-May-2018
Frequently Asked Questions
ISO 13142:2015 is a standard published by the International Organization for Standardization (ISO). Its full title is "Electro-optical systems — Cavity ring-down technique for high-reflectance measurement". This standard covers: ISO 13142:2015 specifies measurement procedures for the precise determination of the high reflectance of optical laser components. Up to now, the ISO standardized testing methods for reflectance of optical laser components have the accuracy limit of approximately 0,01 % (for measurement of absolute reflectance) which are not appropriate for measuring the reflectance higher than 99,99 % or, in some cases, measurement accuracy better than 0,01 % is required. The range of application of this standardized test method is reflectance 99 % and higher (theoretically up to 100 %). The methods given in ISO 13142:2015 are intended to be used for the testing and characterization of high reflectance of both concave and plane mirrors used in laser systems and laser-based instruments. The reflectance of convex mirrors can also be tested by taking into consideration the radius of curvature of the mirror surface.
ISO 13142:2015 specifies measurement procedures for the precise determination of the high reflectance of optical laser components. Up to now, the ISO standardized testing methods for reflectance of optical laser components have the accuracy limit of approximately 0,01 % (for measurement of absolute reflectance) which are not appropriate for measuring the reflectance higher than 99,99 % or, in some cases, measurement accuracy better than 0,01 % is required. The range of application of this standardized test method is reflectance 99 % and higher (theoretically up to 100 %). The methods given in ISO 13142:2015 are intended to be used for the testing and characterization of high reflectance of both concave and plane mirrors used in laser systems and laser-based instruments. The reflectance of convex mirrors can also be tested by taking into consideration the radius of curvature of the mirror surface.
ISO 13142:2015 is classified under the following ICS (International Classification for Standards) categories: 31.260 - Optoelectronics. Laser equipment. The ICS classification helps identify the subject area and facilitates finding related standards.
ISO 13142:2015 has the following relationships with other standards: It is inter standard links to ISO 13142:2021. Understanding these relationships helps ensure you are using the most current and applicable version of the standard.
ISO 13142:2015 is available in PDF format for immediate download after purchase. The document can be added to your cart and obtained through the secure checkout process. Digital delivery ensures instant access to the complete standard document.
Standards Content (Sample)
INTERNATIONAL ISO
STANDARD 13142
First edition
2015-07-01
Electro-optical systems — Cavity
ring-down technique for high-
reflectance measurement
Systèmes électro-optiques — Technique d’alternance de la cavité pour
le mesurage du facteur de réflexion
Reference number
©
ISO 2015
© ISO 2015, Published in Switzerland
All rights reserved. Unless otherwise specified, no part of this publication may be reproduced or utilized otherwise in any form
or by any means, electronic or mechanical, including photocopying, or posting on the internet or an intranet, without prior
written permission. Permission can be requested from either ISO at the address below or ISO’s member body in the country of
the requester.
ISO copyright office
Ch. de Blandonnet 8 • CP 401
CH-1214 Vernier, Geneva, Switzerland
Tel. +41 22 749 01 11
Fax +41 22 749 09 47
copyright@iso.org
www.iso.org
ii © ISO 2015 – All rights reserved
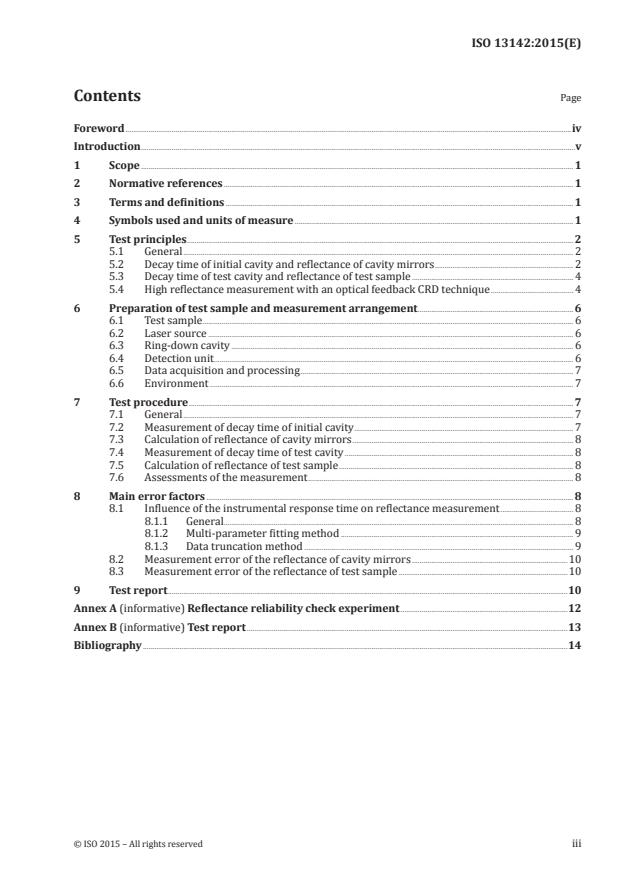
Contents Page
Foreword .iv
Introduction .v
1 Scope . 1
2 Normative references . 1
3 Terms and definitions . 1
4 Symbols used and units of measure . 1
5 Test principles . 2
5.1 General . 2
5.2 Decay time of initial cavity and reflectance of cavity mirrors . 2
5.3 Decay time of test cavity and reflectance of test sample . 4
5.4 High reflectance measurement with an optical feedback CRD technique . 4
6 Preparation of test sample and measurement arrangement . 6
6.1 Test sample . 6
6.2 Laser source . 6
6.3 Ring-down cavity . 6
6.4 Detection unit . 6
6.5 Data acquisition and processing . 7
6.6 Environment . 7
7 Test procedure . 7
7.1 General . 7
7.2 Measurement of decay time of initial cavity . 7
7.3 Calculation of reflectance of cavity mirrors . 8
7.4 Measurement of decay time of test cavity . 8
7.5 Calculation of reflectance of test sample . 8
7.6 Assessments of the measurement . 8
8 Main error factors . 8
8.1 Influence of the instrumental response time on reflectance measurement . 8
8.1.1 General. 8
8.1.2 Multi-parameter fitting method . 9
8.1.3 Data truncation method . 9
8.2 Measurement error of the reflectance of cavity mirrors .10
8.3 Measurement error of the reflectance of test sample .10
9 Test report .10
Annex A (informative) Reflectance reliability check experiment .12
Annex B (informative) Test report .13
Bibliography .14
Foreword
ISO (the International Organization for Standardization) is a worldwide federation of national standards
bodies (ISO member bodies). The work of preparing International Standards is normally carried out
through ISO technical committees. Each member body interested in a subject for which a technical
committee has been established has the right to be represented on that committee. International
organizations, governmental and non-governmental, in liaison with ISO, also take part in the work.
ISO collaborates closely with the International Electrotechnical Commission (IEC) on all matters of
electrotechnical standardization.
The procedures used to develop this document and those intended for its further maintenance are
described in the ISO/IEC Directives, Part 1. In particular the different approval criteria needed for the
different types of ISO documents should be noted. This document was drafted in accordance with the
editorial rules of the ISO/IEC Directives, Part 2 (see www.iso.org/directives).
Attention is drawn to the possibility that some of the elements of this document may be the subject of
patent rights. ISO shall not be held responsible for identifying any or all such patent rights. Details of
any patent rights identified during the development of the document will be in the Introduction and/or
on the ISO list of patent declarations received (see www.iso.org/patents).
Any trade name used in this document is information given for the convenience of users and does not
constitute an endorsement.
For an explanation on the meaning of ISO specific terms and expressions related to conformity
assessment, as well as information about ISO’s adherence to the WTO principles in the Technical Barriers
to Trade (TBT) see the following URL: Foreword - Supplementary information.
The committee responsible for this document is ISO/TC 172, Optics and photonics, Subcommittee SC 9,
Electro-optical systems.
iv © ISO 2015 – All rights reserved
Introduction
With the development of film-deposition technology, the performance of optical thin films, especially
the highly reflective coatings which are widely used in large high-power laser systems, interferometric
gravitational-wave detectors, laser gyroscopes, and cavity-enhanced and cavity ring-down spectroscopy
applications, has been substantially improved in recent years. Laser-based optical systems require some
optical components with extremely high reflectance characteristic. It is necessary to be able to measure
this reflectance characteristic precisely. The measurement procedures in this International Standard
have been optimized to allow the measurement of high reflectance (larger than 99 %, theoretically up
to 100 %) of optical laser components using the cavity ring-down technique which provides reflectance
data with high accuracy, high repeatability and reproducibility, and high reliability.
INTERNATIONAL STANDARD ISO 13142:2015(E)
Electro-optical systems — Cavity ring-down technique for
high-reflectance measurement
1 Scope
This International Standard specifies measurement procedures for the precise determination of the high
reflectance of optical laser components. Up to now, the ISO standardized testing methods for reflectance
of optical laser components have the accuracy limit of approximately 0,01 % (for measurement of
absolute reflectance) which are not appropriate for measuring the reflectance higher than 99,99 % or,
in some cases, measurement accuracy better than 0,01 % is required. The range of application of this
standardized test method is reflectance 99 % and higher (theoretically up to 100 %).
The methods given in this International Standard are intended to be used for the testing and
characterization of high reflectance of both concave and plane mirrors used in laser systems and laser-
based instruments. The reflectance of convex mirrors can also be tested by taking into consideration
the radius of curvature of the mirror surface.
2 Normative references
The following documents, in whole or in part, are normatively referenced in this document and are
indispensable for its application. For dated references, only the edition cited applies. For undated
references, the latest edition of the referenced document (including any amendments) applies.
ISO 11145, Optics and photonics — Lasers and laser-related equipment — Vocabulary and symbols
ISO 14644-1, Cleanrooms and associated controlled environments — Part 1: Classification of air cleanliness
by particle concentration
3 Terms and definitions
For the purposes of this document, the terms and definitions given in ISO 11145 and the following apply.
3.1
reflectance
ratio of the reflected
radiant or luminous flux to the incident flux in the given conditions
4 Symbols used and units of measure
Table 1 — Symbols used and units of measure
Symbol Unit Term
c m/s speed of light in measurement environment
c m/s speed of light in vacuum
h(t) impulse response of the ring-down cavity
h (t) instrumental response function
L , L m lengths of the initial and test cavities
ΔL , ΔL m measurement errors of the initial and test cavity lengths
n refractive index of air in measurement environment
Table 1 (continued)
Symbol Unit Term
R average reflectance of the concave cavity mirrors, equals square root of R *R
1 2
R reflectance of the test sample
s
R , R reflectance of two concave cavity mirrors
1 2
R reflectance of the planar cavity mirror
T s instrumental response time
t s time
u(t) negative-step function
-1
α cm the overall absorption coefficient of the gases inside the cavity at the laser wavelength
δ(t) delta function
θ rad angle of incidence of the test sample
ρ m radius of curvature of concave surface of the cavity mirror
τ , τ s decay time of the initial and test cavities
Δτ , Δτ s measurement errors of the decay time of the initial and test cavities
5 Test principles
5.1 General
The conventional reflectance measurement techniques (spectrophotometry and laser ratiometry) are
based on measuring the relative changes of light power reflected by the test sample. The measurement
accuracy is limited by the power fluctuations of the light sources. The cavity ring-down (CRD) technique,
on the other hand, is based on the measurement of the decay rate of laser power trapped in a ring-
down cavity consisting of at least two highly reflective mirrors. It is therefore totally immune to the
power fluctuations of the light sources. The CRD technique can achieve a measurement accuracy that far
exceeds the limit set by the power fluctuations of the light sources.
5.2 Decay time of initial cavity and reflectance of cavity mirrors
When a laser beam is coupled into the ring-down cavity, it will gradually leak out of the cavity as a
small fraction of the light is transmitted through the cavity mirrors at each reflection. The temporal
behaviour of the cavity output signal immediately after the laser pulse (in the pulsed case, as shown
in Figure 1) or immediately after the laser power is switched off [in the continuous wave (cw) case, as
2 © ISO 2015 – All rights reserved
shown in Figure 2, or at the falling edge of a square-wave modulated power] can be expressed as an
exponentially decay function of time according to the following decay route given in Formula (1):
−t
It ∝ I exp (1)
()
τ
Where I is the initial light intensity of the cavity output signal, τ can be expressed as given in Formula (2):
0 0
L
τ = (2)
cLα −ln RR
()
01 2
with Formula (3):
c
c= (3)
n
When at test laser wavelength the absorptance of gases inside the ring-down cavity is negligible, the
empty cavity ring-down time, τ , is only dependent upon the cavity length and the reflectance of the
cavity mirrors. Formula (2) reduces to Formula (4):
−L
τ = (4)
cRln R
By experimentally measuring the decay time, τ , the average reflectance of the cavity mirrors can be
calculated as Formula (5):
−L
RR==R exp (5)
cτ
0
Key
1 laser 6 input cavity mirror, concave high reflectance mirror
2 mode matching optics 7 output cavity mirror, concave high reflectance mirror
3 initial cavity 8 polarizer
4 focusing lens 9 control and data-processing unit
5 photo-detector
Figure 1 — Schematic of optical arrangement for pulsed-CRD technique for high reflectance
measurement
Key
1 laser 6 input cavity mirror, concave high reflectance mirror
2 mode matching optics 7 output cavity mirror, concave high reflectance mirror
3 initial cavity 8 polarizer
4 focusing lens 9 control and data-processing unit
5 photo-detector 10 optical switch
Figure 2 — Schematic of optical arrangement for cw-CRD technique for high reflectance
measurement
5.3 Decay time of test cavity and reflectance of test sample
If a planar test sample is to be measured, a test ring-down cavity is formed by inserting this test sample
into the initial cavity as shown in Figure 3. The incident angle of the laser beam on the test sample
follows the required incident angle of the test sample. In this case, the decay time of the folded test
cavity can be expressed as Formula (6):
−L
τ = (6)
cRln ⋅ RR
()
s1 2
Therefore, combining Formula (4) and Formula (6), the reflectance R of the test sample can be calculated
s
as Formula (7):
L L
R =−exp (7)
s
cττc
0
Key
1 input cavity mirror, concave high reflectance mirror 3 test sample
2 output cavity mirror, concave high reflectance mirror4 angle of incidence of test sample
Figure 3 — Schematic of optical arrangement for test cavity
5.4 High reflectance measurement with an optical feedback CRD technique
In the cw-CRD case, an optical feedback CRD (OF-CRD) scheme employing a semiconductor laser as the
light source (shown in Figure 4) can be used for the reflectance measurement with an improved signal-
to-noise ratio in the CRD signals. In OF-CRD scheme, the initial cavity consists of three cavity mirrors:
4 © ISO 2015 – All rights reserved
two concave mirrors and one planar mirror. The beam from the semiconductor laser is coaxially coupled
into the ring-down cavity from the high-reflectance planar cavity mirror. The optical feedback (back-
reflection of the laser beam) from the ring-down cavity is retro-reflected into the oscillator cavity of the
semiconductor laser. Due to the self-mixing effect of the semiconductor laser, the spectral linewidth of
the laser is significantly reduced by the frequency selected optical feedback resulting in significant
enhancement of the coupling efficiency of the laser power into the ring-down cavity and therefore, a
large increase of the CRD amplitude. When the laser power is modulated by a square wave signal, the
cavity decay signal can be obtained at the falling edge of the square wave signal. The test principle is the
same as that presented in 5.2 and 5.3. The item RR in Formula (2) to Formula (6) should be
substituted by RR ⋅R in OF-CRD scheme.
12 3
The following two measurements are necessary to determine the reflectance of the test sample:
a) τ and L are measured with the initial cavity;
0 0
b) τ and L are measured with the test cavity.
Key
1 semiconductor laser 8 polarizer
2 mode matching optics 9 control and data-processing unit
3 initial cavity, with three mirrors 10 test sample
4 focusing lens 11 angle of incidence of the test sample
5 photo-detector 12 input cavity mirror, plane high reflectance mirror
6 cavity mirror, concave high reflectance mirror 13 test cavity, with four mirrors
7 output cavity mirror, concave high reflectance mirror
Figure 4 — Schematic of
...


Questions, Comments and Discussion
Ask us and Technical Secretary will try to provide an answer. You can facilitate discussion about the standard in here.
Loading comments...