ISO 11003-2:2019
(Main)Adhesives — Determination of shear behaviour of structural adhesives — Part 2: Tensile test method using thick adherends
Adhesives — Determination of shear behaviour of structural adhesives — Part 2: Tensile test method using thick adherends
This document specifies a test method for determining the shear behaviour of an adhesive in a single lap joint bonded assembly when subjected to a tensile force. The test is performed on specimens consisting of thick, rigid adherends, with a short length of overlap, in order to obtain the most uniform distribution of shear stresses possible and to minimize other stress states which initiate failure. This test method may be used to determine: — the shear-stress against shear-strain curve to failure of the adhesive; — the shear modulus of the adhesive; — other adhesive properties that can be derived from the stress/strain curve such as secant shear modulus and maximum shear stress; — the effect of temperature, environment, test speed, etc., on these properties. This document does not apply in case of adhesion failure.
Adhésifs — Détermination du comportement en cisaillement d'adhésifs structuraux — Partie 2: Méthode d'essai en traction sur éprouvette épaisse
General Information
- Status
- Published
- Publication Date
- 26-May-2019
- Technical Committee
- ISO/TC 61/SC 11 - Products
- Drafting Committee
- ISO/TC 61/SC 11/WG 5 - Polymeric adhesives
- Current Stage
- 9093 - International Standard confirmed
- Start Date
- 21-Oct-2024
- Completion Date
- 12-Feb-2026
Relations
- Effective Date
- 22-Mar-2018
Overview - ISO 11003-2:2019 (Adhesives, shear behaviour, thick adherends)
ISO 11003-2:2019 specifies a tensile test method to determine the shear behaviour of structural adhesives in a single-lap joint configuration using thick, rigid adherends. The procedure produces a largely uniform shear-stress distribution across a short overlap so that adhesive shear properties - rather than peel or mixed-mode failures - are measured. Typical deliverables include the shear stress–shear strain curve to failure, shear modulus, secant modulus, and maximum shear stress. This standard does not apply when failure occurs by adhesion (adhesive/substrate separation).
Key topics and technical requirements
- Specimen configuration: flat-ended or stepped adherends (dimensions per the standard); bond thickness 0.2–0.8 mm (preferred 0.5 mm).
- Adherends: steel recommended (e.g., XC18 or E24 Grades), machined per referenced steel standards.
- Apparatus and accuracy:
- Tensile-testing machine able to produce fracture at 10–80% of force transducer full scale.
- Force transducer accuracy: 1% at a shear strain of 0.01.
- Extensometer(s) for central shear displacement with 1 μm resolution; contact points within 2 mm of bonded faces. Use of two opposing extensometers is recommended to average out twisting.
- Low-torque loading device (simple universal-joint design recommended).
- Data logging to record load and displacement from start to fracture.
- Micrometer and optical microscope for dimensional checks (adhesive thickness).
- Specimen preparation: bonding, surface preparation (follow ISO 17212), machining precautions (temperature limits), and at least five specimens per test condition.
- Outputs and calculations: average shear stress, shear strain, stress–strain curve, shear modulus; procedures for deriving secant modulus and maximum shear stress are defined.
- Environmental and test variables: method permits assessment of temperature, environment, and test speed effects on shear properties.
Applications and typical users
ISO 11003-2 is used for:
- Characterizing structural adhesive shear performance in R&D, material selection, and failure analysis.
- Quality control and acceptance testing by adhesive manufacturers and independent test laboratories.
- Design validation and certification in aerospace, automotive, rail, marine, construction, and composite bonding industries. Typical users: materials engineers, test lab technicians, adhesive formulators, and quality assurance teams.
Related standards
- ISO 17212 - surface preparation for adhesive bonding
- ISO 291 - conditioning and testing atmospheres
- ISO 10365 - failure pattern designation
- ISO 683-3, ISO 14737, ISO 4995 - recommended steel/adherend material provisions
Keywords: ISO 11003-2, shear behaviour, structural adhesives, single lap joint, thick adherends, shear modulus, shear stress–strain, adhesive testing, extensometer, bond thickness.
Get Certified
Connect with accredited certification bodies for this standard

Smithers Quality Assessments
US management systems and product certification.

DIN CERTCO
DIN Group product certification.
Sponsored listings
Frequently Asked Questions
ISO 11003-2:2019 is a standard published by the International Organization for Standardization (ISO). Its full title is "Adhesives — Determination of shear behaviour of structural adhesives — Part 2: Tensile test method using thick adherends". This standard covers: This document specifies a test method for determining the shear behaviour of an adhesive in a single lap joint bonded assembly when subjected to a tensile force. The test is performed on specimens consisting of thick, rigid adherends, with a short length of overlap, in order to obtain the most uniform distribution of shear stresses possible and to minimize other stress states which initiate failure. This test method may be used to determine: — the shear-stress against shear-strain curve to failure of the adhesive; — the shear modulus of the adhesive; — other adhesive properties that can be derived from the stress/strain curve such as secant shear modulus and maximum shear stress; — the effect of temperature, environment, test speed, etc., on these properties. This document does not apply in case of adhesion failure.
This document specifies a test method for determining the shear behaviour of an adhesive in a single lap joint bonded assembly when subjected to a tensile force. The test is performed on specimens consisting of thick, rigid adherends, with a short length of overlap, in order to obtain the most uniform distribution of shear stresses possible and to minimize other stress states which initiate failure. This test method may be used to determine: — the shear-stress against shear-strain curve to failure of the adhesive; — the shear modulus of the adhesive; — other adhesive properties that can be derived from the stress/strain curve such as secant shear modulus and maximum shear stress; — the effect of temperature, environment, test speed, etc., on these properties. This document does not apply in case of adhesion failure.
ISO 11003-2:2019 is classified under the following ICS (International Classification for Standards) categories: 83.180 - Adhesives. The ICS classification helps identify the subject area and facilitates finding related standards.
ISO 11003-2:2019 has the following relationships with other standards: It is inter standard links to ISO 11003-2:2001. Understanding these relationships helps ensure you are using the most current and applicable version of the standard.
ISO 11003-2:2019 is available in PDF format for immediate download after purchase. The document can be added to your cart and obtained through the secure checkout process. Digital delivery ensures instant access to the complete standard document.
Standards Content (Sample)
INTERNATIONAL ISO
STANDARD 11003-2
Third edition
2019-06
Adhesives — Determination of shear
behaviour of structural adhesives —
Part 2:
Tensile test method using thick
adherends
Adhésifs — Détermination du comportement en cisaillement
d'adhésifs structuraux —
Partie 2: Méthode d'essai en traction sur éprouvette épaisse
Reference number
©
ISO 2019
© ISO 2019
All rights reserved. Unless otherwise specified, or required in the context of its implementation, no part of this publication may
be reproduced or utilized otherwise in any form or by any means, electronic or mechanical, including photocopying, or posting
on the internet or an intranet, without prior written permission. Permission can be requested from either ISO at the address
below or ISO’s member body in the country of the requester.
ISO copyright office
CP 401 • Ch. de Blandonnet 8
CH-1214 Vernier, Geneva
Phone: +41 22 749 01 11
Fax: +41 22 749 09 47
Email: copyright@iso.org
Website: www.iso.org
Published in Switzerland
ii © ISO 2019 – All rights reserved
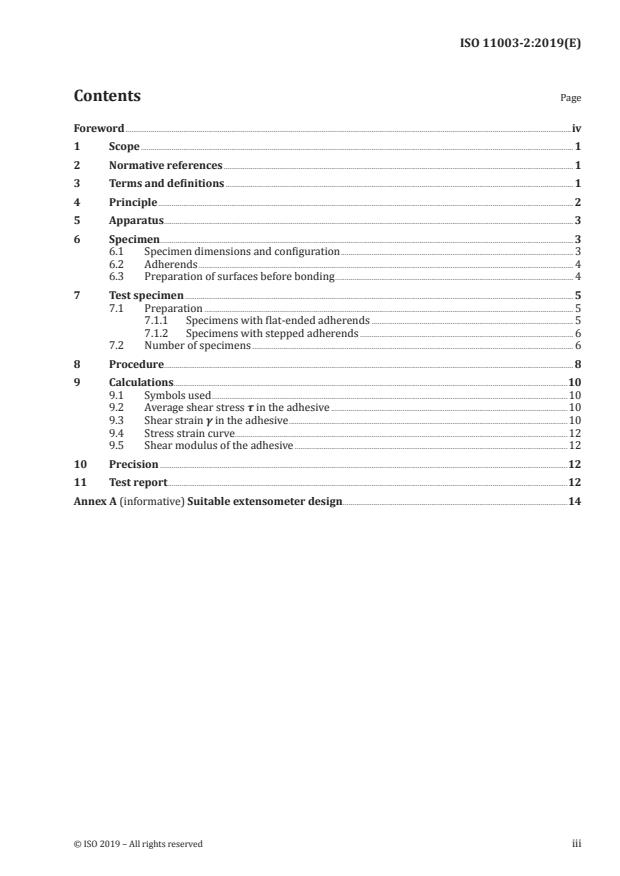
Contents Page
Foreword .iv
1 Scope . 1
2 Normative references . 1
3 Terms and definitions . 1
4 Principle . 2
5 Apparatus . 3
6 Specimen . 3
6.1 Specimen dimensions and configuration . 3
6.2 Adherends . 4
6.3 Preparation of surfaces before bonding . 4
7 Test specimen . 5
7.1 Preparation . 5
7.1.1 Specimens with flat-ended adherends . 5
7.1.2 Specimens with stepped adherends . 6
7.2 Number of specimens . 6
8 Procedure. 8
9 Calculations.10
9.1 Symbols used .10
9.2 Average shear stress τ in the adhesive .10
9.3 Shear strain γ in the adhesive .10
9.4 Stress strain curve .12
9.5 Shear modulus of the adhesive .12
10 Precision .12
11 Test report .12
Annex A (informative) Suitable extensometer design .14
Foreword
ISO (the International Organization for Standardization) is a worldwide federation of national standards
bodies (ISO member bodies). The work of preparing International Standards is normally carried out
through ISO technical committees. Each member body interested in a subject for which a technical
committee has been established has the right to be represented on that committee. International
organizations, governmental and non-governmental, in liaison with ISO, also take part in the work.
ISO collaborates closely with the International Electrotechnical Commission (IEC) on all matters of
electrotechnical standardization.
The procedures used to develop this document and those intended for its further maintenance are
described in the ISO/IEC Directives, Part 1. In particular, the different approval criteria needed for the
different types of ISO documents should be noted. This document was drafted in accordance with the
editorial rules of the ISO/IEC Directives, Part 2 (see www .iso .org/directives).
Attention is drawn to the possibility that some of the elements of this document may be the subject of
patent rights. ISO shall not be held responsible for identifying any or all such patent rights. Details of
any patent rights identified during the development of the document will be in the Introduction and/or
on the ISO list of patent declarations received (see www .iso .org/patents).
Any trade name used in this document is information given for the convenience of users and does not
constitute an endorsement.
For an explanation of the voluntary nature of standards, the meaning of ISO specific terms and
expressions related to conformity assessment, as well as information about ISO's adherence to the
World Trade Organization (WTO) principles in the Technical Barriers to Trade (TBT) see www .iso
.org/iso/foreword .html.
This document was prepared by Technical Committee ISO/TC 61, Plastics, Subcommittee SC 11,
Products.
This third edition cancels and replaces the second edition (ISO 11003-2:2001), which has been
technically revised. The main changes compared to the previous edition are as follows:
— the scope now specifies that this document does not apply in case of adhesion failure;
— revision of former subclause 8.3 (now 9.3), "Shear strain γ in the adhesive".
A list of all parts in the ISO 11003 series can be found on the ISO website.
Any feedback or questions on this document should be directed to the user’s national standards body. A
complete listing of these bodies can be found at www .iso .org/members .html.
iv © ISO 2019 – All rights reserved
INTERNATIONAL STANDARD ISO 11003-2:2019(E)
Adhesives — Determination of shear behaviour of
structural adhesives —
Part 2:
Tensile test method using thick adherends
1 Scope
This document specifies a test method for determining the shear behaviour of an adhesive in a single
lap joint bonded assembly when subjected to a tensile force.
The test is performed on specimens consisting of thick, rigid adherends, with a short length of overlap,
in order to obtain the most uniform distribution of shear stresses possible and to minimize other stress
states which initiate failure.
This test method may be used to determine:
— the shear-stress against shear-strain curve to failure of the adhesive;
— the shear modulus of the adhesive;
— other adhesive properties that can be derived from the stress/strain curve such as secant shear
modulus and maximum shear stress;
— the effect of temperature, environment, test speed, etc., on these properties.
This document does not apply in case of adhesion failure.
2 Normative references
The following documents are referred to in the text in such a way that some or all of their content
constitutes requirements of this document. For dated references, only the edition cited applies. For
undated references, the latest edition of the referenced document (including any amendments) applies.
ISO 291, Plastics — Standard atmospheres for conditioning and testing
ISO 683-3, Heat-treatable steels, alloy steels and free-cutting steels — Part 3: Case-hardening steels
ISO 14737, Carbon and low alloy cast steels for general applications
ISO 17212, Structural adhesives — Guidelines for the surface preparation of metals and plastics prior to
adhesive bonding
ISO 4995, Hot-rolled steel sheet of structural quality
ISO 10365, Adhesives — Designation of main failure patterns
3 Terms and definitions
No terms and definitions are listed in this document.
ISO and IEC maintain terminological databases for use in standardization at the following addresses:
— ISO Online browsing platform: available at https: //www .iso .org/obp
— IEC Electropedia: available at http: //www .electropedia .org/
4 Principle
An adhesively bonded test specimen (see Figure 1) is subjected to a tensile force so that the adhesive is
stressed in shear.
The relative displacement of the adherends is measured using a purpose-built transducer located in
the central region of the specimen. Force and displacement are measured from the start of application
of the load until fracture of the specimen. The shear stresses and strains are then calculated from the
bond dimensions.
Dimensions in millimetres
Key
1 adhesive bond
a) bonded adherends
b) machined adherends
Figure 1 — Specimen dimensions and configuration
2 © ISO 2019 – All rights reserved
5 Apparatus
5.1 Tensile-testing machine, capable of producing fracture in the specimen at a tensile force between
10 % and 80 % of the full-scale range of the force transducer.
5.2 Device for introducing a force into the specimen, so that negligible torque develops when force
is applied to the specimen. For this purpose, the simple universal-joint design shown in Figure 2 is
satisfactory.
5.3 Force transducer, capable of measuring the force in the specimen with an accuracy of 1 % of the
force at a shear strain of 0,01.
5.4 One or two extensometers (see note), for measuring the shear displacement between points of
known separation on each adherend in the central region of the bond (see Figure 3 and Annex A). The
points of contact with the adherends shall be within a distance of 2 mm from the bonded faces. The
device(s) shall be capable of measuring the shear displacement to an accuracy of 1 μm.
During loading, each adherend will bend slightly, leading to a small rotation of the central (bonded)
region of the test specimen. In order to achieve high accuracy in displacement measurements, it is
necessary for the extensometer(s) to rotate with the specimen. This has been achieved in the design
shown in Figure 3 by double-pin contact with one of the adherends.
NOTE The use of two extensometers on opposing faces of the specimen is recommended to minimize,
by averaging the extensometer readings, any contribution to measurements from a twisting moment applied
to the specimen. The use of two extensometers will also serve to indicate any malfunctioning of one of the
extensometers as revealed by significantly different readings from the two devices.
5.5 Data-logging equipment, to continuously record the relative displacement of the adherends and
the applied load, from the start of application of the load until the specimen breaks.
5.6 Micrometer, having an accuracy of better than 0,002 mm, to measure the dimensions of the
adherends.
5.7 Optical microscope, having an accuracy of better than 0,002 mm, to measure the thickness of the
adhesive bond when the specimen configuration shown in Figure 1 a) is used.
6 Specimen
6.1 Specimen dimensions and configuration
Specimens shall be prepared either by bonding metal plates or strips together to produce the
configuration shown in Figure 1 a) or by bonding adherends that have been machined to the shape
shown in Figure 1 b). The dimensions of the specimen are given in Figure 1 and are the same, within
variations in the bond thickness, for both preparation methods.
The bond thickness shall lie in the range 0,2 mm t
...


Questions, Comments and Discussion
Ask us and Technical Secretary will try to provide an answer. You can facilitate discussion about the standard in here.
Loading comments...