ISO 23749:2022
(Main)Microbeam analysis — Electron backscatter diffraction — Quantitative determination of austenite in steel
Microbeam analysis — Electron backscatter diffraction — Quantitative determination of austenite in steel
This document specifies procedures for quantitative analysis of austenite in steel using electron backscatter diffraction (EBSD). This document is mainly applied in low and medium carbon steels, low and medium carbon alloy steels. This document is used to analyse austenite with grain size larger than 50 nm. This method is not used to quantify austenite with grain size smaller than 50 nm, which can significantly affect the accuracy of the analysis results. NOTE 1 The size limit is strongly dependent both on the instrument and the instrument operating parameters. NOTE 2 The size limit is the minimum grain size of the detectable austenite.
Analyse par microfaisceaux — Diffraction d'électrons rétrodiffusés — Détermination quantitative de l'austénite dans l'acier
General Information
- Status
- Published
- Publication Date
- 11-Apr-2022
- Technical Committee
- ISO/TC 202 - Microbeam analysis
- Current Stage
- 6060 - International Standard published
- Start Date
- 12-Apr-2022
- Due Date
- 10-May-2022
- Completion Date
- 12-Apr-2022
Overview
ISO 23749:2022 - "Microbeam analysis - Electron backscatter diffraction - Quantitative determination of austenite in steel" specifies standardized procedures for using electron backscatter diffraction (EBSD) to quantify austenite in low- and medium-carbon steels and alloy steels. The standard governs specimen preparation, EBSD acquisition, data processing and statistical reporting to deliver reliable measurements of retained austenite content, morphology and distribution. ISO 23749:2022 is intended for austenite grains larger than 50 nm; it is not suitable for reliable quantification of grains below this limit.
Key technical topics and requirements
- Scope and limitations: Applied mainly to low/medium carbon steels; detectable austenite grain size > 50 nm (instrument- and parameter-dependent).
- Specimen preparation: Surface polish must produce high-quality EBSD patterns; avoid over-etching and deformation. Electropolishing recommended; ion milling not recommended for austenite.
- SEM/EBSD setup:
- Specimen tilted 70° to the EBSD detector.
- Maintain conductivity (carbon coating not suitable).
- For iron/steel, acceleration voltage not less than 10 kV is recommended (balance pattern quality and resolution).
- Scanning parameters:
- Scanning step size ≤ 1/5 of average austenite grain size (estimate grain size with a quick EBSD scan per ISO 13067).
- Minimum 6 fields at 1000× magnification; total scanned area > 0.065 mm² (Annex A explains derivation).
- Indexing and data quality:
- Define critical indexing reliability: mean angle difference (MAD) ≤ 1° or confidence index (CI) > 0.1.
- Required hit rate: ≥ 85% for martensite-containing microstructures, ≥ 90% for martensite-free microstructures.
- Data cleaning and handling of non-indexed/misindexed points are specified.
- Data analysis and reporting:
- Calculation of austenite fraction, grain-size/shape metrics (ECD, aspect ratio), 95% confidence intervals and relative accuracy.
- Test report requirements and examples (e.g., TRIP 590) are provided.
Practical applications and users
ISO 23749:2022 is valuable for:
- Materials scientists and metallurgists quantifying retained austenite in TRIP, TWIP and Q&P steels.
- Automotive and structural steel manufacturers for process control and mechanical-property optimization.
- R&D labs, failure analysis and quality assurance units requiring standardized EBSD-based austenite quantification.
- Certification bodies and testing laboratories aiming for interoperable, reproducible results.
Quantitative EBSD per ISO 23749 helps link retained austenite content and morphology to mechanical performance (e.g., the TRIP effect), supporting material design and production control.
Related standards
- ISO 13067 - EBSD measurement of average grain size
- ISO 22309 - EDS quantitative analysis (elements ≥ Na)
- ISO 22493 - Scanning electron microscopy vocabulary
- ISO 24173 - Guidelines for orientation measurement using EBSD
Keywords: ISO 23749:2022, EBSD, austenite quantification, retained austenite, steel, TRIP steel, grain size, electron backscatter diffraction.
Get Certified
Connect with accredited certification bodies for this standard

ECOCERT
Organic and sustainability certification.

Eurofins Food Testing Global
Global leader in food, environment, and pharmaceutical product testing.

Intertek Bangladesh
Intertek certification and testing services in Bangladesh.
Sponsored listings
Frequently Asked Questions
ISO 23749:2022 is a standard published by the International Organization for Standardization (ISO). Its full title is "Microbeam analysis — Electron backscatter diffraction — Quantitative determination of austenite in steel". This standard covers: This document specifies procedures for quantitative analysis of austenite in steel using electron backscatter diffraction (EBSD). This document is mainly applied in low and medium carbon steels, low and medium carbon alloy steels. This document is used to analyse austenite with grain size larger than 50 nm. This method is not used to quantify austenite with grain size smaller than 50 nm, which can significantly affect the accuracy of the analysis results. NOTE 1 The size limit is strongly dependent both on the instrument and the instrument operating parameters. NOTE 2 The size limit is the minimum grain size of the detectable austenite.
This document specifies procedures for quantitative analysis of austenite in steel using electron backscatter diffraction (EBSD). This document is mainly applied in low and medium carbon steels, low and medium carbon alloy steels. This document is used to analyse austenite with grain size larger than 50 nm. This method is not used to quantify austenite with grain size smaller than 50 nm, which can significantly affect the accuracy of the analysis results. NOTE 1 The size limit is strongly dependent both on the instrument and the instrument operating parameters. NOTE 2 The size limit is the minimum grain size of the detectable austenite.
ISO 23749:2022 is classified under the following ICS (International Classification for Standards) categories: 71.040.50 - Physicochemical methods of analysis. The ICS classification helps identify the subject area and facilitates finding related standards.
ISO 23749:2022 is available in PDF format for immediate download after purchase. The document can be added to your cart and obtained through the secure checkout process. Digital delivery ensures instant access to the complete standard document.
Standards Content (Sample)
INTERNATIONAL ISO
STANDARD 23749
First edition
2022-04
Microbeam analysis — Electron
backscatter diffraction — Quantitative
determination of austenite in steel
Analyse par microfaisceaux — Diffraction d'électrons rétrodiffusés —
Détermination quantitative de l'austénite dans l'acier
Reference number
© ISO 2022
All rights reserved. Unless otherwise specified, or required in the context of its implementation, no part of this publication may
be reproduced or utilized otherwise in any form or by any means, electronic or mechanical, including photocopying, or posting on
the internet or an intranet, without prior written permission. Permission can be requested from either ISO at the address below
or ISO’s member body in the country of the requester.
ISO copyright office
CP 401 • Ch. de Blandonnet 8
CH-1214 Vernier, Geneva
Phone: +41 22 749 01 11
Email: copyright@iso.org
Website: www.iso.org
Published in Switzerland
ii
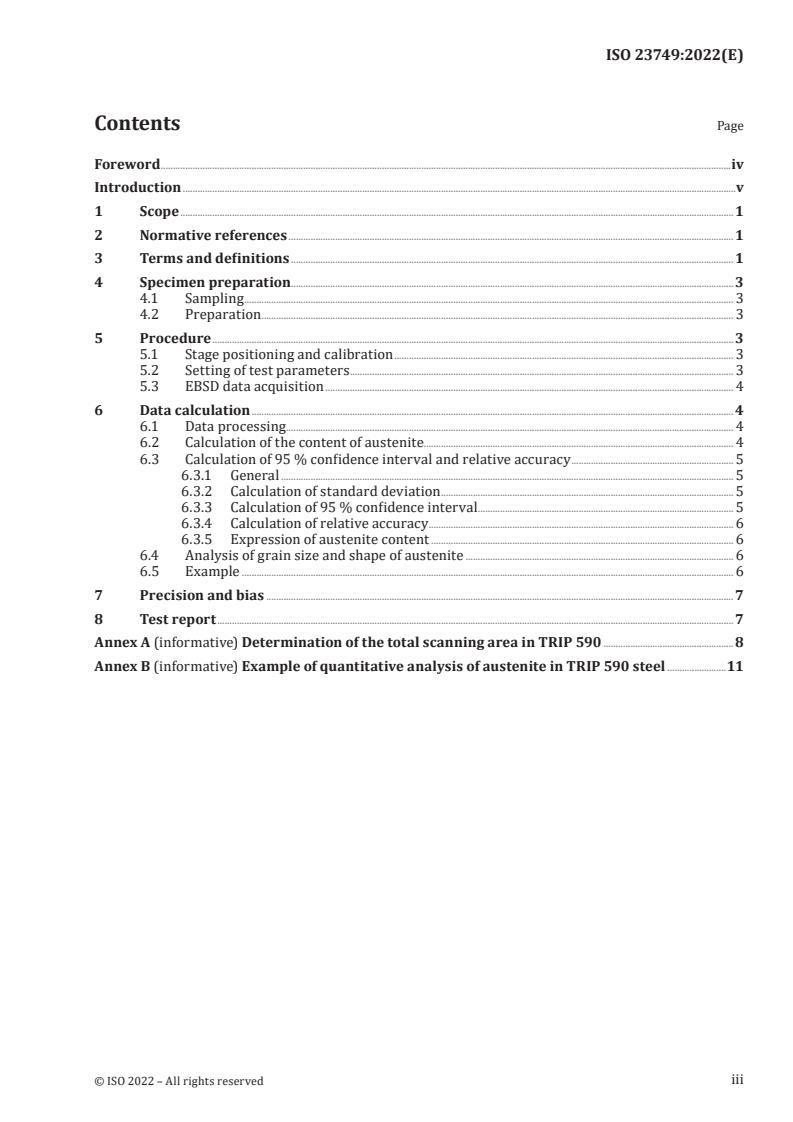
Contents Page
Foreword .iv
Introduction .v
1 Scope . 1
2 Normative references . 1
3 Terms and definitions . 1
4 Specimen preparation . .3
4.1 Sampling . 3
4.2 Preparation . 3
5 Procedure .3
5.1 Stage positioning and calibration . 3
5.2 Setting of test parameters . 3
5.3 EBSD data acquisition . 4
6 Data calculation . 4
6.1 Data processing. 4
6.2 Calculation of the content of austenite . 4
6.3 Calculation of 95 % confidence interval and relative accuracy . 5
6.3.1 General . 5
6.3.2 Calculation of standard deviation . 5
6.3.3 Calculation of 95 % confidence interval . 5
6.3.4 Calculation of relative accuracy . 6
6.3.5 Expression of austenite content . 6
6.4 Analysis of grain size and shape of austenite . 6
6.5 Example . 6
7 Precision and bias . 7
8 Test report . 7
Annex A (informative) Determination of the total scanning area in TRIP 590 .8
Annex B (informative) Example of quantitative analysis of austenite in TRIP 590 steel .11
iii
Foreword
ISO (the International Organization for Standardization) is a worldwide federation of national standards
bodies (ISO member bodies). The work of preparing International Standards is normally carried out
through ISO technical committees. Each member body interested in a subject for which a technical
committee has been established has the right to be represented on that committee. International
organizations, governmental and non-governmental, in liaison with ISO, also take part in the work.
ISO collaborates closely with the International Electrotechnical Commission (IEC) on all matters of
electrotechnical standardization.
The procedures used to develop this document and those intended for its further maintenance are
described in the ISO/IEC Directives, Part 1. In particular, the different approval criteria needed for the
different types of ISO documents should be noted. This document was drafted in accordance with the
editorial rules of the ISO/IEC Directives, Part 2 (see www.iso.org/directives).
Attention is drawn to the possibility that some of the elements of this document may be the subject of
patent rights. ISO shall not be held responsible for identifying any or all such patent rights. Details of
any patent rights identified during the development of the document will be in the Introduction and/or
on the ISO list of patent declarations received (see www.iso.org/patents).
Any trade name used in this document is information given for the convenience of users and does not
constitute an endorsement.
For an explanation of the voluntary nature of standards, the meaning of ISO specific terms and
expressions related to conformity assessment, as well as information about ISO's adherence to
the World Trade Organization (WTO) principles in the Technical Barriers to Trade (TBT), see
www.iso.org/iso/foreword.html.
This document was prepared by Technical Committee 202, Microbeam analysis.
Any feedback or questions on this document should be directed to the user’s national standards body. A
complete listing of these bodies can be found at www.iso.org/members.html.
iv
Introduction
This test method produces a total quantification result of austenite, separate quantification results of
austenite with different aspect ratio, as well as morphology and distribution of austenite. The retained
austenite in steel, such as transformation induced plasticity (TRIP), twinning induced plasticity
(TWIP), quenching and partitioning (Q&P) steel, can give steel good plasticity due to its TRIP effect,
which is that high plasticity can be induced during deformation by the transformation of austenite into
martensite. The TRIP effect is greatly affected by the content and stability of austenite. The stability
of austenite can be divided into chemical stability and mechanical stability. The chemical stability is
mainly influenced by the carbon content of the austenite. The mechanical stability is primarily affected
by the morphology, aspect ratio, distribution in the matrix of austenite. It is important to understand
the effect of austenite on the mechanical properties through the quantitative results of electron
backscatter diffraction (EBSD).
In a conventional scanning electron microscope (SEM) with a tungsten filament, a spatial resolution
of about 0,25 µm for EBSD can be achieved; however, with a field-emission gun SEM (FEG-SEM), the
resolution limit is 10 nm to 50 nm for EBSD, although the value is strongly dependent both on the
instrument and the instrument operating parameters. See ISO 24173.
v
INTERNATIONAL STANDARD ISO 23749:2022(E)
Microbeam analysis — Electron backscatter diffraction —
Quantitative determination of austenite in steel
1 Scope
This document specifies procedures for quantitative analysis of austenite in steel using electron
backscatter diffraction (EBSD). This document is mainly applied in low and medium carbon steels, low
and medium carbon alloy steels.
This document is used to analyse austenite with grain size larger than 50 nm. This method is not used
to quantify austenite with grain size smaller than 50 nm, which can significantly affect the accuracy of
the analysis results.
NOTE 1 The size limit is strongly dependent both on the instrument and the instrument operating parameters.
NOTE 2 The size limit is the minimum grain size of the detectable austenite.
2 Normative references
The following documents are referred to in the text in such a way that some or all of their content
constitutes requirements of this document. For dated references, only the edition cited applies. For
undated references, the latest edition of the referenced document (including any amendments) applies.
ISO 13067, Microbeam analysis — Electron backscatter diffraction — Measurement of average grain size
ISO 22309, Microbeam analysis — Quantitative analysis using energy-dispersive spectrometry (EDS) for
elements with an atomic number of 11 (Na) or above
ISO 22493, Microbeam analysis — Scanning electron microscopy — Vocabulary
ISO 24173, Microbeam analysis — Guidelines for orientation measurement using electron backscatter
diffraction
3 Terms and definitions
For the purposes of this document, the terms and definitions given in ISO 13067, ISO 22493, ISO 24173
and the following apply.
ISO and IEC maintain terminology databases for use in standardization at the following addresses:
— ISO Online browsing platform: available at https:// www .iso .org/ obp
— IEC Electropedia: available at https:// www .electropedia .org/
3.1
equivalent circle diameter
ECD
diameter of the circle with an area equivalent to the grain section area
3.2
aspect ratio
ratio of the length of the minor axis to the length of the major axis of an ellipse fitted round a grain
Note 1 to entry: It is sometimes referred to as grain elongation.
Note 2 to entry: The value lies in the range 0 to 1.
Note 3 to entry: There are several ways of fitting the ellipse round the grain. Different fitting methods can result
in small difference in the measured aspect ratio.
3.3
pattern quality
sharpness of a diffraction band or the contrast range of a diffraction pattern
Note 1 to entry: Different terms, such as band contrast, band slope, image quality, and so on, are used in different
commercial software packages.
3.4
indexing reliability
numerical value that indicates the confidence/reliability that the indexing software places in an
automatic analysis
Note 1 to entry: This parameter varies between EBSD manufacturers, but can include:
a) the average difference between the bands experimentally determined and the bands calculated from the
orientations determined by EBSD software;
b) the difference between the number of triplets (intersections of three Kikuchi bands) in the EBSD pattern
matched by the chosen orientation and the next best possible solution, divided by the total number of
triplets.
3.5
non-indexing
non-assignment of an orientation, e.g. due to insufficient pattern quality (3.3) of the diffraction pattern
Note 1 to entry: This can occur for a variety of reasons, such as roughness of the specimen, dust on the specimen,
overlapping patterns at the grain boundary, a poor-quality pattern due to the effects of strain, or the pattern is
from an unanticipated phase.
3.6
misindexing
assigning an incorrect orientation or phase to the measured EBSD pattern, or dissatisfying the required
indexing reliability (3.4)
Note 1 to entry: This can occur for a number of reasons, e.g. pseudosymmetry effects, attempting to index a poor
pattern or attempting to index a pattern from an unanticipated phase for which the indexing software is not
configured.
3.7
hit rate
percentage of electron backscatter diffraction patterns (EBSPs) that have been reliably indexed
Note 1 to entry: Both the misindexing (3.6) and non-indexing (3.5) data are considered to be unreliably indexed.
3.8
data cleaning
process chosen to accommodate non-indexing (3.5) and misindexing (3.6) data within the map, using a
given set of parameters, typically based on the characteristics (orientation, phase) of a certain number
of nearest neighbours
Note 1 to entry: A wide range of terms (not necessarily mathematically precise) is used in the various
commercially available software packages for different data-cleaning operations, including noise reduction,
extrapolation, dilation and erosion.
4 Specimen preparation
4.1 Sampling
If the order, or the International Standard defining the product, does not specify the number
of specimens and the location at which they are to be taken from the product, these are left to the
manufacturer. It is recommended that two or more sections are assessed. Care shall be taken to ensure
that the specimens are representative of the bulk of the product.
4.2 Preparation
In order to achieve a high degree of indexing of individual pixels, it is necessary to produce a surface
polish which produces EBSD patterns of sufficient quality to be indexed reliably. The criteria used
for indexing reliability shall be defined and reported by the user. Over-etching of grain boundaries
should be avoided since it leads to increased numbers of non- and mis-indexed points and to low index
reliability at the grain boundaries. The surface of specimens used for EBSD test should be free from
deformation due to specimen preparation and flat. Poor deformation can leave at, or just below, the
surface, or can leave contaminants, oxides, reaction product layer on the specimen surface. Due to the
high tilt of the specimen surface (typically 70°) with respect to the electron beam, minimizing surface
relief is also important part of good specimen preparation. Guideline on specimen preparation for EBSD
should refer to standard texts on polishing and etching and ISO 24173. In general, electro- polishing
is recommended. Ion milling is not recommended for the preparation of austenite specimen because
austenite is easy to transform into martensite during this process.
5 Procedure
5.1 Stage positioning and calibration
The procedures for stage positioning and calibration set out in ISO 24173 shall be followed. The
specimen shall be fixed to the scanning electron microscope (SEM) stage in the desired orientation with
the specimen axes relative to the stage axes and imaged at a working distance at which the SEM and
EBSD image magnification
...


Questions, Comments and Discussion
Ask us and Technical Secretary will try to provide an answer. You can facilitate discussion about the standard in here.
Loading comments...