ISO 6502:1999
(Main)Rubber — Guide to the use of curemeters
Rubber — Guide to the use of curemeters
Caoutchouc — Guide pour l'emploi des rhéomètres
General Information
- Status
- Withdrawn
- Publication Date
- 01-Dec-1999
- Withdrawal Date
- 01-Dec-1999
- Technical Committee
- ISO/TC 45/SC 2 - Testing and analysis
- Drafting Committee
- ISO/TC 45/SC 2/WG 2 - Visco-elastic properties
- Current Stage
- 9599 - Withdrawal of International Standard
- Start Date
- 12-Jan-2016
- Completion Date
- 14-Feb-2026
Relations
- Effective Date
- 10-Feb-2026
- Effective Date
- 04-Nov-2015
- Revises
ISO 6502:1991 - Rubber — Measurement of vulcanization characteristics with rotorless curemeters - Effective Date
- 15-Apr-2008
Get Certified
Connect with accredited certification bodies for this standard

Smithers Quality Assessments
US management systems and product certification.

DIN CERTCO
DIN Group product certification.
Sponsored listings
Frequently Asked Questions
ISO 6502:1999 is a standard published by the International Organization for Standardization (ISO). Its full title is "Rubber — Guide to the use of curemeters". This standard covers: Rubber — Guide to the use of curemeters
Rubber — Guide to the use of curemeters
ISO 6502:1999 is classified under the following ICS (International Classification for Standards) categories: 83.060 - Rubber. The ICS classification helps identify the subject area and facilitates finding related standards.
ISO 6502:1999 has the following relationships with other standards: It is inter standard links to EN 50290-2-29:2016, ISO 6502:2016, ISO 6502:1991. Understanding these relationships helps ensure you are using the most current and applicable version of the standard.
ISO 6502:1999 is available in PDF format for immediate download after purchase. The document can be added to your cart and obtained through the secure checkout process. Digital delivery ensures instant access to the complete standard document.
Standards Content (Sample)
INTERNATIONAL ISO
STANDARD 6502
Third edition
1999-12-01
Rubber — Guide to the use of curemeters
Caoutchouc — Guide pour l'emploi des rhéomètres
A
Reference number
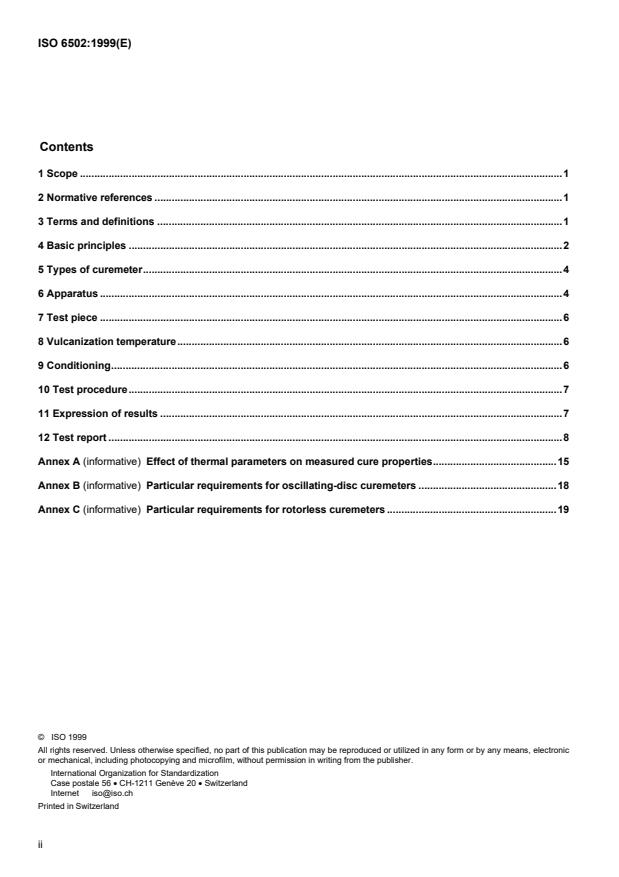
Contents
1 Scope .1
2 Normative references .1
3 Terms and definitions .1
4 Basic principles .2
5 Types of curemeter.4
6 Apparatus .4
7 Test piece .6
8 Vulcanization temperature.6
9 Conditioning.6
10 Test procedure.7
11 Expression of results .7
12 Test report .8
Annex A (informative) Effect of thermal parameters on measured cure properties.15
Annex B (informative) Particular requirements for oscillating-disc curemeters .18
Annex C (informative) Particular requirements for rotorless curemeters .19
© ISO 1999
All rights reserved. Unless otherwise specified, no part of this publication may be reproduced or utilized in any form or by any means, electronic
or mechanical, including photocopying and microfilm, without permission in writing from the publisher.
International Organization for Standardization
Case postale 56 • CH-1211 Genève 20 • Switzerland
Internet iso@iso.ch
Printed in Switzerland
ii
©
ISO ISO 6502:1999(E)
Foreword
ISO (the International Organization for Standardization) is a worldwide federation of national standards bodies (ISO
member bodies). The work of preparing International Standards is normally carried out through ISO technical
committees. Each member body interested in a subject for which a technical committee has been established has
the right to be represented on that committee. International organizations, governmental and non-governmental, in
liaison with ISO, also take part in the work. ISO collaborates closely with the International Electrotechnical
Commission (IEC) on all matters of electrotechnical standardization.
International Standards are drafted in accordance with the rules given in the ISO/IEC Directives, Part 3.
Draft International Standards adopted by the technical committees are circulated to the member bodies for voting.
Publication as an International Standard requires approval by at least 75 % of the member bodies casting a vote.
International Standard ISO 6502 was prepared by Technical Committee ISO/TC 45, Rubber and rubber products,
Subcommittee SC 2, Physical and degradation tests.
This third edition cancels and replaces the second edition (ISO 6502:1991), which has been technically revised.
Annexes A, B and C of this International Standard are for information only.
iii
©
Introduction
Whilst reviewing the previous edition of this International Standard, it became clear that a number of different
curemeters were available and that significant developments had taken place, especially with the rotorless types.
Rather than specify individual rotorless instruments, possibly restricting future developments, it was felt that a more
general document was required. Accordingly, it was decided to provide guidance and assistance in the design and
use of curemeters generally.
iv
©
INTERNATIONAL STANDARD ISO ISO 6502:1999(E)
Rubber — Guide to the use of curemeters
WARNING — Persons using this International Standard should be familiar with normal laboratory practice.
This standard does not purport to address all of the safety problems, if any, associated with its use. It is
the responsibility of the user to establish appropriate safety and health practices and to ensure compliance
with any national regulatory conditions.
1 Scope
This International Standard provides guidance on the determination of vulcanization characteristics of rubber
compounds by means of curemeters.
2 Normative references
The following normative documents contain provisions which, through reference in this text, constitute provisions of
this International Standard. For dated references, subsequent amendments to, or revisions of, any of these
publications do not apply. However, parties to agreements based on this International Standard are encouraged to
investigate the possibility of applying the most recent editions of the normative documents indicated below. For
undated references, the latest edition of the normative document referred to applies. Members of ISO and IEC
maintain registers of currently valid International Standards.
ISO 1382:1996, Rubber — Vocabulary.
ISO 3417:1991, Rubber — Measurement of vulcanization characteristics with the oscillating disc curemeter.
3 Terms and definitions
For the purposes of this International Standard, the terms and definitions given in ISO 1382 apply, plus the
following:
3.1
ocscillating-disc curemeter
ODC
a curemeter consisting of a biconical disc oscillated within a temperature-controlled die cavity containing the test
piece
3.2
rotorless curemeter
RCM
a curemeter consisting of two dies forming a temperature-controlled cavity, one of which is moved relative to the
other to apply a stress or strain to the test piece
NOTE Types of rotorless curemeter are listed in clause 5 and illustrated in Figures 3 to 7.
©
3.3
marching-modulus cure
a type of vulcanization during which the modulus does not reach a maximum value but, after a rapid rise, continues
to rise slowly at the vulcanization temperature
3.4
vulcanization characteristics
characteristics which may be taken from a vulcanization curve (see Figure 1).
NOTE More explanations are given in clause 4.
3.5
stiffness
a general term used for modulus or resistance to stress
NOTE Force and torque have not been defined since they have a generally accepted scientific meaning.
4 Basic principles
The properties of a rubber compound change during the course of vulcanization, and the vulcanization
characteristics can be determined by measuring properties as a function of time and temperature. Vulcanization
characteristics are most commonly determined using instruments known as curemeters in which a cyclic stress or
strain is applied to a test piece and the associated strain or force is measured. Normally, the test is carried out at a
predetermined constant temperature and the measure of stiffness recorded continuously as a function of time.
The stiffness of the rubber increases as vulcanization proceeds. Vulcanization is complete when the recorded
stiffness rises to a plateau value or to a maximum and then declines (see Figure 1). In the latter case, the decrease
in stiffness is caused by reversion. In cases where the recorded stiffness continues to rise (marching-modulus
cure), vulcanization is deemed to be complete after a specified time. The time required to obtain a vulcanization
curve is a function of the test temperature and the characteristics of the rubber compound. Curves analogous to
Figure 1 are obtained for a curemeter in which strain is measured.
The following vulcanization characteristics can be taken from the measure of stiffness against time curve (Figure 1):
Minimum force or torque F or M
L L
Force or torque at a specified time tF or M
t t
Scorch time (time to incipient cure) t
sx
Time to a percentage y of full cure from minimum force or torque t' (y)
c
Plateau force or torque F or M
HF HF
Maximum force or torque (reverting cure) F or M
HR HR
Force or torque value attained after a specified time (marching-modulus cure) F or M
H H
The minimum force or torque F or M characterizes the stiffness of the unvulcanized compound at the curing
L L
temperature.
The scorch time (time to incipient cure) t is a measure of the processing safety of the compound.
sx
The time t' (y) and the corresponding forces or torques give information on the progress of cure. The optimum cure
c
is often taken as t' (90).
c
The highest force or torque is a measure of the stiffness of the vulcanized rubber at the curing temperature.
NOTE The term denotes force, and the term denotes torque.
F M
©
ISO ISO 6502:1999(E)
Key
1 Sinusoidal curve
2 Envelope curve
3 Vulcanization curve with steady increase to F or M at time t at end of test (marching-modulus cure)
H H e
4 Vulcanization curve with plateau at F or M (plateau cure)
HF HF
5 Vulcanization curve with maximum F or M at time t (reverting cure)
HR HR max
a) Vulcanization curve F or M = f(t)
b) Method of evaluation
Figure 1 — Typical vulcanization curve and method of evaluation
©
5 Types of curemeter
Three types of curemeter have found widespread use:
Oscillating-disc;
Reciprocating-paddle;
Rotorless.
The reciprocating-paddle type was popular, but is now much less used and is not considered further in this guide.
Rotorless curemeters can be subdivided into three forms:
Reciprocating (linear strain);
Oscillating (torsion) unsealed cavity;
Oscillating (torsion) sealed cavity.
Oscillating types may have a biconical die, a flat-plate die or be of top-hat section.
Other geometries are possible, for example with a vibrating probe or needle.
The oscillating-disc curemeter has for many years been the most widely used type of instrument, but more recently
the rotorless type of curemeter has increased greatly in popularity. The principal advantages of the rotorless type
are that the specified temperature is reached in a shorter time after insertion of the test piece into the die cavity and
there is better temperature distribution in the test piece (see annex A).
6 Apparatus
6.1 General
A curemeter consists of two heated dies with means of closing them under a specified force to form a die cavity
containing the test piece, a means of oscillating a rotor within the cavity, or alternatively oscillating or reciprocating
one of the dies relative to the other, and a means of measuring and recording the force or torque required to
produce the relative movement, or the movement produced by a given applied force or torque. In addition, with
sealed rotorless torsion systems, reaction torque on the stationary die opposite the moving die may be measured.
The general arrangements for oscillating-disc and rotorless curemeters are shown in Figures 2 to 7.
6.2 Die cavity
The dies should be manufactured from a non-deforming material. The surface of the dies should minimize the effect
of contamination and be hard so as to prevent wear. A minimum Rockwell hardness of 50 HRC, or equivalent, is
recommended. The tolerances necessary on the dimensions of the dies will depend on the particular design, but as
a general guide the dimensions of the cavity should be controlled to ± 0,2 %.
The top and bottom surfaces of the cavity should have a pattern of grooves of dimensions sufficient to prevent
slippage of the rubber test piece.
Holes should be provided in both the upper and lower dies to accommodate temperature sensors. The positions of
the sensors relative to the cavity should be controlled to ensure reproducible response.
In the case of oscillating-disc instruments, one die requires a central hole to allow insertion of the die stem. A seal of
suitable low, constant friction should be provided in this hole to prevent material leaking from the cavity.
©
ISO ISO 6502:1999(E)
Suitable means should be employed by design of dies or otherwise to apply pressure to the test piece throughout
the test to minimize slippage between the disc and the rubber. A positive pressure is also important to exclude air
which may affect the cure of, for example, peroxide-cured rubbers and to prevent any tendency for the rubber to
become porous.
The dimensions of the die cavity may be checked by measuring the dimensions of the vulcanized test piece. For
biconical-die rotorless curemeters, particular attention should be paid to the thin central portion, the thickness of
which depends on the die gap. For oscillating-disc curemeters, the vulcanized test piece should be cut in half and
checked to see that it is symmetrical. Any asymmetry indicates that the rotor height has been set incorrectly.
The dimensions of the cavity and of the vulcanized test piece will not be identical because of the effect of mould
shrinkage.
6.3 Die closure
The dies are closed and held closed during the test by, for example, a pneumatic cylinder.
A force of 11 kN ± 0,5 kN is recommended for oscillating-disc instruments with a mating-surface area between the
dies of approximately 1 400 mm .
In unsealed rotorless instruments, the dies are not completely closed but a small clearance is left which should be
between 0,05 mm and 0,2 mm. For sealed cavities, no gap should exist at the edges of the die cavity. The minimum
closing force required depends on the clearance area. As a general guide, a minimum of 7 kN to 8 kN is
recommended.
6.4 Moving member
The disc in an oscillating-disc instrument should be manufactured from a non-deforming material having a minimum
hardness of 50 HRC. Both the top and bottom surfaces should have a pattern of grooves to prevent slippage of the
rubber test piece.
The disc should be biconical in shape to give an approximately uniform shear rate, and its diameter should be
controlled to ± 0,03 % and the cone angle to ± 1,3 %.
The moving member in a rotorless instrument is one of the dies. The shape of the die cavity should be a plane disc
for reciprocating types and either biconical, flat plate or “top hat” in the oscillating type to produce a substantially
uniform shear rate.
The drive linkage should be sufficiently stiff to prevent significant deformation.
6.5 Movement
The frequency of oscillation or reciprocation should be between 0,05 Hz and 2 Hz, and tests may be made at two or
more frequencies. If a single frequency is selected, 1,7 Hz ± 0,1 Hz is recommended.
Generally, greater sensitivity can be obtained with larger amplitudes, but the amplitude that can be used in practice
is restricted by the possibility of slippage between the test pieces and the die surface or rotor.
For oscillating-disc curemeters, an amplitude of ± 1° is recommended, but ± 3° may be possible and advantageous
in some circumstances.
For rotorless curemeters, the range may be between ± 0,1° and ± 2° or, for reciprocating types, between ± 0,01 mm
and ± 0,1 mm.
The tolerance on amplitude should be ± 2 % apart from the instruments considered in ISO 3417, and the drive
should be sufficiently powerful and stiff to substantially maintain the amplitude under load.
©
6.6 Stiffness measurement
The means of measuring force or torque should be rigidly coupled to a die or rotor and be capable of measuring the
resultant force or torque to an accuracy of ± 1 % of the force or torque range. This tolerance should include any
errors due to deformation of the measuring device and its coupling and of the output device.
The recorder to continuously monitor force or torque should have a response time for full-scale deflection of 1 s or
less.
6.7 Heating and temperature control
The heating and temperature control system should be capable of producing a reproducible and evenly distributed
temperature in the dies and permit rapid and reproducible temperature recovery after insertion of the test piece.
Close control of these parameters is necessary for the precise measurement of vulcanization characteristics.
The temperature-measuring system should enable temperature to be measured to a resolution of ± 0,1 °C over the
range 100 °C to 200 °C. The temperature controllers should enable the dies to be controlled to an accuracy of
± 0,3 °C at the steady state. The temperature of the dies should recover after insertion of a test piece at
23 °C ± 5 °C to within 0,3 °C within 3 min for biconical-die rotorless instruments. For flat-plate-die rotorless
instruments, the recovery range should be ± 1 °C within 1,5 min at the test temperature of 150 °C.
The effect of temperature distribution on measured cure rate is discussed in annex A.
6.8 Calibration
Calibration of curemeters should be carried out in accordance with the manufacturer’s instructions. The force or
torque should be determined at several points over the range(s) used but, additionally, it may be useful to have
provision for making in-use checks.
Stable standard rubber compounds may also be tested periodically to check for consistent
...


Questions, Comments and Discussion
Ask us and Technical Secretary will try to provide an answer. You can facilitate discussion about the standard in here.
Loading comments...