ASTM C1327-15
(Test Method)Standard Test Method for Vickers Indentation Hardness of Advanced Ceramics
Standard Test Method for Vickers Indentation Hardness of Advanced Ceramics
SIGNIFICANCE AND USE
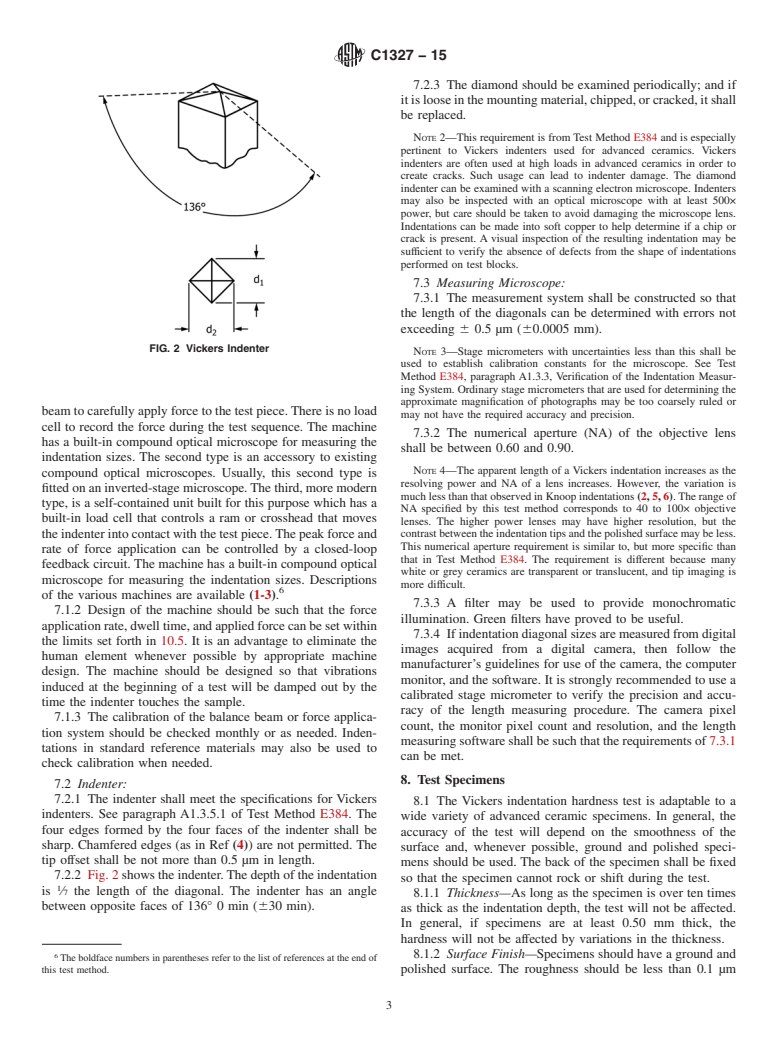
5.1 For advanced ceramics, Vickers indenters are used to create indentations whose surface-projected diagonals are measured with optical microscopes. The Vickers indenter creates a square impression from which two surface-projected diagonal lengths are measured. Vickers hardness is calculated from the ratio of the applied force to the area of contact of the four faces of the undeformed indenter. (In contrast, Knoop indenters are also used to measure hardness, but Knoop hardness is calculated from the ratio of the applied force to the projected area on the specimen surface.)
5.2 Vickers indentation hardness is one of many properties that is used to characterize advanced ceramics. Attempts have been made to relate Vickers indentation hardness to other hardness scales, but no generally accepted methods are available. Such conversions are limited in scope and should be used with caution, except for special cases where a reliable basis for the conversion has been obtained by comparison tests.
5.3 Vickers indentation diagonal lengths are approximately 2.8 times shorter than the long diagonal of Knoop indentations, and the indentation depth is approximately 1.5 times deeper than Knoop indentations made at the same force.
5.4 Vickers indentations are influenced less by specimen surface flatness, parallelism, and surface finish than Knoop indentations, but these parameters must be considered nonetheless.
5.5 Vickers indentations are much more likely to cause cracks in advanced ceramics than Knoop indentations. The cracks may influence the measured hardness by fundamentally altering the deformation processes that contribute to the formation of an impression, and they may impair or preclude measurement of the diagonal lengths due to excessive damage at the indentation tips or sides.
5.6 A full hardness characterization includes measurements over a broad range of indentation forces. Vickers hardness of ceramics usually decreases with increasing indentation size o...
SCOPE
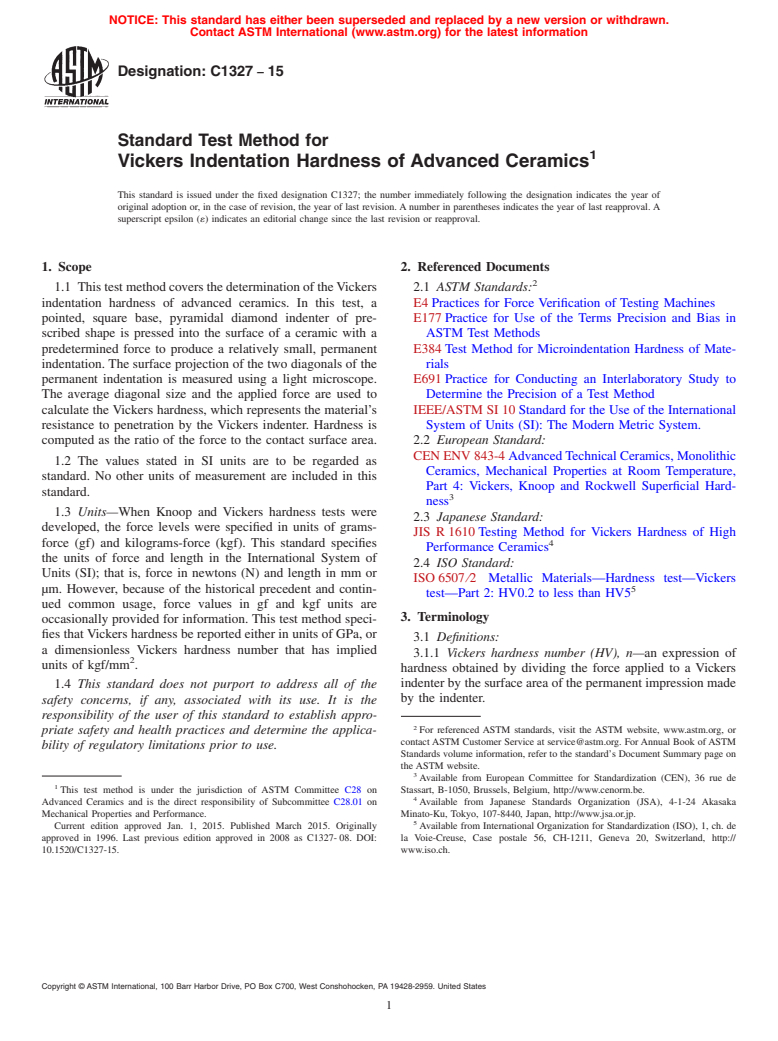
1.1 This test method covers the determination of the Vickers indentation hardness of advanced ceramics. In this test, a pointed, square base, pyramidal diamond indenter of prescribed shape is pressed into the surface of a ceramic with a predetermined force to produce a relatively small, permanent indentation. The surface projection of the two diagonals of the permanent indentation is measured using a light microscope. The average diagonal size and the applied force are used to calculate the Vickers hardness, which represents the material’s resistance to penetration by the Vickers indenter. Hardness is computed as the ratio of the force to the contact surface area.
1.2 The values stated in SI units are to be regarded as standard. No other units of measurement are included in this standard.
1.3 Units—When Knoop and Vickers hardness tests were developed, the force levels were specified in units of grams-force (gf) and kilograms-force (kgf). This standard specifies the units of force and length in the International System of Units (SI); that is, force in newtons (N) and length in mm or μm. However, because of the historical precedent and continued common usage, force values in gf and kgf units are occasionally provided for information. This test method specifies that Vickers hardness be reported either in units of GPa, or a dimensionless Vickers hardness number that has implied units of kgf/mm2.
1.4 This standard does not purport to address all of the safety concerns, if any, associated with its use. It is the responsibility of the user of this standard to establish appropriate safety and health practices and determine the applicability of regulatory limitations prior to use.
General Information
Relations
Buy Standard
Standards Content (Sample)
NOTICE: This standard has either been superseded and replaced by a new version or withdrawn.
Contact ASTM International (www.astm.org) for the latest information
Designation: C1327 − 15
Standard Test Method for
1
Vickers Indentation Hardness of Advanced Ceramics
This standard is issued under the fixed designation C1327; the number immediately following the designation indicates the year of
original adoption or, in the case of revision, the year of last revision.Anumber in parentheses indicates the year of last reapproval.A
superscript epsilon (´) indicates an editorial change since the last revision or reapproval.
1. Scope 2. Referenced Documents
2
1.1 ThistestmethodcoversthedeterminationoftheVickers 2.1 ASTM Standards:
indentation hardness of advanced ceramics. In this test, a E4Practices for Force Verification of Testing Machines
pointed, square base, pyramidal diamond indenter of pre- E177Practice for Use of the Terms Precision and Bias in
scribed shape is pressed into the surface of a ceramic with a ASTM Test Methods
predetermined force to produce a relatively small, permanent E384Test Method for Microindentation Hardness of Mate-
indentation. The surface projection of the two diagonals of the rials
permanent indentation is measured using a light microscope. E691Practice for Conducting an Interlaboratory Study to
The average diagonal size and the applied force are used to Determine the Precision of a Test Method
calculate the Vickers hardness, which represents the material’s IEEE/ASTM SI 10Standard for the Use of the International
resistance to penetration by the Vickers indenter. Hardness is System of Units (SI): The Modern Metric System.
computed as the ratio of the force to the contact surface area. 2.2 European Standard:
CENENV843-4AdvancedTechnicalCeramics,Monolithic
1.2 The values stated in SI units are to be regarded as
Ceramics, Mechanical Properties at Room Temperature,
standard. No other units of measurement are included in this
Part 4: Vickers, Knoop and Rockwell Superficial Hard-
standard.
3
ness
1.3 Units—When Knoop and Vickers hardness tests were
2.3 Japanese Standard:
developed, the force levels were specified in units of grams-
JIS R1610Testing Method for Vickers Hardness of High
4
force (gf) and kilograms-force (kgf). This standard specifies
Performance Ceramics
the units of force and length in the International System of
2.4 ISO Standard:
Units (SI); that is, force in newtons (N) and length in mm or
ISO6507⁄2 Metallic Materials—Hardness test—Vickers
µm. However, because of the historical precedent and contin- 5
test—Part 2: HV0.2 to less than HV5
ued common usage, force values in gf and kgf units are
3. Terminology
occasionally provided for information. This test method speci-
fies thatVickers hardness be reported either in units of GPa, or
3.1 Definitions:
a dimensionless Vickers hardness number that has implied
3.1.1 Vickers hardness number (HV), n—an expression of
2
units of kgf/mm .
hardness obtained by dividing the force applied to a Vickers
indenterbythesurfaceareaofthepermanentimpressionmade
1.4 This standard does not purport to address all of the
by the indenter.
safety concerns, if any, associated with its use. It is the
responsibility of the user of this standard to establish appro-
2
For referenced ASTM standards, visit the ASTM website, www.astm.org, or
priate safety and health practices and determine the applica-
contactASTM Customer Service at service@astm.org. ForAnnual Book ofASTM
bility of regulatory limitations prior to use.
Standards volume information, refer to the standard’s Document Summary page on
the ASTM website.
3
Available from European Committee for Standardization (CEN), 36 rue de
1
This test method is under the jurisdiction of ASTM Committee C28 on Stassart, B-1050, Brussels, Belgium, http://www.cenorm.be.
4
Advanced Ceramics and is the direct responsibility of Subcommittee C28.01 on Available from Japanese Standards Organization (JSA), 4-1-24 Akasaka
Mechanical Properties and Performance. Minato-Ku, Tokyo, 107-8440, Japan, http://www.jsa.or.jp.
5
Current edition approved Jan. 1, 2015. Published March 2015. Originally Available from International Organization for Standardization (ISO), 1, ch. de
approved in 1996. Last previous edition approved in 2008 as C1327-08. DOI: la Voie-Creuse, Case postale 56, CH-1211, Geneva 20, Switzerland, http://
10.1520/C1327-15. www.iso.ch.
Copyright © ASTM International, 100 Barr Harbor Drive, PO Box C700, West Conshohocken, PA 19428-2959. United States
1
---------------------- Page: 1 ----------------------
C1327 − 15
3.1.2 Vickers indenter, n—a square-based pyramidal-shaped
diamond indenter with face angles of 136° 00'.
4. Summary of Test Method
4.1 This test method describes an indentation hardness test
using a calibrated machine to force a pointed, square base,
pyramidal diamond indenter having specified face angles,
under a predetermined force, into the surface of the material
under test and to measure the surface-projecte
...
This document is not an ASTM standard and is intended only to provide the user of an ASTM standard an indication of what changes have been made to the previous version. Because
it may not be technically possible to adequately depict all changes accurately, ASTM recommends that users consult prior editions as appropriate. In all cases only the current version
of the standard as published by ASTM is to be considered the official document.
Designation: C1327 − 08 C1327 − 15
Standard Test Method for
1
Vickers Indentation Hardness of Advanced Ceramics
This standard is issued under the fixed designation C1327; the number immediately following the designation indicates the year of
original adoption or, in the case of revision, the year of last revision. A number in parentheses indicates the year of last reapproval. A
superscript epsilon (´) indicates an editorial change since the last revision or reapproval.
1. Scope
1.1 This test method covers the determination of the Vickers indentation hardness of advanced ceramics. In this test, a pointed,
square base, pyramidal diamond indenter of prescribed shape is pressed into the surface of a ceramic with a predetermined force
to produce a relatively small, permanent indentation. The surface projection of the two diagonals of the permanent indentation is
measured using a light microscope. The average diagonal size and the applied force are used to calculate the Vickers hardness,
which represents the material’s resistance to penetration by the Vickers indenter. Hardness is computed as the ratio of the force
to the contact surface area.
1.2 The values stated in SI units are to be regarded as standard. No other units of measurement are included in this standard.
1.3 Units—When Knoop and Vickers hardness tests were developed, the force levels were specified in units of grams-force (gf)
and kilograms-force (kgf). This standard specifies the units of force and length in the International System of Units (SI); that is,
force in newtons (N) and length in mm or μm. However, because of the historical precedent and continued common usage, force
values in gf and kgf units are occasionally provided for information. This test method specifies that Vickers hardness be reported
2
either in units of GPa, or a dimensionless Vickers hardness number that has implied units of kgf/mm .
1.4 This standard does not purport to address all of the safety concerns, if any, associated with its use. It is the responsibility
of the user of this standard to establish appropriate safety and health practices and determine the applicability of regulatory
limitations prior to use.
2. Referenced Documents
2
2.1 ASTM Standards:
E4 Practices for Force Verification of Testing Machines
E177 Practice for Use of the Terms Precision and Bias in ASTM Test Methods
E384 Test Method for Knoop and Vickers Hardness of Materials
E691 Practice for Conducting an Interlaboratory Study to Determine the Precision of a Test Method
IEEE/ASTM SI 10 Standard for the Use of the International System of Units (SI): The Modern Metric System.
2.2 European Standard:
CEN ENV 843-4 Advanced Technical Ceramics, Monolithic Ceramics, Mechanical Properties at Room Temperature, Part 4:
3
Vickers, Knoop and Rockwell Superficial Hardness
2.3 Japanese Standard:
4
JIS R 1610 Testing Method for Vickers Hardness of High Performance Ceramics
2.4 ISO Standard:
5
ISO 6507 ⁄2 Metallic Materials—Hardness test—Vickers test—Part 2: HV0.2 to less than HV5
3. Terminology
3.1 Definitions:
1
This test method is under the jurisdiction of ASTM Committee C28 on Advanced Ceramics and is the direct responsibility of Subcommittee C28.01 on Mechanical
Properties and Performance.
Current edition approved Aug. 1, 2008Jan. 1, 2015. Published September 2008March 2015. Originally approved in 1996. Last previous edition approved in 20032008 as
C1327 – 03.C1327- 08. DOI: 10.1520/C1327-08.10.1520/C1327-15.
2
For referenced ASTM standards, visit the ASTM website, www.astm.org, or contact ASTM Customer Service at service@astm.org. For Annual Book of ASTM Standards
volume information, refer to the standard’s Document Summary page on the ASTM website.
3
Available from European Committee for Standardization (CEN), 36 rue de Stassart, B-1050, Brussels, Belgium, http://www.cenorm.be.
4
Available from Japanese Standards Organization (JSA), 4-1-24 Akasaka Minato-Ku, Tokyo, 107-8440, Japan, http://www.jsa.or.jp.
5
Available from International Organization for Standardization (ISO), 1, ch. de la Voie-Creuse, Case postale 56, CH-1211, Geneva 20, Switzerland, http://www.iso.ch.
Copyright © ASTM International, 100 Barr Harbor Drive, PO Box C700, West Conshohocken, PA 19428-2959. United States
1
---------------------- Page: 1 ----------------------
C1327 − 15
FIG. 1 Indentation Size Effect (ISE) Curves for a Ceramic (Sometimes they continuously approach a plateau hardness at larger forces,
but sometimes they can have a shift or step if cracking occurs.)
3.1.1 Vickers hardness number (HV), n—a
...


Questions, Comments and Discussion
Ask us and Technical Secretary will try to provide an answer. You can facilitate discussion about the standard in here.