ASTM A100-93(2000)
(Specification)Standard Specification for Ferrosilicon
Standard Specification for Ferrosilicon
SCOPE
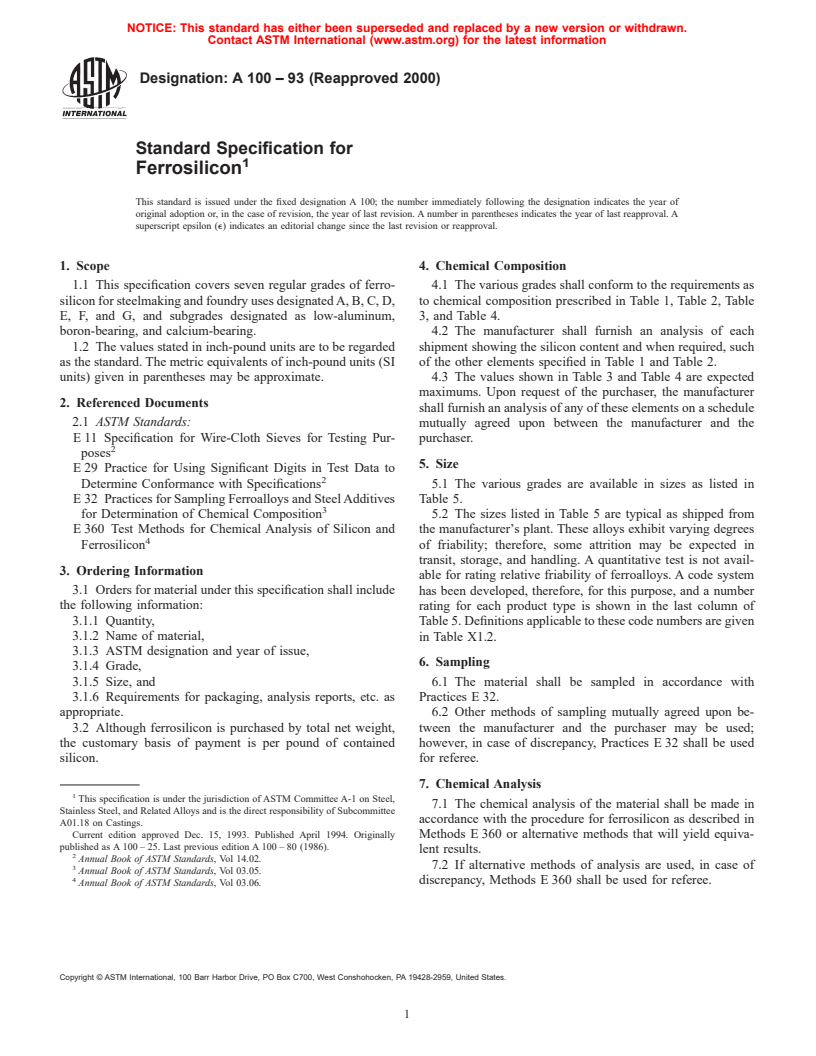
1.1 This specification covers seven regular grades of ferrosilicon for steelmaking and foundry uses designated A, B, C, D, E, F, and G, and subgrades designated as low-aluminum, boron-bearing, and calcium-bearing.
1.2 The values stated in inch-pound units are to be regarded as the standard. The metric equivalents of inch-pound units (SI units) given in parentheses may be approximate.
General Information
Relations
Standards Content (Sample)
NOTICE: This standard has either been superseded and replaced by a new version or withdrawn.
Contact ASTM International (www.astm.org) for the latest information
Designation: A 100 – 93 (Reapproved 2000)
Standard Specification for
Ferrosilicon
This standard is issued under the fixed designation A 100; the number immediately following the designation indicates the year of
original adoption or, in the case of revision, the year of last revision. A number in parentheses indicates the year of last reapproval. A
superscript epsilon (e) indicates an editorial change since the last revision or reapproval.
1. Scope 4. Chemical Composition
1.1 This specification covers seven regular grades of ferro- 4.1 The various grades shall conform to the requirements as
silicon for steelmaking and foundry uses designated A, B, C, D, to chemical composition prescribed in Table 1, Table 2, Table
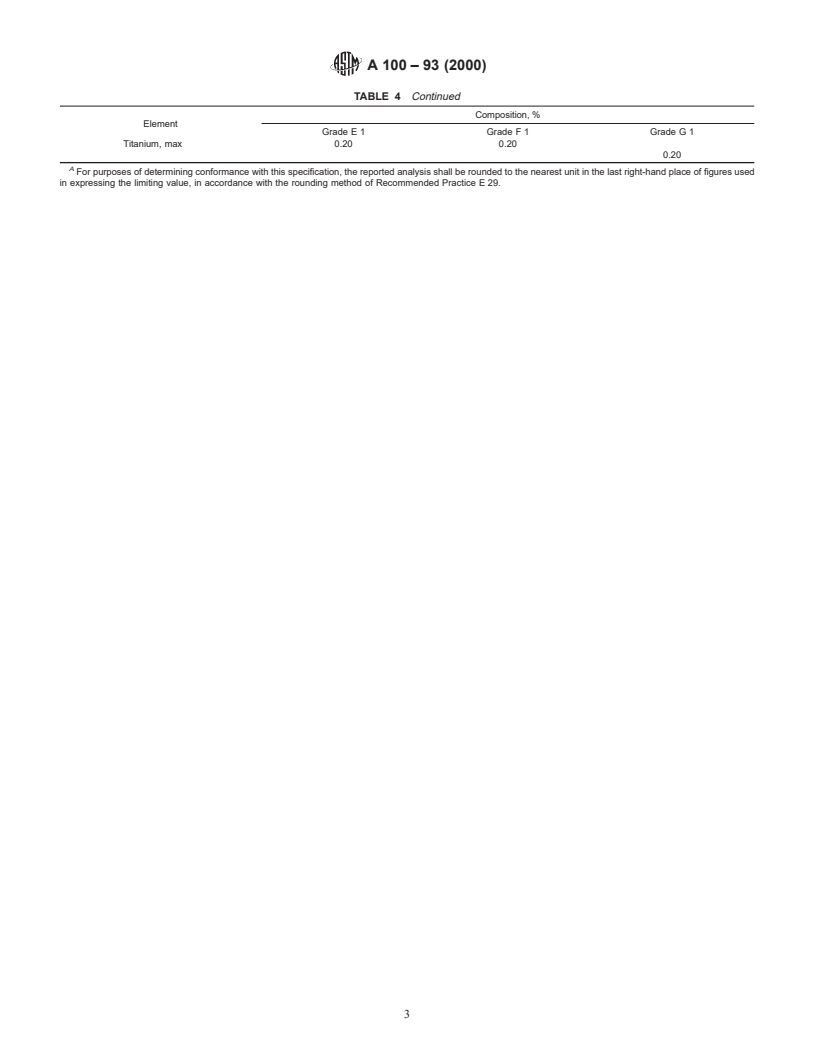
E, F, and G, and subgrades designated as low-aluminum, 3, and Table 4.
boron-bearing, and calcium-bearing. 4.2 The manufacturer shall furnish an analysis of each
1.2 The values stated in inch-pound units are to be regarded shipment showing the silicon content and when required, such
as the standard. The metric equivalents of inch-pound units (SI of the other elements specified in Table 1 and Table 2.
units) given in parentheses may be approximate. 4.3 The values shown in Table 3 and Table 4 are expected
maximums. Upon request of the purchaser, the manufacturer
2. Referenced Documents
shall furnish an analysis of any of these elements on a schedule
2.1 ASTM Standards:
mutually agreed upon between the manufacturer and the
E 11 Specification for Wire-Cloth Sieves for Testing Pur- purchaser.
poses
5. Size
E 29 Practice for Using Significant Digits in Test Data to
Determine Conformance with Specifications 5.1 The various grades are available in sizes as listed in
E 32 Practices for Sampling Ferroalloys and Steel Additives Table 5.
for Determination of Chemical Composition 5.2 The sizes listed in Table 5 are typical as shipped from
E 360 Test Methods for Chemical Analysis of Silicon and the manufacturer’s plant. These alloys exhibit varying degrees
Ferrosilicon of friability; therefore, some attrition may be expected in
transit, storage, and handling. A quantitative test is not avail-
3. Ordering Information
able for rating relative friability of ferroalloys. A code system
3.1 Orders for material under this specification shall include has been developed, therefore, for this purpose, and a number
the following information:
rating for each product type is shown in the last column of
3.1.1 Quantity, Table 5. Definitions applicable to these code numbers are given
3.1.2 Name of material,
in Table X1.2.
3.1.3 ASTM designation and year of issue,
6. Sampling
3.1.4 Grade,
3.1.5 Size, and 6.1 The material shall be sampled in accordance with
3.1.6 Requirements for packaging, analysis reports, etc. as Practices E 32.
appropriate. 6.2 Other methods of sampling mutually agreed upon be-
3.2 Although ferrosilicon is purchased by total net weight, tween the manufacturer and the purchaser may be used;
the customary basis of payment is per pound of contained however, in case of discrepancy, Practices E 32 shall be used
silicon. for referee.
7. Chemical Analysis
This specification is under the jurisdiction of ASTM Committee A-1 on Steel,
7.1 The chemical analysis of the material shall be made in
Stainless Steel, and Related Alloys and is the direct responsibility of Subcommittee
accordance with the procedure for ferrosilicon as described in
A01.18 on Castings.
Current edition approved Dec. 15, 1993. Published April 1994. Originally Methods E 360 or alternative methods that will yield equiva-
published as A 100 – 25. Last previous edition A 100 – 80 (1986).
lent results.
Annual Book of ASTM Standards, Vol 14.02.
7.2 If alternative methods of analysis are used, in case of
Annual Book of ASTM Standards, Vol 03.05.
discrepancy, Methods E 360 shall be used for referee.
Annual Book of ASTM Standards, Vol 03.06.
Copyright © ASTM International, 100 Barr Harbor Drive, PO Box C700, West Conshohocken, PA 19428-2959, United States.
A 100 – 93 (2000)
7.3 Where no method is given in Methods E 360 for the 9. Rejection
analysis for a particular element, the analysis shall be made in
9.1 Any claims or rejections shall be made to the manufac-
accordance with a procedure agreed upon between the manu-
turer within 45 days from receipt of material by the purchaser.
facturer and the purchaser.
10. Packaging
8. Inspection
8.1 The manufacturer shall afford the inspector representing
10.1 The material shall be packaged in sound containers, or
the purchaser all reasonable facilities, without charge, to satisfy
shipped in bulk, in such a manner that none of the product is
him that the material is being furnished in accordance with this
lost or contaminated in shipment.
specification.
A
TABLE 1 Chemical Requirements —Steel Making Grades
Composition, %
Element
B,C C D E
Grade C Grade D Grade E Grade F Grade G
Silicon 74.0–79.0 65.0–70.0 47.0–51.0 20.0–24.0 14.0–17.0
Carbon, max 0.10 0.10 0.10 0.50 0.70
Sulfur, max 0.025 0.025 0.025 0.025 0.025
Phosphorus, max 0.035 0.035 0.040 0.120 0.120
Aluminum, max 1.50 1.25 1.25 1.00 0.75
Manganese, max 0.40 0.50 0.75 1.00 1.25
A
For purposes of determining conformance with this specification, the reported analysis shall be rounded to the nearest unit in the last right-hand place of figures used
in expressing the limiting value, in accordance with the rounding method of Recommended Practice E 29.
B
For low-aluminum grades, aluminum specification is 0.50 %, max.
C
A high purity grade is available (0.10 max, aluminum).
D
For low-aluminum grade, aluminum specification is 0.40 %, max.
E
Manganese content over 1.25 % may be specified as agreed.
A
TABLE 2 Chemical Requirements —Foundry Grades
Composition, %
Element
B,C C C,D
Grade C 1 Grade C 2 Grade E 1 Grade F 1 Grade G 1
Silicon 74.0–79.0 74.0–79.0 47.0–51.0 20.0–24.0 14.0–17.0
Carbon, max 0.10 0.10 0.10 0.50 0.70
Sulfur, max 0.025 0.025 0.025 0.025 0.025
Phosphorus, max 0.035 0.035 0.040 0.120 0.120
Aluminum 1.00–1.50 1.00–1.50 1.25 max 1.00 max 0.75 max
Manganese, max 0.40 0.40 0.75 1.00 1.25
Calcium, min 0.50 1.50 . . . . . . . . .
Boron . . . . . . 0.04–0.10 0.04–0.10 0.04–0.10
A
For purposes of determining conformance with this specification, the reported analysis shall be rounded to the nearest unit in the last right-hand place of figures used
in expressing the limiting value, in accordance with the rounding method of Recommended Practice E 29.
B
Grade E in Table 1 is suitable for foundry use.
C
Boron content may be specified within a range from 0.04 to 0.10 %. When shipped in 3000-lb containers, the average boron content of a container shall not vary from
the average reported for the entire ship
...


Questions, Comments and Discussion
Ask us and Technical Secretary will try to provide an answer. You can facilitate discussion about the standard in here.