ASTM D1430-11(2016)
(Classification)Standard Classification System for Polychlorotrifluoroethylene (PCTFE) Plastics
Standard Classification System for Polychlorotrifluoroethylene (PCTFE) Plastics
ABSTRACT
This classification system covers polychlorotrifluoroethylene (PCTFE) plastics that consist of at least 90% chlorotrifluoroethylene and are suitable for extrusion and for compression and injection molding. The remaining 10% may include chemical modifications, such as co-monomers, but not colorants, fillers, plasticizers, or mechanical blends with other resins. PCTFE materials in powders and pellets are classified into one group. The group is subdivided into classes based on chemical composition: Class 1; Class 2; and Class 3. These classes are subdivided into grades: Grades 1, 2, 3, and 0; Grades 1, 2, and 0; and Grades 1, 2, and 0; respectively. The molding or extrusion material shall be of uniform composition and so compounded as to conform to the requirements of this classification system. The properties shall be determined in accordance with the following test methods: conditioning; zero strength time; test conditions; deformation under load; melting point; dissipation factor and dielectric constant; and specific gravity.
SCOPE
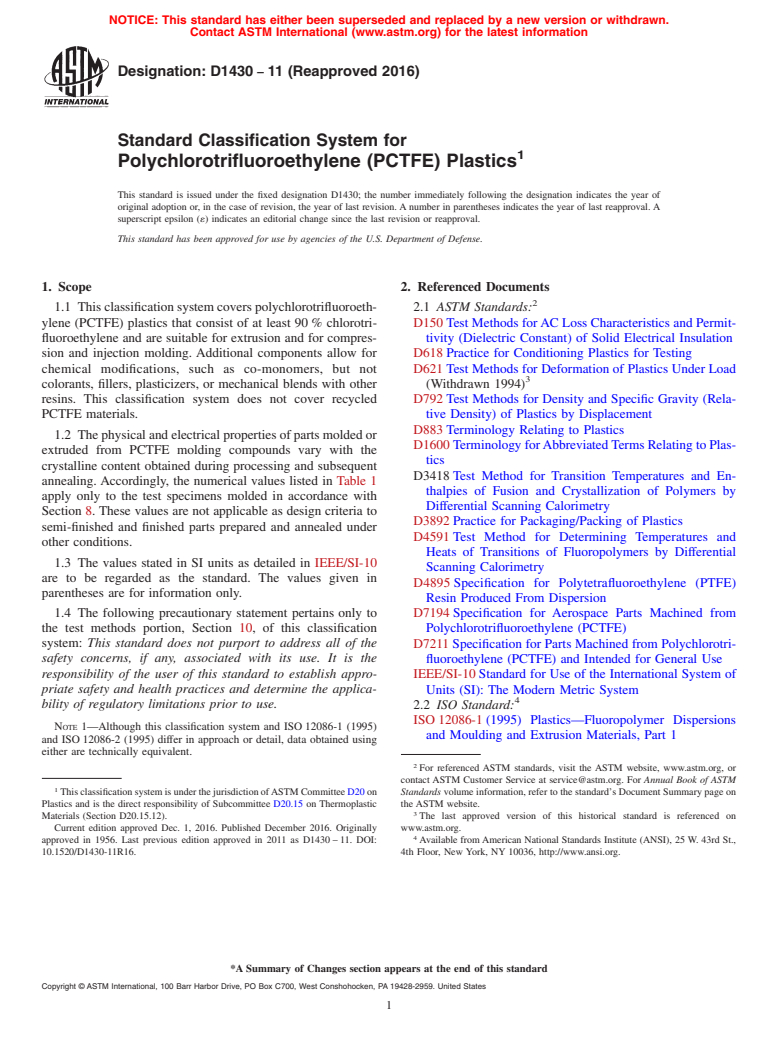
1.1 This classification system covers polychlorotrifluoroethylene (PCTFE) plastics that consist of at least 90 % chlorotrifluoroethylene and are suitable for extrusion and for compression and injection molding. Additional components allow for chemical modifications, such as co-monomers, but not colorants, fillers, plasticizers, or mechanical blends with other resins. This classification system does not cover recycled PCTFE materials.
1.2 The physical and electrical properties of parts molded or extruded from PCTFE molding compounds vary with the crystalline content obtained during processing and subsequent annealing. Accordingly, the numerical values listed in Table 1 apply only to the test specimens molded in accordance with Section 8. These values are not applicable as design criteria to semi-finished and finished parts prepared and annealed under other conditions. (A) See 10.1.7.(B) See 10.1.3.(C) See 10.1.4.(D) Maximum at 1112 N (250 lbf), 24 h, 70°C, %.(E) See 10.1.5.(F) See 10.1.6.(G) See 10.1.6.
1.3 The values stated in SI units as detailed in IEEE/SI-10 are to be regarded as the standard. The values given in parentheses are for information only.
1.4 The following precautionary statement pertains only to the test methods portion, Section 10, of this classification system: This standard does not purport to address all of the safety concerns, if any, associated with its use. It is the responsibility of the user of this standard to establish appropriate safety and health practices and determine the applicability of regulatory limitations prior to use.
Note 1: Although this classification system and ISO 12086-1 (1995) and ISO 12086-2 (1995) differ in approach or detail, data obtained using either are technically equivalent.
General Information
Relations
Buy Standard
Standards Content (Sample)
NOTICE: This standard has either been superseded and replaced by a new version or withdrawn.
Contact ASTM International (www.astm.org) for the latest information
Designation:D1430 −11 (Reapproved 2016)
Standard Classification System for
Polychlorotrifluoroethylene (PCTFE) Plastics
This standard is issued under the fixed designation D1430; the number immediately following the designation indicates the year of
original adoption or, in the case of revision, the year of last revision.Anumber in parentheses indicates the year of last reapproval.A
superscript epsilon (´) indicates an editorial change since the last revision or reapproval.
This standard has been approved for use by agencies of the U.S. Department of Defense.
1. Scope 2. Referenced Documents
1.1 Thisclassificationsystemcoverspolychlorotrifluoroeth- 2.1 ASTM Standards:
ylene (PCTFE) plastics that consist of at least 90% chlorotri- D150Test Methods forAC Loss Characteristics and Permit-
fluoroethylene and are suitable for extrusion and for compres- tivity (Dielectric Constant) of Solid Electrical Insulation
sion and injection molding. Additional components allow for D618Practice for Conditioning Plastics for Testing
chemical modifications, such as co-monomers, but not D621Test Methods for Deformation of Plastics Under Load
colorants, fillers, plasticizers, or mechanical blends with other (Withdrawn 1994)
resins. This classification system does not cover recycled D792Test Methods for Density and Specific Gravity (Rela-
PCTFE materials. tive Density) of Plastics by Displacement
D883Terminology Relating to Plastics
1.2 Thephysicalandelectricalpropertiesofpartsmoldedor
D1600TerminologyforAbbreviatedTermsRelatingtoPlas-
extruded from PCTFE molding compounds vary with the
tics
crystalline content obtained during processing and subsequent
D3418Test Method for Transition Temperatures and En-
annealing.Accordingly, the numerical values listed in Table 1
thalpies of Fusion and Crystallization of Polymers by
apply only to the test specimens molded in accordance with
Differential Scanning Calorimetry
Section 8. These values are not applicable as design criteria to
D3892Practice for Packaging/Packing of Plastics
semi-finished and finished parts prepared and annealed under
D4591Test Method for Determining Temperatures and
other conditions.
Heats of Transitions of Fluoropolymers by Differential
1.3 The values stated in SI units as detailed in IEEE/SI-10
Scanning Calorimetry
are to be regarded as the standard. The values given in
D4895 Specification for Polytetrafluoroethylene (PTFE)
parentheses are for information only.
Resin Produced From Dispersion
1.4 The following precautionary statement pertains only to
D7194Specification for Aerospace Parts Machined from
the test methods portion, Section 10, of this classification Polychlorotrifluoroethylene (PCTFE)
system: This standard does not purport to address all of the
D7211Specification for Parts Machined from Polychlorotri-
safety concerns, if any, associated with its use. It is the fluoroethylene (PCTFE) and Intended for General Use
responsibility of the user of this standard to establish appro-
IEEE/SI-10Standard for Use of the International System of
priate safety and health practices and determine the applica- Units (SI): The Modern Metric System
bility of regulatory limitations prior to use.
2.2 ISO Standard:
ISO12086-1(1995) Plastics—Fluoropolymer Dispersions
NOTE 1—Although this classification system and ISO12086-1 (1995)
and Moulding and Extrusion Materials, Part 1
and ISO12086-2 (1995) differ in approach or detail, data obtained using
either are technically equivalent.
For referenced ASTM standards, visit the ASTM website, www.astm.org, or
contact ASTM Customer Service at service@astm.org. For Annual Book of ASTM
ThisclassificationsystemisunderthejurisdictionofASTMCommitteeD20on Standards volume information, refer to the standard’s Document Summary page on
Plastics and is the direct responsibility of Subcommittee D20.15 on Thermoplastic the ASTM website.
Materials (Section D20.15.12). The last approved version of this historical standard is referenced on
Current edition approved Dec. 1, 2016. Published December 2016. Originally www.astm.org.
approved in 1956. Last previous edition approved in 2011 as D1430–11. DOI: Available fromAmerican National Standards Institute (ANSI), 25 W. 43rd St.,
10.1520/D1430-11R16. 4th Floor, New York, NY 10036, http://www.ansi.org.
*A Summary of Changes section appears at the end of this standard
Copyright © ASTM International, 100 Barr Harbor Drive, PO Box C700, West Conshohocken, PA 19428-2959. United States
D1430−11 (2016)
TABLE 1 Requirements for PCTFE Molded Test Specimens
Properties
Zero Deformation Melting
Specific
F G
Dielectric Constant , max Dissipation Factor , max
A
Group Class Description Grade Strength Under Point,
Gravity,
B C,D E Khz MHz KHz MHz
23/23°C Time, s Load °C
01 1 homopolymer 1 2.10-2.15 100-199 10 210-220 2.70 2.50 0.030 0.012
2 2.10-2.15 200-299 10 210-220 2.70 2.50 0.030 0.012
3 2.10-2.15 300-450 10 210-220 2.70 2.50 0.030 0.012
2 modified
homopolymer 1 2.10-2.12 100-199 15 200-210 2.70 2.50 0.030 0.012
2 2.10-2.12 200-299 15 200-210 2.70 2.50 0.030 0.012
3 copolymer 1 2.08-2.10 100-199 20 190-200 2.70 2.50 0.035 0.015
2 2.07-2.10 200-299 25 190-200 2.70 2.50 0.035 0.015
0 other
A
See 10.1.7.
B
See 10.1.3.
C
See 10.1.4.
D
Maximum at 1112 N (250 lbf), 24 h, 70°C, %.
E
See 10.1.5.
F
See 10.1.6.
G
See 10.1.6.
ISO12086-2(1995) Plastics—Fluoropolymer Dispersions 5. General Requirements
and Moulding and Extrusion Materials, Part 2
5.1 The molding or extrusion material shall be of uniform
composition and so compounded as to conform to the require-
3. Terminology
ments of this classification system.
3.1 Definitions:
6. Detail Requirements
3.1.1 Definitions of terms used in this classification system
shall be in accordance with Terminology D883.
6.1 Test specimens prepared in accordance with Section 9
shall conform to the requirements prescribed for the particular
3.1.2 lot, n—one production run or uniform blend of two or
more production runs. D4895 type and grade in Table 1.
6.2 For finished PCTFE parts made from resin meeting
3.2 Definitions of Terms Specific to This Standard:
Group 01, Class 1, Grade 3 requirements, and intended for
3.2.1 preforming, n—a process to compress the material
aerospace use, detail requirements given in Specification
under pressure in a mold to form a preform.
D7194 shall be followed.
3.2.2 zero strength time (ZST ), n—time measured in accor-
6.3 For finished PCTFE parts made from resin Group 01,
dancewithSection10ofthisclassificationsystemtocheckthe
Class 1, Grade 0, 1, 2, or 3 requirements, and intended for
relative molecular weight of PCTFE material.
general use, detail requirements given in Specification D7211
3.3 Abbreviations:
shall be followed.
3.3.1 Abbreviated terms are in accordance with Terminol-
ogy D1600.
7. Sampling
7.1 Sampling shall be statistically adequate to satisfy the
4. Classification
requirements of 11.4.
4.1 PCTFE materials in powders and pellets are classified
8. Number of Tests
into one group. The group is subdivided into classes based on
chemical composition. These classes are subdivided into
8.1 One set of test specimens as prescribed in Section 9
grades as shown in the Basic Property Table (Table 1).
shall be considered sufficient for testing each batch. The
An example of this classification system is given as follows:
average result for the specimens tested shall conform to the
Group 01 = PCTFE
requirements prescribed in this classification system.
Class 1 = homopolymer
9. Specimen Preparation
Grade 2 = having properties per Table 1 (Grade 2)
4.1.1 To facilitate incorporation of future material the 9.1 Test specimens shall be cut from compression-molded
“other” category for group (01), class (0), and grade (0) are sheets 1.58 6 0.08 mm (0.062 6 0.003 in.) thick, prepared
shown in Table 1. from the resins in the following manner:
D1430−11 (2016)
9.1.1 Preforming—Powder resin shall be preformed prior to line(equallydistantfromtheendsofthe50-mmlength)sothat
molding in the following way: Place 30 6 0.5 g of resin into the notches are directly opposite each other. The cross-
a 57-mm (2.25-in.) diameter positive-pressure compression sectional width between the notches shall be 1.19 6 0.03 mm
mold and compress the material at room temperature into a (0.047 6 0.001 in.), and the sides of each notch shall form an
preformhavingadensityof1.4to1.5g/cm .Apressureof68.9 angleof90 60.5°witheachother.Alternatively,cutandnotch
MPa (10 000 psi) will satisfactorily accomplish the densifica- the test strips in one operation with a test specimen punch
tion. mountedinanarborpress.Dimensionsofthefinishedteststrip
9.1.2 Molding—Pelletized resin, granular resin, and pre- are shown in Fig. A1.1.
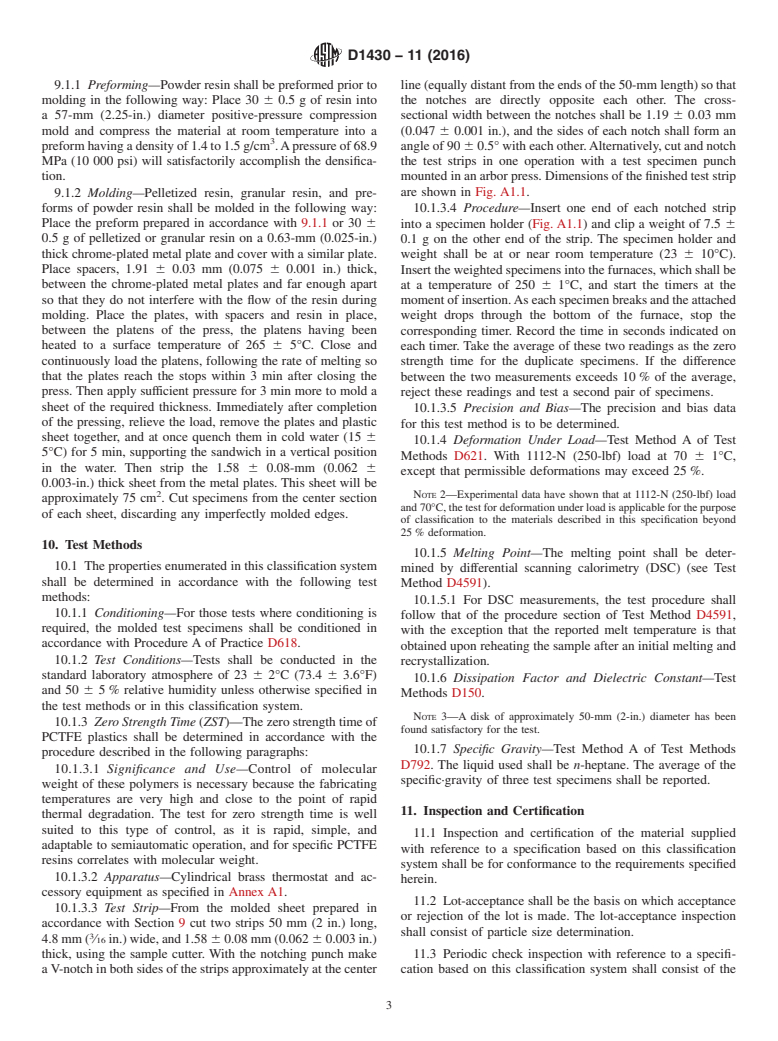
forms of powder resin shall be molded in the following way: 10.1.3.4 Procedure—Insert one end of each notched strip
Place the preform prepared in accordance with 9.1.1 or 30 6
into a specimen holder (Fig.A1.1) and clip a weight of 7.5 6
0.5 g of pelletized or granular resin on a 0.63-mm (0.025-in.) 0.1 g on the other end of the strip. The specimen holder and
thick chrome-plated metal plate and cover with a similar plate.
weight shall be at or near room temperature (23 6 10°C).
Place spacers, 1.91 6 0.03 mm (0.075 6 0.001 in.) thick, Inserttheweightedspecimensintothefurnaces,whichshallbe
between the chrome-plated metal plates and far enough apart
at a temperature of 250 6 1°C, and start the timers at the
so that they do not interfere with the flow of the resin during momentofinsertion.Aseachspecimenbreaksandtheattached
molding. Place the plates, with spacers and resin in place, weight drops through the bottom of the furnace, stop the
between the platens of the press, the platens having been corresponding timer. Record the time in seconds indicated on
heated to a surface temperature of 265 6 5°C. Close and each timer. Take the average of these two read
...
This document is not an ASTM standard and is intended only to provide the user of an ASTM standard an indication of what changes have been made to the previous version. Because
it may not be technically possible to adequately depict all changes accurately, ASTM recommends that users consult prior editions as appropriate. In all cases only the current version
of the standard as published by ASTM is to be considered the official document.
Designation: D1430 − 11 D1430 − 11 (Reapproved 2016)
Standard Classification System for
Polychlorotrifluoroethylene (PCTFE) Plastics
This standard is issued under the fixed designation D1430; the number immediately following the designation indicates the year of
original adoption or, in the case of revision, the year of last revision. A number in parentheses indicates the year of last reapproval. A
superscript epsilon (´) indicates an editorial change since the last revision or reapproval.
This standard has been approved for use by agencies of the U.S. Department of Defense.
1. Scope*Scope
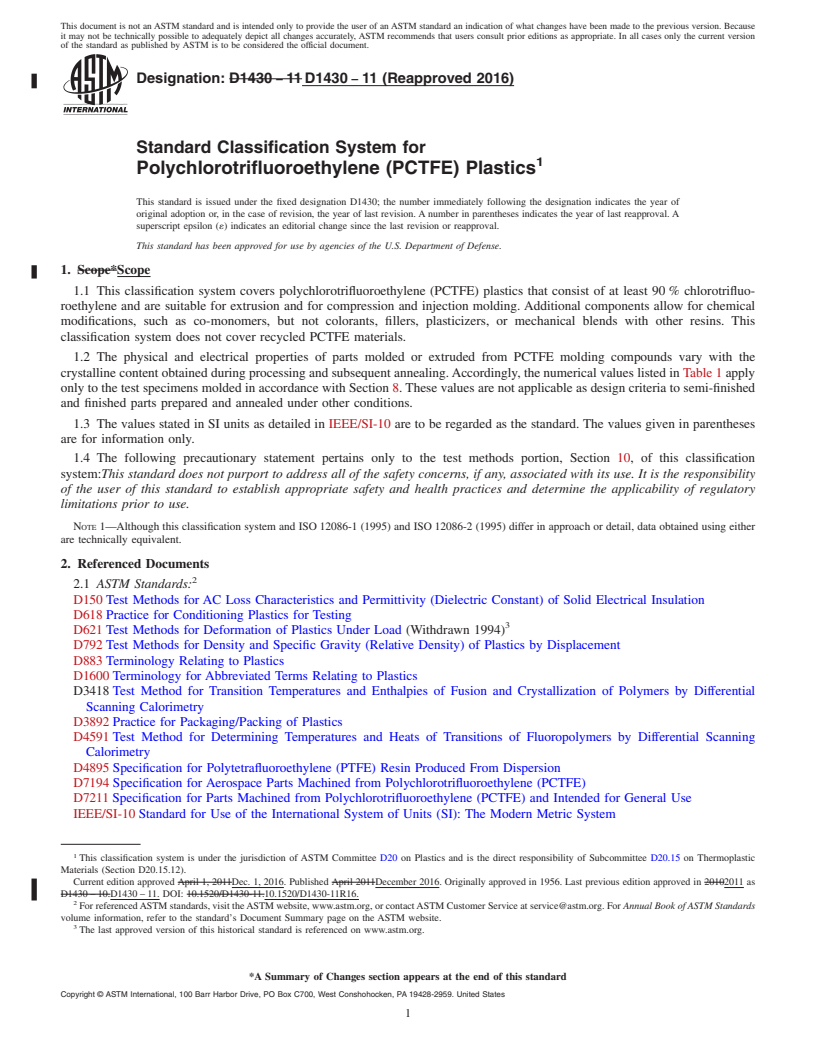
1.1 This classification system covers polychlorotrifluoroethylene (PCTFE) plastics that consist of at least 90 % chlorotrifluo-
roethylene and are suitable for extrusion and for compression and injection molding. Additional components allow for chemical
modifications, such as co-monomers, but not colorants, fillers, plasticizers, or mechanical blends with other resins. This
classification system does not cover recycled PCTFE materials.
1.2 The physical and electrical properties of parts molded or extruded from PCTFE molding compounds vary with the
crystalline content obtained during processing and subsequent annealing. Accordingly, the numerical values listed in Table 1 apply
only to the test specimens molded in accordance with Section 8. These values are not applicable as design criteria to semi-finished
and finished parts prepared and annealed under other conditions.
1.3 The values stated in SI units as detailed in IEEE/SI-10 are to be regarded as the standard. The values given in parentheses
are for information only.
1.4 The following precautionary statement pertains only to the test methods portion, Section 10, of this classification
system:This standard does not purport to address all of the safety concerns, if any, associated with its use. It is the responsibility
of the user of this standard to establish appropriate safety and health practices and determine the applicability of regulatory
limitations prior to use.
NOTE 1—Although this classification system and ISO 12086-1 (1995) and ISO 12086-2 (1995) differ in approach or detail, data obtained using either
are technically equivalent.
2. Referenced Documents
2.1 ASTM Standards:
D150 Test Methods for AC Loss Characteristics and Permittivity (Dielectric Constant) of Solid Electrical Insulation
D618 Practice for Conditioning Plastics for Testing
D621 Test Methods for Deformation of Plastics Under Load (Withdrawn 1994)
D792 Test Methods for Density and Specific Gravity (Relative Density) of Plastics by Displacement
D883 Terminology Relating to Plastics
D1600 Terminology for Abbreviated Terms Relating to Plastics
D3418 Test Method for Transition Temperatures and Enthalpies of Fusion and Crystallization of Polymers by Differential
Scanning Calorimetry
D3892 Practice for Packaging/Packing of Plastics
D4591 Test Method for Determining Temperatures and Heats of Transitions of Fluoropolymers by Differential Scanning
Calorimetry
D4895 Specification for Polytetrafluoroethylene (PTFE) Resin Produced From Dispersion
D7194 Specification for Aerospace Parts Machined from Polychlorotrifluoroethylene (PCTFE)
D7211 Specification for Parts Machined from Polychlorotrifluoroethylene (PCTFE) and Intended for General Use
IEEE/SI-10 Standard for Use of the International System of Units (SI): The Modern Metric System
This classification system is under the jurisdiction of ASTM Committee D20 on Plastics and is the direct responsibility of Subcommittee D20.15 on Thermoplastic
Materials (Section D20.15.12).
Current edition approved April 1, 2011Dec. 1, 2016. Published April 2011December 2016. Originally approved in 1956. Last previous edition approved in 20102011 as
D1430 – 10.D1430 – 11. DOI: 10.1520/D1430-11.10.1520/D1430-11R16.
For referenced ASTM standards, visit the ASTM website, www.astm.org, or contact ASTM Customer Service at service@astm.org. For Annual Book of ASTM Standards
volume information, refer to the standard’s Document Summary page on the ASTM website.
The last approved version of this historical standard is referenced on www.astm.org.
*A Summary of Changes section appears at the end of this standard
Copyright © ASTM International, 100 Barr Harbor Drive, PO Box C700, West Conshohocken, PA 19428-2959. United States
D1430 − 11 (2016)
TABLE 1 Requirements for PCTFE Molded Test Specimens
Properties
Specific Zero Deformation Melting
F G
Dielectric Constant , max Dissipation Factor , max
A
Group Class Description Grade Strength Under Point,
Gravity,
B C,D E Khz MHz KHz MHz
23/23°C Time, s Load °C
01 1 homopolymer 1 2.10-2.15 100-199 10 210-220 2.70 2.50 0.030 0.012
2 2.10-2.15 200-299 10 210-220 2.70 2.50 0.030 0.012
3 2.10-2.15 300-450 10 210-220 2.70 2.50 0.030 0.012
2 modified
homopolymer 1 2.10-2.12 100-199 15 200-210 2.70 2.50 0.030 0.012
2 2.10-2.12 200-299 15 200-210 2.70 2.50 0.030 0.012
3 copolymer 1 2.08-2.10 100-199 20 190-200 2.70 2.50 0.035 0.015
2 2.07-2.10 200-299 25 190-200 2.70 2.50 0.035 0.015
0 other
A
See 10.1.7.
B
See 10.1.3.
C
See 10.1.4.
D
Maximum at 1112 N (250 lbf), 24 h, 70°C, %.
E
See 10.1.5.
F
See 10.1.6.
G
See 10.1.6.
2.2 ISO Standard:
ISO 12086-1 (1995) Plastics—Fluoropolymer Dispersions and Moulding and Extrusion Materials, Part 1
ISO 12086-2 (1995) Plastics—Fluoropolymer Dispersions and Moulding and Extrusion Materials, Part 2
3. Terminology
3.1 Definitions:
3.1.1 Definitions of terms used in this classification system shall be in accordance with Terminology D883.
3.1.2 lot, n—one production run or uniform blend of two or more production runs. D4895
3.2 Definitions of Terms Specific to This Standard:
3.2.1 preforming, n—a process to compress the material under pressure in a mold to form a preform.
3.2.2 zero strength time (ZST ), n—time measured in accordance with Section 10 of this classification system to check the
relative molecular weight of PCTFE material.
3.3 Abbreviations:
3.3.1 Abbreviated terms are in accordance with Terminology D1600.
4. Classification
4.1 PCTFE materials in powders and pellets are classified into one group. The group is subdivided into classes based on
chemical composition. These classes are subdivided into grades as shown in the Basic Property Table (Table 1).
An example of this classification system is given as follows:
Group 01 = PCTFE
Class 1 = homopolymer
Grade 2 = having properties per Table 1 (Grade 2)
4.1.1 To facilitate incorporation of future material the “other” category for group (01), class (0), and grade (0) are shown in
Table 1.
5. General Requirements
5.1 The molding or extrusion material shall be of uniform composition and so compounded as to conform to the requirements
of this classification system.
6. Detail Requirements
6.1 Test specimens prepared in accordance with Section 9 shall conform to the requirements prescribed for the particular type
and grade in Table 1.
Available from American National Standards Institute (ANSI), 25 W. 43rd St., 4th Floor, New York, NY 10036, http://www.ansi.org.
D1430 − 11 (2016)
6.2 For finished PCTFE parts made from resin meeting Group 01, Class 1, Grade 3 requirements, and intended for aerospace
use, detail requirements given in Specification D7194 shall be followed.
6.3 For finished PCTFE parts made from resin Group 01, Class 1, Grade 0, 1, 2, or 3 requirements, and intended for general
use, detail requirements given in Specification D7211 shall be followed.
7. Sampling
7.1 Sampling shall be statistically adequate to satisfy the requirements of 11.4.
8. Number of Tests
8.1 One set of test specimens as prescribed in Section 9 shall be considered sufficient for testing each batch. The average result
for the specimens tested shall conform to the requirements prescribed in this classification system.
9. Specimen Preparation
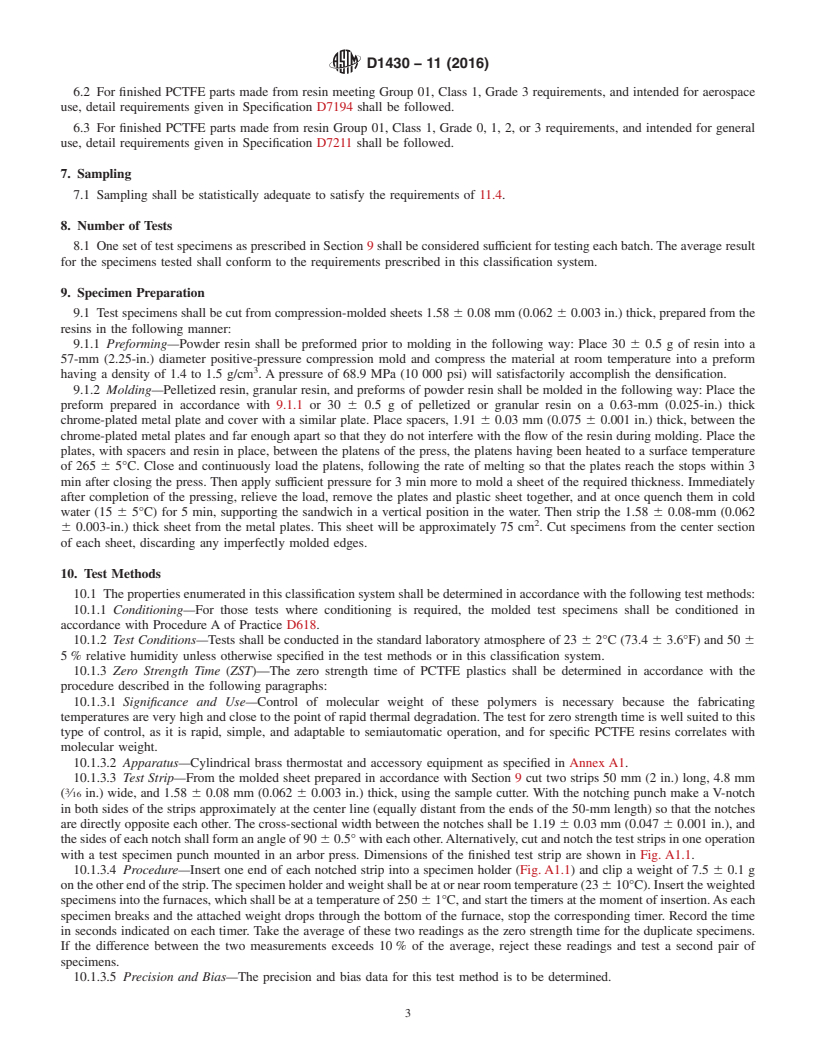
9.1 Test specimens shall be cut from compression-molded sheets 1.58 6 0.08 mm (0.062 6 0.003 in.) thick, prepared from the
resins in the following manner:
9.1.1 Preforming—Powder resin shall be preformed prior to molding in the following way: Place 30 6 0.5 g of resin into a
57-mm (2.25-in.) diameter positive-pressure compression mold and compress the material at room temperature into a preform
having a density of 1.4 to 1.5 g/cm . A pressure of 68.9 MPa (10 000 psi) will satisfactorily accomplish the densification.
9.1.2 Molding—Pelletized resin, granular resin, and preforms of powder resin shall be molded in the following way: Place the
preform prepared in accordance with 9.1.1 or 30 6 0.5 g of pelletized or granular resin on a 0.63-mm (0.025-in.) thick
chrome-plated metal plate and cover with a similar plate. Place spacers, 1.91 6 0.03 mm (0.075 6 0.001 in.) thick, between the
chrome-plated metal plates and far enough apart so that they do not interfere with the flow of the resin during molding. Place the
plates, with spacers and resin in place, between the platens of the press, the platens having been heated to a surface temperature
of 265 6 5°C. Close and continuously load the platens, following the rate of melting so that the plates reach the stops within 3
min after closing the press. Then apply sufficient pressure for 3 min more to mold a sheet of the required thickness. Immediately
after completion of the pressing, relieve the load, remove the plates and plastic sheet together, and at once quench them in cold
water (15 6 5°C) for 5 min, supporting the sandwich in a vertical position in the water. Then strip the 1.58 6 0.08-mm (0.062
6 0.003-in.) thick sheet from the metal plates. This sheet will be approximately 75 cm . Cut specimens from the center section
of each sheet, discarding any imperfectly molded edges.
10. Test Methods
10.1 The properties enumerated in this classification system shall be determined in accordance with the following test methods:
10.1.1 Conditioning—For those tests where conditioning is required, the molded test specimens shall be conditioned in
accordance with Procedure A of Practice D618.
10.1.2 Test Conditions—Tests shall be conducted in the standard laboratory atmosphere of 23 6 2°C (73.4 6 3.6°F) and 50 6
5 % relative humidity unless otherwise specified in the test methods or in this classification system.
10.1.3 Ze
...


Questions, Comments and Discussion
Ask us and Technical Secretary will try to provide an answer. You can facilitate discussion about the standard in here.