ASTM E604-18
(Test Method)Standard Test Method for Dynamic Tear Testing of Metallic Materials
Standard Test Method for Dynamic Tear Testing of Metallic Materials
SIGNIFICANCE AND USE
5.1 The DT energy value is a measure of resistance to rapid progressive fracturing. In a number of applications, the enhanced resistance that may develop during about one plate thickness of crack extension from a sharp notch is of major interest. In the test method, a sufficiently long fracture path is provided so that the results serve as a measure of this property.
5.2 Fracture surfaces of nonaustenitic steels tested in their temperature transition region have areas that appear bright and areas that appear dull. The bright, faceted appearing areas are termed “cleavage” fracture, and the dull appearing areas are termed “shear” fracture after their respective mode of fracture on a micro scale.
5.3 This test method can serve the following purposes:
5.3.1 In research and development, to evaluate the effects of metallurgical variables such as composition, processing, or heat treatment, or of fabricating operations such as forming and welding on the dynamic tear fracture resistance of new or existing materials.
5.3.2 In service evaluation, to establish the suitability of a material for a specific application only where a correlation between DT energy and service performance has been established.3
5.3.3 For information, specifications of acceptance, and manufacturing quality control when a minimum DT energy is requested. Detailed discussion of the basis for determining such minimum values in a particular case is beyond the scope of this test method.
SCOPE
1.1 This test method covers the dynamic tear (DT) test using specimens that are 3/16 in. to 5/8 in. (5 mm to 16 mm) inclusive in thickness.
1.2 This test method is applicable to materials with a minimum thickness of 3/16 in. (5 mm).
1.3 The pressed-knife procedure described for sharpening the notch tip generally limits this test method to materials with a hardness level less than 36 HRC.
Note 1: The designation 36 HRC is a Rockwell hardness number of 36 on Rockwell C scale as defined in Test Methods E18.
1.4 The values stated in inch-pound units are to be regarded as standard. The values given in parentheses are mathematical conversions to SI units that are provided for information only and are not considered standard.
1.5 This standard does not purport to address all of the safety concerns, if any, associated with its use. It is the responsibility of the user of this standard to establish appropriate safety, health, and environmental practices and determine the applicability of regulatory limitations prior to use.
1.6 This international standard was developed in accordance with internationally recognized principles on standardization established in the Decision on Principles for the Development of International Standards, Guides and Recommendations issued by the World Trade Organization Technical Barriers to Trade (TBT) Committee.
General Information
- Status
- Published
- Publication Date
- 31-May-2018
- Technical Committee
- E28 - Mechanical Testing
- Drafting Committee
- E28.07 - Impact Testing
Relations
- Effective Date
- 01-Jun-2018
- Effective Date
- 01-Jul-2018
- Effective Date
- 01-Jul-2017
- Effective Date
- 01-Apr-2013
- Effective Date
- 01-Dec-2012
- Effective Date
- 15-Nov-2012
- Effective Date
- 15-Nov-2012
- Effective Date
- 15-Nov-2012
- Effective Date
- 15-Nov-2012
- Effective Date
- 15-Nov-2012
- Effective Date
- 15-Jan-2012
- Effective Date
- 01-Nov-2011
- Effective Date
- 01-Jul-2009
- Effective Date
- 01-Jul-2009
- Effective Date
- 15-May-2009
Overview
ASTM E604-18: Standard Test Method for Dynamic Tear Testing of Metallic Materials specifies procedures for assessing the dynamic tear (DT) fracture resistance of metallic materials. Developed by ASTM International, this standard outlines the test method for measuring the resistance of a material to rapid, progressive cracking, particularly for applications where fracture extending through approximately one plate thickness from a sharp notch is of concern. This method is widely used to evaluate materials ranging from steels to aluminum alloys within specified thickness and hardness ranges, providing critical data for material selection, research, and quality control.
Key Topics
- Dynamic Tear Testing: The core concept of ASTM E604-18 is the measurement of DT energy, the total energy required to propagate a fracture through a notched test specimen when subjected to impact. The test evaluates a material’s resistance to rapid crack extension.
- Specimen Requirements: The method applies to metallic specimens 3/16 in. to 5/8 in. (5 mm to 16 mm) thick and with hardness less than 36 HRC (Rockwell C).
- Testing Equipment: Either pendulum or drop-weight type impact machines are used, capable of delivering a single blow to fracture the specimen.
- Fracture Surface Analysis: After testing, the fracture surface may be characterized by the percent shear fracture appearance, distinguishing between cleavage (bright) and shear (dull) zones, informative in materials with pronounced ductile-to-brittle transitions.
- Test Procedure: Impact testing is performed over a range of service-relevant temperatures to measure dynamic fracture properties under realistic conditions.
- Reporting and Quality Control: Results such as DT energy, percent shear appearance, and specimen orientation are recorded. These aid material evaluation for research, specification, and manufacturing quality assurance.
Applications
ASTM E604-18 has practical applications in several key areas:
- Material Selection and Research: Dynamic tear testing is employed in research and development to assess the effects of alloy composition, processing, and heat treatment on fracture resistance. This information guides the design of tougher, more resilient metallic materials for demanding applications.
- Performance Evaluation: The method can establish a correlation between DT energy and the service performance of a material, providing a basis for qualifying materials for structural, transportation, or industrial uses-especially where impact and rapid crack propagation are concerns.
- Manufacturing and Quality Assurance: Custom specification of minimum DT energy values can be used for acceptance criteria and quality control during fabrication, particularly in industries such as construction, pipelines, and heavy equipment manufacturing.
- Failure Analysis: In the event of material failures, dynamic tear test results assist engineers in understanding fracture mechanisms and temperatures at which ductile-to-brittle transitions occur.
Related Standards
Dynamic tear testing, as outlined in ASTM E604-18, is complemented by or referenced alongside several other ASTM standards in the field of mechanical testing:
- ASTM E6: Terminology Relating to Methods of Mechanical Testing
- ASTM E18: Test Methods for Rockwell Hardness of Metallic Materials (for defining and measuring material hardness)
- ASTM E399: Test Method for Linear-Elastic Plane-Strain Fracture Toughness (K_IC) of Metallic Materials
- ASTM B221: Specification for Aluminum and Aluminum-Alloy Extruded Bars, Rods, Wire, Profiles, and Tubes
Conclusion
ASTM E604-18 provides a comprehensive and standardized approach for dynamic tear testing of metallic materials. By generating reliable data on fracture resistance under impact loads, this method supports informed decisions in material development, structural integrity assessment, and quality control, ensuring safety and performance across a wide range of engineering applications.
Buy Documents
ASTM E604-18 - Standard Test Method for Dynamic Tear Testing of Metallic Materials
REDLINE ASTM E604-18 - Standard Test Method for Dynamic Tear Testing of Metallic Materials
Get Certified
Connect with accredited certification bodies for this standard

Element Materials Technology
Materials testing and product certification.

Inštitut za kovinske materiale in tehnologije
Institute of Metals and Technology. Materials testing, metallurgical analysis, NDT.
Sponsored listings
Frequently Asked Questions
ASTM E604-18 is a standard published by ASTM International. Its full title is "Standard Test Method for Dynamic Tear Testing of Metallic Materials". This standard covers: SIGNIFICANCE AND USE 5.1 The DT energy value is a measure of resistance to rapid progressive fracturing. In a number of applications, the enhanced resistance that may develop during about one plate thickness of crack extension from a sharp notch is of major interest. In the test method, a sufficiently long fracture path is provided so that the results serve as a measure of this property. 5.2 Fracture surfaces of nonaustenitic steels tested in their temperature transition region have areas that appear bright and areas that appear dull. The bright, faceted appearing areas are termed “cleavage” fracture, and the dull appearing areas are termed “shear” fracture after their respective mode of fracture on a micro scale. 5.3 This test method can serve the following purposes: 5.3.1 In research and development, to evaluate the effects of metallurgical variables such as composition, processing, or heat treatment, or of fabricating operations such as forming and welding on the dynamic tear fracture resistance of new or existing materials. 5.3.2 In service evaluation, to establish the suitability of a material for a specific application only where a correlation between DT energy and service performance has been established.3 5.3.3 For information, specifications of acceptance, and manufacturing quality control when a minimum DT energy is requested. Detailed discussion of the basis for determining such minimum values in a particular case is beyond the scope of this test method. SCOPE 1.1 This test method covers the dynamic tear (DT) test using specimens that are 3/16 in. to 5/8 in. (5 mm to 16 mm) inclusive in thickness. 1.2 This test method is applicable to materials with a minimum thickness of 3/16 in. (5 mm). 1.3 The pressed-knife procedure described for sharpening the notch tip generally limits this test method to materials with a hardness level less than 36 HRC. Note 1: The designation 36 HRC is a Rockwell hardness number of 36 on Rockwell C scale as defined in Test Methods E18. 1.4 The values stated in inch-pound units are to be regarded as standard. The values given in parentheses are mathematical conversions to SI units that are provided for information only and are not considered standard. 1.5 This standard does not purport to address all of the safety concerns, if any, associated with its use. It is the responsibility of the user of this standard to establish appropriate safety, health, and environmental practices and determine the applicability of regulatory limitations prior to use. 1.6 This international standard was developed in accordance with internationally recognized principles on standardization established in the Decision on Principles for the Development of International Standards, Guides and Recommendations issued by the World Trade Organization Technical Barriers to Trade (TBT) Committee.
SIGNIFICANCE AND USE 5.1 The DT energy value is a measure of resistance to rapid progressive fracturing. In a number of applications, the enhanced resistance that may develop during about one plate thickness of crack extension from a sharp notch is of major interest. In the test method, a sufficiently long fracture path is provided so that the results serve as a measure of this property. 5.2 Fracture surfaces of nonaustenitic steels tested in their temperature transition region have areas that appear bright and areas that appear dull. The bright, faceted appearing areas are termed “cleavage” fracture, and the dull appearing areas are termed “shear” fracture after their respective mode of fracture on a micro scale. 5.3 This test method can serve the following purposes: 5.3.1 In research and development, to evaluate the effects of metallurgical variables such as composition, processing, or heat treatment, or of fabricating operations such as forming and welding on the dynamic tear fracture resistance of new or existing materials. 5.3.2 In service evaluation, to establish the suitability of a material for a specific application only where a correlation between DT energy and service performance has been established.3 5.3.3 For information, specifications of acceptance, and manufacturing quality control when a minimum DT energy is requested. Detailed discussion of the basis for determining such minimum values in a particular case is beyond the scope of this test method. SCOPE 1.1 This test method covers the dynamic tear (DT) test using specimens that are 3/16 in. to 5/8 in. (5 mm to 16 mm) inclusive in thickness. 1.2 This test method is applicable to materials with a minimum thickness of 3/16 in. (5 mm). 1.3 The pressed-knife procedure described for sharpening the notch tip generally limits this test method to materials with a hardness level less than 36 HRC. Note 1: The designation 36 HRC is a Rockwell hardness number of 36 on Rockwell C scale as defined in Test Methods E18. 1.4 The values stated in inch-pound units are to be regarded as standard. The values given in parentheses are mathematical conversions to SI units that are provided for information only and are not considered standard. 1.5 This standard does not purport to address all of the safety concerns, if any, associated with its use. It is the responsibility of the user of this standard to establish appropriate safety, health, and environmental practices and determine the applicability of regulatory limitations prior to use. 1.6 This international standard was developed in accordance with internationally recognized principles on standardization established in the Decision on Principles for the Development of International Standards, Guides and Recommendations issued by the World Trade Organization Technical Barriers to Trade (TBT) Committee.
ASTM E604-18 is classified under the following ICS (International Classification for Standards) categories: 77.040.10 - Mechanical testing of metals. The ICS classification helps identify the subject area and facilitates finding related standards.
ASTM E604-18 has the following relationships with other standards: It is inter standard links to ASTM E604-15, ASTM E18-18, ASTM E18-17, ASTM B221-13, ASTM E18-12, ASTM E399-12e1, ASTM E399-12e2, ASTM E399-12e3, ASTM E399-12, ASTM B221-12a, ASTM B221-12, ASTM E18-11, ASTM E399-09, ASTM E399-09e1, ASTM E6-09b. Understanding these relationships helps ensure you are using the most current and applicable version of the standard.
ASTM E604-18 is available in PDF format for immediate download after purchase. The document can be added to your cart and obtained through the secure checkout process. Digital delivery ensures instant access to the complete standard document.
Standards Content (Sample)
This international standard was developed in accordance with internationally recognized principles on standardization established in the Decision on Principles for the
Development of International Standards, Guides and Recommendations issued by the World Trade Organization Technical Barriers to Trade (TBT) Committee.
Designation: E604 − 18
Standard Test Method for
Dynamic Tear Testing of Metallic Materials
This standard is issued under the fixed designation E604; the number immediately following the designation indicates the year of
original adoption or, in the case of revision, the year of last revision.Anumber in parentheses indicates the year of last reapproval.A
superscript epsilon (´) indicates an editorial change since the last revision or reapproval.
This standard has been approved for use by agencies of the U.S. Department of Defense.
1. Scope* E6Terminology Relating to Methods of Mechanical Testing
E18Test Methods for Rockwell Hardness of Metallic Ma-
1.1 Thistestmethodcoversthedynamictear(DT)testusing
terials
3 5
specimens that are ⁄16 in. to ⁄8 in. (5 mm to 16 mm) inclusive
E399Test Method for Linear-Elastic Plane-Strain Fracture
in thickness.
Toughness K of Metallic Materials
Ic
1.2 This test method is applicable to materials with a
minimum thickness of ⁄16 in. (5 mm). 3. Terminology
1.3 The pressed-knife procedure described for sharpening 3.1 Definitions of Terms Common in Mechanical Testing:
the notch tip generally limits this test method to materials with 3.1.1 The definitions of mechanical testing terms that ap-
a hardness level less than 36 HRC. pear in Terminology E6 apply to this test method.
3.2 Definitions of Terms Specific to This Standard:
NOTE1—Thedesignation36HRCisaRockwellhardnessnumberof36
on Rockwell C scale as defined in Test Methods E18.
3.2.1 dynamic tear (DT) energy—the total energy required
to fracture DT specimens tested in accordance with the
1.4 The values stated in inch-pound units are to be regarded
provisions of this test method.
as standard. The values given in parentheses are mathematical
3.2.1.1 Discussion—With pendulum-type machines, the DT
conversions to SI units that are provided for information only
energy is the difference between the initial and the final
and are not considered standard.
potential energies of the pendulum or pendulums.
1.5 This standard does not purport to address all of the
3.2.1.2 Discussion—With drop-weight machines, the DT
safety concerns, if any, associated with its use. It is the
energy is the difference between the initial potential energy of
responsibility of the user of this standard to establish appro-
the hammer and the final energy of the hammer as determined
priate safety, health, and environmental practices and deter-
by a calibrated energy measurement system.
mine the applicability of regulatory limitations prior to use.
3.2.2 shear fracture appearance, SFA, n—the amount of
1.6 This international standard was developed in accor-
fracture surface in the specimen that failed in a shear (stable)
dance with internationally recognized principles on standard-
mode, expressed in percent
ization established in the Decision on Principles for the
3.2.2.1 Discussion—Net section may be either the net sec-
Development of International Standards, Guides and Recom-
tion area before fracture or the area of the projected plane of
mendations issued by the World Trade Organization Technical
the fracture surface.
Barriers to Trade (TBT) Committee.
4. Summary of Test Method
2. Referenced Documents
4.1 TheDTtestinvolvesasingle-edgenotchedbeamthatis
2.1 ASTM Standards:
impact loaded in three-point bending, and the DT energy is
B221Specification forAluminum andAluminum-Alloy Ex-
recorded.
truded Bars, Rods, Wire, Profiles, and Tubes
4.2 The DT specimens are fractured with pendulum or
drop-weight machines.
This test method is under the jurisdiction of ASTM Committee E28 on
5. Significance and Use
Mechanical Testing and is the direct responsibility of Subcommittee E28.07 on
Impact Testing.
5.1 The DTenergy value is a measure of resistance to rapid
CurrenteditionapprovedJune1,2018.PublishedJuly2018.Originallyapproved
progressive fracturing. In a number of applications, the en-
as a proposed test method in 1975. Last previous edition approved in 2015 as
E604–15. DOI: 10.1520/E0604-18.
hanced resistance that may develop during about one plate
For referenced ASTM standards, visit the ASTM website, www.astm.org, or
thickness of crack extension from a sharp notch is of major
contact ASTM Customer Service at service@astm.org. For Annual Book of ASTM
interest. In the test method, a sufficiently long fracture path is
Standards volume information, refer to the standard’s Document Summary page on
the ASTM website. provided so that the results serve as a measure of this property.
*A Summary of Changes section appears at the end of this standard
Copyright © ASTM International, 100 Barr Harbor Drive, PO Box C700, West Conshohocken, PA 19428-2959. United States
E604 − 18
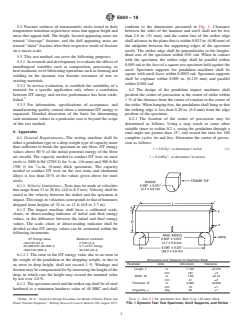
5.2 Fracture surfaces of nonaustenitic steels tested in their conform to the dimensions presented in Fig. 1. Clearance
temperature transition region have areas that appear bright and between the sides of the hammer and anvil shall not be less
areas that appear dull. The bright, faceted appearing areas are than 2.0 in. (51 mm), and the center line of the striker edge
termed “cleavage” fracture, and the dull appearing areas are shalladvanceintheplanethatiswithin0.032in.(0.80mm)of
termed “shear” fracture after their respective mode of fracture the midpoint between the supporting edges of the specimen
on a micro scale. anvils. The striker edge shall be perpendicular to the longitu-
dinal axis of the specimen within 0.01 rad. When in contact
5.3 This test method can serve the following purposes:
with the specimen, the striker edge shall be parallel within
5.3.1 Inresearchanddevelopment,toevaluatetheeffectsof
0.005 rad to the face of a square test specimen held against the
metallurgical variables such as composition, processing, or
anvil. Specimen supports for pendulum machines shall be
heattreatment,oroffabricatingoperationssuchasformingand
square with anvil faces within 0.0025 rad. Specimen supports
welding on the dynamic tear fracture resistance of new or
shall be coplanar within 0.005 in. (0.125 mm) and parallel
existing materials.
within 0.002 rad.
5.3.2 In service evaluation, to establish the suitability of a
material for a specific application only where a correlation 6.2 The design of the pendulum impact machines shall
between DT energy and service performance has been estab- position the center of percussion at the center of strike within
lished. 1% of the distance from the center of rotation to the center of
5.3.3 For information, specifications of acceptance, and thestrike.Whenhangingfree,thependulumsshallhangsothat
manufacturing quality control when a minimum DT energy is the striking edge is less than 0.20 in. (5.0 mm) from the edge
requested. Detailed discussion of the basis for determining position of the specimen.
such minimum values in a particular case is beyond the scope 6.2.1 The location of the center of percussion may be
of this test method. determined as follows: Using a stop watch or some other
suitable timer to within 0.2 s, swing the pendulum through a
6. Apparatus
total angle not greater than 15°, and record the time for 100
6.1 General Requirements—The testing machine shall be complete cycles (to and fro). Determine the center of percus-
either a pendulum type or a drop-weight type of capacity more
sion as follows:
than sufficient to break the specimen in one blow. DT energy
l 5 0.815ρ , todetermine l infeet (1)
values above 80% of the initial potential energy of the blow
are invalid. The capacity needed to conduct DT tests on most
l 5 0.2485ρ , todetermine l inmetres
steels is 2000 ft·lbf (2700 J) for ⁄8-in. (16-mm) and 500 ft·lbf
(700 J) for ⁄16-in. (5-mm) thick specimens. The capacity
needed to conduct DT tests on the cast irons and aluminum
alloys is less than 20% of the values given above for most
steels.
6.1.1 Velocity Limitations—Tests may be made at velocities
that range from 13 to 28 ft/s (4.0 to 8.5 m/s). Velocity shall be
stated as the velocity between the striker and the specimen at
impact.Thisrangeinvelocitiescorrespondstothatofhammers
dropped from heights of 32 in. to 12 ft (0.8 to 3.7 m).
6.1.2 The impact machine shall have a calibrated scale,
charts, or direct-reading indicator of initial and final energy
values, or the difference between the initial and final energy
values. The scale, chart, or direct-reading indicator shall be
divided so that DT energy values can be estimated within the
following increments:
DT Energy Value Maximum Increment
<40 ft·lbf (54 J) 2 ft·lbf (3 J)
40–600 ft·lbf (54–800 J) 5 % of DT energy
>600 ft·lbf (800 J) 30 ft·lbf (40 J)
6.1.2.1 The error in the DT energy value due to an error in
Dimensions and Tolerance for Specimen Blank
the weight of the pendulum or the dropping weight, or due to
Parameter Units Dimension Tolerance
an error in drop height, shall not exceed 1%. Windage and
Length, L in. 7.125 ±0.125
frictionmaybecompensatedforbyincreasingtheheightofthe
mm 181 ±3
drop, in which case the height may exceed the nominal value
Width, W in. 1.60 ±0.10
by not over 2.0%.
mm 41 ±2
Thickness, B in. 0.625 ±0.035
6.1.3 Thespecimenanvilandthestrikertupshallbeofsteel
mm 16 ±1
hardened to a minimum hardness value of 48 HRC and shall
Angularity, α deg 90 ±1
3 5
NOTE 1—See 9.1 for specimens less than ⁄8-in. (16 mm) thick.
Pellini ,W. S., “Analytical Design Procedures for Metals of Elastic-Plastic and
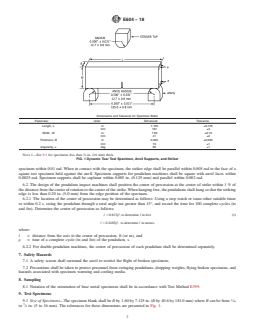
Plastic Fracture Properties,” Welding Research Council Bulletin 186,August 1973. FIG. 1 Dynamic Tear Test Specimen, Anvil Supports, and Striker
E604 − 18
where:
l = distancefromtheaxistothecenterofpercussion,ft(or
m), and
ρ = time of a complete cycle (to and fro) of the pendulum,
s.
6.2.2 For double-pendulum machines, the center of percus-
sion of each pendulum shall be determined separately.
7. Safety Hazards
7.1 A safety screen shall surround the anvil to restrict the
flight of broken specimens.
7.2 Precautions shall be taken to protect personnel from Dimensions and Tolerances for Notch Tip
swinging pendulums, dropping weights, flying broken Parameter Units Dimension Tolerance
specimens,andhazardsassociatedwithspecimenwarmingand Net width, (W−a ) in. 1.125 ±0.020
mm 28.6 ±0.5
cooling media.
Machined notch width, N in. 0.0625 ±0.005
w
mm 1.59 ±0.13
8. Sampling
Machined notch root angle, N deg 60 ±2
a
Machined notch root radius, N in. 0.005 max
r
8.1 Notation of the orientation of base metal specimens
mm 0.13 max
shall be in accordance with Test Method E399.
Pressed tip depth, t in. 0.010 ±0.005
D
mm 0.25 ±0.13
Pressed tip angle, t deg 40 ±5
9. Test Specimens a
Pressed tip root radius, t in. 0.001 max
r
9.1 Size of Specimens—The specimen blank shall be B by mm 0.025 max
1.60 by 7.125 in. (B by 40.6 by 181.0 mm) where B can be
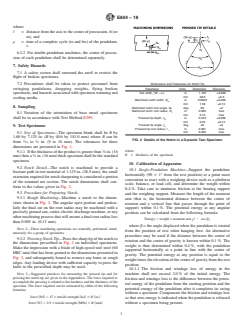
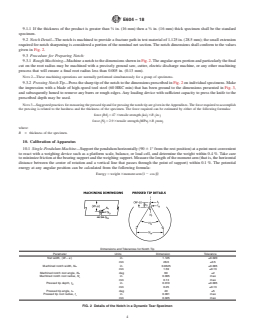
FIG. 2 Details of the Notch in a Dynamic Tear Specimen
3 5
from ⁄16 to ⁄8 in. (5 to 16 mm). The tolerances for these
dimensions are presented in Fig. 1.
5 where:
9.1.1 Ifthethicknessoftheproductisgreaterthan ⁄8in.(16
5 B = thickness of the specimen.
mm)thena ⁄8in.(16mm)thickspecimenshallbethestandard
specimen.
10. Calibration of Apparatus
9.2 Notch Detail—The notch is machined to provide a
10.1 Single-Pendulum Machine—Support the pendulum
fracture path in test material of 1.125 in. (28.5 mm); the small
horizontally (90 6 1° from the rest position) at a point most
extensionrequiredfornotchsharpeningisconsideredaportion
convenient to react with a weighing device such as a platform
of the nominal net section. The notch dimensions shall con-
scale, balance, or load cell, and determine the weight within
form to the values given in Fig. 2.
0.4%. Take care to minimize friction at the bearing support
9.3 Procedure for Preparing Notch:
and the weighing support. Measure the length of the moment
9.3.1 Rough Machining—Machine a notch to the dimen-
arm (that is, the horizontal distance between the center of
sions shown in Fig. 2. The angular apex portion and particu-
rotation and a vertical line that passes through the point of
larly the final cut on the root radius may be machined with a
support) within 0.1%. The potential energy at any angular
preciselygroundsaw,cutter,electricdischargemachine,orany
position can be calculated from the following formula:
othermachiningprocessthatwillensureafinalrootradiusless
Energy 5 weight 3momentarm 1 2 cos β
~ !
than 0.005 in. (0.13 mm).
where β=the angle displaced when the pendulum is rotated
NOTE 2—These machining operations are normally performed simul-
from the position of rest when hanging free. An alternative
taneously for a group of specimens.
procedure may be used if the distance between the center of
9.3.2 Pressing Notch Tip—Pressthesharptipofthenotchto
rotation and the center of gravity is known within 0.1%. The
the dimensions prescribed in Fig. 2 on individual specimens.
weight is then determined within 0.4%, with the pendulum
Make the impression with a blade of high-speed tool steel (60
supported horizontally at a point in line with the center of
HRCmin)thathasbeengroundtothedimensionspresentedin
gravity. The potential energy at any position is equal to the
Fig. 3, and subsequently honed to remove any burrs or rough
weighttimestheelevationofthecenterofgravityfromtherest
edges.Any loading device with sufficient capacity to press the
position.
knife to the prescribed depth may be used.
10.1.1 The friction and windage loss of energy in the
NOTE 3—Suggested practices for measuring the pressed tip and for machine shall not exceed 2.0% of the initial energy. The
pressing the notch tip are given in theAppendixes. The force required to
friction and windage loss is the difference between the poten-
accomplish the pressing is related to the hardness and the thickness of the
tial energy of the pendulum from the starting position and the
specimen. The force required can be estimated by either of the following
potential energy of the pendulum after it completes its swing
formulas:
without a specimen. Compensate the friction and windage loss
force lbf 5 47 3tensilestrength ksi 3B in.
~ ! ~ ! ~ !
so that zero energy is indicated when the pendulum is released
force N 5 2.9 3tensilestrength MPa 3B mm without a specimen being present.
~ ! ~ ! ~ !
E604 − 18
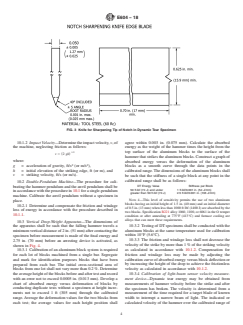
FIG. 3 Knife for Sharpening Tip of Notch in Dynamic Tear Specimen
10.1.2 ImpactVelocity—Determinetheimpactvelocity,v,of agree within 0.003 in. (0.075 mm). Calculate the absorbed
the machine, neglecting friction as follows: energy as the weight of the hammer times the height from the
1/2 top surface of the aluminum blocks to the surface of the
v 5 ~2 gh!
hammerthatstrikesthealuminumblocks.Constructagraphof
where:
absorbed energy versus the deformation of the aluminum
2 2
g = acceleration of gravity, ft/s (or m/s ), blocks as a smooth curve through the data points in the
h = initial elevation of the striking edge, ft (or m), and
calibrated range.The dimensions of the aluminum blocks shall
v = striking velocity, ft/s (or m/s).
be such that the stiffness of a single block at any point in the
calibrated range shall be as follows:
10.2 Double-Pendulum Machine—The procedure for cali-
DT Energy Value Stiffness per Block
brating the hammer pendulum and the anvil pendulum shall be
50 ft·lbf (74 J) and under 1 ft·lbf/0.001 in. (54 J/mm)
inaccordancewiththeprocedurein10.1forasingle-pendulum
greater than 50 ft·lbf (74 J) 2.5 ft·lbf/0.001 in. (136 J/mm)
machine. Calibrate the anvil pendulum without a specimen in
NOTE 4—This level of sensitivity permits the use of two aluminum
place.
blocks having an initial height of 1.5 in. (40 mm) and an initial diameter
10.2.1 Determine and compensate the friction and windage
of0.5in.(13mm)whenlessthan1000ftlbf(1400J)areabsorbedbythe
loss of energy in accordance with the procedure described in
two blocks. Specification B221 alloy 1060, 1100, or 6061 in the O temper
10.1.1. condition or after annealing at 775°F (413°C) and furnace cooling are
alloys that can meet these requirements.
10.3 Vertical Drop-Weight Apparatus—The dimensions of
10.3.2 TestingofDTspecimensshallbeconductedwiththe
the apparatus shall be such that the falling hammer travels a
aluminum blocks at the same temperature used for calibration
minimumverticaldistanceof2in.(51mm)aftercontactingthe
within 10°F (5.6°C).
specimen before measurement is made of the final energy and
10.3.3 The friction and windage loss shall not decrease the
2.75 in. (70 mm) before an arresting device is activated, as
shown in Fig. 4. velocity of the strike by more than 1% of the striking velocity
as calculated in accordance with 10.1.2. Compensation for
10.3.1 Calibration of an aluminum block system is requi
...
This document is not an ASTM standard and is intended only to provide the user of an ASTM standard an indication of what changes have been made to the previous version. Because
it may not be technically possible to adequately depict all changes accurately, ASTM recommends that users consult prior editions as appropriate. In all cases only the current version
of the standard as published by ASTM is to be considered the official document.
Designation: E604 − 15 E604 − 18
Standard Test Method for
Dynamic Tear Testing of Metallic Materials
This standard is issued under the fixed designation E604; the number immediately following the designation indicates the year of
original adoption or, in the case of revision, the year of last revision. A number in parentheses indicates the year of last reapproval. A
superscript epsilon (´) indicates an editorial change since the last revision or reapproval.
This standard has been approved for use by agencies of the U.S. Department of Defense.
1. Scope*
3 5
1.1 This test method covers the dynamic tear (DT) test using specimens that are ⁄16 in. to ⁄8 in. (5 mm to 16 mm) inclusive
in thickness.
1.2 This test method is applicable to materials with a minimum thickness of ⁄16 in. (5 mm).
1.3 The pressed-knife procedure described for sharpening the notch tip generally limits this test method to materials with a
hardness level less than 36 HRC.
NOTE 1—The designation 36 HRC is a Rockwell hardness number of 36 on Rockwell C scale as defined in Test Methods E18.
1.4 The values stated in inch-pound units are to be regarded as standard. The values given in parentheses are mathematical
conversions to SI units that are provided for information only and are not considered standard.
1.5 This standard does not purport to address all of the safety concerns, if any, associated with its use. It is the responsibility
of the user of this standard to establish appropriate safety safety, health, and healthenvironmental practices and determine the
applicability of regulatory limitations prior to use.
1.6 This international standard was developed in accordance with internationally recognized principles on standardization
established in the Decision on Principles for the Development of International Standards, Guides and Recommendations issued
by the World Trade Organization Technical Barriers to Trade (TBT) Committee.
2. Referenced Documents
2.1 ASTM Standards:
B221 Specification for Aluminum and Aluminum-Alloy Extruded Bars, Rods, Wire, Profiles, and Tubes
E6 Terminology Relating to Methods of Mechanical Testing
E18 Test Methods for Rockwell Hardness of Metallic Materials
E399 Test Method for Linear-Elastic Plane-Strain Fracture Toughness K of Metallic Materials
Ic
3. Terminology
3.1 Definitions of Terms Common in Mechanical Testing:
3.1.1 The definitions of mechanical testing terms that appear in Terminology E6 apply to this test method.
3.2 Definitions of Terms Specific to This Standard:
3.2.1 dynamic tear (DT) energy—the total energy required to fracture DT specimens tested in accordance with the provisions
of this test method.
3.2.1.1 Discussion—
With pendulum-type machines, the DT energy is the difference between the initial and the final potential energies of the pendulum
or pendulums.
This test method is under the jurisdiction of ASTM Committee E28 on Mechanical Testing and is the direct responsibility of Subcommittee E28.07 on Impact Testing.
Current edition approved Dec. 1, 2015June 1, 2018. Published February 2016July 2018. Originally approved as a proposed test method in 1975. Last previous edition
approved in 20082015 as E604 –83(2008). –15. DOI: 10.1520/E0604-15.10.1520/E0604-18.
For referenced ASTM standards, visit the ASTM website, www.astm.org, or contact ASTM Customer Service at service@astm.org. For Annual Book of ASTM Standards
volume information, refer to the standard’s Document Summary page on the ASTM website.
*A Summary of Changes section appears at the end of this standard
Copyright © ASTM International, 100 Barr Harbor Drive, PO Box C700, West Conshohocken, PA 19428-2959. United States
E604 − 18
3.2.1.2 Discussion—
With drop-weight machines, the DT energy is the difference between the initial potential energy of the hammer and the final energy
of the hammer as determined by a calibrated energy measurement system.
3.2.2 percent shear fracture appearance—appearance, SFA, n—the percent of the net section that fracturedamount of fracture
surface in the specimen that failed in a shear mode. (stable) mode, expressed in percent
3.2.2.1 Discussion—
Net section may be either the net section area before fracture or the area of the projected plane of the fracture surface.
4. Summary of Test Method
4.1 The DT test involves a single-edge notched beam that is impact loaded in three-point bending, and the total energy loss
during separation DT energy is recorded.
4.2 The DT specimens are fractured with pendulum or drop-weight machines.
5. Significance and Use
5.1 The DT energy value is a measure of resistance to rapid progressive fracturing. In a number of applications, the enhanced
resistance that may develop during about one plate thickness of crack extension from a sharp notch is of major interest. In the test
method, a sufficiently long fracture path is provided so that the results serve as a measure of this property.
5.2 Fracture surfaces of nonaustenitic steels tested in their temperature transition region have areas that appear bright and areas
that appear dull. The bright, faceted appearing areas are termed “cleavage” fracture, and the dull appearing areas are termed “shear”
fracture after their respective mode of fracture on a micro scale.
5.3 This test method can serve the following purposes:
5.3.1 In research and development, to evaluate the effects of metallurgical variables such as composition, processing, or heat
treatment, or of fabricating operations such as forming and welding on the dynamic tear fracture resistance of new or existing
materials.
5.3.2 In service evaluation, to establish the suitability of a material for a specific application only where a correlation between
DT energy and service performance has been established.
5.3.3 For information, specifications of acceptance, and manufacturing quality control when a minimum DT energy is requested.
Detailed discussion of the basis for determining such minimum values in a particular case is beyond the scope of this test method.
6. Apparatus
6.1 General Requirements—The testing machine shall be either a pendulum type or a drop-weight type of capacity more than
sufficient to break the specimen in one blow. DT energy values above 80 % of the initial potential energy of the blow are invalid.
5 3
The capacity needed to conduct DT tests on most steels is 2000 ft·lbf (2700 J) for ⁄8-in. (16-mm) and 500 ft·lbf (700 J) for ⁄16-in.
(5-mm) thick specimens. The capacity needed to conduct DT tests on the cast irons and aluminum alloys is less than 20 % of the
values given above for most steels.
6.1.1 Velocity Limitations—Tests may be made at velocities that range from 13 to 28 ft/s (4.0 to 8.5 m/s). Velocity shall be stated
as the velocity between the striker and the specimen at impact. This range in velocities corresponds to that of hammers dropped
from heights of 32 in. to 12 ft (0.8 to 3.7 m).
6.1.2 The impact machine shall have a calibrated scale, charts, or direct-reading indicator of initial and final energy values, or
the difference between the initial and final energy values. The scale, chart, or direct-reading indicator shall be divided so that DT
energy values can be estimated within the following increments:
DT Energy Value Maximum Increment
<40 ft·lbf (54 J) 2 ft·lbf (3 J)
40–600 ft·lbf (54–800 J) 5 % of DT energy
>600 ft·lbf (800 J) 30 ft·lbf (40 J)
6.1.2.1 The error in the DT energy value due to an error in the weight of the pendulum or the dropping weight, or due to an
error in drop height, shall not exceed 1 %. Windage and friction may be compensated for by increasing the height of the drop, in
which case the height may exceed the nominal value by not over 2.0 %.
6.1.3 The specimen anvil and the striker tup shall be of steel hardened to a minimum hardness value of 48 HRC and shall
conform to the dimensions presented in Fig. 1. Clearance between the sides of the hammer and anvil shall not be less than 2.0 in.
(51 mm), and the center line of the striker edge shall advance in the plane that is within 0.032 in. (0.80 mm) of the midpoint
between the supporting edges of the specimen anvils. The striker edge shall be perpendicular to the longitudinal axis of the
Pellini , W. S., “Analytical Design Procedures for Metals of Elastic-Plastic and Plastic Fracture Properties,” Welding Research Council Bulletin 186, August 1973.
E604 − 18
Dimensions and Tolerance for Specimen Blank
Parameter Units Dimension Tolerance
Length, L in. 7.125 ±0.125
mm 181 ±3
Width, W in. 1.60 ±0.10
mm 41 ±2
Thickness, B in. 0.625 ±0.035
mm 16 ±1
Angularity, α deg 90 ±1
NOTE 1—See 9.1 for specimens less than ⁄8-in. (16 mm) thick.
FIG. 1 Dynamic Tear Test Specimen, Anvil Supports, and Striker
specimen within 0.01 rad. When in contact with the specimen, the striker edge shall be parallel within 0.005 rad to the face of a
square test specimen held against the anvil. Specimen supports for pendulum machines shall be square with anvil faces within
0.0025 rad. Specimen supports shall be coplanar within 0.005 in. (0.125 mm) and parallel within 0.002 rad.
6.2 The design of the pendulum impact machines shall position the center of percussion at the center of strike within 1 % of
the distance from the center of rotation to the center of the strike. When hanging free, the pendulums shall hang so that the striking
edge is less than 0.20 in. (5.0 mm) from the edge position of the specimen.
6.2.1 The location of the center of percussion may be determined as follows: Using a stop watch or some other suitable timer
to within 0.2 s, swing the pendulum through a total angle not greater than 15°, and record the time for 100 complete cycles (to
and fro). Determine the center of percussion as follows:
l 5 0.815ρ , to determine l in feet (1)
l 5 0.2485ρ , to determine l in metres
where:
l = distance from the axis to the center of percussion, ft (or m), and
ρ = time of a complete cycle (to and fro) of the pendulum, s.
6.2.2 For double-pendulum machines, the center of percussion of each pendulum shall be determined separately.
7. Safety Hazards
7.1 A safety screen shall surround the anvil to restrict the flight of broken specimens.
7.2 Precautions shall be taken to protect personnel from swinging pendulums, dropping weights, flying broken specimens, and
hazards associated with specimen warming and cooling media.
8. Sampling
8.1 Notation of the orientation of base metal specimens shall be in accordance with Test Method E399.
9. Test Specimens
9.1 Size of Specimens—The specimen blank shall be B by 1.60 by 7.125 in. (B by 40.6 by 181.0 mm) where B can be from ⁄16
to ⁄8 in. (5 to 16 mm). The tolerances for these dimensions are presented in Fig. 1.
E604 − 18
5 5
9.1.1 If the thickness of the product is greater than ⁄8 in. (16 mm) then a ⁄8 in. (16 mm) thick specimen shall be the standard
specimen.
9.2 Notch Detail—The notch is machined to provide a fracture path in test material of 1.125 in. (28.5 mm); the small extension
required for notch sharpening is considered a portion of the nominal net section. The notch dimensions shall conform to the values
given in Fig. 2.
9.3 Procedure for Preparing Notch:
9.3.1 Rough Machining—Machine a notch to the dimensions shown in Fig. 2. The angular apex portion and particularly the final
cut on the root radius may be machined with a precisely ground saw, cutter, electric discharge machine, or any other machining
process that will ensure a final root radius less than 0.005 in. (0.13 mm).
NOTE 2—These machining operations are normally performed simultaneously for a group of specimens.
9.3.2 Pressing Notch Tip—Press the sharp tip of the notch to the dimensions prescribed in Fig. 2 on individual specimens. Make
the impression with a blade of high-speed tool steel (60 HRC min) that has been ground to the dimensions presented in Fig. 3,
and subsequently honed to remove any burrs or rough edges. Any loading device with sufficient capacity to press the knife to the
prescribed depth may be used.
NOTE 3—Suggested practices for measuring the pressed tip and for pressing the notch tip are given in the Appendixes. The force required to accomplish
the pressing is related to the hardness and the thickness of the specimen. The force required can be estimated by either of the following formulas:
force ~lbf!5 47 3tensile strength ~ksi!3B ~in.!
force N 5 2.9 3tensile strength MPa 3B mm
~ ! ~ ! ~ !
where:
B = thickness of the specimen.
10. Calibration of Apparatus
10.1 Single-Pendulum Machine—Support the pendulum horizontally (90 6 1° from the rest position) at a point most convenient
to react with a weighing device such as a platform scale, balance, or load cell, and determine the weight within 0.4 %. Take care
to minimize friction at the bearing support and the weighing support. Measure the length of the moment arm (that is, the horizontal
distance between the center of rotation and a vertical line that passes through the point of support) within 0.1 %. The potential
energy at any angular position can be calculated from the following formula:
Energy 5 weight 3moment arm 12 cos β
~ !
Dimensions and Tolerances for Notch Tip
Parameter Units Dimension Tolerance
Net width, (W − a ) in. 1.125 ±0.020
mm 28.6 ±0.5
Machined notch width, N in. 0.0625 ±0.005
w
mm 1.59 ±0.13
Machined notch root angle, N deg 60 ±2
a
Machined notch root radius, N in. 0.005 max
r
mm 0.13 max
Pressed tip depth, t in. 0.010 ±0.005
D
mm 0.25 ±0.13
Pressed tip angle, t deg 40 ±5
a
Pressed tip root radius, t in. 0.001 max
r
mm 0.025 max
FIG. 2 Details of the Notch in a Dynamic Tear Specimen
E604 − 18
FIG. 3 Knife for Sharpening Tip of Notch in Dynamic Tear Specimen
where β = the angle displaced when the pendulum is rotated from the position of rest when hanging free. An alternative
procedure may be used if the distance between the center of rotation and the center of gravity is known within 0.1 %. The weight
is then determined within 0.4 %, with the pendulum supported horizontally at a point in line with the center of gravity. The
potential energy at any position is equal to the weight times the elevation of the center of gravity from the rest position.
10.1.1 The friction and windage loss of energy in the machine shall not exceed 2.0 % of the initial energy. The friction and
windage loss is the difference between the potential energy of the pendulum from the starting position and the potential energy
of the pendulum after it completes its swing without a specimen. Compensate the friction and windage loss so that zero energy
is indicated when the pendulum is released without a specimen being present.
10.1.2 Impact Velocity—Determine the impact velocity, v, of the machine, neglecting friction as follows:
1/2
v 5 ~2 gh!
where:
2 2
g = acceleration of gravity, ft/s (or m/s ),
h = initial elevation of the striking edge, ft (or m), and
v = striking velocity, ft/s (or m/s).
10.2 Double-Pendulum Machine—The procedure for calibrating the hammer pendulum and the anvil pendulum shall be in
accordance with the procedure in 10.1 for a single-pendulum machine. Calibrate the anvil pendulum without a specimen in place.
10.2.1 Determine and compensate the friction and windage loss of energy in accordance with the procedure described in 10.1.1.
10.3 Vertical Drop-Weight Apparatus—The dimensions of the apparatus shall be such that the falling hammer travels a
minimum vertical distance of 2 in. (51 mm) after contacting the specimen before measurement is made of the final energy and 2.75
in. (70 mm) before an arresting device is activated, as shown in Fig. 4.
10.3.1 Calibration of an aluminum block system is required for each lot of blocks machined from a single bar. Segregate and
mark for identification purposes blocks that have been prepared from each bar. The initial cross-sectional area of blocks from one
lot shall not vary more than 0.2 %. Determine the average height of the blocks before and after test and record with an error not
to exceed 0.0005 in. (0.013 mm). Develop a chart of absorbed energy versus deformation of blocks by conducting duplicate tests
without a specimen at height increments not to exceed 1 ft (305 mm) through the calibrated range. Average the deformation values
for the two blocks from each test; the average values for each height position shall agree within 0.003 in. (0.075 mm). Calculate
the absorbed energy as the weight of the hammer times the height from the top surface of the aluminum blocks to the surface of
the hammer that strikes the aluminum blocks. Construct a graph of absorbed energy versus the deformation of the aluminum blocks
as a smooth curve through the data points in the calibrated range. The dimensions of the aluminum blocks shall be such that the
stiffness of a single block at any point in the calibrated range shall be as follows:
DT Energy Value Stiffness per Block
50 ft·lbf (74 J) and under 1 ft·lbf/0.001 in. (54 J/mm)
greater than 50 ft·lbf (74 J) 2.5 ft·lbf/0.001 in. (136 J/mm)
E604 − 18
FIG. 4 Striker, Anvil, Aluminum Block Arre
...
Questions, Comments and Discussion
Ask us and Technical Secretary will try to provide an answer. You can facilitate discussion about the standard in here.
Loading comments...