ASTM E2248-09
(Test Method)Standard Test Method for Impact Testing of Miniaturized Charpy V-Notch Specimens
Standard Test Method for Impact Testing of Miniaturized Charpy V-Notch Specimens
SIGNIFICANCE AND USE
There are cases where it is impractical or impossible to prepare conventional CVN specimens. MCVN specimens are an alternative approach for characterizing notched specimen impact behavior. Typical applications include MCVN specimens prepared from the broken halves of previously tested specimens, from thin product form material, or from material cut from in-service components.
This standard establishes the requirements for performing impact tests on MCVN specimens fabricated from metallic materials. Minimum requirements are given for measurement and recording equipment such that similar sensitivity and comparable measurements, as compared to conventional CVN tests, are achieved. The user should be aware that the transition region temperature dependence data obtained from MCVN specimens are not directly comparable to those obtained from full-size standard Charpy-V specimens and suitable correlation procedures have to be employed to obtain ductile-to-brittle transition temperature (DBTT) data equivalent to those obtained using CVN specimens. In all instances, correlations will have to be developed to relate upper shelf energy (USE) data from MCVN test to CVN comparable energy levels. Application of MCVN test data to the evaluation of ferritic material behavior is the responsibility of the user of this test method. MCVN test data should not be used directly to determine the lowest allowable operating temperature for an in-service material. The data must be interpreted within the framework of a fracture mechanics assessment.
While this Test Method treats the use of an instrumented striker as an option, the use of instrumentation in the impact test is recommended and is fully described in Test Method E 2298. In order to establish the force-displacement diagram, it is necessary to measure the impact force as a function of time during contact of the striker with the specimen. The area under the force-displacement curve is a measure of absorbed energy. As an alternative,...
SCOPE
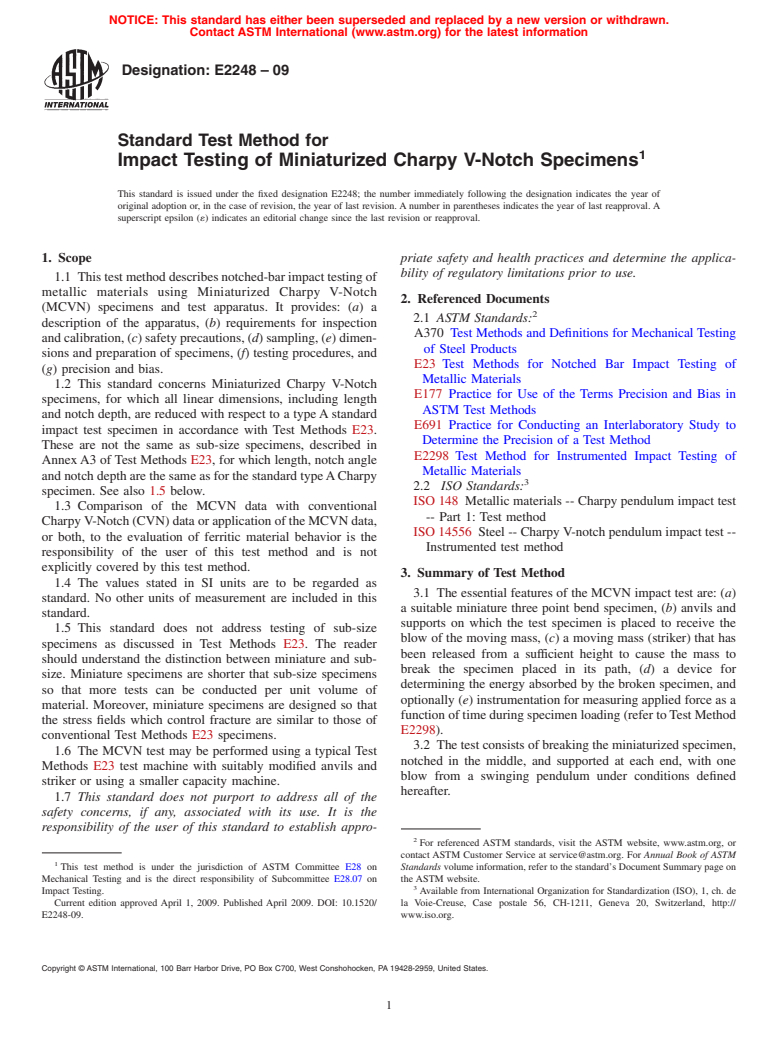
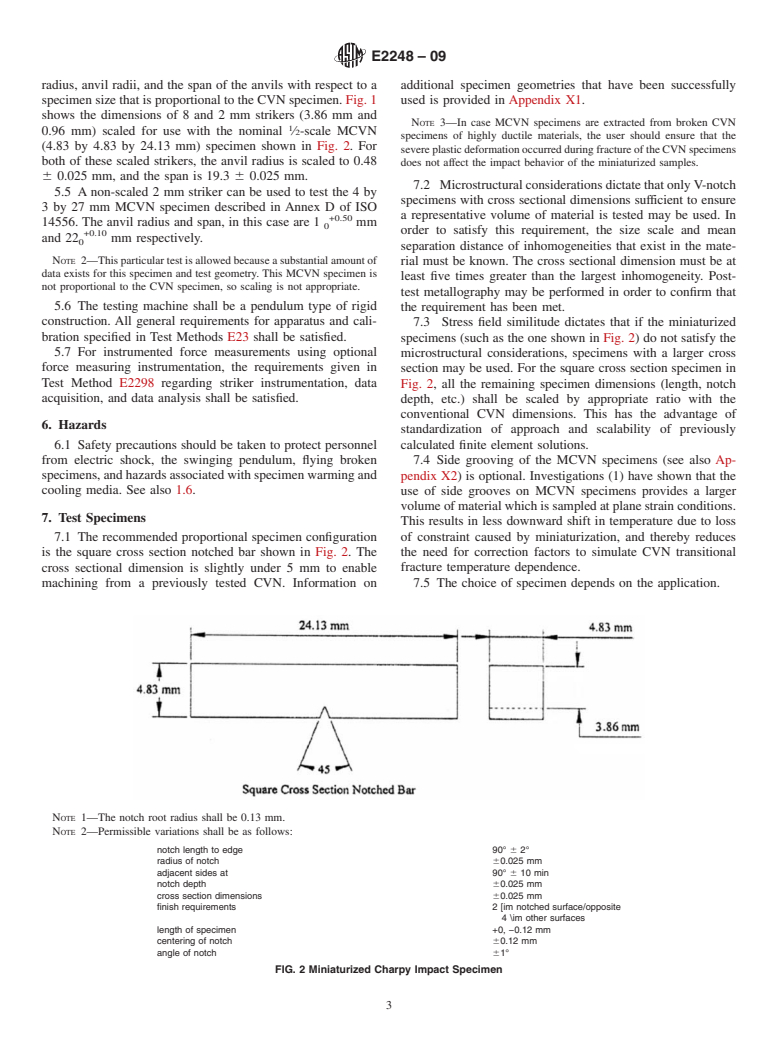
1.1 This test method describes notched-bar impact testing of metallic materials using Miniaturized Charpy V-Notch (MCVN) specimens and test apparatus. It provides: (a) a description of the apparatus, (b) requirements for inspection and calibration, (c) safety precautions, (d) sampling, (e) dimensions and preparation of specimens, (f) testing procedures, and (g) precision and bias.
1.2 This standard concerns Miniaturized Charpy V-Notch specimens, for which all linear dimensions, including length and notch depth, are reduced with respect to a type A standard impact test specimen in accordance with Test Methods E 23. These are not the same as sub-size specimens, described in Annex A3 of Test Methods E 23, for which length, notch angle and notch depth are the same as for the standard type A Charpy specimen. See also 1.5 below.
1.3 Comparison of the MCVN data with conventional Charpy V-Notch (CVN) data or application of the MCVN data, or both, to the evaluation of ferritic material behavior is the responsibility of the user of this test method and is not explicitly covered by this test method.
1.4 The values stated in SI units are to be regarded as standard. No other units of measurement are included in this standard.
1.5 This standard does not address testing of sub-size specimens as discussed in Test Methods E 23. The reader should understand the distinction between miniature and subsize. Miniature specimens are shorter that sub-size specimens so that more tests can be conducted per unit volume of material. Moreover, miniature specimens are designed so that the stress fields which control fracture are similar to those of conventional Test Methods E 23 specimens.
1.6 The MCVN test may be performed using a typical Test Methods E 23 test machine with suitably modified anvils and striker or using a smaller capacity machine.
1.7 This standard does not purport to address all of the safety concerns, if any, associated ...
General Information
Relations
Standards Content (Sample)
NOTICE: This standard has either been superseded and replaced by a new version or withdrawn.
Contact ASTM International (www.astm.org) for the latest information
Designation:E2248–09
Standard Test Method for
1
Impact Testing of Miniaturized Charpy V-Notch Specimens
This standard is issued under the fixed designation E2248; the number immediately following the designation indicates the year of
original adoption or, in the case of revision, the year of last revision. A number in parentheses indicates the year of last reapproval. A
superscript epsilon (´) indicates an editorial change since the last revision or reapproval.
1. Scope priate safety and health practices and determine the applica-
bility of regulatory limitations prior to use.
1.1 Thistestmethoddescribesnotched-barimpacttestingof
metallic materials using Miniaturized Charpy V-Notch
2. Referenced Documents
(MCVN) specimens and test apparatus. It provides: (a)a
2
2.1 ASTM Standards:
description of the apparatus, (b) requirements for inspection
A370 Test Methods and Definitions for Mechanical Testing
andcalibration,(c)safetyprecautions,(d)sampling,(e)dimen-
of Steel Products
sions and preparation of specimens, (f) testing procedures, and
E23 Test Methods for Notched Bar Impact Testing of
(g) precision and bias.
Metallic Materials
1.2 This standard concerns Miniaturized Charpy V-Notch
E177 Practice for Use of the Terms Precision and Bias in
specimens, for which all linear dimensions, including length
ASTM Test Methods
and notch depth, are reduced with respect to a typeAstandard
E691 Practice for Conducting an Interlaboratory Study to
impact test specimen in accordance with Test Methods E23.
Determine the Precision of a Test Method
These are not the same as sub-size specimens, described in
E2298 Test Method for Instrumented Impact Testing of
AnnexA3 of Test Methods E23, for which length, notch angle
Metallic Materials
and notch depth are the same as for the standard typeACharpy
3
2.2 ISO Standards:
specimen. See also 1.5 below.
ISO 148 Metallic materials -- Charpy pendulum impact test
1.3 Comparison of the MCVN data with conventional
-- Part 1: Test method
CharpyV-Notch (CVN) data or application of the MCVN data,
ISO 14556 Steel -- Charpy V-notch pendulum impact test --
or both, to the evaluation of ferritic material behavior is the
Instrumented test method
responsibility of the user of this test method and is not
explicitly covered by this test method.
3. Summary of Test Method
1.4 The values stated in SI units are to be regarded as
3.1 The essential features of the MCVN impact test are: (a)
standard. No other units of measurement are included in this
a suitable miniature three point bend specimen, (b) anvils and
standard.
supports on which the test specimen is placed to receive the
1.5 This standard does not address testing of sub-size
blow of the moving mass, (c) a moving mass (striker) that has
specimens as discussed in Test Methods E23. The reader
been released from a sufficient height to cause the mass to
should understand the distinction between miniature and sub-
break the specimen placed in its path, (d) a device for
size. Miniature specimens are shorter that sub-size specimens
determining the energy absorbed by the broken specimen, and
so that more tests can be conducted per unit volume of
optionally (e) instrumentation for measuring applied force as a
material. Moreover, miniature specimens are designed so that
functionoftimeduringspecimenloading(refertoTestMethod
the stress fields which control fracture are similar to those of
E2298).
conventional Test Methods E23 specimens.
3.2 The test consists of breaking the miniaturized specimen,
1.6 The MCVN test may be performed using a typical Test
notched in the middle, and supported at each end, with one
Methods E23 test machine with suitably modified anvils and
blow from a swinging pendulum under conditions defined
striker or using a smaller capacity machine.
hereafter.
1.7 This standard does not purport to address all of the
safety concerns, if any, associated with its use. It is the
responsibility of the user of this standard to establish appro-
2
For referenced ASTM standards, visit the ASTM website, www.astm.org, or
contact ASTM Customer Service at service@astm.org. For Annual Book of ASTM
1
This test method is under the jurisdiction of ASTM Committee E28 on Standards volume information, refer to the standard’s Document Summary page on
Mechanical Testing and is the direct responsibility of Subcommittee E28.07 on the ASTM website.
3
Impact Testing. Available from International Organization for Standardization (ISO), 1, ch. de
Current edition approved April 1, 2009. Published April 2009. DOI: 10.1520/ la Voie-Creuse, Case postale 56, CH-1211, Geneva 20, Switzerland, http://
E2248-09. www.iso.org.
Copyright © ASTM International, 100 Barr Harbor Drive, PO Box C700, West Conshohocken, PA 19428-2959, United States.
1
---------------------- Page: 1 ----------------------
E2248–09
4. Significance and U
...


Questions, Comments and Discussion
Ask us and Technical Secretary will try to provide an answer. You can facilitate discussion about the standard in here.