ASTM F24-20
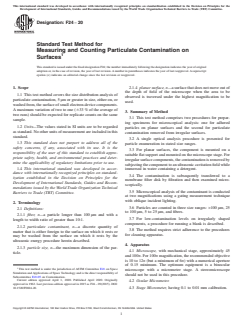
(Test Method)Standard Test Method for Measuring and Counting Particulate Contamination on Surfaces
Standard Test Method for Measuring and Counting Particulate Contamination on Surfaces
ABSTRACT
This test method establishes the standard procedures for measuring and quantizing the size distribution of particulate contamination either on, or washed from, the surface of small electron-device components. The apparatuses and reagents required for this test are also enumerated herein. The number of required test specimens is governed by the dimensions of the component or surface being analyzed. Results shall be interpreted as particles per component or particles per square centimetre of component surface.
SCOPE
1.1 This test method covers the size distribution analysis of particulate contamination, 5 μm or greater in size, either on, or washed from, the surface of small electron-device components. A maximum variation of two to one (±33 % of the average of two runs) should be expected for replicate counts on the same sample.
1.2 Units—The values stated in SI units are to be regarded as standard. No other units of measurement are included in this standard.
1.3 This standard does not purport to address all of the safety concerns, if any, associated with its use. It is the responsibility of the user of this standard to establish appropriate safety, health, and environmental practices and determine the applicability of regulatory limitations prior to use.
1.4 This international standard was developed in accordance with internationally recognized principles on standardization established in the Decision on Principles for the Development of International Standards, Guides and Recommendations issued by the World Trade Organization Technical Barriers to Trade (TBT) Committee.
General Information
- Status
- Published
- Publication Date
- 31-Mar-2020
- Technical Committee
- E21 - Space Simulation and Applications of Space Technology
- Drafting Committee
- E21.05 - Contamination
Relations
- Effective Date
- 01-Apr-2020
- Effective Date
- 01-Apr-2020
- Effective Date
- 01-Apr-2020
- Effective Date
- 01-Apr-2020
- Effective Date
- 01-Apr-2020
Overview
ASTM F24-20: Standard Test Method for Measuring and Counting Particulate Contamination on Surfaces provides standardized procedures for quantifying and analyzing particulate contamination-specifically, particles 5 μm or greater-either present on or removed from the surfaces of small electron-device components. This internationally recognized ASTM standard specifies the apparatus, reagents, and measurement techniques required to accurately determine particle size distribution and contaminant levels, vital for quality assurance in industries utilizing sensitive electronic components.
The test method supports critical contamination control processes by measuring particles per component or per square centimetre. It outlines two principal procedures: one for planar surfaces and another for irregular surfaces where particulate contamination is washed off for analysis.
Key Topics
- Particle Size Distribution Analysis: Focuses on the detection and enumeration of particles 5 μm and larger, including fibers, using optical particle counting methods.
- Surface Cleanliness Evaluation: Enables quantitative assessment of particulate contamination on planar and irregular surfaces.
- Sample Preparation: Comprehensive procedures for handling, cleaning, and preparing components to minimize background contamination and ensure reliable results.
- Microscopical Analysis: Utilizes specified magnifications and equipment calibration for accurate size and count data, employing an optical microscope with an ocular micrometer.
- Statistical Counting Techniques: Provides guidance for efficient enumeration when contamination levels are high.
- Blank Controls: Requires preparation of blanks to determine background contamination and maintain result accuracy.
- Result Interpretation: Results are reported as particles per component or per unit area, supporting statistical analysis of component cleanliness.
Applications
ASTM F24-20 has wide-reaching relevance in industries where particulate contamination control is critical, including:
- Semiconductor Manufacturing: Ensures clean production environments for elements susceptible to surface contamination.
- Microelectronics Assembly: Vital for quality control during construction and packaging of small electronic devices.
- Aerospace and Defense: Supports mission-critical reliability by minimizing the risk of particulate-induced failures.
- Medical Device Manufacturing: Assists in compliance with stringent cleanliness requirements for implantable and sensitive electronic devices.
- Research and Development Facilities: Provides a dependable test method for guarantees of cleanliness in prototyping and advanced manufacturing.
By delivering reproducible, standardized measurements of particulate contamination, organizations can mitigate product failures, reduce warranty claims, and comply with industry and international regulations.
Related Standards
Professionals using ASTM F24-20 may also reference related and complementary standards, including:
- ASTM E595: Standard Test Method for Total Mass Loss and Collected Volatile Condensable Materials from Outgassing in a Vacuum Environment.
- ASTM F50: Practice for Continuous Sizing and Counting of Particulate Contamination in Water Systems of Electronic or Microelectronic Processing Applications.
- ISO 14644-1: Cleanrooms and Associated Controlled Environments - Classification of Air Cleanliness by Particle Concentration.
- ISO 14644-9: Classification of Surface Cleanliness by Particle Concentration.
These related documents reinforce best practices in contamination control, cleanliness assessments, and environmental monitoring.
Keywords: ASTM F24-20, particulate contamination, surface cleanliness, particle counting, size distribution analysis, electron-device components, optical particle counting, cleanroom standards, contamination control, industrial cleanliness testing.
Buy Documents
ASTM F24-20 - Standard Test Method for Measuring and Counting Particulate Contamination on Surfaces
REDLINE ASTM F24-20 - Standard Test Method for Measuring and Counting Particulate Contamination on Surfaces
Get Certified
Connect with accredited certification bodies for this standard

BSMI (Bureau of Standards, Metrology and Inspection)
Taiwan's standards and inspection authority.
Sponsored listings
Frequently Asked Questions
ASTM F24-20 is a standard published by ASTM International. Its full title is "Standard Test Method for Measuring and Counting Particulate Contamination on Surfaces". This standard covers: ABSTRACT This test method establishes the standard procedures for measuring and quantizing the size distribution of particulate contamination either on, or washed from, the surface of small electron-device components. The apparatuses and reagents required for this test are also enumerated herein. The number of required test specimens is governed by the dimensions of the component or surface being analyzed. Results shall be interpreted as particles per component or particles per square centimetre of component surface. SCOPE 1.1 This test method covers the size distribution analysis of particulate contamination, 5 μm or greater in size, either on, or washed from, the surface of small electron-device components. A maximum variation of two to one (±33 % of the average of two runs) should be expected for replicate counts on the same sample. 1.2 Units—The values stated in SI units are to be regarded as standard. No other units of measurement are included in this standard. 1.3 This standard does not purport to address all of the safety concerns, if any, associated with its use. It is the responsibility of the user of this standard to establish appropriate safety, health, and environmental practices and determine the applicability of regulatory limitations prior to use. 1.4 This international standard was developed in accordance with internationally recognized principles on standardization established in the Decision on Principles for the Development of International Standards, Guides and Recommendations issued by the World Trade Organization Technical Barriers to Trade (TBT) Committee.
ABSTRACT This test method establishes the standard procedures for measuring and quantizing the size distribution of particulate contamination either on, or washed from, the surface of small electron-device components. The apparatuses and reagents required for this test are also enumerated herein. The number of required test specimens is governed by the dimensions of the component or surface being analyzed. Results shall be interpreted as particles per component or particles per square centimetre of component surface. SCOPE 1.1 This test method covers the size distribution analysis of particulate contamination, 5 μm or greater in size, either on, or washed from, the surface of small electron-device components. A maximum variation of two to one (±33 % of the average of two runs) should be expected for replicate counts on the same sample. 1.2 Units—The values stated in SI units are to be regarded as standard. No other units of measurement are included in this standard. 1.3 This standard does not purport to address all of the safety concerns, if any, associated with its use. It is the responsibility of the user of this standard to establish appropriate safety, health, and environmental practices and determine the applicability of regulatory limitations prior to use. 1.4 This international standard was developed in accordance with internationally recognized principles on standardization established in the Decision on Principles for the Development of International Standards, Guides and Recommendations issued by the World Trade Organization Technical Barriers to Trade (TBT) Committee.
ASTM F24-20 is classified under the following ICS (International Classification for Standards) categories: 17.040.20 - Properties of surfaces. The ICS classification helps identify the subject area and facilitates finding related standards.
ASTM F24-20 has the following relationships with other standards: It is inter standard links to ASTM F24-09(2015), ASTM E1560-18, ASTM E2217-12(2019), ASTM E2042/E2042M-09(2021), ASTM E2088-06(2021). Understanding these relationships helps ensure you are using the most current and applicable version of the standard.
ASTM F24-20 is available in PDF format for immediate download after purchase. The document can be added to your cart and obtained through the secure checkout process. Digital delivery ensures instant access to the complete standard document.
Standards Content (Sample)
This international standard was developed in accordance with internationally recognized principles on standardization established in the Decision on Principles for the
Development of International Standards, Guides and Recommendations issued by the World Trade Organization Technical Barriers to Trade (TBT) Committee.
Designation: F24 − 20
Standard Test Method for
Measuring and Counting Particulate Contamination on
Surfaces
ThisstandardisissuedunderthefixeddesignationF24;thenumberimmediatelyfollowingthedesignationindicatestheyearoforiginal
adoptionor,inthecaseofrevision,theyearoflastrevision.Anumberinparenthesesindicatestheyearoflastreapproval.Asuperscript
epsilon (´) indicates an editorial change since the last revision or reapproval.
1. Scope 2.1.4 planar surface, n—asurfacethatdoesnotmoveoutof
the depth of field of the microscope when the area to be
1.1 This test method covers the size distribution analysis of
observed is traversed under the highest magnification to be
particulate contamination, 5µm or greater in size, either on, or
used.
washedfrom,thesurfaceofsmallelectron-devicecomponents.
Amaximum variation of two to one (633% of the average of
3. Summary of Method
two runs) should be expected for replicate counts on the same
3.1 This test method comprises two procedures for prepar-
sample.
ing specimens for microscopical analysis: one for adhered
1.2 Units—The values stated in SI units are to be regarded
particles on planar surfaces and the second for particulate
asstandard.Nootherunitsofmeasurementareincludedinthis
contamination removed from irregular surfaces.
standard.
3.2 A single optical analysis procedure is presented for
1.3 This standard does not purport to address all of the
particle enumeration in stated size ranges.
safety concerns, if any, associated with its use. It is the
3.3 For planar surfaces, the component is mounted on a
responsibility of the user of this standard to establish appro-
suitableflatsupportandmountedonthemicroscopestage.For
priate safety, health, and environmental practices and deter-
irregularsurfacecomponents,thecontaminationisremovedby
mine the applicability of regulatory limitations prior to use.
subjectingthecomponenttoanultrasoniccavitationfieldwhile
1.4 This international standard was developed in accor-
immersed in water containing a detergent.
dance with internationally recognized principles on standard-
3.4 The contamination is subsequently transferred to a
ization established in the Decision on Principles for the
membrane filter disk by filtration and then examined micro-
Development of International Standards, Guides and Recom-
scopically.
mendations issued by the World Trade Organization Technical
3.5 Microscopical analysis of the contaminant is conducted
Barriers to Trade (TBT) Committee.
at two magnifications using a gating measurement technique
with oblique incident lighting.
2. Terminology
3.6 Particles are counted in three size ranges: >100µm, 25
2.1 Definitions:
to 100µm, 5 to 25µm, and fibers.
2.1.1 fiber, n—a particle longer than 100µm and with a
3.7 For low-contamination levels on irregularly shaped
length to width ratio of greater than 10:1.
components, a procedure for running a blank is described.
2.1.2 particulate contaminant, n—a discrete quantity of
3.8 The method requires strict adherence to the procedures
matter that is either foreign to the surface on which it rests or
for cleaning apparatus.
may be washed from the surface on which it rests by the
ultrasonic energy procedure herein described.
4. Apparatus
2.1.3 particle size, n—the maximum dimension of the par-
4.1 Microscope, with mechanical stage, approximately 45
ticle.
and100×.For100×magnification,therecommendedobjective
is 10 to 12× (but a minimum of 6×) with a numerical aperture
of 0.15 minimum. The optimum equipment is a binocular
This test method is under the jurisdiction of ASTM Committee E21 on Space
microscope with a micrometer stage. A stereomicroscope
Simulation andApplications of SpaceTechnology and is the direct responsibility of
should not be used in this procedure.
Subcommittee E21.05 on Contamination.
Current edition approved April 1, 2020. Published April 2020. Originally
4.2 Ocular Micrometer.
approved in 1962. Last previous edition approved in 2015 as F24–09(2015). DOI:
10.1520/F0024-20. 4.3 Stage Micrometer, having 0.1 to 0.01mm calibration.
Copyright © ASTM International, 100 Barr Harbor Drive, PO Box C700, West Conshohocken, PA 19428-2959. United States
F24−20
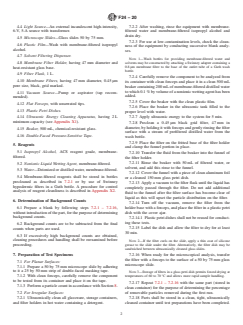
4.4 Light Source—An external incandescent high-intensity, 7.2.2 After washing, rinse the equipment with membrane-
6-V, 5-A source with transformer. filtered water and membrane-filtered isopropyl alcohol and
drain dry.
4.5 Microscope Slides—Glass slides 50 by 75 mm.
7.2.3 For use at low-contamination levels, check the clean-
4.6 Plastic Film—Wash with membrane-filtered isopropyl
ness of the equipment by conducting successive blank analy-
alcohol.
ses.
4.7 Solvent Filtering Dispenser.
NOTE 1—Wash bottles for providing membrane-filtered water and
solvents may be constructed by attaching a Swinney adapter containing a
4.8 Membrane Filter Holder, having 47mm diameter and
0.8µm membrane filter to the base of the outlet tube of a Guth wash
heat-resistant glass base.
bottle.
4.9 Filter Flask,1L.
7.2.4 Carefully remove the component to be analyzed from
4.10 Membrane Filters, having 47mm diameter, 0.45µm
its container with clean forceps and place it in a clean 500mL
pore size, black, grid marked.
beakercontaining200mLofmembrane-filtereddistilledwater
towhich0.1%byvolumeofanonionicwettingagenthasbeen
4.11 Vacuum Source—Pump or aspirator (tap recom-
added.
mended).
7.2.5 Cover the beaker with the clean plastic film.
4.12 Flat Forceps, with unserrated tips.
7.2.6 Place the beaker in the ultrasonic tank filled to the
4.13 Plastic Petri Dishes.
proper level with water.
4.14 Ultrasonic Energy Cleaning Apparatus, having 2L 7.2.7 Apply ultrasonic energy to the system for 5min.
minimum capacity (see Appendix X1).
7.2.8 Preclean a 0.45 µm black grid filter, 47 mm in
diameter,byholdingitwithforcepsandgentlyrinsingthefilter
4.15 Beaker, 500mL, chemical-resistant glass.
surface with a stream of prefiltered distilled water from the
4.16 Double-Faced Pressure-Sensitive Tape.
wash bottle.
7.2.9 Place the filter on the fritted base of the filter holder
5. Reagents
and clamp the funnel portion in place.
5.1 Isopropyl Alcohol, ACS reagent grade, membrane-
7.2.10 Transfer the fluid from the beaker into the funnel of
filtered.
the filter holder.
7.2.11 Rinse the beaker with 50mL of filtered water, or
5.2 Nonionic Liquid Wetting Agent, membrane-filtered.
solvent, and add this rinse to the funnel.
5.3 Water—Deionizedordistilledwater,membrane-filtered.
7.2.12 Coverthefunnelwithapieceofcleanaluminumfoil
5.4 Membrane-filtered reagents shall be stored in bottles
or a cleaned 150mm glass petri dish.
precleaned as described in 7.2.1 or by use of Swinney
7.2.13 Apply a vacuum to the filter flask until the liquid has
hypodermic filters in a Guth bottle. A procedure for control
completely passed through the filter. Do not add additional
analysis of reagent cleanliness is described in Appendix X2.
fluid to the funnel after the filter surface has become clear of
liquid as this will upset the particle distribution on the filter.
6. Determination of Background Counts
7.2.14 Turn off the vacuum, remove the filter from the
6.1 Prepare a blank by following steps 7.2.1 – 7.2.16, holderbas
...
This document is not an ASTM standard and is intended only to provide the user of an ASTM standard an indication of what changes have been made to the previous version. Because
it may not be technically possible to adequately depict all changes accurately, ASTM recommends that users consult prior editions as appropriate. In all cases only the current version
of the standard as published by ASTM is to be considered the official document.
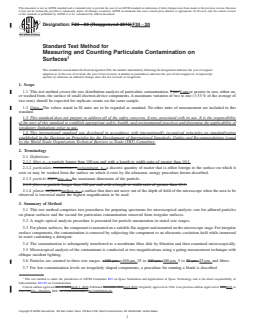
Designation: F24 − 09 (Reapproved 2015) F24 − 20
Standard Test Method for
Measuring and Counting Particulate Contamination on
Surfaces
This standard is issued under the fixed designation F24; the number immediately following the designation indicates the year of original
adoption or, in the case of revision, the year of last revision. A number in parentheses indicates the year of last reapproval. A superscript
epsilon (´) indicates an editorial change since the last revision or reapproval.
1. Scope
1.1 This test method covers the size distribution analysis of particulate contamination, 5 μm 5 μm or greater in size, either on,
or washed from, the surface of small electron-device components. A maximum variation of two to one (633 % of the average of
two runs) should be expected for replicate counts on the same sample.
1.2 Units—The values stated in SI units are to be regarded as standard. No other units of measurement are included in this
standard.
1.3 This standard does not purport to address all of the safety concerns, if any, associated with its use. It is the responsibility
of the user of this standard to establish appropriate safety, health, and environmental practices and determine the applicability of
regulatory limitations prior to use.
1.4 This international standard was developed in accordance with internationally recognized principles on standardization
established in the Decision on Principles for the Development of International Standards, Guides and Recommendations issued
by the World Trade Organization Technical Barriers to Trade (TBT) Committee.
2. Terminology
2.1 Definitions:
2.1.1 fiber, n—a particle longer than 100 μm and with a length to width ratio of greater than 10:1.
2.1.2 particulate contaminant—contaminant, n—a discrete quantity of matter that is either foreign to the surface on which it
rests or may be washed from the surface on which it rests by the ultrasonic energy procedure herein described.
2.1.3 particle size—size, n—the maximum dimension of the particle.
2.1.3 fiber—a particle longer than 100 μm and with a length to width ratio of greater than 10:1.
2.1.4 planar surface—surface, n—a surface that does not move out of the depth of field of the microscope when the area to be
observed is traversed under the highest magnification to be used.
3. Summary of Method
3.1 This test method comprises two procedures for preparing specimens for microscopical analysis: one for adhered particles
on planar surfaces and the second for particulate contamination removed from irregular surfaces.
3.2 A single optical analysis procedure is presented for particle enumeration in stated size ranges.
3.3 For planar surfaces, the component is mounted on a suitable flat support and mounted on the microscope stage. For irregular
surface components, the contamination is removed by subjecting the component to an ultrasonic cavitation field while immersed
in water containing a detergent.
3.4 The contamination is subsequently transferred to a membrane filter disk by filtration and then examined microscopically.
3.5 Microscopical analysis of the contaminant is conducted at two magnifications using a gating measurement technique with
oblique incident lighting.
3.6 Particles are counted in three size ranges: >100 μm, >100 μm, 25 to 100 μm, 100 μm, 5 to 25 μm, 25 μm, and fibers.
3.7 For low-contamination levels on irregularly shaped components, a procedure for running a blank is described.
This test method is under the jurisdiction of ASTM Committee E21 on Space Simulation and Applications of Space Technology and is the direct responsibility of
Subcommittee E21.05 on Contamination.
Current edition approved Oct. 1, 2015April 1, 2020. Published November 2015April 2020. Originally approved in 1962. Last previous edition approved in 20092015 as
F24 – 09.F24 – 09(2015). DOI: 10.1520/F0024-09R15.10.1520/F0024-20.
Copyright © ASTM International, 100 Barr Harbor Drive, PO Box C700, West Conshohocken, PA 19428-2959. United States
F24 − 20
3.8 The method requires strict adherence to the procedures for cleaning apparatus.
4. Apparatus
4.1 Microscope, with mechanical stage, approximately 45 and 100×. For 100× magnification, the recommended objective is 10
to 12× (but a minimum of 6×) with a numerical aperture of 0.15 minimum. The optimum equipment is a binocular microscope
with a micrometer stage. A stereomicroscope should not be used in this procedure.
4.2 Ocular Micrometer,Micrometer. B & L 31–16–10.
4.3 Stage Micrometer, B & L 31–16–99,having 0.1-0.1 to 0.01-mm0.01 mm calibration.
4.4 Light Source—An external incandescent high-intensity, 6-V, 5-A source with transformer.
4.5 Microscope Slides—Glass slides 50 by 75 mm.
4.6 Plastic Film—Wash with membrane-filtered isopropyl alcohol.
4.7 Solvent Filtering Dispenser.
4.8 Membrane Filter Holder, having 47-mm47 mm diameter and heat-resistant glass base.
4.9 Filter Flask, 1 L.
4.10 Membrane Filters, having 47-mm47 mm diameter, 0.45-μm0.45 μm pore size, black, grid marked.
4.11 Vacuum Source—Pump or aspirator (tap recommended).
4.12 Flat Forceps, with unserrated tips.
4.13 Plastic Petri Dishes.
4.14 Ultrasonic Energy Cleaning Apparatus, having 2-L2 L minimum capacity (see Appendix X1).
4.15 Beaker, 500-mL,500 mL, chemical-resistant glass.
4.16 Double-Faced Pressure-Sensitive Tape.
5. Reagents
5.1 Isopropyl Alcohol, ACS reagent grade, membrane-filtered.
5.2 Nonionic Liquid Wetting Agent, membrane-filtered.
5.3 Water—Deionized or distilled water, membrane-filtered.
5.4 Membrane-filtered reagents shall be stored in bottles precleaned as described in 7.2.1 or by use of Swinney hypodermic
filters in a Guth bottle. A procedure for control analysis of reagent cleanliness is described in Appendix X2.
6. Determination of Background Counts
6.1 Prepare a blank by following steps 7.2.1 – 7.2.16, without introduction of the part, for the purpose of determining
background counts.
6.2 Background counts are to be subtracted from the final counts when parts are used.
6.3 If excessively high background counts are obtained, cleaning procedures and handling shall be reexamined before
proceeding.
7. Preparation of Test Specimens
7.1 For Planar Surfaces:
7.1.1 Prepare a 50-50 by 75-mm75 mm microscope slide by adhering to it a 25-25 by 50-mm50 mm strip of double-faced
masking tape.
7.1.2 With clean forceps, carefully remove the component to be tested from its container and place it on the tape.
7.1.3 Perform a particle count in accordance with Section 8.
7.2 For Irregular Surfaces:
7.2.1 Ultrasonically clean all glassware, storage containers, and filter holders in hot water containing a detergent.
7.2.2 After washing, rinse the equipment with membrane-filtered water and membrane-filtered isopropyl alcohol and drain dry.
7.2.3 For use at low-contamination levels, check the cleanness of the equipment by conducting successive blank analyses.
NOTE 1—Wash bottles for providing membrane-filtered water and solvents may be constructed by attaching a Swinney adapter containing a
0.8-μm0.8 μm membrane filter to the base of the outlet tube of a Guth wash bottle.
7.2.4 Carefully remove the component to be analyzed from its container with clean forceps and place it in a clean
500-mL500 mL beaker containing 200 mL 200 mL of membrane-filtered distilled water to which 0.1 % by volume of a nonionic
wetting agent has been added.
F24 − 20
7.2.5 Cover the beaker with the clean plastic film.
7.2.6 Place the beaker in the ultrasonic tank filled to the proper level with water.
7.2.7 Apply ultrasonic energy to the system for 5 min. 5 min.
7.2.8 Preclean a 0.45-μm0.45 μm black grid filter, 47 mm 47 mm in diameter, by holding it with forceps and gently rinsing the
filter surface with a stream of prefiltered distilled water from the wash bottle.
7.2.9 Place the filter on the fritted base of the fi
...

Questions, Comments and Discussion
Ask us and Technical Secretary will try to provide an answer. You can facilitate discussion about the standard in here.
Loading comments...