ASTM B919-19
(Specification)Standard Specification for Welded Copper Heat Exchanger Tubes With Internal Enhancement
Standard Specification for Welded Copper Heat Exchanger Tubes With Internal Enhancement
ABSTRACT
This specification establishes the requirements for welded, internally enhanced copper tube, in straight lengths or coils, suitable for use in refrigeration and air conditioning products or other heat exchangers. The following types of welded tubes are: as-welded and welded tube, subsequently annealed. The material of manufacture shall be sheet or strip, of the required alloy, and may be either cold worked or annealed. The welded tube shall be manufactured from either cold rolled or annealed sheet or strip. The sheet or strip shall be formed into a tubular shape on a suitable forming mill. The material shall conform to the chemical requirements specified. The microstructure shall show complete recrystallization and shall have an average grain size within the limits specified. Nondestructive examination, electromagnetic test, cleanness requirements, and cuprous oxide requirement shall be made to conform to the specified requirements.
SCOPE
1.1 This specification establishes the requirements for welded, internally enhanced copper tube, in straight lengths or coils, suitable for use in refrigeration and air conditioning products or other heat exchangers.
1.2 Units—The values stated in inch-pound units are to be regarded as standard. The values given in parentheses are mathematical conversions to SI units that are provided for information only and are not considered standard.
1.3 The product shall be produced of the following coppers. Unless otherwise specified, tubes made from any one of these coppers may be supplied:
Copper UNS No.
Type of Metal
C10200
Oxygen-free without residual deoxidants
C12200
Phosphorized, high residual phosphorus (DHP)
1.4 The following pertains to the test method described in 18.5 of this specification. This standard does not purport to address all of the safety concerns, if any, associated with its use. It is the responsibility of the user of this standard to establish appropriate safety, health, and environmental practices and determine the applicability of regulatory requirements prior to use.
1.5 This international standard was developed in accordance with internationally recognized principles on standardization established in the Decision on Principles for the Development of International Standards, Guides and Recommendations issued by the World Trade Organization Technical Barriers to Trade (TBT) Committee.
General Information
- Status
- Published
- Publication Date
- 31-Mar-2019
- Technical Committee
- B05 - Copper and Copper Alloys
- Drafting Committee
- B05.04 - Pipe and Tube
Relations
- Effective Date
- 01-Apr-2019
- Effective Date
- 01-Jan-2024
- Effective Date
- 01-Aug-2019
- Effective Date
- 15-Jun-2019
- Effective Date
- 01-Apr-2019
- Effective Date
- 01-Jan-2019
- Effective Date
- 01-Oct-2018
- Effective Date
- 01-Jun-2018
- Effective Date
- 01-Mar-2018
- Effective Date
- 01-Oct-2016
- Effective Date
- 15-Jul-2016
- Effective Date
- 01-Apr-2016
- Effective Date
- 01-Feb-2015
- Effective Date
- 01-Dec-2013
- Effective Date
- 01-Jun-2013
Overview
ASTM B919-19: Standard Specification for Welded Copper Heat Exchanger Tubes With Internal Enhancement outlines the requirements for welded, internally enhanced copper tubes, supplied in straight lengths or coils. These tubes are engineered for applications such as refrigeration, air conditioning, and other types of heat exchangers where enhanced heat transfer is essential. The standard covers two main copper alloys, C10200 (Oxygen-free) and C12200 (Phosphorized, high residual phosphorus – DHP), ensuring high purity and performance. ASTM B919-19 specifies manufacturing, chemical composition, mechanical properties, testing, and packaging to promote reliability and interchangeability in global HVAC and heat transfer systems.
Key Topics
- Product Types: Describes welded copper tubes supplied as as-welded, or welded and subsequently annealed, in both straight lengths and coils.
- Material Requirements: Tubes must be manufactured from sheet or strip of specified copper alloys (C10200 or C12200). Chemical composition must meet specified purity and phosphorus limits.
- Internal Enhancement: Mandates that the internal surface geometry is intentionally cold-formed to improve the tube's heat transfer efficiency.
- Manufacturing Methods: Welding is accomplished without filler metal, using forge or fusion processes, with internal flash management options for quality control.
- Physical and Mechanical Properties: Includes tensile strength, elongation, grain size, and expansion requirements suitable for efficient and durable performance in heat exchangers.
- Testing and Inspection: Outlines nondestructive eddy current tests, cleanness standards, and cuprous oxide limits (especially for C10200), enhancing quality assurance.
- Dimensional Tolerances: Specifies permissible variations for outside diameter, bottom-wall thickness, roundness, length, straightness, and squareness of cut for consistency in installation and performance.
Applications
Welded copper heat exchanger tubes with internal enhancement are vital components across several industries due to their efficient heat transfer, mechanical stability, and cleanliness:
- Refrigeration: Used in evaporators, condensers, and chillers for commercial, industrial, and residential systems, providing reliable performance under varying pressures and temperatures.
- Air Conditioning: Integral to HVAC coils and heat exchanger assemblies, these enhanced tubes ensure optimal energy efficiency and system durability.
- Industrial Heat Exchangers: Suitable for process cooling and heating equipment, power generation, and other thermal management solutions requiring efficient heat transfer.
- Other Thermal Applications: Deployed in specialized equipment such as heat recovery systems, marine condensers, and automotive climate control solutions.
Related Standards
Users of ASTM B919-19 will benefit from familiarity with relevant ASTM standards for copper tubes and associated testing methods, including:
- ASTM B153: Test Method for Expansion (Pin Test) of Copper and Copper-Alloy Pipe and Tubing
- ASTM B577: Methods for Detection of Cuprous Oxide in Copper (Hydrogen Embrittlement Susceptibility)
- ASTM B601: Classification for Temper Designations for Copper and Copper Alloys
- ASTM E8/E8M: Test Methods for Tension Testing of Metallic Materials
- ASTM E243: Practice for Electromagnetic (Eddy Current) Examination of Copper Tubes
- ASTM E112: Methods for Determining Average Grain Size
- ASTM B846: Terminology for Copper and Copper Alloys
When specifying or purchasing welded copper heat exchanger tubes, referencing ASTM B919-19 ensures that products meet internationally recognized quality, mechanical, and chemical performance criteria, bolstering reliability and efficiency in critical heating and cooling systems.
Buy Documents
ASTM B919-19 - Standard Specification for Welded Copper Heat Exchanger Tubes With Internal Enhancement
REDLINE ASTM B919-19 - Standard Specification for Welded Copper Heat Exchanger Tubes With Internal Enhancement
Get Certified
Connect with accredited certification bodies for this standard

Element Materials Technology
Materials testing and product certification.

Inštitut za kovinske materiale in tehnologije
Institute of Metals and Technology. Materials testing, metallurgical analysis, NDT.
Sponsored listings
Frequently Asked Questions
ASTM B919-19 is a technical specification published by ASTM International. Its full title is "Standard Specification for Welded Copper Heat Exchanger Tubes With Internal Enhancement". This standard covers: ABSTRACT This specification establishes the requirements for welded, internally enhanced copper tube, in straight lengths or coils, suitable for use in refrigeration and air conditioning products or other heat exchangers. The following types of welded tubes are: as-welded and welded tube, subsequently annealed. The material of manufacture shall be sheet or strip, of the required alloy, and may be either cold worked or annealed. The welded tube shall be manufactured from either cold rolled or annealed sheet or strip. The sheet or strip shall be formed into a tubular shape on a suitable forming mill. The material shall conform to the chemical requirements specified. The microstructure shall show complete recrystallization and shall have an average grain size within the limits specified. Nondestructive examination, electromagnetic test, cleanness requirements, and cuprous oxide requirement shall be made to conform to the specified requirements. SCOPE 1.1 This specification establishes the requirements for welded, internally enhanced copper tube, in straight lengths or coils, suitable for use in refrigeration and air conditioning products or other heat exchangers. 1.2 Units—The values stated in inch-pound units are to be regarded as standard. The values given in parentheses are mathematical conversions to SI units that are provided for information only and are not considered standard. 1.3 The product shall be produced of the following coppers. Unless otherwise specified, tubes made from any one of these coppers may be supplied: Copper UNS No. Type of Metal C10200 Oxygen-free without residual deoxidants C12200 Phosphorized, high residual phosphorus (DHP) 1.4 The following pertains to the test method described in 18.5 of this specification. This standard does not purport to address all of the safety concerns, if any, associated with its use. It is the responsibility of the user of this standard to establish appropriate safety, health, and environmental practices and determine the applicability of regulatory requirements prior to use. 1.5 This international standard was developed in accordance with internationally recognized principles on standardization established in the Decision on Principles for the Development of International Standards, Guides and Recommendations issued by the World Trade Organization Technical Barriers to Trade (TBT) Committee.
ABSTRACT This specification establishes the requirements for welded, internally enhanced copper tube, in straight lengths or coils, suitable for use in refrigeration and air conditioning products or other heat exchangers. The following types of welded tubes are: as-welded and welded tube, subsequently annealed. The material of manufacture shall be sheet or strip, of the required alloy, and may be either cold worked or annealed. The welded tube shall be manufactured from either cold rolled or annealed sheet or strip. The sheet or strip shall be formed into a tubular shape on a suitable forming mill. The material shall conform to the chemical requirements specified. The microstructure shall show complete recrystallization and shall have an average grain size within the limits specified. Nondestructive examination, electromagnetic test, cleanness requirements, and cuprous oxide requirement shall be made to conform to the specified requirements. SCOPE 1.1 This specification establishes the requirements for welded, internally enhanced copper tube, in straight lengths or coils, suitable for use in refrigeration and air conditioning products or other heat exchangers. 1.2 Units—The values stated in inch-pound units are to be regarded as standard. The values given in parentheses are mathematical conversions to SI units that are provided for information only and are not considered standard. 1.3 The product shall be produced of the following coppers. Unless otherwise specified, tubes made from any one of these coppers may be supplied: Copper UNS No. Type of Metal C10200 Oxygen-free without residual deoxidants C12200 Phosphorized, high residual phosphorus (DHP) 1.4 The following pertains to the test method described in 18.5 of this specification. This standard does not purport to address all of the safety concerns, if any, associated with its use. It is the responsibility of the user of this standard to establish appropriate safety, health, and environmental practices and determine the applicability of regulatory requirements prior to use. 1.5 This international standard was developed in accordance with internationally recognized principles on standardization established in the Decision on Principles for the Development of International Standards, Guides and Recommendations issued by the World Trade Organization Technical Barriers to Trade (TBT) Committee.
ASTM B919-19 is classified under the following ICS (International Classification for Standards) categories: 77.140.30 - Steels for pressure purposes. The ICS classification helps identify the subject area and facilitates finding related standards.
ASTM B919-19 has the following relationships with other standards: It is inter standard links to ASTM B919-12, ASTM E8/E8M-24, ASTM B846-19a, ASTM E2575-19, ASTM B577-19, ASTM B846-19, ASTM B601-18a, ASTM E243-18, ASTM B601-18, ASTM B601-16, ASTM E8/E8M-16, ASTM B577-16, ASTM E8/E8M-15, ASTM E243-13, ASTM E8/E8M-13. Understanding these relationships helps ensure you are using the most current and applicable version of the standard.
ASTM B919-19 is available in PDF format for immediate download after purchase. The document can be added to your cart and obtained through the secure checkout process. Digital delivery ensures instant access to the complete standard document.
Standards Content (Sample)
This international standard was developed in accordance with internationally recognized principles on standardization established in the Decision on Principles for the
Development of International Standards, Guides and Recommendations issued by the World Trade Organization Technical Barriers to Trade (TBT) Committee.
Designation:B919 −19
Standard Specification for
Welded Copper Heat Exchanger Tubes With Internal
Enhancement
This standard is issued under the fixed designation B919; the number immediately following the designation indicates the year of
original adoption or, in the case of revision, the year of last revision.Anumber in parentheses indicates the year of last reapproval.A
superscript epsilon (´) indicates an editorial change since the last revision or reapproval.
1. Scope* B153Test Method for Expansion (Pin Test) of Copper and
Copper-Alloy Pipe and Tubing
1.1 This specification establishes the requirements for
B577TestMethodsforDetectionofCuprousOxide(Hydro-
welded, internally enhanced copper tube, in straight lengths or
gen Embrittlement Susceptibility) in Copper
coils, suitable for use in refrigeration and air conditioning
B601ClassificationforTemperDesignationsforCopperand
products or other heat exchangers.
Copper Alloys—Wrought and Cast
1.2 Units—The values stated in inch-pound units are to be
B846Terminology for Copper and Copper Alloys
regarded as standard. The values given in parentheses are
E3Guide for Preparation of Metallographic Specimens
mathematical conversions to SI units that are provided for
E8/E8MTest Methods for Tension Testing of Metallic Ma-
information only and are not considered standard.
terials
1.3 Theproductshallbeproducedofthefollowingcoppers. E29Practice for Using Significant Digits in Test Data to
Determine Conformance with Specifications
Unless otherwise specified, tubes made from any one of these
coppers may be supplied: E62Test Methods for Chemical Analysis of Copper and
CopperAlloys(PhotometricMethods)(Withdrawn2010)
Copper UNS No. Type of Metal
E112Test Methods for Determining Average Grain Size
C10200 Oxygen-free without residual deoxidants
E243PracticeforElectromagnetic(EddyCurrent)Examina-
C12200 Phosphorized, high residual phosphorus (DHP)
tion of Copper and Copper-Alloy Tubes
1.4 The following pertains to the test method described in
E255Practice for Sampling Copper and Copper Alloys for
18.5 of this specification. This standard does not purport to
the Determination of Chemical Composition
address all of the safety concerns, if any, associated with its
E478Test Methods for ChemicalAnalysis of CopperAlloys
use. It is the responsibility of the user of this standard to
E2575Standard Test Method for Determination of Oxygen
establish appropriate safety, health, and environmental prac-
in Copper and Copper Alloys (Withdrawn 2017)
tices and determine the applicability of regulatory require-
ments prior to use.
3. Terminology
1.5 This international standard was developed in accor-
3.1 Forthedefinitionsoftermsrelatedtocopperandcopper
dance with internationally recognized principles on standard-
alloys refer to Terminology B846.
ization established in the Decision on Principles for the
Development of International Standards, Guides and Recom- 3.2 Definitions of Terms Specific to This Standard:
mendations issued by the World Trade Organization Technical 3.2.1 bottom wall, n—the wall thickness measured from the
Barriers to Trade (TBT) Committee. base of the enhancement to the outside surface.
3.2.2 enhancement, n—a geometrical feature intentionally
2. Referenced Documents
formed on a tube I.D. surface to improve heat transfer.
2.1 ASTM Standards:
3.2.3 level wound, adj—a type of coil in which the turns are
wound into layers parallel to the axis of the coil such that
successive turns in a given layer are next to one another.
ThisspecificationisunderthejurisdictionofASTMCommitteeB05onCopper
3.2.4 roundness tolerance, n—the roundness tolerance is
and CopperAlloys and is the direct responsibility of Subcommittee B05.04 on Pipe
defined as the maximum OD at a point minus the minimum
and Tube.
Current edition approved April 1, 2019. Published May 2019. Originally
OD, at the same plane of intersection of the tube, divided by
approved in 2001. Last previous edition approved in 2012 as B919–12. DOI:
the specified OD × 100%.
10.1520/B0919–19.
For referenced ASTM standards, visit the ASTM website, www.astm.org, or
contact ASTM Customer Service at service@astm.org. For Annual Book of ASTM
Standards volume information, refer to the standard’s Document Summary page on The last approved version of this historical standard is referenced on
the ASTM website. www.astm.org.
*A Summary of Changes section appears at the end of this standard
Copyright © ASTM International, 100 Barr Harbor Drive, PO Box C700, West Conshohocken, PA 19428-2959. United States
B919−19
TABLE 1 Chemical Requirements
3.2.5 squareness of cut, n—the maximum deviation of one
A
side of a cross section from the opposite side, when measured UNS Alloy Number Copper, wt % Phosphorus, wt %
B
against the projected perpendicularity of the plane of the C10200 99.95 min .
C12200 99.9 min 0.015–0.040
projected center of the tube at the ends.
A
Cu value includes Ag.
B
Oxygen in C10200 shall be 10 ppm max.
4. Classification
4.1 The following types of welded tube are manufactured
under the scope of this specification:
4.1.1 As-Welded—Welded tube without subsequent heat
(2) IFR—internal flash to be removed by scarfing, and (3)
treatment or cold work.
IFD—internal flash displaced by rolling or drawing.
4.1.2 Welded Tube, Subsequently Annealed—Welded tube
6.2.3 The internal enhancement shall be produced by cold
annealed to produce a uniform grain size appropriate to the
forming.
specified annealed temper.
6.2.4 The longitudinal seam from welding shall be free of
5. Ordering Information
filler metal.
5.1 Include the following information when placing orders
7. Chemical Composition
for product under this specification:
5.1.1 ASTM designation number and year of issue; 7.1 The material shall conform to the requirements in Table
5.1.2 Copper UNS No.; 1 for the copper specified in the contract or purchase order.
5.1.3 Tube type (Section 4);
7.2 The composition limits do not preclude the presence of
5.1.4 Temper (Section 8);
other elements. By agreement between the manufacturer and
5.1.5 Length, diameter, bottom-wall thickness, and en-
purchaser, limits may be established and analysis required for
hancement dimensions. Configuration of the enhanced surface
unnamed elements.
shall be as agreed upon between the manufacturer or supplier
and purchaser;
8. Temper
5.1.6 How furnished: straight or coils;
8.1 Tempers, as defined in Classification B601,ofthe
5.1.7 Quantity;
various tube types are as follows:
5.1.8 Cuprous oxide test, if required (12.3 and 16.1.4);
8.1.1 As-Welded:
5.1.9 Certification, when required (Section 22); and
8.1.1.1 Annealed strip WM50, subsequently internally en-
5.1.10 Mill test report, if required (Section 23).
hanced by cold working and welded.
8.1.2 Welded and Annealed:
6. Materials and Manufacture
8.1.2.1 Annealed strip, internally enhanced by cold
6.1 Materials:
working, welded and soft annealed W060, and
6.1.1 Thematerialofmanufactureshallbeaform(cast,bar,
8.1.2.2 Annealed strip, internally enhanced by cold
cake, slab, etc.) of CopperAlloy UNS No. C10200 or C12200
working, welded and light annealed W050.
[or other designation] of such purity and soundness as to be
suitable for processing into the products prescribed herein. NOTE 1—By agreement with the purchaser and manufacturer, product
in special tempers may be supplied with properties as agreed upon
6.2 Manufacture:
between the purchaser and the manufacturer.
6.2.1 The welded tube shall be manufactured from either
coldrolledorannealedsheetorstrip.Thesheetorstripshallbe
9. Grain Size for Annealed Tempers
formed into a tubular shape on a suitable forming mill.
9.1 Grain size shall be the standard requirement for all
6.2.2 Welding shall be accomplished by any process that
productintheannealedtempers.Acceptanceorrejectionbased
producesforgeorfusionweldsleavingnocrevicevisibletothe
upon grain size shall depend only on the averae grain size of a
unaided eye in the weld seam.
test specimen taken from each of two sample portions, and
6.2.2.1 Forge—Welded Tube—The edges of the strip shall
each specimen shall be within the limits prescribed in Table 2
be heated to the required welding temperature, usually by a
when determined in accordance with Test Methods E112.
high frequency electric current, and be pressed firmly together
causing a forged-type joint to be formed with internal and
external flash.
TABLE 2 Mechanical Property Requirements of As-Fabricated
6.2.2.2 Fusion—Welded Tube—The edges of the tube shall
and Annealed Tube
be brought together and welded, usually by a GTAW welding
Elongation in
process, without the addition of filler metal, causing a fusion-
Average Grain Tensile Strength, Yield Strength,
Temper 2 in. (51 mm),
A B
Size, mm ksi (MPa) ksi (MPa)
type joint to be formed with no internal or external flash.
min %
6.2.2.3 Flash Removal—The external flash of forge welded
WM50 . . . 30 min (205 min) . . . . . .
tubes, if present, shall be removed by scarfing. The internal
WO60 0.040 min. 30 min (205 min) 6 (40) min 35
WO50 0.040 max 30 min (205 min) 9–15 (60–105) 35
flash shall be treated by one of the following techniques: (1)
A
ksi = 1000 psi.
IFI—internal flash to remain in the as-welded condition,
B
Yield strength to be determined at 0.5 % extension under load.
B919−19
9.2 The surface of the test specimen for the microscopical 12.2 Cleanness Requirements:
examination shall approximate a radial longitudinal section of 12.2.1 The tube shall be capable of meeting the following
the tube. cleanness requirement:
12.2.1.1 The inside of the tube with closed ends shall be
10. Mechanical Property Requirements
sufficiently clean so that when tested in accordance with the
method given in 18.5, the residue remaining upon evaporation
10.1 Tensile Strength Requirements:
2 2
of the solvent shall not exceed 0.0035 g/ft (0.038 g/m)of
10.1.1 Product furnished under this specification shall con-
interior surface.
form to the tensile requirements prescribed in Table 2, when
12.2.1.2 The term “capable of” in the context of this
tested in accordance with Test Methods E8/E8M.
requirement shall mean that the testing and reporting of
10.1.2 Acceptance or rejection based upon mechanical
individual lots need not be performed by the producer of the
properties shall depend only on tensile strength.
product,ifcapabilityofthemanufacturingprocesstomeetthis
11. Performance Requirements requirement has previously been established. However, should
subsequenttestingbyeithertheproducerorpurchaserestablish
11.1 Expansion Requirements:
that the product does not meet this requirement, the product
11.1.1 The annealed material shall be capable of being
shall be subject to either rejection, or recall or both. See 18.5
expanded in accordance with Test Method B153 with an
for the test method.
expansion of the outside diameter in the following percentage:
12.3 Cuprous Oxide Requirement:
Outside Diameter, Expansion of Outside
in. (mm) Diameter, %
12.3.1 Product manufactured from Copper UNS Alloy
C10200 shall be significantly free of cuprous oxide as deter-
0.750 in. (19.0) and under 30
mined by Procedure A of Test Methods B577.
Over 0.750 in. (19.0) 20
11.1.2 Theexpandedtubeshallshownocrackingorrupture
13. Dimensions, Mass, and Permissible Variations
visible to the unaided eye.
13.1 Thestandardmethodforspecifyingtubediametersand
12. Other Requirements
walls shall be decimal fractions of an inch.
12.1 Nondestructive Examination for Defects:
13.2 Tolerances on a given tube are permitted to be speci-
12.1.1 Each tube shall be subjected to an eddy-current test.
fied with respect to any two but not all three of the following:
Tubes shall normally be tested in the fabricated temper;
outside diameter, inside diameter, and bottom-wall thickness.
however, they may be tested in the annealed temper at the
13.3 For the purposes of determining conformance with the
option of the manufacturer.
dimensional requirements in this specification, any measured
12.1.2 Electromagnetic (Eddy-Current) Test:
value outside the specified limiting values for any dimension
12.1.2.1 The testing shall follow the procedures specified in
shall be cause for rejection.
Practice E243. Unless otherwise agreed upon between the
13.4 Bottom-Wall Thickness Tolerances:
manufacturer, or supplier, and the purchaser, the manufacturer
13.4.1 Bottom-wall thickness tolerances shall conform to
shall have the option of calibrating the test equipment using
the tolerances listed in Table 3 (see Fig. 1).
either notches or drilled holes. Notch depth standards rounded
13.4.2 The wall thickness tolerances, listed in Table 3 for
to the nearest 0.001 in. (0.025 mm) shall be 22% max. of the
tube furnished IFI, shall not apply to that portion of the tube
nominal,bottom-wallthickness.Drilledholestandardsshallbe
wall that contains the interior flash and weld upset.
0.025 in. (0.635 mm) max. diameter for tubes up to and
including ⁄4 in. (19.05 mm) specified diameter and 0.031 in.
NOTE 2—The weld thickness shall not exceed the summation of the
(0.785 mm) max. diameter for tubes over ⁄4 in. (19.05 mm)
bottom-wall thickness and the enhancement height.
specified diameter.
13.4.3 The tolerances of Table 3 shall be increased by
12.1.2.2 Tubes that do not actuate the signaling device on
100% for tube furnished IFR and IFD for the portion of the
the eddy-current tester shall be considered in conformance to
tube wall that contains the weld zone.
the requirements of this test.
13.5 Diameter Tolerances:
12.1.2.3 Tubes rejected for irrelevant signals because of
13.5.1 The average diameter tolerances in Table 4 shall
moisture, soil, or minor mechanical damage, or combinations
apply to both coils and straight lengths of product.
thereof, shall, at the option of the manufacturer, be recondi-
tioned and retested.
12.1.2.4 Tubes that are reconditioned and retested (see
12.1.2.3)shallbeconsideredtoconformtotherequirementsof
TABLE 3 Bottom-Wall Tolerance
this specification, if they do not cause output signals beyond
Tolerance (Plus and Minus)
the acceptable limits. Outside Diameter, in. (mm)
Bottom-Wall Thickness,
in. (mm)
12.1.2.5 Unless otherwise specified, eddy-current disconti- 0.125 to 0.625 Over 0.625 to 1.000
(3 to 16), incl (16 to 25), incl
nuities will be identified on coils in excess of 200 ft (6096 cm)
Up to 0.017 (0.43), incl. 0.001(0.025) 0.0015 (0.038)
in length for subsequent removal by the purchaser.
Over 0.017 to 0.024 0.002 (0.050) 0.002 (0.050)
12.1.2.6 When required, the customer shall specify the
(0.43 to 0.61), incl
permissible number of identified eddy-current discontinuities.
B919−19
FIG. 1Bottom-Wall Thickness Tolerances
TABLE 4 Average Diameter Tolerances TABLE 6 Length Tolerances for Straight Lengths
Specified Diameter, Tolerance, Plus and Minus,
NOTE1—Tolerancesareallplus;ifallminustolerancesaredesired,use
in. (mm) in. (mm)
the same values; if tolerances of plus and minus are desired, halve the
0.125 to 0.625 (3 to 16), incl 0.002 (0.050)
values given.
Over 0.625 to 1.000 (16 to 25), incl 0.0025 (0.063)
Tolerance,
Length
in. (mm)
Up to 6 in (152 mm), incl. 0.063 in. (1.6)
Over 6 in. (152 mm) to 2 ft (610 mm), incl. 0.063 in. (1.6)
13.5.2 For product furnished IFI, IFD, or IFR, the inside
Over 2 ft (610 mm) to 6 ft (1.83 m), incl. 0.094 in. (2.38)
Over 6 ft (1.83 m) to 14 ft (4.27 m) 0.250 in. (6.3)
diameter shall not be taken so as to include the flash or
Over 14 ft ( 4.27 m) 0.500 in. (12.7)
flash-treated areas.
13.6 Lengths:
13.6.1 For coil lengths, see Table 5 of this specification. If
TABLE 7 Straightness Tolerance
coils are produced to a specified nominal weight, no coil shall
Maximum Curvature
Length
...
This document is not an ASTM standard and is intended only to provide the user of an ASTM standard an indication of what changes have been made to the previous version. Because
it may not be technically possible to adequately depict all changes accurately, ASTM recommends that users consult prior editions as appropriate. In all cases only the current version
of the standard as published by ASTM is to be considered the official document.
Designation: B919 − 12 B919 − 19
Standard Specification for
Welded Copper Heat Exchanger Tubes With Internal
Enhancement
This standard is issued under the fixed designation B919; the number immediately following the designation indicates the year of
original adoption or, in the case of revision, the year of last revision. A number in parentheses indicates the year of last reapproval. A
superscript epsilon (´) indicates an editorial change since the last revision or reapproval.
1. Scope*
1.1 This specification establishes the requirements for welded, internally enhanced copper tube, in straight lengths or coils,
suitable for use in refrigeration and air conditioning products or other heat exchangers.
1.2 Units—The values stated in inch-pound units are to be regarded as standard. The values given in parentheses are
mathematical conversions to SI units that are provided for information only and are not considered standard.
1.3 The product shall be produced of the following coppers. Unless otherwise specified, tubes made from any one of these
coppers may be supplied:
Copper UNS No. Type of Metal
C10200 Oxygen-free without residual deoxidants
C12200 Phosphorized, high residual phosphorus (DHP)
1.4 The following pertains to the test method described in 18.418.5 of this specification. This This standard does not purport
to address all of the safety concerns, if any, associated with its use. It is the responsibility of the user of this standard to establish
appropriate safety safety, health, and healthenvironmental practices and determine the applicability of regulatory requirements
prior to use.
1.5 This international standard was developed in accordance with internationally recognized principles on standardization
established in the Decision on Principles for the Development of International Standards, Guides and Recommendations issued
by the World Trade Organization Technical Barriers to Trade (TBT) Committee.
2. Referenced Documents
2.1 ASTM Standards:
B153 Test Method for Expansion (Pin Test) of Copper and Copper-Alloy Pipe and Tubing
B577 Test Methods for Detection of Cuprous Oxide (Hydrogen Embrittlement Susceptibility) in Copper
B601 Classification for Temper Designations for Copper and Copper Alloys—Wrought and Cast
B846 Terminology for Copper and Copper Alloys
E3 Guide for Preparation of Metallographic Specimens
E8/E8M Test Methods for Tension Testing of Metallic Materials
E29 Practice for Using Significant Digits in Test Data to Determine Conformance with Specifications
E53 Test Method for Determination of Copper in Unalloyed Copper by Gravimetry
E62 Test Methods for Chemical Analysis of Copper and Copper Alloys (Photometric Methods) (Withdrawn 2010)
E112 Test Methods for Determining Average Grain Size
E243 Practice for Electromagnetic (Eddy Current) Examination of Copper and Copper-Alloy Tubes
E255 Practice for Sampling Copper and Copper Alloys for the Determination of Chemical Composition
E478 Test Methods for Chemical Analysis of Copper Alloys
E2575 Standard Test Method for Determination of Oxygen in Copper and Copper Alloys (Withdrawn 2017)
This specification is under the jurisdiction of ASTM Committee B05 on Copper and Copper Alloys and is the direct responsibility of Subcommittee B05.04 on Pipe and
Tube.
Current edition approved April 1, 2012April 1, 2019. Published May 2012May 2019. Originally approved in 2001. Last previous edition approved in 20062012 as
B919 – 01 (2006).B919–12. DOI: 10.1520/B0919-12.10.1520/B0919–19.
For referenced ASTM standards, visit the ASTM website, www.astm.org, or contact ASTM Customer Service at service@astm.org. For Annual Book of ASTM Standards
volume information, refer to the standard’sstandard’s Document Summary page on the ASTM website.
The last approved version of this historical standard is referenced on www.astm.org.
*A Summary of Changes section appears at the end of this standard
Copyright © ASTM International, 100 Barr Harbor Drive, PO Box C700, West Conshohocken, PA 19428-2959. United States
B919 − 19
3. Terminology
3.1 For the definitiondefinitions of terms related to copper and copper alloys refer to Terminology B846.
3.2 Definitions:
3.2.1 bottom wall, n—the wall thickness measured from the base of the enhancement to the outside surface.
3.2.2 coil, n—a length of the product wound into a series of connected turns.
3.2.3 enhancement, n—a geometrical feature intentionally formed on a tube I.D. surface to improve heat transfer.
3.2.4 level wound, adj—a type of coil in which the turns are wound into layers parallel to the axis of the coil such that successive
turns in a given layer are next to one another.
3.2 Definitions of Terms Specific to This Standard:
3.2.1 bottom wall, n—the wall thickness measured from the base of the enhancement to the outside surface.
3.2.2 enhancement, n—a geometrical feature intentionally formed on a tube I.D. surface to improve heat transfer.
3.2.3 level wound, adj—a type of coil in which the turns are wound into layers parallel to the axis of the coil such that successive
turns in a given layer are next to one another.
3.2.4 roundness tolerance, n—the roundness tolerance is defined as the maximum OD at a point minus the minimum OD, at
the same plane of intersection of the tube, divided by the specified OD × 100 %.
3.2.5 squareness of cut, n—the maximum deviation of one side of a cross section from the opposite side, when measured against
the projected perpendicularity of the plane of the projected center of the tube at the ends.
4. Classification
4.1 The following types of welded tube are manufactured under the scope of this specification:
4.1.1 As-Welded—Welded tube without subsequent heat treatment or cold work.
4.1.2 Welded Tube, Subsequently Annealed—Welded tube annealed to produce a uniform grain size appropriate to the specified
annealed temper.
5. Ordering Information
5.1 Include the following information when placing orders for product under this specification:
5.1.1 ASTM designation number and year of issue,issue;
5.1.2 Copper UNS No.,No.;
5.1.3 Tube type (Section 4),);
5.1.4 Temper (Section 8),);
5.1.5 Length, diameter, bottom-wall thickness, and enhancement dimensions. Configuration of the enhanced surface shall be as
agreed upon between the manufacturer,manufacturer or supplier,supplier and purchaser,purchaser;
5.1.6 How furnished: straight or coils,coils;
5.1.7 Quantity,Quantity;
5.1.8 Cuprous oxide test, if required (12.3 and 16.1.4),);
5.1.9 Certification, when required (Section 22),); and
5.1.10 Mill test report, if required (Section 23).
6. Materials and Manufacture
6.1 Material:Materials:
6.1.1 The material of manufacture shall be sheet or strip, of the required alloy, and may be either cold worked or annealed.
6.1.1 The material shall be of of manufacture shall be a form (cast, bar, cake, slab, etc.) of Copper Alloy UNS No. C10200 or
C12200 [or other designation] of such purity and soundness as to be suitable for processing into the productproducts prescribed
herein.
6.2 Manufacture:
6.2.1 The welded tube shall be manufactured from either cold rolled or annealed sheet or strip. The sheet or strip shall be formed
into a tubular shape on a suitable forming mill.
6.2.2 Welding shall be accomplished by any process that produces forge or fusion welds leaving no crevice visible to the
unaided eye in the weld seam.
6.2.2.1 Forge—Welded Tube—The edges of the strip shall be heated to the required welding temperature, usually by a high
frequency electric current, and be pressed firmly together causing a forged-type joint to be formed with internal and external flash.
6.2.2.2 Fusion—Welded Tube—The edges of the tube shall be brought together and welded, usually by a GTAW welding
process, without the addition of filler metal, causing a fusion-type joint to be formed with no internal or external flash.
6.2.2.3 Flash Removal—The external flash of forge welded tubes, if present, shall be removed by scarfing. The internal flash
shall be treated by one of the following techniques: (1) IFI—internal flash to remain in the as-welded condition,
B919 − 19
TABLE 1 Chemical Requirements
UNS Alloy Number Copper, wt % Phosphorus, wt %
A
C10200 99.95 min
C12200 99.9 min 0.015 - 0.040
TABLE 1 Chemical Requirements
A
UNS Alloy Number Copper, wt % Phosphorus, wt %
B
C10200 99.95 min .
C12200 99.9 min 0.015–0.040
A
Cu value includes Ag.
B
Oxygen in C10200 shall be 10 ppm max.
(2) IFR—internal flash to be removed by scarfing, and (3) IFD—internal flash displaced by rolling or drawing.
6.2.3 The internal enhancement shall be produced by cold forming.
6.2.4 The longitudinal seam from welding shall be free of filler metal.
7. Chemical Composition
7.1 The material shall conform to the requirements in Table 1 for the copper specified in the contract or purchase order.
7.2 These compositionalThe composition limits do not preclude the possible presence of other unnamed elements. When
required, limits and analysis for unnamed elements shall be established by agreement between the manufacturer and the
purchaser.elements. By agreement between the manufacturer and purchaser, limits may be established and analysis required for
unnamed elements.
8. Temper
8.1 Tempers, as defined in Classification B601, of the various tube types are as follows:
8.1.1 As-Welded:
8.1.1.1 Annealed strip WM50, subsequently internally enhanced by cold working and welded.
8.1.2 Welded and Annealed:
8.1.2.1 Annealed strip, internally enhanced by cold working, welded and soft annealed W060, and
8.1.2.2 Annealed strip, internally enhanced by cold working, welded and light annealed W050.
NOTE 1—By agreement with the purchaser and manufacturer, product in special tempers may be supplied with properties as agreed upon between the
purchaser and the manufacturer.
9. Grain Size for Annealed Tempers
9.1 Samples of annealed temper tubes shall be examined at a magnification of 75 diameters. The Grain size shall be the standard
requirement for all product in the annealed tempers. Acceptance or rejection based upon grain size shall be determined in the wall
beneath the internal enhancement. The microstructure shall show complete recrystallization and shall have an average grain size
depend only on the averae grain size of a test specimen taken from each of two sample portions, and each specimen shall be within
the limits specifiedprescribed in Table 2 when determined in accordance with Test Methods E112.
9.2 The surface of the test specimen for the microscopical examination shall approximate a radial longitudinal section of the
tube.
10. Mechanical PropertiesProperty Requirements
10.1 WM (as-welded) and WO (annealed) temper shall conform to the mechanical properties as specified in Table 2.Tensile
Strength Requirements:
TABLE 2 Mechanical Property Requirements of As-Fabricated
and Annealed Tube
Elongation in
Average Grain Tensile Strength, Yield Strength,
Temper 2 in. (51 mm),
A B
Size, mm ksi (MPa) ksi (MPa)
min %
WM . . . 30 min (205 min) . . . . . .
WM50 . . . 30 min (205 min) . . . . . .
WO60 0.040 min. 30 min (205 min) 6 (40) min 35
WO50 0.040 max 30 min (205 min) 9-15 (60 - 105) 35
WO50 0.040 max 30 min (205 min) 9–15 (60–105) 35
A
ksi = 1000 psi.
B
Yield strength to be determined at 0.5 % extension under load.
B919 − 19
10.1.1 Product furnished under this specification shall conform to the tensile requirements prescribed in Table 2, when tested
in accordance with Test Methods E8/E8M.
10.1.2 Acceptance or rejection based upon mechanical properties shall depend only on tensile strength.
10.2 If disagreement arises between the grain size requirement and the mechanical property requirements for annealed tempers,
the mechanical property requirements take precedent.
11. Performance Requirements
11.1 Expansion Requirements:
11.1.1 The annealed material shall be capable of being expanded in accordance with Test Method B153 with an expansion of
the outside diameter in the following percentage:
Outside Diameter, Expansion of Outside
in. (mm) Diameter, %
0.750 in. (19.0) and under 30
Over 0.750 in. (19.0) 20
11.1.2 The expanded tube shall show no cracking or rupture visible to the unaided eye.
12. Other Requirements
12.1 Nondestructive Examination for Defects:
12.1.1 Each tube shall be subjected to an eddy-current test. Tubes shall normally be tested in the fabricated temper; however,
they may be tested in the annealed temper at the option of the manufacturer.
12.1.2 Electromagnetic (Eddy-Current) Test:
12.1.2.1 The testing shall follow the procedures specified in Practice E243. Unless otherwise agreed upon between the
manufacturer, or supplier, and the purchaser, the manufacturer shall have the option of calibrating the test equipment using either
notches or drilled holes. Notch depth standards rounded to the nearest 0.001 in. (0.025 mm) shall be 22 % max. of the nominal,
bottom-wall thickness. Drilled hole standards shall be 0.025-in. (0.635-mm) 0.025 in. (0.635 mm) max. diameter for tubes up to
and including ⁄4-in. (19.05-mm) in. (19.05 mm) specified diameter and 0.031-in. (0.785-mm) 0.031 in. (0.785 mm) max. diameter
for tubes over ⁄4-in. (19.05-mm) in. (19.05 mm) specified diameter.
12.1.2.2 Tubes that do not actuate the signaling device on the eddy-current tester shall be considered in conformance to the
requirements of this test.
12.1.2.3 Tubes,Tubes rejected for irrelevant signals because of moisture, soil, and or minor,minor mechanical damage, or
combinations thereof, shall, at the option of the manufacturer, be reconditioned and retested.
12.1.2.4 Tubes that are reconditioned and retested (see 12.1.2.3) shall be considered to conform to the requirements of this
specification, if they do not cause output signals beyond the acceptable limits.
12.1.2.5 Unless otherwise specified, eddy-current discontinuities will be identified on coils in excess of 200 ft.ft (6096 cm) in
length for subsequent removal by the purchaser.
12.1.2.6 When required, the customer shall specify the permissible number of identified eddy-current discontinuities.
12.2 Cleanness Requirements:
12.2.1 The tube shall be capable of meeting the following cleanness requirement:
12.2.1.1 The inside of the tube with closed ends shall be sufficiently clean so that when tested in accordance with the method
2 2
given in 18.518.4,, the residue remaining upon evaporation of the solvent shall not exceed 0.0035 g/ft (0.038 g/m ) of interior
surface.
12.2.1.2 The term “capable of” in the context of this requirement shall mean that the testing and reporting of individual lots need
not be performed by the producer of the product, if capability of the manufacturing process to meet this requirement has previously
been established. However, should subsequent testing by either the producer or purchaser establish that the product does not meet
this requirement, the product shall be subject to either rejection, or recall or both. See 18.418.5 for the test method.
12.3 Cuprous Oxide Requirement:
12.3.1 Product manufactured from Copper UNS Alloy C10200 shall be significantly free of cuprous oxide as determined by
Procedure A of Test Methods B577.
13. Dimensions, Mass, and Permissible Variations
13.1 The standard method for specifying tube diameters and walls shall be decimal fractions of an inch.
13.2 Tolerances on a given tube are permitted to be specified with respect to any two but not all three of the following: outside
diameter, inside diameter, and bottom-wall thickness.
13.3 For the purposes of determining conformance with the dimensional requirements in this specification, any measured value
outside the specified limiting values for any dimension shall be cause for rejection.
13.4 Bottom-Wall Thickness Tolerances:
B919 − 19
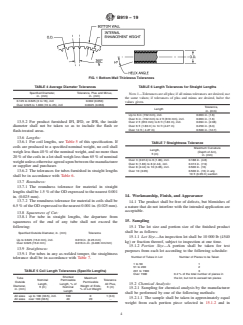
13.4.1 Bottom-wall thickness tolerances shall conform to the tolerances listed in Table 3 (See(see Fig. 1).
13.4.2 The wall thickness tolerances, listed in Table 3 for tube furnished IFI, shall not apply to that portion of the tube wall that
contains the interior flash and weld upset.
NOTE 2—The weld thickness shall not exceed the summation of the bottom- wall bottom-wall thickness and the enhancement height.
13.4.3 The tolerances of Table 3 shall be increased by 100 % for tube furnished IFR and IFD for the portion of the tube wall
that contains the weld zone.
13.5 Diameter Tolerances:
13.5.1 The average diameter tolerances in Table 4 shall apply to both coils and straight lengths of product:product.
13.5.2 For product furnished IFI, IFD, or IFR, the inside diameter shall not be taken so as to include the flash or flash-treated
areas.
13.6 Lengths:
13.6.1 For coil lengths, see Table 5 of this specification. If coils are produced to a specified nominal weight, no coil shall weigh
less than 40 % of the nominal weight, and no more than 20 % of the coils in a lot shall weigh less than 65 % of nominal weight
unless otherwise agreed upon between the manufacturer,manufacturer or supplier,supplier and purchaser.
13.6.2 The tolerances for tubes furnished in straight lengths shall be in accordance with Table 6.
13.7 Roundness:
13.7.1 The roundness tolerance for material in straight lengths shall be 1.5 % of the OD expressed to the nearest 0.001 in. (0.025
mm).
13.7.2 The roundness tolerance for material in coils shall be 6.5 % of the OD expressed to the nearest 0.001 in. (0.025 mm).
13.8 Squareness of Cut:
13.8.1 For tube in straight lengths, the departure from squareness of the end of any tube shall not exceed the following:
Specified Outside Diameter, in. (mm) Tolerance
Up to 0.625 (15.9 mm), incl. 0.010 in. (0.25 mm)
Over 0.625 (15.9 mm) 0.016 in./in. (0.406 mm/mm)
13.9 Straightness:
13.9.1 For tubes in any as-welded temper, the straightness tolerance shall be in accordance with Table 7.
14. Workmanship, Finish, and Appearance
14.1 The product shall be free of defects, but blemishes of a nature that do not interfere with the
...
Questions, Comments and Discussion
Ask us and Technical Secretary will try to provide an answer. You can facilitate discussion about the standard in here.
Loading comments...