ASTM B754-10
(Test Method)Standard Test Method for Measuring and Recording the Deviations from Flatness in Copper and Copper Alloy Strip
Standard Test Method for Measuring and Recording the Deviations from Flatness in Copper and Copper Alloy Strip
SIGNIFICANCE AND USE
This test method is intended for measuring distortion in strip used for making close tolerance parts. Since distortion in this strip would influence the shape of the part being produced and cause difficulties in feeding through close-fitting dies and other manufacturing equipment, it is important that this material be flat.
This test method provides a universal procedure for measuring the irregularities that cause the deviation from flatness.
This test method allows the purchaser and manufacturer to inspect strip with a standard technique to a mutually agreed upon and acceptable percentage deviation from flatness.
SCOPE
1.1 This test method describes a procedure for the measurement of distortions in thin metal strip and the application of these measurements to an equation that will indicate the deviation from flatness.
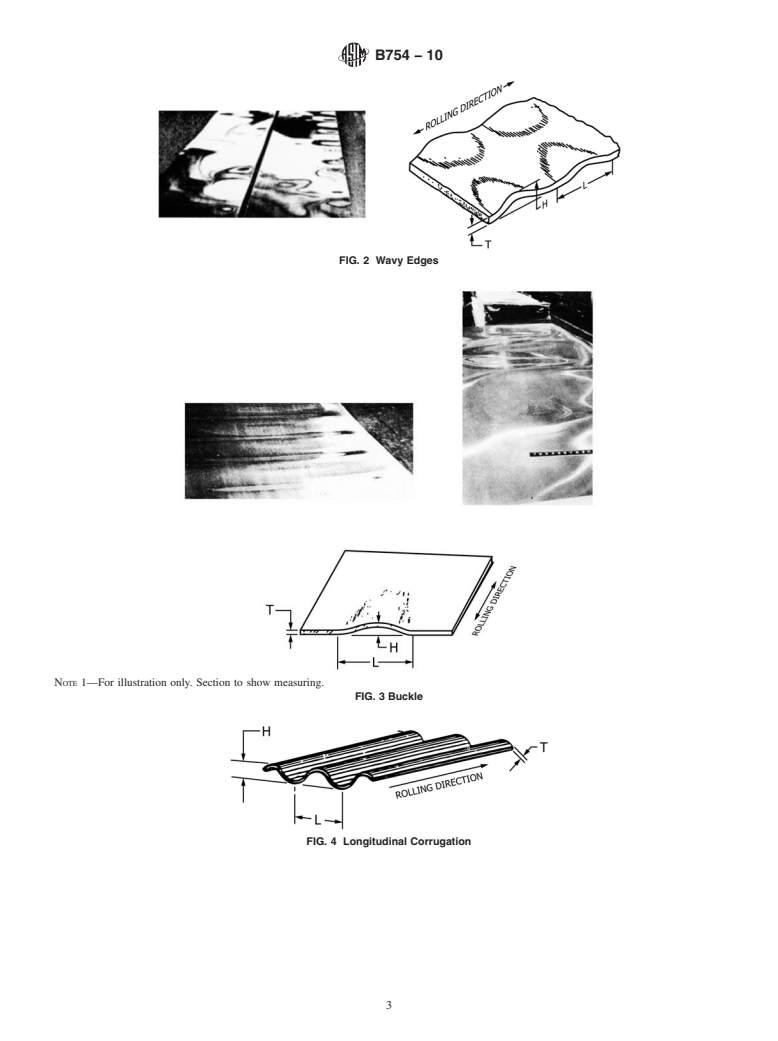
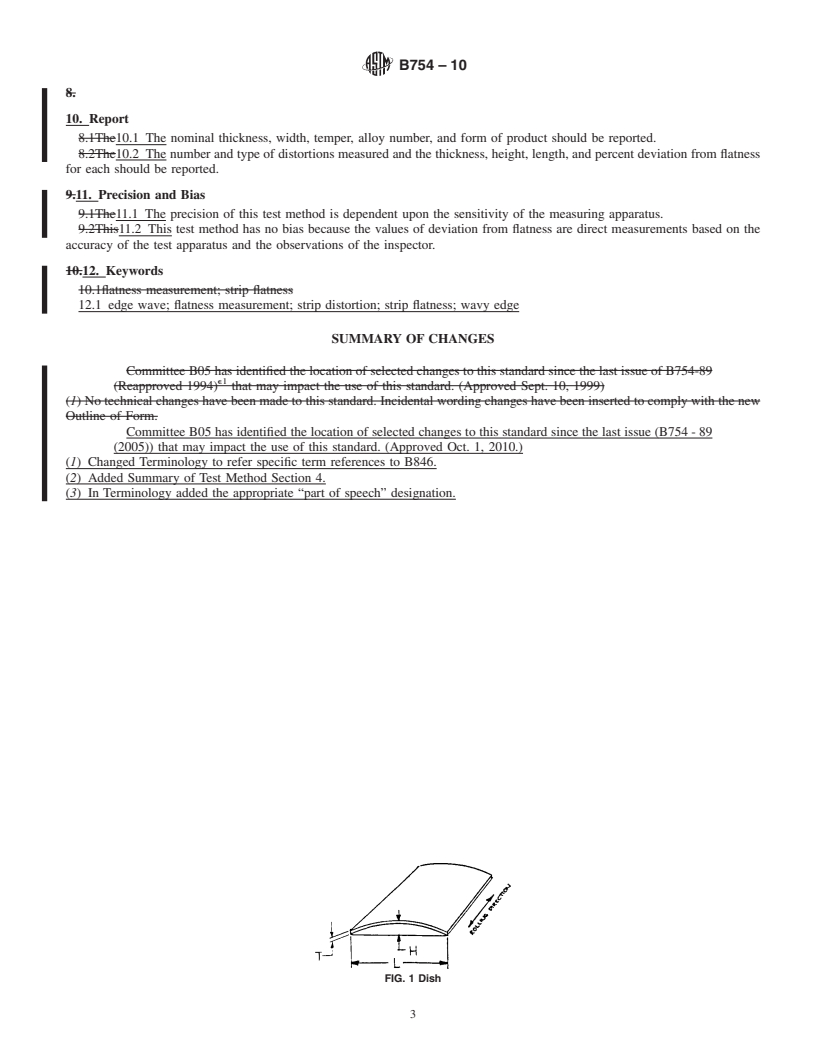
1.2 The distortions to be measured in this test method are dish, wavy edges, buckle, longitudinal corrugation, and herringbone.
1.3 This test method is not intended to include the measurement of coil set or longitudinal curl, camber or edgewise curvature, or twist.
1.4 This test method is limited to metal strip 0.003 to 0.020 in. (0.08 to 0.50 mm) thick and not more than 6.0 in. (150.0 mm) wide.
1.5 Units—The values stated in inch-pound units are to be regarded as standard. The values given in parentheses are mathematical conversions to SI units that are provided for information only and are not considered standard.
1.6 The following safety hazard caveat pertains only to the test method(s) described in this test method. This standard does not purport to address all of the safety concerns, if any, associated with its use. It is the responsibility of the user of this standard to establish appropriate safety and health practices and determine the applicability of regulatory limitations prior to use.
General Information
Relations
Buy Standard
Standards Content (Sample)
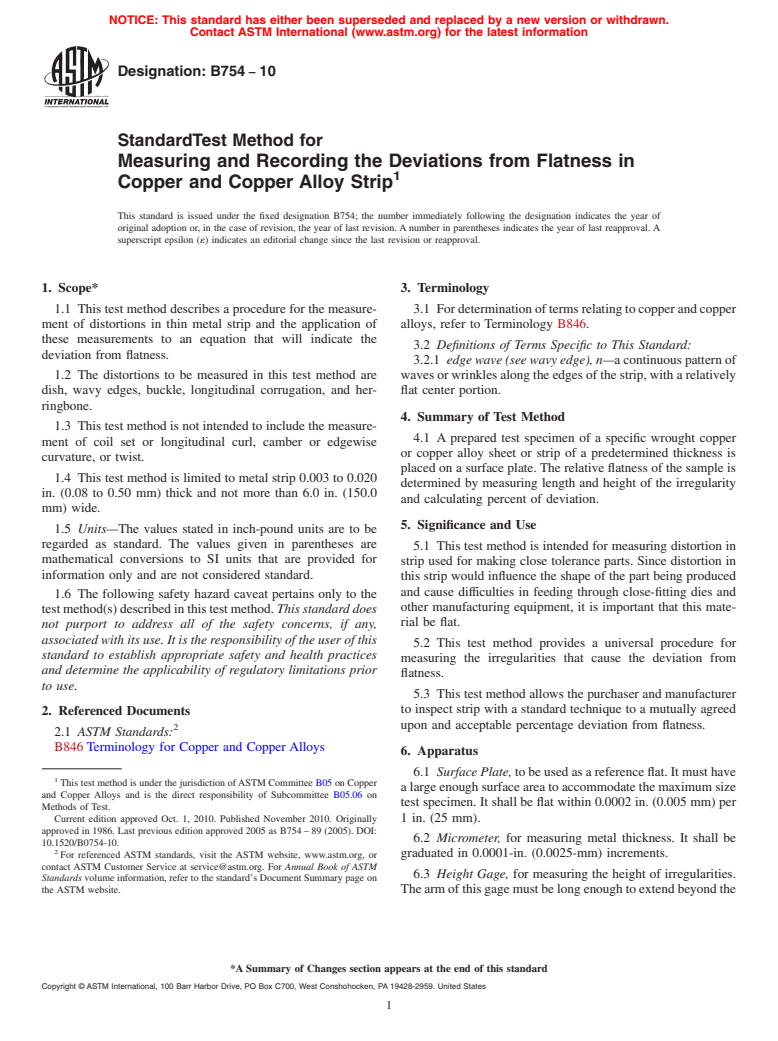
NOTICE: This standard has either been superseded and replaced by a new version or withdrawn.
Contact ASTM International (www.astm.org) for the latest information
Designation: B754 − 10
StandardTest Method for
Measuring and Recording the Deviations from Flatness in
1
Copper and Copper Alloy Strip
This standard is issued under the fixed designation B754; the number immediately following the designation indicates the year of
original adoption or, in the case of revision, the year of last revision. A number in parentheses indicates the year of last reapproval. A
superscript epsilon (´) indicates an editorial change since the last revision or reapproval.
1. Scope* 3. Terminology
1.1 This test method describes a procedure for the measure- 3.1 Fordeterminationoftermsrelatingtocopperandcopper
ment of distortions in thin metal strip and the application of alloys, refer to Terminology B846.
these measurements to an equation that will indicate the
3.2 Definitions of Terms Specific to This Standard:
deviation from flatness.
3.2.1 edge wave (see wavy edge), n—acontinuouspatternof
1.2 The distortions to be measured in this test method are waves or wrinkles along the edges of the strip, with a relatively
dish, wavy edges, buckle, longitudinal corrugation, and her- flat center portion.
ringbone.
4. Summary of Test Method
1.3 This test method is not intended to include the measure-
4.1 A prepared test specimen of a specific wrought copper
ment of coil set or longitudinal curl, camber or edgewise
or copper alloy sheet or strip of a predetermined thickness is
curvature, or twist.
placed on a surface plate. The relative flatness of the sample is
1.4 This test method is limited to metal strip 0.003 to 0.020
determined by measuring length and height of the irregularity
in. (0.08 to 0.50 mm) thick and not more than 6.0 in. (150.0
and calculating percent of deviation.
mm) wide.
5. Significance and Use
1.5 Units—The values stated in inch-pound units are to be
regarded as standard. The values given in parentheses are
5.1 This test method is intended for measuring distortion in
mathematical conversions to SI units that are provided for
strip used for making close tolerance parts. Since distortion in
information only and are not considered standard.
this strip would influence the shape of the part being produced
and cause difficulties in feeding through close-fitting dies and
1.6 The following safety hazard caveat pertains only to the
other manufacturing equipment, it is important that this mate-
testmethod(s)describedinthistestmethod. This standard does
rial be flat.
not purport to address all of the safety concerns, if any,
associated with its use. It is the responsibility of the user of this
5.2 This test method provides a universal procedure for
standard to establish appropriate safety and health practices
measuring the irregularities that cause the deviation from
and determine the applicability of regulatory limitations prior
flatness.
to use.
5.3 This test method allows the purchaser and manufacturer
to inspect strip with a standard technique to a mutually agreed
2. Referenced Documents
upon and acceptable percentage deviation from flatness.
2
2.1 ASTM Standards:
B846 Terminology for Copper and Copper Alloys
6. Apparatus
6.1 Surface Plate,tobeusedasareferenceflat.Itmusthave
1
This test method is under the jurisdiction ofASTM Committee B05 on Copper
a large enough surface area to accommodate the maximum size
and Copper Alloys and is the direct responsibility of Subcommittee B05.06 on
test specimen. It shall be flat within 0.0002 in. (0.005 mm) per
Methods of Test.
Current edition approved Oct. 1, 2010. Published November 2010. Originally 1 in. (25 mm).
approved in 1986. Last previous edition approved 2005 as B754 – 89 (2005). DOI:
6.2 Micrometer, for measuring metal thickness. It shall be
10.1520/B0754-10.
2
For referenced ASTM standards, visit the ASTM website, www.astm.org, or graduated in 0.0001-in. (0.0025-mm) increments.
contact ASTM Customer Service at service@astm.org. For Annual Book of ASTM
6.3 Height Gage, for measuring the height of irregularities.
Standards volume information, refer to the standard’s Document Summary page on
the ASTM website. Thearmofthisgagemustbelongenoughtoextendbeyondthe
*A Summary of Changes section appears at the end of this standard
Copyright © ASTM International, 100 Barr Harbor Drive, PO Box C700, West Conshohocken, PA 19428-2959. United States
1
---------------------- Page: 1 ----------------------
B754 − 10
center of the widest strip to be measured. It shall be graduated 8.5 Repeat this procedure as often as necessary to satisfy
3
in 0.001-in. (0.025-mm) increments. quality level requirements, recording each measurement.
6.4 Steel Rule, for measuring the lengths of the irregulari-
9. Calculation or Interpretation of Results
ties. It shall be graduated in 0.02-in. (0.50-mm) increments.
9.1 Apply the values for T, H, and L obtained for each
7. Test Specimens
irregularity to the following equation to de
...
This document is not an ASTM standard and is intended only to provide the user of an ASTM standard an indication of what changes have been made to the previous version. Because
it may not be technically possible to adequately depict all changes accurately, ASTM recommends that users consult prior editions as appropriate. In all cases only the current version
of the standard as published by ASTM is to be considered the official document.
Designation:B754–89(Reapproved2005) Designation:B754–10
Standard Test Method for
Measuring and Recording the Deviations from Flatness in
1
Copper and Copper Alloy Strip
This standard is issued under the fixed designation B754; the number immediately following the designation indicates the year of
original adoption or, in the case of revision, the year of last revision. A number in parentheses indicates the year of last reapproval. A
superscript epsilon (´) indicates an editorial change since the last revision or reapproval.
1. Scope*
1.1 This test method describes a procedure for the measurement of distortions in thin metal strip and the application of these
measurements to an equation that will indicate the deviation from flatness.
1.2 The distortions to be measured in this test method are dish, wavy edges, buckle, longitudinal corrugation, and herringbone.
1.3 This test method is not intended to include the measurement of coil set or longitudinal curl, camber or edgewise curvature,
or twist.
1.4 This test method is limited to metal strip 0.003 to 0.020 in. (0.08 to 0.50 mm) thick and not more than 6.0 in. (150.0 mm)
wide.
1.5The values stated in inch-pound units are the standard. The values given in parentheses are for information only.
1.6
1.5 Units—The values stated in inch-pound units are to be regarded as standard. The values given in parentheses are
mathematical conversions to SI units that are provided for information only and are not considered standard.
1.6 The following safety hazard caveat pertains only to the test method(s) described in this test method. This standard does not
purport to address all of the safety concerns, if any, associated with its use. It is the responsibility of the user of this standard to
establish appropriate safety and health practices and determine the applicability of regulatory limitations prior to use.
2. Terminology Referenced Documents
2
2.1 ASTM Standards:
B846 Terminology for Copper and Copper Alloys
3. Terminology
3.1 For determination of terms relating to copper and copper alloys, refer to Terminology B846.
3.2 Definitions of Terms Specific to This Standard:
2.1.1buckle (center bulge or oil can)—alternatebulgesandhollowsrecurringalongthelengthofastripwiththeedgesremaining
relatively flat.
2.1.2dish (cross or transverse bow)—the departure from flatness across the full width of the strip in the form of a single arc,
excluding burrs.
2.1.3herringbone—a series of long continuous waves running at various angles to the rolling direction.
2.1.4longitudinal corrugation—a condition similar to dish except that the sense of curvature changes sign at least once across
the width of the strip.
2.1.5wavy edges (waves—edge wave)
3.2.1 edge wave (see wavy edge), n—a continuous pattern of waves or wrinkles along the edges of the strip, with a relatively
flat center portion.
3.Significance and Use
3.1This test method is intended for measuring distortion in strip used for making close tolerance parts. Since distortion in this
1
This test method is under the jurisdiction ofASTM Committee B05 on Copper and CopperAlloys and is the direct responsibility of Subcommittee B05.06 on Methods
of Test.
´1
Current edition approved Mar. 1, 2005. Published March 2005. Originally appproved in 1986. Last previous edition approved 1999 as B754–89 (1999) . DOI:
10.1520/B0754-89R05.
Current edition approved Oct. 1, 2010. Published November 2010. Originally approved in 1986. Last previous edition approved 2005 as B754 – 89 (2005). DOI:
10.1520/B0754-10.
2
An electronic touch sensitive system, which will not distort the sample, has been found to be acceptable.
2
For referencedASTM standards, visit theASTM website, www.astm.org, or contactASTM Customer Service at service@astm.org. For Annual Book of ASTM Standards
volume information, refer to the standard’s Document Summary page on the ASTM website.
*A Summary of Changes section appears at the end of this standard.
Copyright © ASTM International, 100 Barr Harbor Drive, PO Box C700, West Conshohocken, PA 19428-2959, United States.
1
---------------------- Page: 1 ----------------------
B754–10
strip would influence the shape of the part being produced and cause difficulties in feeding through close-fitting dies and other
manufacturing equipment, it is important that this material be flat.
3.2This test method provides a universal procedure for measuring the irregularities that cause the deviation from flatness.
3.3This test method allows the purchaser and manufacturer to inspect strip with a standard technique to a mutually agr
...


Questions, Comments and Discussion
Ask us and Technical Secretary will try to provide an answer. You can facilitate discussion about the standard in here.