ASTM B973-10(2014)
(Specification)Standard Specification for Tin-Coated Braid and Ribbon Flat Copper Wire intended for use in Electronic Application
Standard Specification for Tin-Coated Braid and Ribbon Flat Copper Wire intended for use in Electronic Application
ABSTRACT
This specification covers tin-coated hard-drawn copper braid and ribbon flat wire intended for electronic application. The tin shall be electroplated for the coating and shall be commercially pure. For purposes of this specification, the tin shall be considered commercially pure if the total of other elements, exclusive of copper, does not exceed 1%. This specification covers electrical resistivity requirements, permissible variations in thickness, permissible variations in width, and limiting number of test specimens for coating test.
SCOPE
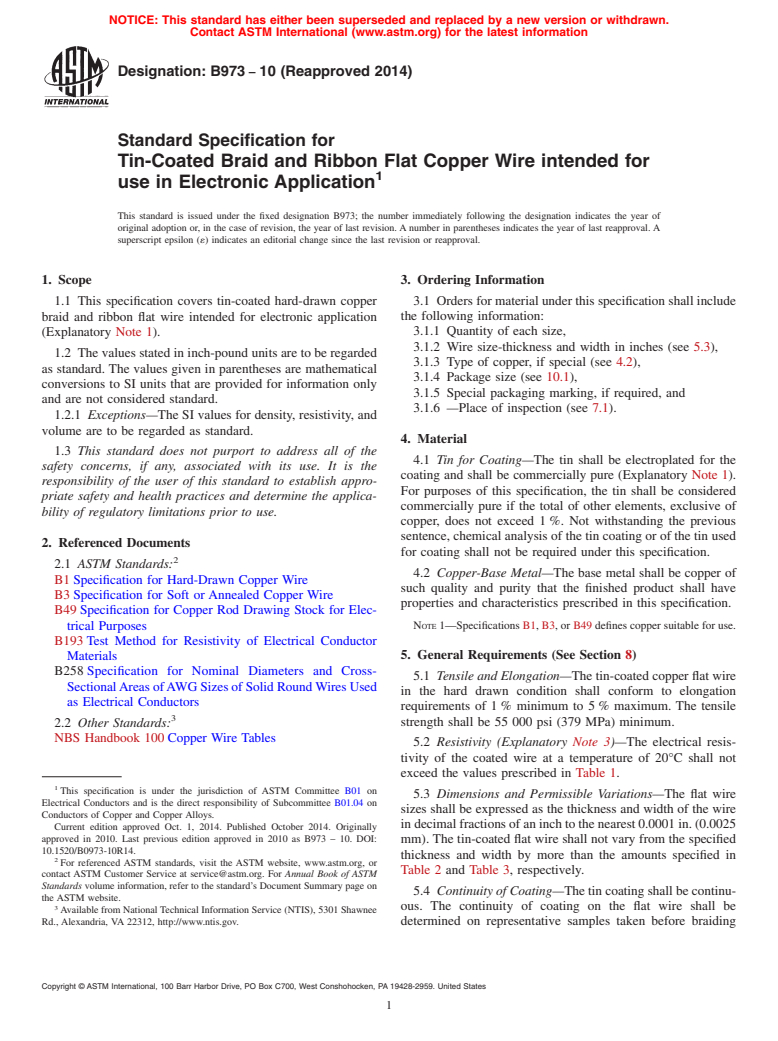
1.1 This specification covers tin-coated hard-drawn copper braid and ribbon flat wire intended for electronic application (Explanatory Note 1).
1.2 The values stated in inch-pound units are to be regarded as standard. The values given in parentheses are mathematical conversions to SI units that are provided for information only and are not considered standard.
1.2.1 Exceptions—The SI values for density, resistivity, and volume are to be regarded as standard.
1.3 This standard does not purport to address all of the safety concerns, if any, associated with its use. It is the responsibility of the user of this standard to establish appropriate safety and health practices and determine the applicability of regulatory limitations prior to use.
General Information
Relations
Buy Standard
Standards Content (Sample)
NOTICE: This standard has either been superseded and replaced by a new version or withdrawn.
Contact ASTM International (www.astm.org) for the latest information
Designation:B973 −10 (Reapproved 2014)
Standard Specification for
Tin-Coated Braid and Ribbon Flat Copper Wire intended for
use in Electronic Application
This standard is issued under the fixed designation B973; the number immediately following the designation indicates the year of
original adoption or, in the case of revision, the year of last revision. A number in parentheses indicates the year of last reapproval. A
superscript epsilon (´) indicates an editorial change since the last revision or reapproval.
1. Scope 3. Ordering Information
3.1 Orders for material under this specification shall include
1.1 This specification covers tin-coated hard-drawn copper
braid and ribbon flat wire intended for electronic application the following information:
3.1.1 Quantity of each size,
(Explanatory Note 1).
3.1.2 Wire size-thickness and width in inches (see 5.3),
1.2 The values stated in inch-pound units are to be regarded
3.1.3 Type of copper, if special (see 4.2),
as standard. The values given in parentheses are mathematical
3.1.4 Package size (see 10.1),
conversions to SI units that are provided for information only
3.1.5 Special packaging marking, if required, and
and are not considered standard.
3.1.6 —Place of inspection (see 7.1).
1.2.1 Exceptions—The SI values for density, resistivity, and
volume are to be regarded as standard.
4. Material
1.3 This standard does not purport to address all of the
4.1 Tin for Coating—The tin shall be electroplated for the
safety concerns, if any, associated with its use. It is the
coating and shall be commercially pure (Explanatory Note 1).
responsibility of the user of this standard to establish appro-
For purposes of this specification, the tin shall be considered
priate safety and health practices and determine the applica-
commercially pure if the total of other elements, exclusive of
bility of regulatory limitations prior to use.
copper, does not exceed 1 %. Not withstanding the previous
sentence, chemical analysis of the tin coating or of the tin used
2. Referenced Documents
for coating shall not be required under this specification.
2.1 ASTM Standards:
4.2 Copper-Base Metal—The base metal shall be copper of
B1 Specification for Hard-Drawn Copper Wire
such quality and purity that the finished product shall have
B3 Specification for Soft or Annealed Copper Wire
properties and characteristics prescribed in this specification.
B49 Specification for Copper Rod Drawing Stock for Elec-
trical Purposes NOTE 1—Specifications B1, B3,or B49 defines copper suitable for use.
B193 Test Method for Resistivity of Electrical Conductor
5. General Requirements (See Section 8)
Materials
B258 Specification for Nominal Diameters and Cross-
5.1 Tensile and Elongation—The tin-coated copper flat wire
SectionalAreasofAWGSizesofSolidRoundWiresUsed
in the hard drawn condition shall conform to elongation
as Electrical Conductors
requirements of 1 % minimum to 5 % maximum. The tensile
strength shall be 55 000 psi (379 MPa) minimum.
2.2 Other Standards:
NBS Handbook 100 Copper Wire Tables
5.2 Resistivity (Explanatory Note 3)—The electrical resis-
tivity of the coated wire at a temperature of 20°C shall not
exceed the values prescribed in Table 1.
This specification is under the jurisdiction of ASTM Committee B01 on
5.3 Dimensions and Permissible Variations—The flat wire
Electrical Conductors and is the direct responsibility of Subcommittee B01.04 on
sizes shall be expressed as the thickness and width of the wire
Conductors of Copper and Copper Alloys.
indecimalfractionsofaninchtothenearest0.0001in.(0.0025
Current edition approved Oct. 1, 2014. Published October 2014. Originally
approved in 2010. Last previous edition approved in 2010 as B973 – 10. DOI:
mm). The tin-coated flat wire shall not vary from the specified
10.1520/B0973-10R14.
thickness and width by more than the amounts specified in
For referenced ASTM standards, visit the ASTM website, www.astm.org, or
Table 2 and Table 3, respectively.
contact ASTM Customer Service at service@astm.org. For Annual Book of ASTM
Standards volume information, refer to the standard’s Document Summary page on
5.4 Continuity of Coating—The tin coating shall be continu-
the ASTM website.
ous. The continuity of coating on the flat wire shall be
Available from National Technical Information Service (NTIS), 5301 Shawnee
Rd., Alexandria, VA 22312, http://www.ntis.gov. determined on representative samples taken before braiding
Copyright © ASTM International, 100 Barr Harbor Drive, PO Box C700, West Conshohocken, PA 19428-2959. United States
B973−10 (2014)
TABLE 1 Electrical Resistivity Requirements
the wire was drawn from rod stock meeting the international
Thickness Range, Resistivity at 20°C standard for annealed copper instead of resistivity tests on the
Inch (mm) Ω·lb/mile2
finished wire.
0.0008 to 0.0012 (0.020 to 0.031), incl 1006.0
6.3 Dimensional Measurements—Dimensional measure-
0.0013 to 0.0016 (0.033 to 0.041), incl 972.45
mentsforwidthandthicknessshallbemadewithamicrometer
0.0017 to 0.0024 (0.043 to 0.061), incl 961.76
caliper equipped with a vernier graduated in 0.0001 in. (0.0025
0.0025 to 0.0048 (0.064 to 0.122), incl 951.31
0.0049 to 0.0100 (0.125 to 0.254), incl 941.08
mm). Measurements shall be made on at least three places on
each unit selected for this test. Any measurement taken
exceeding the dimensions and permissible variation require-
TABLE 2 Permissible Variations in Thickness
ments in 5.4 shall constitute failure to meet the dimensional
Nominal Thickness Range, Tolerance,
conformance criterion.
Inch (mm) Inch (mm)
6.4 Continuity of Coating:
0.0010 to 0.0014 (0.025 to 0.036) +/- 0.0002 (0.005)
6.4.1 Specimens:
0.0015 to 0.0019 (0.038 to 0.048) +/- 0.0003 (0.008)
6.4.1.1 Length of Specimens—Test specimens shall have a
0.0020 to 0.0049 (0.051 to 0.124) +/- 0.0004 (0.010)
0.0050 to 0.0100 (0.127 to 0.254) +/- 0.0005 (0.013)
lengthofabout6in.(152mm).Theyshallbetaggedormarked
tocorrespondwiththecoil,spool,orreelfromwhichtheywere
cut.
TABLE 3 Permissible Variations in Width
6.4.1.2 Treatment of Specimens—The specimens shall be
Nominal Width Range, Tolerance,
thoroughly cleaned by immersion in a suitable organic solvent
Inch (mm) Inch (mm)
for at least 3 min; then removed and wiped dry with a clean,
0.0100 to 0.0499 (0.254 to 1.27) +/- 0.0013 (0.033) soft cloth ( Caution-see Explanatory Note 5). The specimens
0.0500 to 0.0699 (1.27 to 1.78) +/- 0.0015 (0.038)
thus cleaned shall be kept wrapped in a clean, dry cloth until
0.0700 to 0.0999 (1.78 to 2.54) +/- 0.0020 (0.051)
tested. That part of the specimen to be immersed in the test
0.1000 to 0.1249 (2.54 to 3.17) +/- 0.0030 (0.076)
solution shall not be handled. Care shall be taken to avoid
0.1250 to 0.1500 (3.18 to 3.81) +/- 0.0040 (0.102)
abrasion by the cut ends.
6.4.2 Special Solutions Required:
applications or insulating. The continuity of coating shall be 6.4.2.1 Hydrochloric Acid Solution (HCl) (sp gr 1.088)—
Commercial HCl (sp gr 1.12) shall be diluted with distilled
determined by the hydrochloric acid-sodium polysulfide test in
accordance with 6.4. water to a specific gravity of 1.088 measured at 15.6°C (60°F).
Aportion of HCl solution having a volume of 180 mLshall be
5.5 Joints—Necessary joints in the wire and rods prior to
considered to be exhausted when the number of test specimens
final coating and drawing shall be made in accordance with the
prescribed in Table 4 of a size as indicated in 6.4.3 have been
best commercial practice. There shall be no uncoated joints in
immersed in it for two cycles.
the final product.
6.4.2.2 Sodium Polysulfide Solution (sp gr 1.142) (Explana-
5.6 Finish—The coating shall consist of a smooth continu-
tory Note 6)—A concentrated solution shall be made by
ouslayer,firmlyadherenttothesurfaceofthecopper.Thewire
dissolving sodium sulfide crystals (cp) in distilled water until
shall be free of all imperfections not consistent with the best
commercial practice.
A
TABLE 4 Limiting Number of Test Specimens for Coating Test
6. Test Methods
Maximum Number of
Specimens
6.1 Tensile Strength and Elongation (Explanatory Note 4):
Equivalent Round to be Tested for 2
6.1.1 The tensile strength, expressed in pounds per square
Nominal Diameter Cycles
inch, shall be obtained by dividing the maximum load carried
in 180 mL of Acid
Solution
by the specimen during the tension test by the original
in. mm
cross-sectional area of the specimen. Tensile strength and
elongation may be determined simultaneously on the same
Under 0.0851 to Under 2.2 to 1.3, 6
0.0501, incl
specimen.
incl
6.1.2 The elongation of the flat wire may be determined by
measurements made between the jaws of the tensile testing
Under 0.0501 to Under 1.3 to 0.97, 10
0.0381, incl
machine. The zero length shall be the distance between the
incl
jaws at the start of the tension test and be as near 10 in. (254
mm) as practicable. The final length shall be the distance
Under 0.0381 to Under 0.97 to 0.76, 12
0.0301, incl
between the jaws at the time of rupture. The fracture shall be
incl
between the jaws of the testing machine and not closer than 1
in. (25.4 mm) to the jaw. Under 0.0301 to Under 0.76 to 0.076, 14
0.0030, incl
6.2 Resistivity (Explanatory Note 3)—The electrical resis-
incl
tivity of the material shall be determined in accordance with A
See Explanatory Note 2 for equivalent round calculation.
Test Method B193. The purchaser may accept certification that
B973−10 (2014)
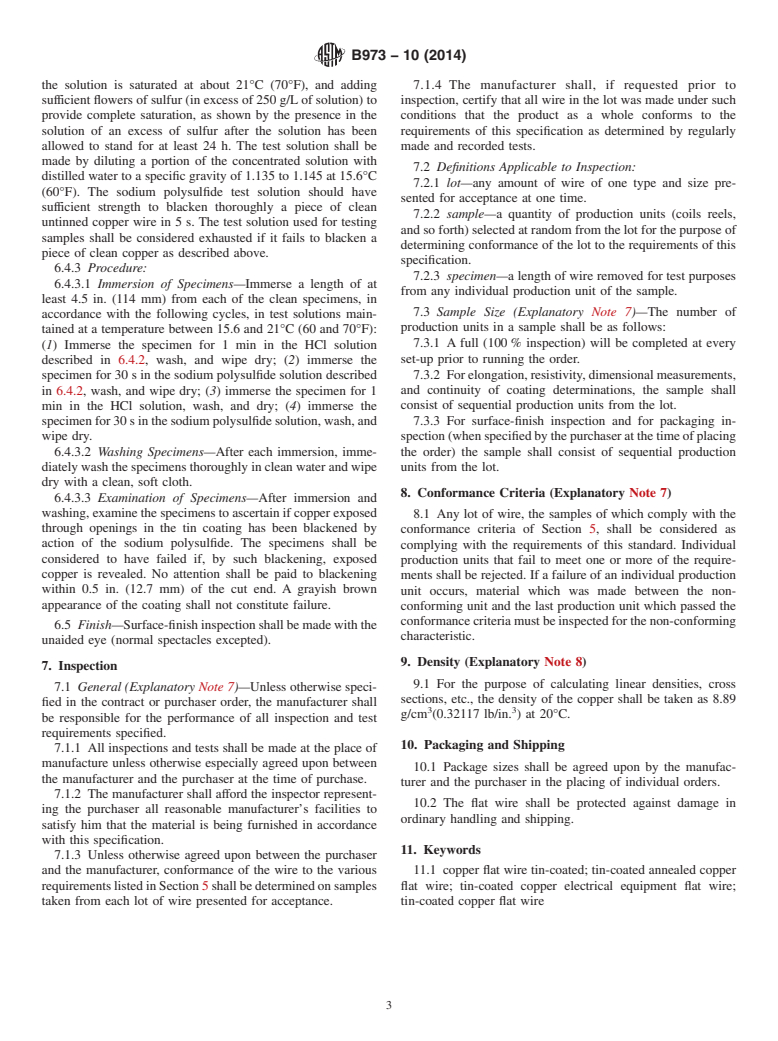
the solution is saturated at about 21°C (70°F), and adding 7.1.4 The manufacturer shall, if requested prior to
sufficient flowers of sulfur (in excess of 250 g/Lof solution) to inspection, certify that all wire in the lot was made under such
provide complete saturation, as shown by the presence in the conditions that the product as a whole conforms to the
solution of an excess of sulfur after the solution has been requirements of this specification as determined by regularly
allowed to stand for at least 24 h. The test solution shall be made and recorded tests.
made by diluting a portion of the concentrated solution with
7.2 Definitions Applicable to Inspection:
distilled water to a specific gravity of 1.135 to 1.145 at 15.6°C
7.2.1 lot—any amount of wire of one type and size pre-
(60°F). The sodium polysulfide test solution should have
sented for acceptance at one time.
sufficient strength to blacken thoroughly a piece of clean
7.2.2 sample—a quantity of production units (coils reels,
untinned copper wire in 5 s. The test solution used for testing
and so forth) selected at random fro
...
This document is not an ASTM standard and is intended only to provide the user of an ASTM standard an indication of what changes have been made to the previous version. Because
it may not be technically possible to adequately depict all changes accurately, ASTM recommends that users consult prior editions as appropriate. In all cases only the current version
of the standard as published by ASTM is to be considered the official document.
Designation: B973 − 10 B973 − 10 (Reapproved 2014)
Standard Specification for
Tin-Coated Braid and Ribbon Flat Copper Wire intended for
use in Electronic Application
This standard is issued under the fixed designation B973; the number immediately following the designation indicates the year of
original adoption or, in the case of revision, the year of last revision. A number in parentheses indicates the year of last reapproval. A
superscript epsilon (´) indicates an editorial change since the last revision or reapproval.
1. Scope
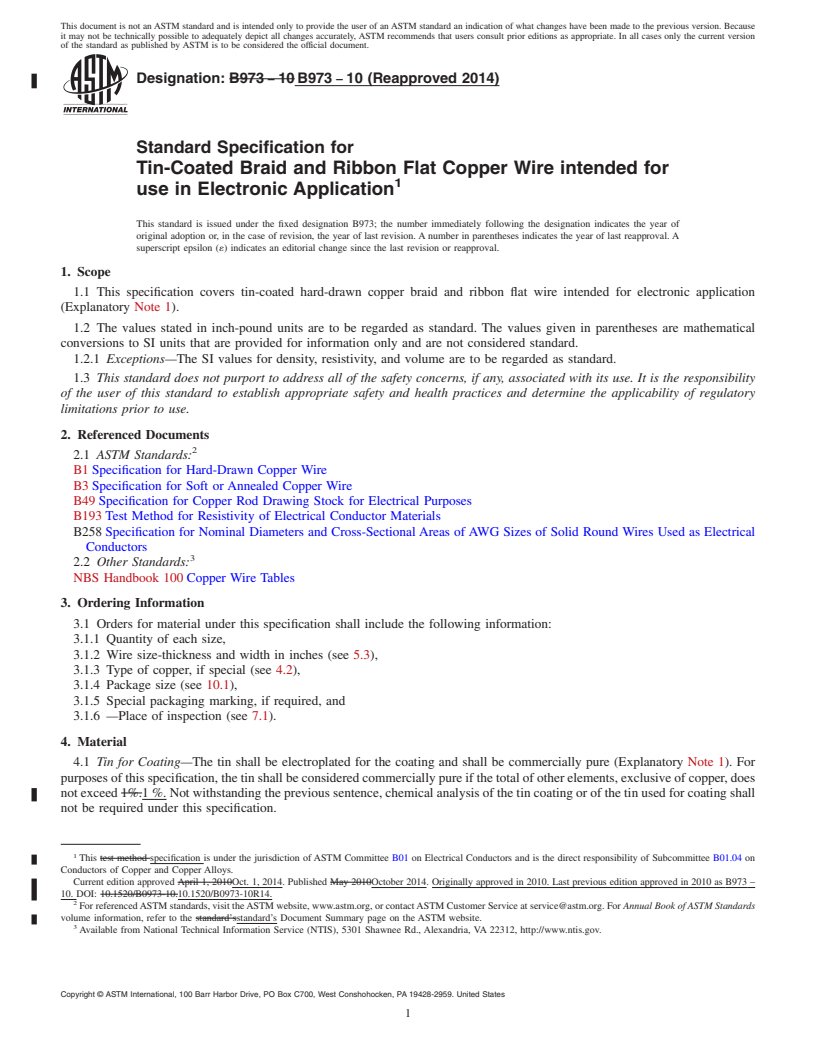
1.1 This specification covers tin-coated hard-drawn copper braid and ribbon flat wire intended for electronic application
(Explanatory Note 1).
1.2 The values stated in inch-pound units are to be regarded as standard. The values given in parentheses are mathematical
conversions to SI units that are provided for information only and are not considered standard.
1.2.1 Exceptions—The SI values for density, resistivity, and volume are to be regarded as standard.
1.3 This standard does not purport to address all of the safety concerns, if any, associated with its use. It is the responsibility
of the user of this standard to establish appropriate safety and health practices and determine the applicability of regulatory
limitations prior to use.
2. Referenced Documents
2.1 ASTM Standards:
B1 Specification for Hard-Drawn Copper Wire
B3 Specification for Soft or Annealed Copper Wire
B49 Specification for Copper Rod Drawing Stock for Electrical Purposes
B193 Test Method for Resistivity of Electrical Conductor Materials
B258 Specification for Nominal Diameters and Cross-Sectional Areas of AWG Sizes of Solid Round Wires Used as Electrical
Conductors
2.2 Other Standards:
NBS Handbook 100 Copper Wire Tables
3. Ordering Information
3.1 Orders for material under this specification shall include the following information:
3.1.1 Quantity of each size,
3.1.2 Wire size-thickness and width in inches (see 5.3),
3.1.3 Type of copper, if special (see 4.2),
3.1.4 Package size (see 10.1),
3.1.5 Special packaging marking, if required, and
3.1.6 —Place of inspection (see 7.1).
4. Material
4.1 Tin for Coating—The tin shall be electroplated for the coating and shall be commercially pure (Explanatory Note 1). For
purposes of this specification, the tin shall be considered commercially pure if the total of other elements, exclusive of copper, does
not exceed 1%.1 %. Not withstanding the previous sentence, chemical analysis of the tin coating or of the tin used for coating shall
not be required under this specification.
This test method specification is under the jurisdiction of ASTM Committee B01 on Electrical Conductors and is the direct responsibility of Subcommittee B01.04 on
Conductors of Copper and Copper Alloys.
Current edition approved April 1, 2010Oct. 1, 2014. Published May 2010October 2014. Originally approved in 2010. Last previous edition approved in 2010 as B973 –
10. DOI: 10.1520/B0973-10.10.1520/B0973-10R14.
For referenced ASTM standards, visit the ASTM website, www.astm.org, or contact ASTM Customer Service at service@astm.org. For Annual Book of ASTM Standards
volume information, refer to the standard’sstandard’s Document Summary page on the ASTM website.
Available from National Technical Information Service (NTIS), 5301 Shawnee Rd., Alexandria, VA 22312, http://www.ntis.gov.
Copyright © ASTM International, 100 Barr Harbor Drive, PO Box C700, West Conshohocken, PA 19428-2959. United States
B973 − 10 (2014)
4.2 Copper-Base Metal—The base metal shall be copper of such quality and purity that the finished product shall have
properties and characteristics prescribed in this specification.
NOTE 1—Specifications B1, B3, or B49 defines copper suitable for use.
5. General Requirements (See Section 8)
5.1 Tensile and Elongation—The tin-coated copper flat wire in the hard drawn condition shall conform to elongation
requirements of 1%1 % minimum to 5%5 % maximum. The tensile strength shall be 55 000 psi (379 MPa) minimum.
5.2 Resistivity (Explanatory Note 3)—The electrical resistivity of the coated wire at a temperature of 20°C shall not exceed the
values prescribed in Table 1.
5.3 Dimensions and Permissible Variations—The flat wire sizes shall be expressed as the thickness and width of the wire in
decimal fractions of an inch to the nearest 0.0001 in. (0.0025 mm). The tin-coated flat wire shall not vary from the specified
thickness and width by more than the amounts specified in Table 2 and Table 3, respectively.
5.4 Continuity of Coating—The tin coating shall be continuous. The continuity of coating on the flat wire shall be determined
on representative samples taken before braiding applications or insulating. The continuity of coating shall be determined by the
hydrochloric acid-sodium polysulfide test in accordance with 6.4.
5.5 Joints—Necessary joints in the wire and rods prior to final coating and drawing shall be made in accordance with the best
commercial practice. There shall be no uncoated joints in the final product.
5.6 Finish—The coating shall consist of a smooth continuous layer, firmly adherent to the surface of the copper. The wire shall
be free of all imperfections not consistent with the best commercial practice.
6. Test Methods
6.1 Tensile Strength and Elongation (Explanatory Note 4):
6.1.1 The tensile strength, expressed in pounds per square inch, shall be obtained by dividing the maximum load carried by the
specimen during the tension test by the original cross-sectional area of the specimen. Tensile strength and elongation may be
determined simultaneously on the same specimen.
6.1.2 The elongation of the flat wire may be determined by measurements made between the jaws of the tensile testing machine.
The zero length shall be the distance between the jaws at the start of the tension test and be as near 10 in. (254 mm) as practicable.
The final length shall be the distance between the jaws at the time of rupture. The fracture shall be between the jaws of the testing
machine and not closer than 1 in. (25.4 mm) to the jaw.
6.2 Resistivity (Explanatory Note 3)—The electrical resistivity of the material shall be determined in accordance with Test
Method B193. The purchaser may accept certification that the wire was drawn from rod stock meeting the international standard
for annealed copper instead of resistivity tests on the finished wire.
6.3 Dimensional Measurements—Dimensional measurements for width and thickness shall be made with a micrometer caliper
equipped with a vernier graduated in 0.0001 in. (0.0025 mm). Measurements shall be made on at least three places on each unit
selected for this test. Any measurement taken exceeding the dimensions and permissible variation requirements in 5.4 shall
constitute failure to meet the dimensional conformance criterion.
6.4 Continuity of Coating:
6.4.1 Specimens:
6.4.1.1 Length of Specimens—Test specimens shall have a length of about 6 in. (152 mm). They shall be tagged or marked to
correspond with the coil, spool, or reel from which they were cut.
6.4.1.2 Treatment of Specimens—The specimens shall be thoroughly cleaned by immersion in a suitable organic solvent for at
least 3 min; then removed and wiped dry with a clean, soft cloth ( Caution-see Explanatory Note 5). The specimens thus cleaned
shall be kept wrapped in a clean, dry cloth until tested. That part of the specimen to be immersed in the test solution shall not be
handled. Care shall be taken to avoid abrasion by the cut ends.
6.4.2 Special Solutions Required:
TABLE 1 Electrical Resistivity Requirements
Thickness Range, Resistivity at 20°C
Inch (mm) Ω·lb/mile2
0.0008 to 0.0012 (0.020 to 0.031), incl 1006.0
0.0013 to 0.0016 (0.033 to 0.041), incl 972.45
0.0017 to 0.0024 (0.043 to 0.061), incl 961.76
0.0025 to 0.0048 (0.064 to 0.122), incl 951.31
0.0049 to 0.0100 (0.125 to 0.254), incl 941.08
B973 − 10 (2014)
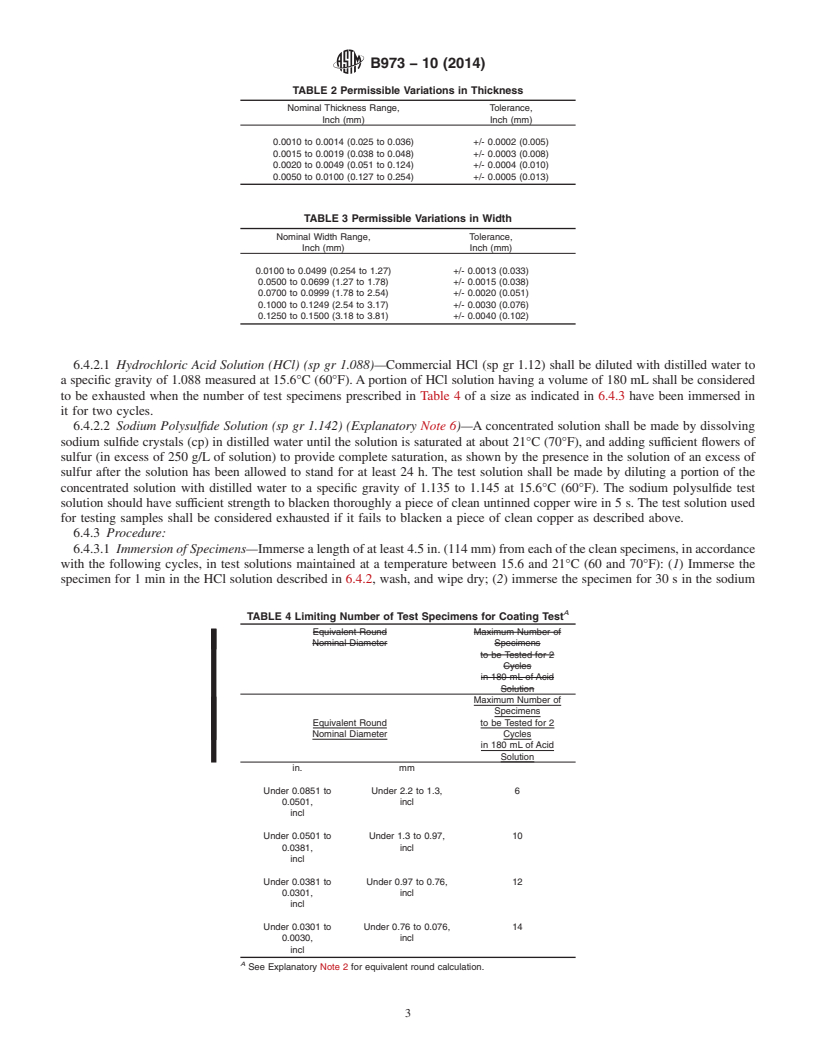
TABLE 2 Permissible Variations in Thickness
Nominal Thickness Range, Tolerance,
Inch (mm) Inch (mm)
0.0010 to 0.0014 (0.025 to 0.036) +/- 0.0002 (0.005)
0.0015 to 0.0019 (0.038 to 0.048) +/- 0.0003 (0.008)
0.0020 to 0.0049 (0.051 to 0.124) +/- 0.0004 (0.010)
0.0050 to 0.0100 (0.127 to 0.254) +/- 0.0005 (0.013)
TABLE 3 Permissible Variations in Width
Nominal Width Range, Tolerance,
Inch (mm) Inch (mm)
0.0100 to 0.0499 (0.254 to 1.27) +/- 0.0013 (0.033)
0.0500 to 0.0699 (1.27 to 1.78) +/- 0.0015 (0.038)
0.0700 to 0.0999 (1.78 to 2.54) +/- 0.0020 (0.051)
0.1000 to 0.1249 (2.54 to 3.17) +/- 0.0030 (0.076)
0.1250 to 0.1500 (3.18 to 3.81) +/- 0.0040 (0.102)
6.4.2.1 Hydrochloric Acid Solution (HCl) (sp gr 1.088)—Commercial HCl (sp gr 1.12) shall be diluted with distilled water to
a specific gravity of 1.088 measured at 15.6°C (60°F). A portion of HCl solution having a volume of 180 mL shall be considered
to be exhausted when the number of test specimens prescribed in Table 4 of a size as indicated in 6.4.3 have been immersed in
it for two cycles.
6.4.2.2 Sodium Polysulfide Solution (sp gr 1.142) (Explanatory Note 6)—A concentrated solution shall be made by dissolving
sodium sulfide crystals (cp) in distilled water until the solution is saturated at about 21°C (70°F), and adding sufficient flowers of
sulfur (in excess of 250 g/L of solution) to provide complete saturation, as shown by the presence in the solution of an excess of
sulfur after the solution has been allowed to stand for at least 24 h. The test solution shall be made by diluting a portion of the
concentrated solution with distilled water to a specific gravity of 1.135 to 1.145 at 15.6°C (60°F). The sodium polysulfide test
solution should have sufficient strength to blacken thoroughly a piece of clean untinned copper wire in 5 s. The test solution used
for testing samples shall be considered exhausted if it fails to blacken a piece of clean copper as described above.
6.4.3 Procedure:
6.4.3.1 Immersion of Specimens—Immerse a length of at least 4.5 in. (114 mm) from each of the clean specimens, in accordance
with the following cycles, in test solutions maintained at a temperature between 15.6 and 21°C (60 and 70°F): (1) Immerse the
specimen for 1 min in the HCl solution described in 6.4.2, wash, and wipe dry; (2) immerse the specimen for 30 s in the sodium
A
TABLE 4 Limiting Number of Test Specimens for Coating Test
Equivalent Round Maximum Number of
Nominal Diameter Specimens
to be Tested for 2
Cycles
in 180 mL of Acid
Solution
Maximum Number of
Specimens
Equivalent Round to be Tested for 2
Nominal Diameter Cycles
in 180 mL of Acid
Solution
in. mm
Under 0.0851 to Under 2.2 to 1.3, 6
0.0501, incl
incl
Under 0.0501 to Under 1.3 to 0.97, 10
0.0381, incl
incl
Under 0.0381 to Under 0.97 to 0.76, 1
...


Questions, Comments and Discussion
Ask us and Technical Secretary will try to provide an answer. You can facilitate discussion about the standard in here.