ASTM B571-97(2008)e1
(Practice)Standard Practice for Qualitative Adhesion Testing of Metallic Coatings
Standard Practice for Qualitative Adhesion Testing of Metallic Coatings
SIGNIFICANCE AND USE
These tests are useful for production control and for acceptance testing of products.
Interpreting the results of qualitative methods for determining the adhesion of metallic coatings is often a controversial subject. If more than one test is used, failure to pass any one test is considered unsatisfactory. In many instances, the end use of the coated article or its method of fabrication will suggest the technique that best represents functional requirements. For example, an article that is to be subsequently formed would suggest a draw or a bend test; an article that is to be soldered or otherwise exposed to heat would suggest a heat-quench test. If a part requires baking or heat treating after plating, adhesion tests should be carried out after such posttreatment as well.
Several of the tests are limited to specific types of coatings, thickness ranges, ductilities, or compositions of the substrate. These limitations are noted generally in the test descriptions and are summarized in Table 1 for certain metallic coatings.
“Perfect” adhesion exists if the bonding between the coating and the substrate is greater than the cohesive strength of either. Such adhesion is usually obtained if good electroplating practices are followed.
For many purposes, the adhesion test has the objective of detecting any adhesion less than “perfect.” For such a test, one uses any means available to attempt to separate the coating from the substrate. This may be prying, hammering, bending, beating, heating, sawing, grinding, pulling, scribing, chiseling, or a combination of such treatments. If the coating peels, flakes, or lifts from the substrate, the adhesion is less than perfect.
If evaluation of adhesion is required, it may be desirable to use one or more of the following tests. These tests have varying degrees of severity; and one might serve to distinguish between satisfactory and unsatisfactory adhesion in a specific application. The choice for each situation must be determi...
SCOPE
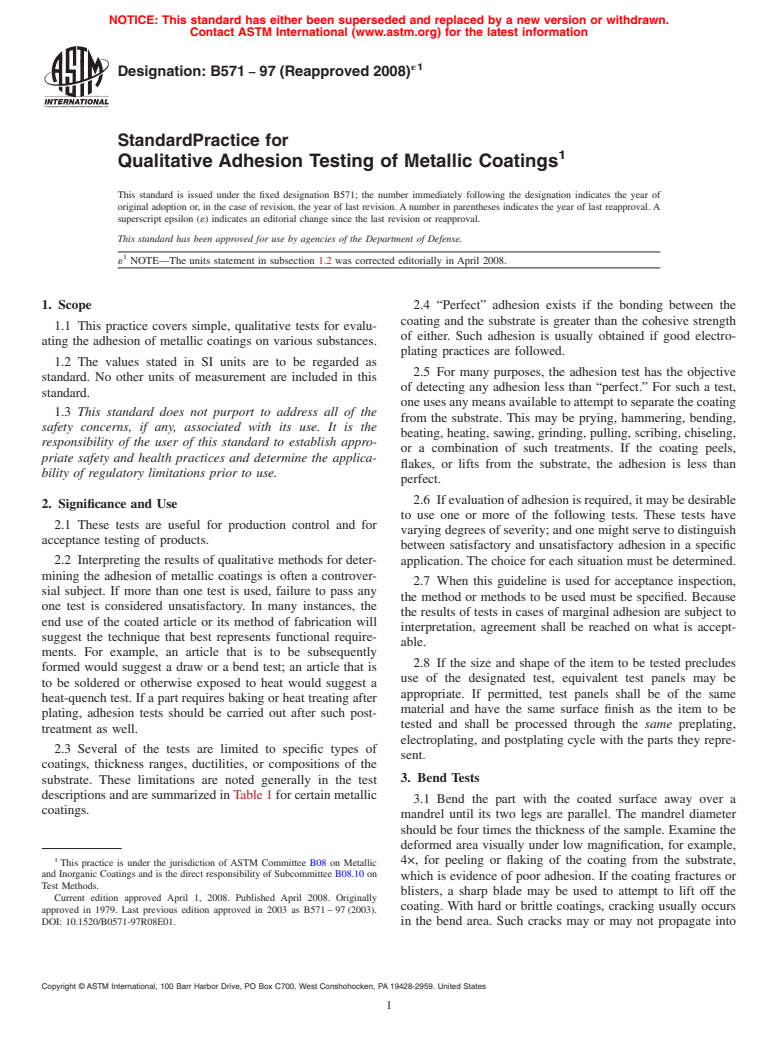
1.1 This practice covers simple, qualitative tests for evaluating the adhesion of metallic coatings on various substances.
1.2 The values stated in SI units are to be regarded as standard. No other units of measurement are included in this standard.
1.3 This standard does not purport to address all of the safety concerns, if any, associated with its use. It is the responsibility of the user of this standard to establish appropriate safety and health practices and determine the applicability of regulatory limitations prior to use.
General Information
Relations
Buy Standard
Standards Content (Sample)
NOTICE: This standard has either been superseded and replaced by a new version or withdrawn.
Contact ASTM International (www.astm.org) for the latest information
´1
Designation: B571 − 97 (Reapproved 2008)
StandardPractice for
Qualitative Adhesion Testing of Metallic Coatings
This standard is issued under the fixed designation B571; the number immediately following the designation indicates the year of
original adoption or, in the case of revision, the year of last revision.Anumber in parentheses indicates the year of last reapproval.A
superscript epsilon (´) indicates an editorial change since the last revision or reapproval.
This standard has been approved for use by agencies of the Department of Defense.
´ NOTE—The units statement in subsection 1.2 was corrected editorially in April 2008.
1. Scope 2.4 “Perfect” adhesion exists if the bonding between the
coating and the substrate is greater than the cohesive strength
1.1 This practice covers simple, qualitative tests for evalu-
of either. Such adhesion is usually obtained if good electro-
ating the adhesion of metallic coatings on various substances.
plating practices are followed.
1.2 The values stated in SI units are to be regarded as
2.5 For many purposes, the adhesion test has the objective
standard. No other units of measurement are included in this
of detecting any adhesion less than “perfect.” For such a test,
standard.
oneusesanymeansavailabletoattempttoseparatethecoating
1.3 This standard does not purport to address all of the
from the substrate. This may be prying, hammering, bending,
safety concerns, if any, associated with its use. It is the
beating, heating, sawing, grinding, pulling, scribing, chiseling,
responsibility of the user of this standard to establish appro-
or a combination of such treatments. If the coating peels,
priate safety and health practices and determine the applica-
flakes, or lifts from the substrate, the adhesion is less than
bility of regulatory limitations prior to use.
perfect.
2.6 Ifevaluationofadhesionisrequired,itmaybedesirable
2. Significance and Use
to use one or more of the following tests. These tests have
2.1 These tests are useful for production control and for
varying degrees of severity; and one might serve to distinguish
acceptance testing of products.
between satisfactory and unsatisfactory adhesion in a specific
2.2 Interpreting the results of qualitative methods for deter-
application. The choice for each situation must be determined.
mining the adhesion of metallic coatings is often a controver-
2.7 When this guideline is used for acceptance inspection,
sial subject. If more than one test is used, failure to pass any
the method or methods to be used must be specified. Because
one test is considered unsatisfactory. In many instances, the
the results of tests in cases of marginal adhesion are subject to
end use of the coated article or its method of fabrication will
interpretation, agreement shall be reached on what is accept-
suggest the technique that best represents functional require-
able.
ments. For example, an article that is to be subsequently
2.8 If the size and shape of the item to be tested precludes
formed would suggest a draw or a bend test; an article that is
use of the designated test, equivalent test panels may be
to be soldered or otherwise exposed to heat would suggest a
appropriate. If permitted, test panels shall be of the same
heat-quench test. If a part requires baking or heat treating after
material and have the same surface finish as the item to be
plating, adhesion tests should be carried out after such post-
tested and shall be processed through the same preplating,
treatment as well.
electroplating, and postplating cycle with the parts they repre-
2.3 Several of the tests are limited to specific types of
sent.
coatings, thickness ranges, ductilities, or compositions of the
3. Bend Tests
substrate. These limitations are noted generally in the test
descriptionsandaresummarizedinTable1forcertainmetallic
3.1 Bend the part with the coated surface away over a
coatings.
mandrel until its two legs are parallel. The mandrel diameter
should be four times the thickness of the sample. Examine the
deformed area visually under low magnification, for example,
4×, for peeling or flaking of the coating from the substrate,
This practice is under the jurisdiction of ASTM Committee B08 on Metallic
and Inorganic Coatings and is the direct responsibility of Subcommittee B08.10 on
which is evidence of poor adhesion. If the coating fractures or
Test Methods.
blisters, a sharp blade may be used to attempt to lift off the
Current edition approved April 1, 2008. Published April 2008. Originally
coating. With hard or brittle coatings, cracking usually occurs
approved in 1979. Last previous edition approved in 2003 as B571–97(2003).
DOI: 10.1520/B0571-97R08E01. in the bend area. Such cracks may or may not propagate into
Copyright © ASTM International, 100 Barr Harbor Drive, PO Box C700, West Conshohocken, PA 19428-2959. United States
´1
B571 − 97 (Reapproved 2008)
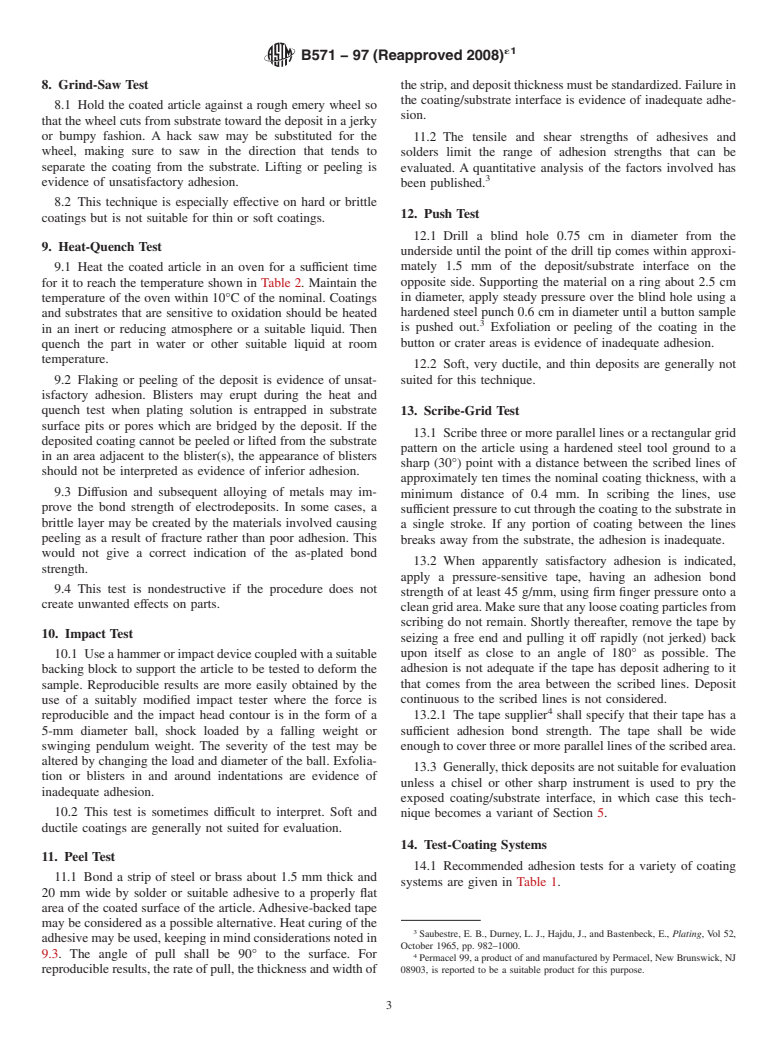
TABLE 1 Adhesion Tests Appropriate for Various Coatings
A
Coating Material
Lead and Tin and
Adhesion Test
Nickel and
Cadmium Chromium Copper Lead/Tin Nickel Palladium Rhodium Silver Tin/Lead Zinc Gold
Chromium
Alloy Alloy
Bend +−+++ + + + + + + +
Burnish −++−+ + − − + − + −
Chisel/knife +++++ − + − + + − +
Draw −−+−+ + − − − − + −
File −++++ + − + + + − +
Grind and ++−−+ + + − − + + −
saw
Heat/quench −++++ + − − + + − +
Impact +−+−+ + − − − − + −
Peel −++−+ − − − + + − +
Push −−−−+ + − − − − + −
Scribe −−+−+ − − − − − − −
A
+ Appropriate; − not appropriate.
TABLE 2 Temperature Test Guide
Coating Material
Chromium,
Lead, Gold and
Nickel, Nickel + Tin, Zinc, Palladium, Rhodium,
Substrate
Tin/Lead, Silver,
Chromium, Temperature, Temperature, Temperature, Temperature,
Temperature, Temperature,
Copper, °C °C °C °C
°C °C
Temperature, °C
Steel 250 150 150 150 250 350 185
Zinc alloys 150 150 150 150 150 150 150
Copper and 250 150 150 150 250 350 185
copper alloys
Aluminum and 220 150 150 150 220 220 185
aluminum alloys
the substrate. In either case, cracks are not indicative of poor 6. Draw Test
adhesion unless the coating can be peeled back with a sharp
6.1 Form a suitable sample about 60 mm in diameter into a
instrument.
flanged cap approximately 38 mm in diameter, to a depth up to
3.2 Bend the part repeatedly, back and forth, through an 18 mm, through the use of a set of adjustable dies in an
angle of 180° until failure of the basis metal occurs. Examine ordinary punch press. Penetration of the male die may be
the region at low magnification, for example, 10×, for separa- continued until the cap fractures. The adhesion of the coating
tion or peeling of the coating. Prying with a sharp blade will may be observed directly or evaluated further by techniques
indicate unsatisfactory adhesion by lift off of the coating. described in Section 5 for detachment from the substrate. If
there is peeling or flaking of the coating or if it can be
4. Burnishing Test detached, the adhesion is not satisfactory.
4.1 Rub a coated area of about 5 cm with a smooth-ended
6.2 Results from this technique must be interpreted cau-
tool for approximately 15 s.Asuitable tool is a steel rod 6 mm
tiously,becausetheductilitiesofboththecoatingandsubstrate
in diameter with a smooth hemispherical end. The pressure are involved.
shall be sufficient to burnish the coating at each stroke but not
so great as to dig into it. Blisters, lifting, or peeling should not 7. File Test
develop. Generally, thick deposits cannot be evaluated satis-
7.1 Sawoffapieceofthecoatedspecimenandinspectitfor
factorily.
detachmentatthedeposit/substrateinterface.Applycoarsemill
file across the sawed edge from the substrate toward the
5. Chisel-Knife Test
coating so as to raise it, using an approach angle of approxi-
5.1 Use a sharp cold chisel to penetrate the coating on the mately45°tothecoatingsurface.Liftingorpeelingisevidence
article being evaluated.Alternatively the chis
...
This document is not an ASTM standard and is intended only to provide the user of an ASTM standard an indication of what changes have been made to the previous version. Because
it may not be technically possible to adequately depict all changes accurately, ASTM recommends that users consult prior editions as appropriate. In all cases only the current version
of the standard as published by ASTM is to be considered the official document.
´1
Designation:B 571–97(Reapproved 2003) Designation:B571–97(Reapproved2008)
Standard Practice for
Qualitative Adhesion Testing of Metallic Coatings
This standard is issued under the fixed designation B571; the number immediately following the designation indicates the year of
original adoption or, in the case of revision, the year of last revision. A number in parentheses indicates the year of last reapproval. A
superscript epsilon (´) indicates an editorial change since the last revision or reapproval.
This standard has been approved for use by agencies of the Department of Defense.
´ NOTE—The units statement in subsection 1.2 was corrected editorially in April 2008.
1. Scope
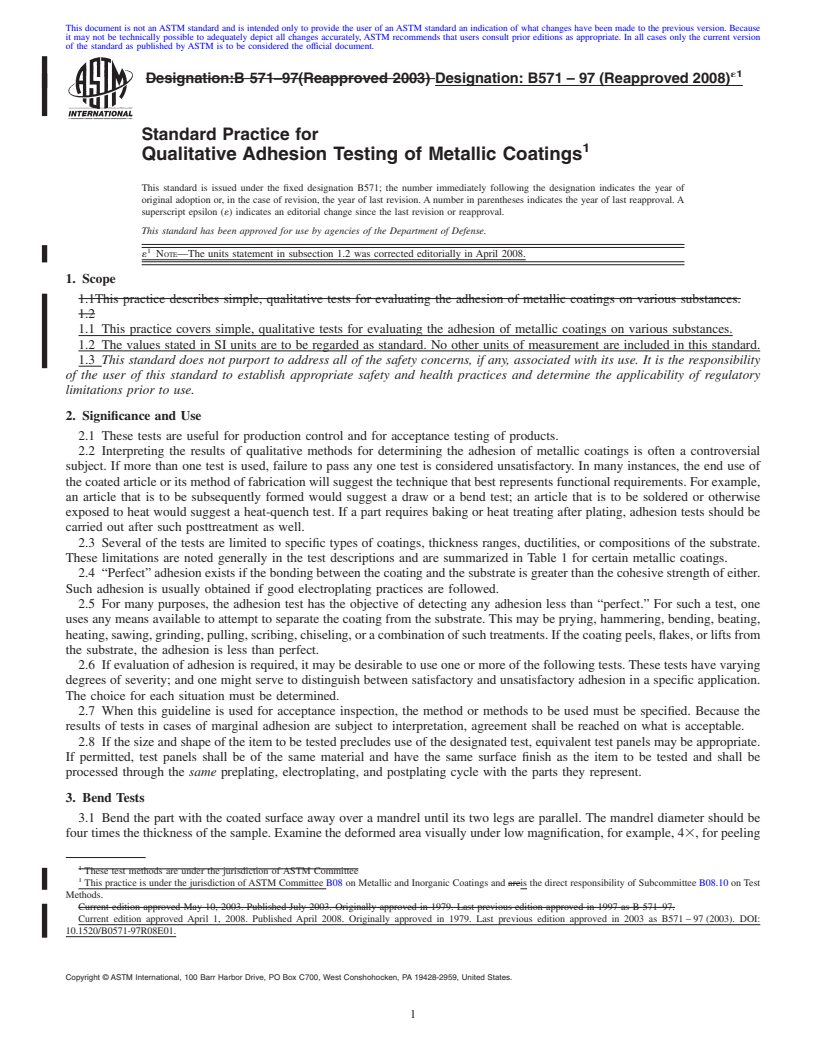
1.1This practice describes simple, qualitative tests for evaluating the adhesion of metallic coatings on various substances.
1.2
1.1 This practice covers simple, qualitative tests for evaluating the adhesion of metallic coatings on various substances.
1.2 The values stated in SI units are to be regarded as standard. No other units of measurement are included in this standard.
1.3 This standard does not purport to address all of the safety concerns, if any, associated with its use. It is the responsibility
of the user of this standard to establish appropriate safety and health practices and determine the applicability of regulatory
limitations prior to use.
2. Significance and Use
2.1 These tests are useful for production control and for acceptance testing of products.
2.2 Interpreting the results of qualitative methods for determining the adhesion of metallic coatings is often a controversial
subject. If more than one test is used, failure to pass any one test is considered unsatisfactory. In many instances, the end use of
the coated article or its method of fabrication will suggest the technique that best represents functional requirements. For example,
an article that is to be subsequently formed would suggest a draw or a bend test; an article that is to be soldered or otherwise
exposed to heat would suggest a heat-quench test. If a part requires baking or heat treating after plating, adhesion tests should be
carried out after such posttreatment as well.
2.3 Several of the tests are limited to specific types of coatings, thickness ranges, ductilities, or compositions of the substrate.
These limitations are noted generally in the test descriptions and are summarized in Table 1 for certain metallic coatings.
2.4 “Perfect” adhesion exists if the bonding between the coating and the substrate is greater than the cohesive strength of either.
Such adhesion is usually obtained if good electroplating practices are followed.
2.5 For many purposes, the adhesion test has the objective of detecting any adhesion less than “perfect.” For such a test, one
uses any means available to attempt to separate the coating from the substrate. This may be prying, hammering, bending, beating,
heating, sawing, grinding, pulling, scribing, chiseling, or a combination of such treatments. If the coating peels, flakes, or lifts from
the substrate, the adhesion is less than perfect.
2.6 If evaluation of adhesion is required, it may be desirable to use one or more of the following tests. These tests have varying
degrees of severity; and one might serve to distinguish between satisfactory and unsatisfactory adhesion in a specific application.
The choice for each situation must be determined.
2.7 When this guideline is used for acceptance inspection, the method or methods to be used must be specified. Because the
results of tests in cases of marginal adhesion are subject to interpretation, agreement shall be reached on what is acceptable.
2.8 If the size and shape of the item to be tested precludes use of the designated test, equivalent test panels may be appropriate.
If permitted, test panels shall be of the same material and have the same surface finish as the item to be tested and shall be
processed through the same preplating, electroplating, and postplating cycle with the parts they represent.
3. Bend Tests
3.1 Bend the part with the coated surface away over a mandrel until its two legs are parallel. The mandrel diameter should be
four times the thickness of the sample. Examine the deformed area visually under low magnification, for example, 43, for peeling
These test methods are under the jurisdiction of ASTM Committee
This practice is under the jurisdiction ofASTM Committee B08 on Metallic and Inorganic Coatings and areis the direct responsibility of Subcommittee B08.10 on Test
Methods.
Current edition approved May 10, 2003. Published July 2003. Originally approved in 1979. Last previous edition approved in 1997 as B 571–97.
Current edition approved April 1, 2008. Published April 2008. Originally approved in 1979. Last previous edition approved in 2003 as B571 – 97 (2003). DOI:
10.1520/B0571-97R08E01.
Copyright © ASTM International, 100 Barr Harbor Drive, PO Box C700, West Conshohocken, PA 19428-2959, United States.
´1
B571–97 (2008)
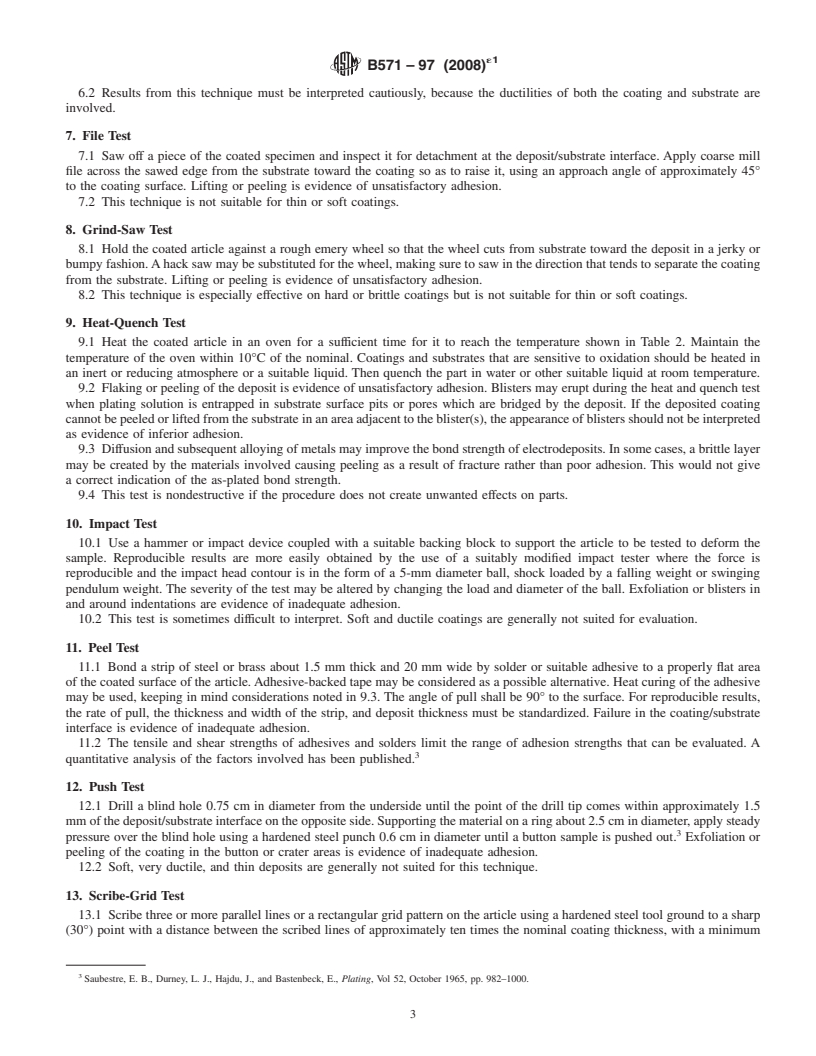
TABLE 1 Adhesion Tests Appropriate for Various Coatings
A
Coating Material
Lead and Tin and
Adhesion Test
Nickel and
Cadmium Chromium Copper Lead/Tin Nickel Palladium Rhodium Silver Tin/Lead Zinc Gold
Chromium
Alloy Alloy
Bend +−+++ + + + + + + +
Burnish −++−+ + − − + − + −
Chisel/knife +++++ − + − + + − +
Draw −−+−+ + − − − − + −
File −++++ + − + + + − +
Grind and ++−−+ + + − − + + −
saw
Heat/quench −++++ + − − + + − +
Impact +−+−+ + − − − − + −
Peel −++−+ − − − + + − +
Push −−−−+ + − − − − + −
Scribe −−+−+ − − − − − − −
A
+ Appropriate; − not appropriate.
TABLE 2 Temperature Test Guide
Coating Material
Chromium,
Lead, Gold and
Nickel, Nickel + Tin, Zinc, Palladium, Rhodium,
Substrate
Tin/Lead, Silver,
Chromium, Temperature, Temperature, Temperature, Temperature,
Temperature, Temperature,
Copper, °C °C °C °C
°C °C
Temperature, °C
Steel 250 150 150 150 250 350 185
Zinc alloys 150 150 150 150 150 150 150
Copper and 250 150 150 150 250 350 185
copper alloys
Aluminum and 220 150 150 150 220 220 185
aluminum alloys
or flaking of the coating from the substrate, which is evidence of poor adhesion. If the coating fractures or blisters, a sharp blade
may be used to attempt to lift off the coating. With hard or brittle coatings, cracking usually occurs in the bend area. Such cracks
may or may not propagate into the substrate. In either case, cracks are not indicative of poor adhesion unless the coating can be
peeled back with a sharp instrument.
3.2 Bendthepartrepeatedly,backandforth,throughanangleof180°untilfailureofthebasismetaloccurs.Examinetheregion
at low magnification, for example, 103, for separation or peeling of the coating. Prying with a sharp blade will indicate
unsatisfactory adhesion by lift off of the coating.
4. Burnishing Test
4.1 Rub a coated area of about 5 cm with a smooth-ended tool for approximately 15 s. A suitable tool is a steel rod 6 mm in
diameter with a smooth hemispherical end. The pressure shall be sufficient to burnish the coating at each stroke but not so great
as to dig into it. Blisters, lifting, or peeling should not develop. Generally, thick deposits cannot be evaluated satisfactorily.
5. Chisel-Knife Test
5.1 Use a sharp cold chisel to penetrate the coating on the article being evaluated.Alternatively the chisel may be placed in back
of an overhang area of the coating or at a coating-substrate interface exposed by sectioning the article with a saw. A knife may
be substituted for the chisel with or without hammering or light tapping. If it is possible to remove the deposit, the adhesion is
not satisfactory. Soft or thin coatings cannot be evaluated for adhesion by this method.
6. Draw Test
6.1 Form a suitable sample about 60 mm in diameter into a flanged cap approximately 38 mm in diameter, to a depth up to 18
mm, through the use of a set of adjustable dies in an ordinary punch press. Penetration of the male die may be con
...


Questions, Comments and Discussion
Ask us and Technical Secretary will try to provide an answer. You can facilitate discussion about the standard in here.