ASTM D4497-94(2004)e1
(Test Method)Standard Test Method for Determining the Open Time of Hot Melt Adhesives (Manual Method)
Standard Test Method for Determining the Open Time of Hot Melt Adhesives (Manual Method)
SIGNIFICANCE AND USE
This test method allows comparing the open time of several hot melt adhesives.
This test method is not intended to provide the open-time observed for a specific adhesive in a specific manufacturing operation. This test method can be used to compare the performance of adhesives which are represented to be identical or to rank the open-time of a group of hot melt adhesives.
SCOPE
1.1 This test method covers the manual determination of the open-time range of hot-melt adhesives under the stated conditions.
1.2 The values stated in SI units are to be regarded as the standard. The inch-pound units in parentheses are provided for information only.
1.3 This standard does not purport to address all of the safety concerns, if any, associated with its use. It is the responsibility of the user of this standard to establish appropriate safety and health practices and determine the applicability of regulatory limitations prior to use.
General Information
Relations
Standards Content (Sample)
NOTICE: This standard has either been superseded and replaced by a new version or withdrawn.
Contact ASTM International (www.astm.org) for the latest information
´1
Designation: D4497 – 94 (Reapproved 2004)
Standard Test Method for
Determining the Open Time of Hot Melt Adhesives (Manual
Method)
This standard is issued under the fixed designation D4497; the number immediately following the designation indicates the year of
original adoption or, in the case of revision, the year of last revision. A number in parentheses indicates the year of last reapproval. A
superscript epsilon (´) indicates an editorial change since the last revision or reapproval.
´ NOTE—An editorial change was made in 3.1 in September 2004.
1. Scope 4. Summary of Test Method
1.1 This test method covers the manual determination of the 4.1 In this test method, open time is determined by bonding
open-time range of hot-melt adhesives under the stated condi- togetherwiththeadhesive,piecesofstandardpaperatintervals
tions. of 5 s sequentially after the molten adhesive has been applied
1.2 The values stated in SI units are to be regarded as the using a heated film applicator on one surface. The bonded
standard. The inch-pound units in parentheses are provided for specimens are examined later to determine the longest time
information only. period, between application of the adhesive to one surface and
1.3 This standard does not purport to address all of the mating with a second surface, which allows substantial bond-
safety concerns, if any, associated with its use. It is the ing.
responsibility of the user of this standard to establish appro-
5. Significance and Use
priate safety and health practices and determine the applica-
bility of regulatory limitations prior to use. 5.1 This test method allows comparing the open time of
several hot melt adhesives.
2. Referenced Documents
5.2 This test method is not intended to provide the open-
2.1 ASTM Standards: time observed for a specific adhesive in a specific manufactur-
D907 Terminology of Adhesives ing operation. This test method can be used to compare the
E171 Specification for Atmospheres for Conditioning and performance of adhesives which are represented to be identical
Testing Flexible Barrier Materials or to rank the open-time of a group of hot melt adhesives.
E691 Practice for Conducting an Interlaboratory Study to
6. Apparatus
Determine the Precision of a Test Method
6.1 Oven, which meets the precision required by the proce-
3. Terminology
dure, should be used to heat the adhesive sample and the
3.1 Definitions—Many of the terms found in this test applicator.
method are defined in Terminology D907. 6.2 Film Applicator—Multiple clearance 0.125 to 1.25 mm
3.2 Definitions of Terms Specific to This Standard: (5 to 50 mil) square P.G. and T. Number 2 Film Applicator
3.2.1 open time, n—the time available between application capable of providing an applied film of adhesive having a
of the adhesive to the first substrate and the mating of the nominal width of 50 mm (2 in.).
second substrate which still results in a minimum of 50 % fiber 6.3 Hand Thermometer, preferably metal, capable of mea-
tear when tested at ambient conditions. suring the temperature of the hot-melt with an accuracy of
61°C (62°F).
6.4 Primary Standard Substrate, 200 by 280 mm (8 by 11
This test method is under the jurisdiction of ASTM Committee D14 on 4
in.), NBS Standard Reference Material 1810 (Liner Board).
Adhesives and is the direct responsibility of Subcommittee D14.50 on Hot Melts,
Substrates are to be conditioned as described in Specification
Pressure Sensitives, and Archival Adhesives.
Current edition approved Sept. 1, 2004. Published September 2004. Originally E171.
approved in 1985. Last previous edition approved in 1999 as D4497 – 94 (1999).
DOI: 10.1520/D4497-94R04E01.
2 3
For referenced ASTM standards, visit the ASTM website, www.astm.org, or FilmApplicator No. 2 is available from Precision Gage and Tool Company, 28
contact ASTM Customer Service at service@astm.org. For Annual Book of ASTM Volkenand Street, Dayton, OH 45410.
Standards volume information, refer to the standard’s Document Summary page on Available from National Institute of Standards and Technology (NIST), 100
the ASTM website. Bureau Dr., Stop 3460, Gaithersburg, MD 20899-3460.
Copyright © ASTM International, 100 Barr Harbor Drive, PO Box C700, West Conshohocken, PA 19428-2959, United States.
´1
D4497 – 94 (2004)
6.5 Secondary Standard Substrate, 125 mm (5 in.) length in
the material direction cut to 19 mm (0.75 in.) wide, NBS
Standard Reference Material 1810 (Liner Board).
6.6 Glass Beakers (600 mL), for melting the adhesive.
6.7 Watchglass, to cover beaker.
6.8 Beakers, Tongs, and Protective gloves, for handling hot
vessels and applicators.
6.9 Transparent Pressure Sensitive Tape.
6.10 Stop Watch or Other Timer, graduated to at least 0.5 s.
6.11 Weighted Rectangular Block, having at least one
smooth and flat wood face, 50 by 12.5 mm (2 by 0.5 in.)
weighing 100 g (3.5 oz), the mass being uniformly distributed.
6.12 Micrometer or Thickness Gage, capable of measuring
to the nearest 0.025 mm (1 mil).
7. Sampling
7.1 The test sample should be representative of the adhesive
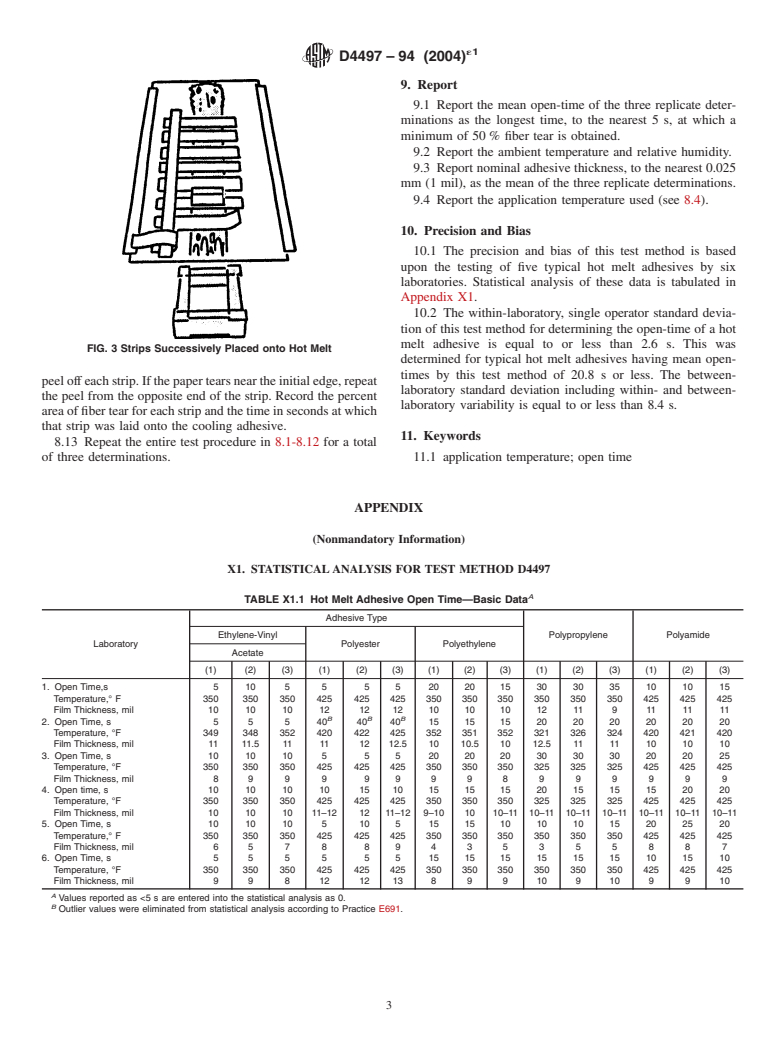
FIG. 2 Strips Drawn Back to Allow Hot Melt Application
being tested.
8.4 Remove the sample from the oven, and by stirring with
8. Procedure
the metal thermometer, quickly verify that the temperature is
8.1 Add 300 6 10 g of the adhesive to the 600-mL glass
within 63°C (65°F) of the manufacturers recommended
beaker and cover with a watch glass. Place the beaker
application temperature.
containing the adhesive into the oven and heat until at the
8.5 Quickly remove the adhesive applicator from the oven,
application temperature recommended by the manufacturer.
and center it above the top strip of the secondary substrate.The
8.2 Concurrently heat the film applicator in the same oven
0.5 mm (20 mil) gap should face down and be near the top end
to condition it to the sample temperature as in 8.1.
of the primary substrate.
8.3 Performtestinginarelativelydraft-freeroom.Whilethe
8.6 Fill the applicator reservoir to approximately a ⁄4-in.
sample is melting, prepare the substrates for testing as shown
level with conditioned hot adhesive.
in Figs. 1 and 2.
8.7 Move the applicator and the contained molten adhesive
8.3.1 Tape the long sides of a piece of primary standard
with one smooth motion over the length of the paper taking
substrate (see 6.4), minimum sheet size 100 by 280 mm (4 by
approximately2sto complete the drawdown.
11 in.), to a flat smooth surface of low thermal conductivity,
NOTE 1—Approximately2sis satisfactory. The purpose is to standard-
specifically to a larger piece of chipboard (such as from the
ize on a reasonable rate and eliminate an excessively fast or slow
back of a tablet). Then tape the chipboard to an underlying
drawdown which will affect the results.
surface.
NOTE 2—Trial applications should be made to determine the proper
8.3.2 Place the strips of the secondary standard substrate
applicator gap to lay down a specified film thickness. Normally, a gap of
(see 6.5) across the width of the primary substrate, as shown in
0.50 mm (20 mil) will lay down a film of 0.25 mm (10 mil). Variations in
applied film thickness will occur because of differences in the hot flow
Fig. 1, leaving a
...


Questions, Comments and Discussion
Ask us and Technical Secretary will try to provide an answer. You can facilitate discussion about the standard in here.