ASTM F1886/F1886M-16
(Test Method)Standard Test Method for Determining Integrity of Seals for Flexible Packaging by Visual Inspection
Standard Test Method for Determining Integrity of Seals for Flexible Packaging by Visual Inspection
SIGNIFICANCE AND USE
5.1 Seal attributes can be linked directly to a number of variables in process parameters, equipment, or material, as well as environmental (room temperature and relative humidity). Visual seal characteristics and defects can provide evidence of package integrity and production sealing problems.
5.2 Visual seal defects often will be the first indication of heat sealing process variation. They also will indicate a lack of, or potential compromise to, package integrity after physical package performance testing.
SCOPE
1.1 This test method covers the determination of channels in the package seal down to a width of 75 μm [0.003 in.] with a 60–100 % probability (see Section 8).
1.1.1 The ability to visually detect channel defects in package seals is highly dependent on the size of channel, the degree of contrast from sealed and unsealed areas, the amount and type of adhesive between the two package layers, reflecting light angle, types of material used, the use of magnification, and the inspector's level of training and experience.
1.2 This test method is applicable to packages with at least one transparent side so that the seal area may be clearly viewed.
1.3 The values stated in either SI units or inch-pound units are to be regarded separately as standard. The values stated in each system may not be exact equivalents; therefore, each system shall be used independently of the other. Combining values from the two systems may result in non-conformance with the standard.
1.4 This standard does not purport to address all of the safety concerns, if any, associated with its use. It is the responsibility of the user of this standard to establish appropriate safety and health practices and determine the applicability of regulatory limitations prior to use.
General Information
- Status
- Published
- Publication Date
- 30-Sep-2016
- Technical Committee
- F02 - Primary Barrier Packaging
- Drafting Committee
- F02.40 - Package Integrity
Relations
- Effective Date
- 01-Oct-2016
- Effective Date
- 01-May-2020
- Effective Date
- 01-Oct-2018
- Effective Date
- 15-Aug-2018
- Effective Date
- 01-Jun-2017
- Effective Date
- 01-Aug-2013
- Effective Date
- 15-Apr-2013
- Effective Date
- 01-Nov-2012
- Effective Date
- 01-Aug-2008
- Effective Date
- 01-Sep-2007
- Effective Date
- 01-May-2007
- Effective Date
- 01-Dec-2006
- Effective Date
- 10-Oct-2002
- Effective Date
- 10-Oct-1998
Overview
ASTM F1886/F1886M-16 is the internationally recognized standard test method for determining the integrity of seals for flexible packaging through visual inspection. Published by ASTM International, this standard is crucial for evaluating the presence of seal defects that could compromise package integrity. It outlines procedures for the qualitative assessment of seal quality in unopened, intact packages, particularly those with at least one transparent side for clear viewing.
Visual inspection is an essential part of packaging quality assurance, helping manufacturers, quality auditors, and regulators ensure that flexible packages meet integrity requirements for safe distribution and use. Seal attributes and defects offer immediate evidence of potential process issues or compromised package sterility, making this method highly significant in applications such as medical device packaging and sterile product containment.
Key Topics
- Seal Defect Identification: Focuses on the detection of channels in package seals down to 75 μm (0.003 in.), as well as other visual characteristics including unsealed areas, spotty seals, and oversealed regions.
- Inspection Process: Specifies viewing distances (30 to 45 cm / 12 to 18 in.), lighting requirements, and optional use of magnification or ultraviolet light to enhance defect visibility.
- Influencing Factors: Notes that detection effectiveness depends on factors such as channel size, material contrast, type of adhesive, lighting conditions, and inspector experience.
- Seal Defect Types: Documents unsealed areas, nonhomogeneous or undersealed areas, oversealed areas, narrow seals, channels, wrinkles, foldovers, cracks, tears, and pinholes as typical defects.
- Pass/Fail Assessment: Provides a qualitative, binomial basis for accept/reject decisions without quantitative bias.
- Precision Data: Includes cross-laboratory studies highlighting variance by material type and defect size, supporting reliability in industrial application.
Applications
ASTM F1886/F1886M-16 is used widely across sectors requiring high package integrity, especially:
- Medical Device Packaging: Ensures barrier properties and sterility by identifying seal defects that could admit contaminants.
- Pharmaceutical Packaging: Verifies closure integrity for products requiring stable, sterile environments.
- Food Packaging: Assesses integrity to prevent spoilage and contamination in flexible pouches and blister packs.
- Quality Assurance Programs: Serves as a fundamental visual inspection method during routine manufacturing audits and process validation.
This standard is particularly suited for flexible packaging with transparent sides, permitting reliable visual evaluation of seals. It supports manufacturers in establishing in-house visual inspection protocols and complements physical package performance tests.
Related Standards
Organizations utilizing ASTM F1886/F1886M-16 may also reference:
- ASTM F17: Terminology Relating to Flexible Barrier Packaging, providing key definitions.
- ASTM F1929: Standard Test Method for Detecting Seal Leaks in Porous Medical Packaging by Dye Penetration.
- ISO 11607: Packaging for terminally sterilized medical devices - guidance on packaging requirements and validation.
- ASTM F2096: Detection of gross leaks in packaging by internal pressurization (bubble test).
Practical Value
By implementing ASTM F1886/F1886M-16, manufacturers can:
- Detect and address process variability before product release
- Reduce the risk of compromised product sterility
- Document and categorize seal integrity issues for continuous improvement
- Demonstrate compliance with regulatory and industry best practices for package integrity
Proper application assures end-users and regulators of flexible package quality, directly supporting product safety and efficacy throughout the supply chain.
Buy Documents
ASTM F1886/F1886M-16 - Standard Test Method for Determining Integrity of Seals for Flexible Packaging by Visual Inspection
REDLINE ASTM F1886/F1886M-16 - Standard Test Method for Determining Integrity of Seals for Flexible Packaging by Visual Inspection
Get Certified
Connect with accredited certification bodies for this standard

BRCGS (Brand Reputation Compliance Global Standards)
Global food safety and quality standards owner.
Sponsored listings
Frequently Asked Questions
ASTM F1886/F1886M-16 is a standard published by ASTM International. Its full title is "Standard Test Method for Determining Integrity of Seals for Flexible Packaging by Visual Inspection". This standard covers: SIGNIFICANCE AND USE 5.1 Seal attributes can be linked directly to a number of variables in process parameters, equipment, or material, as well as environmental (room temperature and relative humidity). Visual seal characteristics and defects can provide evidence of package integrity and production sealing problems. 5.2 Visual seal defects often will be the first indication of heat sealing process variation. They also will indicate a lack of, or potential compromise to, package integrity after physical package performance testing. SCOPE 1.1 This test method covers the determination of channels in the package seal down to a width of 75 μm [0.003 in.] with a 60–100 % probability (see Section 8). 1.1.1 The ability to visually detect channel defects in package seals is highly dependent on the size of channel, the degree of contrast from sealed and unsealed areas, the amount and type of adhesive between the two package layers, reflecting light angle, types of material used, the use of magnification, and the inspector's level of training and experience. 1.2 This test method is applicable to packages with at least one transparent side so that the seal area may be clearly viewed. 1.3 The values stated in either SI units or inch-pound units are to be regarded separately as standard. The values stated in each system may not be exact equivalents; therefore, each system shall be used independently of the other. Combining values from the two systems may result in non-conformance with the standard. 1.4 This standard does not purport to address all of the safety concerns, if any, associated with its use. It is the responsibility of the user of this standard to establish appropriate safety and health practices and determine the applicability of regulatory limitations prior to use.
SIGNIFICANCE AND USE 5.1 Seal attributes can be linked directly to a number of variables in process parameters, equipment, or material, as well as environmental (room temperature and relative humidity). Visual seal characteristics and defects can provide evidence of package integrity and production sealing problems. 5.2 Visual seal defects often will be the first indication of heat sealing process variation. They also will indicate a lack of, or potential compromise to, package integrity after physical package performance testing. SCOPE 1.1 This test method covers the determination of channels in the package seal down to a width of 75 μm [0.003 in.] with a 60–100 % probability (see Section 8). 1.1.1 The ability to visually detect channel defects in package seals is highly dependent on the size of channel, the degree of contrast from sealed and unsealed areas, the amount and type of adhesive between the two package layers, reflecting light angle, types of material used, the use of magnification, and the inspector's level of training and experience. 1.2 This test method is applicable to packages with at least one transparent side so that the seal area may be clearly viewed. 1.3 The values stated in either SI units or inch-pound units are to be regarded separately as standard. The values stated in each system may not be exact equivalents; therefore, each system shall be used independently of the other. Combining values from the two systems may result in non-conformance with the standard. 1.4 This standard does not purport to address all of the safety concerns, if any, associated with its use. It is the responsibility of the user of this standard to establish appropriate safety and health practices and determine the applicability of regulatory limitations prior to use.
ASTM F1886/F1886M-16 is classified under the following ICS (International Classification for Standards) categories: 55.040 - Packaging materials and accessories. The ICS classification helps identify the subject area and facilitates finding related standards.
ASTM F1886/F1886M-16 has the following relationships with other standards: It is inter standard links to ASTM F1886/F1886M-09(2013), ASTM F17-20, ASTM F17-18a, ASTM F17-18, ASTM F17-17, ASTM F17-13a, ASTM F17-13, ASTM F17-12, ASTM F17-08, ASTM F17-07a, ASTM F17-07, ASTM F17-06, ASTM F17-02, ASTM F17-98. Understanding these relationships helps ensure you are using the most current and applicable version of the standard.
ASTM F1886/F1886M-16 is available in PDF format for immediate download after purchase. The document can be added to your cart and obtained through the secure checkout process. Digital delivery ensures instant access to the complete standard document.
Standards Content (Sample)
This international standard was developed in accordance with internationally recognized principles on standardization established in the Decision on Principles for the
Development of International Standards, Guides and Recommendations issued by the World Trade Organization Technical Barriers to Trade (TBT) Committee.
Designation: F1886/F1886M − 16
Standard Test Method for
Determining Integrity of Seals for Flexible Packaging by
Visual Inspection
ThisstandardisissuedunderthefixeddesignationF1886/F1886M;thenumberimmediatelyfollowingthedesignationindicatestheyear
of original adoption or, in the case of revision, the year of last revision. A number in parentheses indicates the year of last reapproval.
A superscript epsilon (´) indicates an editorial change since the last revision or reapproval.
1. Scope 4. Summary of Test Method
1.1 Thistestmethodcoversthedeterminationofchannelsin 4.1 This test method provides a qualitative (accept/reject)
the package seal down to a width of 75 µm [0.003 in.] with a visual inspection method to evaluate the appearance character-
60–100 % probability (see Section 8). istics of unopened, intact seals in order to determine the
1.1.1 The ability to visually detect channel defects in presence of defects that may affect the integrity of the package.
package seals is highly dependent on the size of channel, the
5. Significance and Use
degree of contrast from sealed and unsealed areas, the amount
and type of adhesive between the two package layers, reflect-
5.1 Seal attributes can be linked directly to a number of
inglightangle,typesofmaterialused,theuseofmagnification,
variablesinprocessparameters,equipment,ormaterial,aswell
and the inspector’s level of training and experience.
as environmental (room temperature and relative humidity).
Visual seal characteristics and defects can provide evidence of
1.2 This test method is applicable to packages with at least
package integrity and production sealing problems.
one transparent side so that the seal area may be clearly
viewed.
5.2 Visual seal defects often will be the first indication of
heatsealingprocessvariation.Theyalsowillindicatealackof,
1.3 The values stated in either SI units or inch-pound units
or potential compromise to, package integrity after physical
are to be regarded separately as standard. The values stated in
package performance testing.
each system may not be exact equivalents; therefore, each
system shall be used independently of the other. Combining
6. Apparatus
values from the two systems may result in non-conformance
with the standard. 6.1 Illuminant, lighting arrangements to give about 540
lumens/m [50 fc] of white light or daylight on the specimens.
1.4 This standard does not purport to address all of the
safety concerns, if any, associated with its use. It is the
6.2 Indelible Marking Pen.
responsibility of the user of this standard to establish appro-
priate safety and health practices and determine the applica-
7. Procedure
bility of regulatory limitations prior to use.
7.1 Visualacuityshallbesuchthattheinspectionoftheseal
may be performed at a distance of 30 to 45 cm [12 to 18 in.]
2. Referenced Documents
NOTE 1—Magnification devices, such as eyeloops, may be used as an
2.1 ASTM Standards:
analytical tool to characterize identified seal defects.
F17 Terminology Relating to Flexible Barrier Packaging
7.2 Inspect the entire sealed area of the package for com-
3. Terminology
pleteness and uniformity.
3.1 For terminology related to flexible barrier packaging,
NOTE 2—Different package sizes and shapes may require differing
see Terminology F17. lengths of time to adequately inspect the entire seal perimeter. Any time
requirement associated with visual inspection should allow for complete
seal inspection.
This test method is under the jurisdiction ofASTM Committee F02 on Primary
NOTE 3—Some packaging materials and adhesives may fluoresce under
Barrier Packaging and is the direct responsibility of Subcommittee F02.40 on
ultraviolet light. Viewing the seal area in a UV light box will enhance the
Package Integrity.
sealed-to-unsealed area contrast, and provide for easier defect identifica-
Current edition approved Oct. 1, 2016. Published October 2016. Originally
tion.
approved in 1998. Last previous edition approved in 2013 as F1886/
7.3 Identify and record any part of the seal where channels
F1886M – 09(2013). DOI: 10.1520/F1886_F1886M-16.
For referenced ASTM standards, visit the ASTM website, www.astm.org, or
appear. Mark the location of the channels.
contact ASTM Customer Service at service@astm.org. For Annual Book of ASTM
Standards volume information, refer to the standard’s Document Summary page on NOTE 4—All other seal characteristics noted (refer to Appendix X1)
the ASTM website. should be categorized according to user defined accept/reject criteria.
Copyright © ASTM International, 100 Barr Harbor Drive, PO Box C700, West Conshohocken, PA 19428-2959. United States
F1886/F1886M − 16
Define the actions to be taken in the event seal characteristics are detected TABLE 1 Percent Incorrect by Laboratory
during normal production runs.
Lab Samples Incorrect Percent (%)
Inspected Analysis Incorrect
7.4 Record the number and location of channels identified
1 117 0 0.00
on each package.
2 117 24 20.51
3 117 5 4.27
NOTE 5—If confirmation of channels or incomplete seal areas in
4 117 17 14.53
peelable packages is necessary, hand peel such suspected package
5 117 5 4.27
completely separating the two material components and inspect the seal
6 117 12 10.26
area of the transferred adhesive for the same incomplete seal attributes as
7 117 9 7.69
the unopened package. Care should be taken to ensure a smooth
8 117 18 15.38
continuous peeling motion so as not to cause any extraneous attributes.
9 117 26 22.22
Heat seals should be cooled to ambient conditions before peeling open to
10 117 10 8.55
allow for adhesive bonding to the opposite substrate to occur.
In some instances, a channel or unsealed area may be observed only
after the package is peeled open. Adhesive transfer is a qualitative
TABLE 2 Percent Incorrect by Material
measureofamaterial’sabilitytoreleasethecoatingratherthanconclusive
Samples Incorrect Percent (%)
evidence that the seal has not been made. It is possible to have continuous
Material Inspected Analysis Incorrect
seal integrity but fail to give complete transfer.This is because the coating
may have a stronger affinity for the substrate on which it is coated rather Film paper 300 14 4.67
Film TYVEK 300 38 12.67
thantheonetowhichitissealed.Insuchcases,anadditionalphysicalseal
PETG/TYVEK 290 59 20.34
integrity test may be required to confirm if it is an unsealed area.
Film/film 280 15 5.36
8. Precision and Bias
8.1 A round robin study was conducted in 1997, which
TABLE 3 Percent Incorrect by Defect Type
included ten laboratories, four package types, and two different
Samples Incorrect Percent
channel sizes randomly produced with 75 µm [0.003 in.] and
Defect Type Inspected Analysis (%) Incorrect
No channels 370 20 5.41
125µm[0.005in.]diameterwire.Thenegativecontrolconsists
75 µm channel 400 83 20.75
ofthesametypepackagesproducedwithnochannels.Thefour
125 µm channel 400 23 5.75
different types of packages are:
8.1.1 Open pouch—clear film/coated paper;
8.1.2 Open pouch—clear film/uncoated TYVEK ;
TABLE 4 Percent Correct by Material and Defect Type
8.1.3 Sealed blister—blue tinted blister/coated TYVEK;
Samples Correct Percent (%)
and,
Material Defect Type I
...
This document is not an ASTM standard and is intended only to provide the user of an ASTM standard an indication of what changes have been made to the previous version. Because
it may not be technically possible to adequately depict all changes accurately, ASTM recommends that users consult prior editions as appropriate. In all cases only the current version
of the standard as published by ASTM is to be considered the official document.
Designation: F1886/F1886M − 09 (Reapproved 2013) F1886/F1886M − 16
Standard Test Method for
Determining Integrity of Seals for Flexible Packaging by
Visual Inspection
This standard is issued under the fixed designation F1886/F1886M; the number immediately following the designation indicates the year
of original adoption or, in the case of revision, the year of last revision. A number in parentheses indicates the year of last reapproval.
A superscript epsilon (´) indicates an editorial change since the last revision or reapproval.
1. Scope
1.1 This test method covers the determination of channels in the package seal down to a width of 75 μm [0.003 in.] with a
60–100 % probability (see Section 8).
1.1.1 The ability to visually detect channel defects in package seals is highly dependent on the size of channel, the degree of
contrast from sealed and unsealed areas, the amount and type of adhesive between the two package layers, reflecting light angle,
types of material used, the use of magnification, and the inspector’s level of training and experience.
1.2 This test method is applicable to packages with at least one transparent side so that the seal area may be clearly viewed.
1.3 The values stated in either SI units or inch-pound units are to be regarded separately as standard. The values stated in each
system may not be exact equivalents; therefore, each system shall be used independently of the other. Combining values from the
two systems may result in non-conformance with the standard.
1.4 This standard does not purport to address all of the safety concerns, if any, associated with its use. It is the responsibility
of the user of this standard to establish appropriate safety and health practices and determine the applicability of regulatory
limitations prior to use.
2. Referenced Documents
2.1 ASTM Standards:
F17 Terminology Relating to Flexible Barrier Packaging
3. Terminology
3.1 For terminology related to flexible barrier packaging, see Terminology F17.
4. Summary of Test Method
4.1 This test method provides a qualitative (accept/reject) visual inspection method to evaluate the appearance characteristics
of unopened, intact seals in order to determine the presence of defects that may affect the integrity of the package.
5. Significance and Use
5.1 Seal attributes can be linked directly to a number of variables in process parameters, equipment, or material, as well as
environmental (room temperature and relative humidity). Visual seal characteristics and defects can provide evidence of package
integrity and production sealing problems.
5.2 Visual seal defects often will be the first indication of heat sealing process variation. They also will indicate a lack of, or
potential compromise to, package integrity after physical package performance testing.
6. Apparatus
6.1 Illuminant, lighting arrangements to give about 540 lumens/m [50 fc] of white light or daylight on the specimens.
6.2 Indelible Marking Pen.
This test method is under the jurisdiction of ASTM Committee F02 on FlexiblePrimary Barrier Packaging and is the direct responsibility of Subcommittee F02.40 on
Package Integrity.
Current edition approved Aug. 1, 2013Oct. 1, 2016. Published September 2013October 2016. Originally approved in 1998. Last previous edition approved in 20092013
as F1886/F1886M – 09.F1886/F1886M – 09(2013). DOI: 10.1520/F1886_F1886M-09R13.10.1520/F1886_F1886M-16.
For referenced ASTM standards, visit the ASTM website, www.astm.org, or contact ASTM Customer Service at service@astm.org. For Annual Book of ASTM Standards
volume information, refer to the standard’s Document Summary page on the ASTM website.
Copyright © ASTM International, 100 Barr Harbor Drive, PO Box C700, West Conshohocken, PA 19428-2959. United States
F1886/F1886M − 16
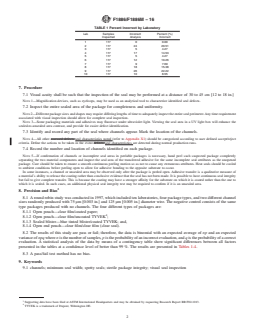
TABLE 1 Percent Incorrect by Laboratory
Lab Samples Incorrect Percent (%)
Inspected Analysis Incorrect
1 117 0 0.00
2 117 24 20.51
3 117 5 4.27
4 117 17 14.53
5 117 5 4.27
6 117 12 10.26
7 117 9 7.69
8 117 18 15.38
9 117 26 22.22
10 117 10 8.55
7. Procedure
7.1 Visual acuity shall be such that the inspection of the seal may be performed at a distance of 30 to 45 cm [12 to 18 in.]
NOTE 1—Magnification devices, such as eyeloops, may be used as an analytical tool to characterize identified seal defects.
7.2 Inspect the entire sealed area of the package for completeness and uniformity.
NOTE 2—Different package sizes and shapes may require differing lengths of time to adequately inspect the entire seal perimeter. Any time requirement
associated with visual inspection should allow for complete seal inspection.
NOTE 3—Some packaging materials and adhesives may fluoresce under ultraviolet light. Viewing the seal area in a UV light box will enhance the
sealed-to-unsealed area contrast, and provide for easier defect identification.
7.3 Identify and record any part of the seal where channels appear. Mark the location of the channels.
NOTE 4—All other assessed defects seal characteristics noted (refer to Appendix X1) should be categorized according to user defined accept/reject
criteria. Define the actions to be taken in the event defects seal characteristics are detected during normal production runs.
7.4 Record the number and location of channels identified on each package.
NOTE 5—If confirmation of channels or incomplete seal areas in peelable packages is necessary, hand peel such suspected package completely
separating the two material components and inspect the seal area of the transferred adhesive for the same incomplete seal attributes as the unopened
package. Care should be taken to ensure a smooth continuous peeling motion so as not to cause any extraneous attributes. Heat seals should be cooled
to ambient conditions before peeling open to allow for adhesive bonding to the opposite substrate to occur.
In some instances, a channel or unsealed area may be observed only after the package is peeled open. Adhesive transfer is a qualitative measure of
a material’s ability to release the coating rather than conclusive evidence that the seal has not been made. It is possible to have continuous seal integrity
but fail to give complete transfer. This is because the coating may have a stronger affinity for the substrate on which it is coated rather than the one to
which it is sealed. In such cases, an additional physical seal integrity test may be required to confirm if it is an unsealed area.
8. Precision and Bias
8.1 A round robin study was conducted in 1997, which included ten laboratories, four package types, and two different channel
sizes randomly produced with 75 μm [0.003 in.] and 125 μm [0.005 in.] diameter wire. The negative control consists of the same
type packages produced with no channels. The four different types of packages are:
8.1.1 Open pouch—clear film/coated paper;
8.1.2 Open pouch—clear film/uncoated TYVEK ;
8.1.3 Sealed blister—blue tinted blister/coated TYVEK; and,
8.1.4 Open end pouch—clear film/clear film (clear seal).
8.2 The results of this study are pass or fail; therefore, the data is binomial with an expected average of np and an expected
variance of npq where n is the number of samples, p is the probability of an incorrect evaluation, and q is the probability of a correct
evaluation
...


Questions, Comments and Discussion
Ask us and Technical Secretary will try to provide an answer. You can facilitate discussion about the standard in here.
Loading comments...