ASTM F1886-98(2004)
(Test Method)Standard Test Method for Determining Integrity of Seals for Medical Packaging by Visual Inspection
Standard Test Method for Determining Integrity of Seals for Medical Packaging by Visual Inspection
SIGNIFICANCE AND USE
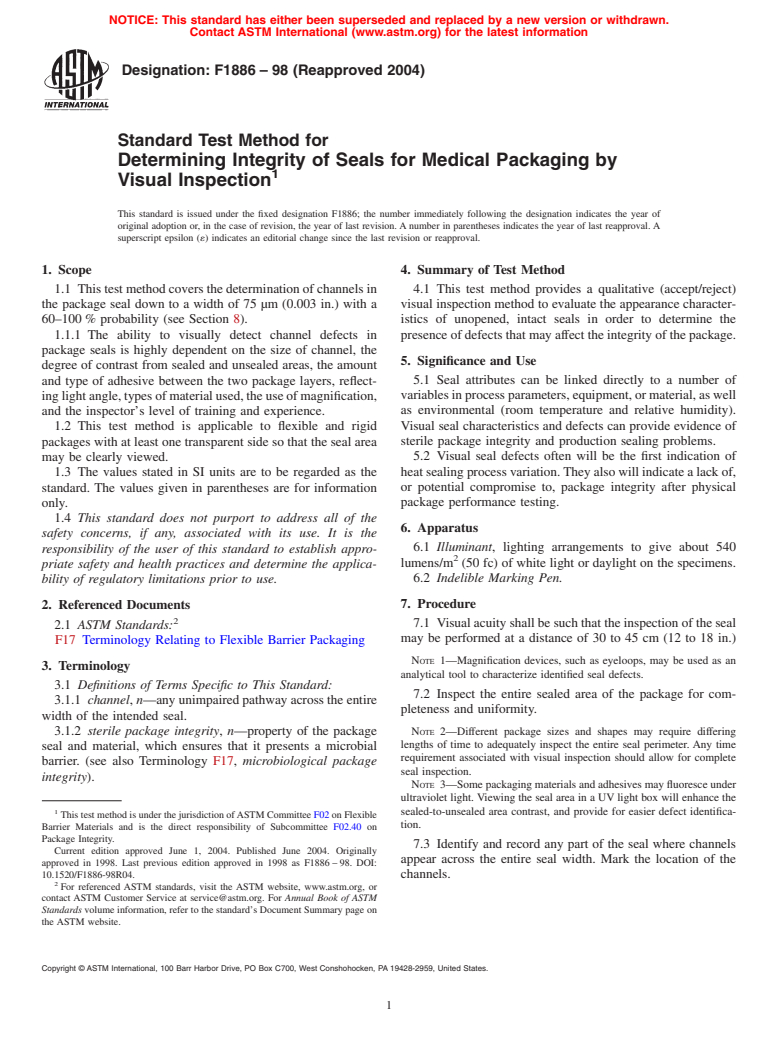
Seal attributes can be linked directly to a number of variables in process parameters, equipment, or material, as well as environmental (room temperature and relative humidity). Visual seal characteristics and defects can provide evidence of sterile package integrity and production sealing problems.
Visual seal defects often will be the first indication of heat sealing process variation. They also will indicate a lack of, or potential compromise to, package integrity after physical package performance testing.
SCOPE
1.1 This test method covers the determination of channels in the package seal down to a width of 75 μm (0.003 in.) with a 60-100 % probability (see Section 8).
1.1.1 The ability to visually detect channel defects in package seals is highly dependent on the size of channel, the degree of contrast from sealed and unsealed areas, the amount and type of adhesive between the two package layers, reflecting light angle, types of material used, the use of magnification, and the inspector's level of training and experience.
1.2 This test method is applicable to flexible and rigid packages with at least one transparent side so that the seal area may be clearly viewed.
1.3 The values stated in SI units are to be regarded as the standard. The values given in parentheses are for information only.
1.4 This standard does not purport to address all of the safety concerns, if any, associated with its use. It is the responsibility of the user of this standard to establish appropriate safety and health practices and determine the applicability of regulatory limitations prior to use.
General Information
Relations
Standards Content (Sample)
NOTICE: This standard has either been superseded and replaced by a new version or withdrawn.
Contact ASTM International (www.astm.org) for the latest information
Designation:F1886–98 (Reapproved 2004)
Standard Test Method for
Determining Integrity of Seals for Medical Packaging by
Visual Inspection
This standard is issued under the fixed designation F1886; the number immediately following the designation indicates the year of
original adoption or, in the case of revision, the year of last revision. A number in parentheses indicates the year of last reapproval. A
superscript epsilon (´) indicates an editorial change since the last revision or reapproval.
1. Scope 4. Summary of Test Method
4.1 This test method provides a qualitative (accept/reject)
1.1 Thistestmethodcoversthedeterminationofchannelsin
the package seal down to a width of 75 µm (0.003 in.) with a visual inspection method to evaluate the appearance character-
60–100 % probability (see Section 8). istics of unopened, intact seals in order to determine the
1.1.1 The ability to visually detect channel defects in presence of defects that may affect the integrity of the package.
package seals is highly dependent on the size of channel, the
5. Significance and Use
degree of contrast from sealed and unsealed areas, the amount
and type of adhesive between the two package layers, reflect- 5.1 Seal attributes can be linked directly to a number of
variablesinprocessparameters,equipment,ormaterial,aswell
inglightangle,typesofmaterialused,theuseofmagnification,
and the inspector’s level of training and experience. as environmental (room temperature and relative humidity).
Visual seal characteristics and defects can provide evidence of
1.2 This test method is applicable to flexible and rigid
packages with at least one transparent side so that the seal area sterile package integrity and production sealing problems.
5.2 Visual seal defects often will be the first indication of
may be clearly viewed.
1.3 The values stated in SI units are to be regarded as the heatsealingprocessvariation.Theyalsowillindicatealackof,
or potential compromise to, package integrity after physical
standard. The values given in parentheses are for information
only. package performance testing.
1.4 This standard does not purport to address all of the
6. Apparatus
safety concerns, if any, associated with its use. It is the
6.1 Illuminant, lighting arrangements to give about 540
responsibility of the user of this standard to establish appro-
lumens/m (50 fc) of white light or daylight on the specimens.
priate safety and health practices and determine the applica-
6.2 Indelible Marking Pen.
bility of regulatory limitations prior to use.
7. Procedure
2. Referenced Documents
7.1 Visualacuityshallbesuchthattheinspectionoftheseal
2.1 ASTM Standards:
may be performed at a distance of 30 to 45 cm (12 to 18 in.)
F17 Terminology Relating to Flexible Barrier Packaging
NOTE 1—Magnification devices, such as eyeloops, may be used as an
3. Terminology
analytical tool to characterize identified seal defects.
3.1 Definitions of Terms Specific to This Standard:
7.2 Inspect the entire sealed area of the package for com-
3.1.1 channel, n—any unimpaired pathway across the entire
pleteness and uniformity.
width of the intended seal.
3.1.2 sterile package integrity, n—property of the package NOTE 2—Different package sizes and shapes may require differing
lengths of time to adequately inspect the entire seal perimeter. Any time
seal and material, which ensures that it presents a microbial
requirement associated with visual inspection should allow for complete
barrier. (see also Terminology F17, microbiological package
seal inspection.
integrity).
NOTE 3—Somepackagingmaterialsandadhesivesmayfluoresceunder
ultraviolet light. Viewing the seal area in a UV light box will enhance the
sealed-to-unsealed area contrast, and provide for easier defect identifica-
This test method is under the jurisdiction ofASTM Committee F02 on Flexible
tion.
Barrier Materials and is the direct responsibility of Subcommittee F02.40 on
Package Integrity.
7.3 Identify and record any part of the seal where channels
Current edition approved June 1, 2004. Published June 2004. Originally
appear across the entire seal width. Mark the location of the
approved in 1998. Last previous edition approved in 1998 as F1886 – 98. DOI:
10.1520/F1886-98R04.
channels.
For referenced ASTM standards, visit the ASTM website, www.astm.org, or
contact ASTM Customer Service at service@astm.org. For Annual Book of ASTM
Standards volume information, refer to the standard’s Document Summary page on
the ASTM website.
Copyright © ASTM International, 100 Barr Harbor Drive, PO Box C700, West Conshohocken, PA 19428-2959, United States.
F1886–98 (2004)
NOTE 4—All other assessed defects (refer to Appendix X1) should be TABLE 1 Percent Incorrect by Laboratory
categorized according to user defined accept/reject criteria. Define the
Lab Samples Incorrect Percent (%)
actions to be taken in the event defects are detected during normal
Inspected Analysis Incorrect
production runs.
1 117 0 0.00
2 117 24 20.51
7.4 Record the number and location of channels identified
3 117 5 4.27
on each package.
4 117 17 14.53
5 117 5 4.27
NOTE 5—If confirmation of channels or incomplete seal areas in
6 117 12 10.26
peelable packages is necessary, hand peel such suspected package
7 117 9 7.69
completely separating the two material components and inspect the seal
8 117 18 15.38
area of the transferred adhesive for the same incomplete seal attributes as 9 117 26 22.22
10 117 10 8.55
the unopened package. Care should be taken to ensure a smooth
continuous peeling motion so as not to cause any extraneous attributes.
Heat seals should be cooled to ambient conditions before peeling open to
allow for adhesive bonding to the opposite substrate to occur. TABLE 2 Percent Incorrect by Material
In some instances, a channel or unsealed area may be observed only
Samples Incorrect Percent (%)
after the package is peeled open. Adhesive transfer is a qualitative
Material Inspected Analysis Incorrect
measureofamaterial’sabilitytoreleasethecoatingratherthanconclusive
Film paper 300 14 4.67
evidence that the seal has not been made. It is possible to have continuous
Film TYVEK 300 38 12.67
seal integrity but fail to give complete transfer.This is because the coating
PETG/TYVEK 290 59 20.34
may have a stronger affinity for the substrate on which it is coated rather
Film/film 280 15 5.36
thantheonetowhichitissealed.Insuchcases,anadditionalphysicalseal
integrity test may be required to confirm if it is an unsealed area.
TABLE 3 Percent Incorrect by Defect Type
8. Precision and Bias
Samples Incorrect Percent
8.1 A round robin study was conducted in 1997, which
Defect Type Inspected Analysis (%) Incorrect
included ten laboratories, four package types, and two different
No channels 370 20 5.41
75 µm channel 400 83 20.75
channel sizes randomly produced with 75 µm (0.003 in.) and
125 µm channel 400 23 5.75
125µm(0.005in.)diameterwire.Thenegativecontrolconsists
ofthesametypepackagesproducedwithnochannels.Thefour
different types of medical device packages are:
TABLE 4 Percent Correct by Material and Defect Type
8.1.1 Open pouch (5 by 7 in.)—clear film/coated paper;
Samples Correct Percent (%)
1 1
8.1.2 Open pouch (5 ⁄4 by 7 ⁄2 in.)—clear film/uncoated
Material Defect Type I
...


Questions, Comments and Discussion
Ask us and Technical Secretary will try to provide an answer. You can facilitate discussion about the standard in here.